2006 BMW 330I child lock
[x] Cancel search: child lockPage 39 of 246
Controls
37Reference
At a glance
Driving tips
Communications
Navigation
Entertainment
Mobility
The indicator lamp in the instrument
cluster comes on and a message
appears on the Control Display:
replace the battery in the remote control.
Replacing the battery
The remote control for convenient access con-
tains a battery that will need to be replaced from
time to time.
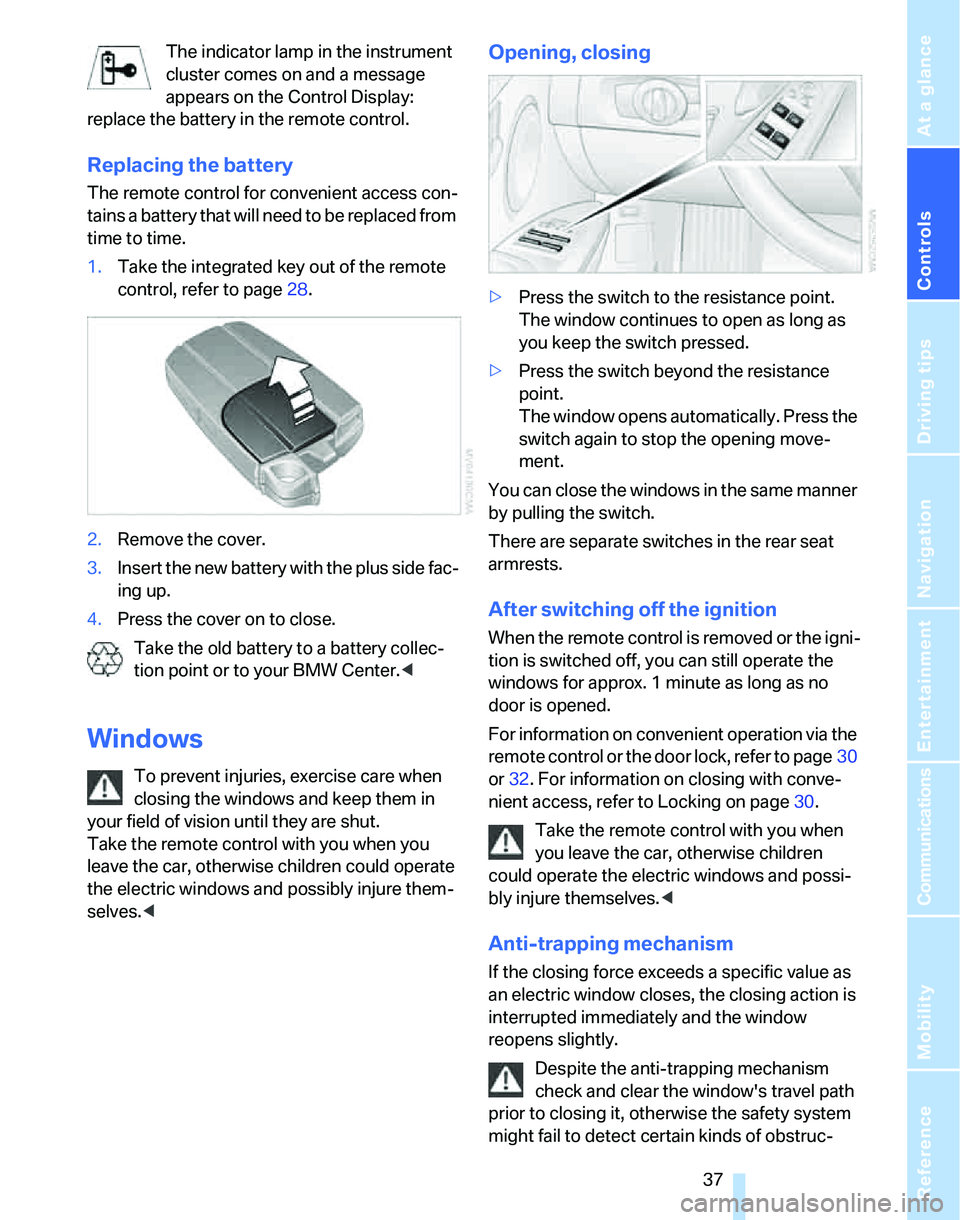
1.Take the integrated key out of the remote
control, refer to page28.
2.Remove the cover.
3.Insert the new battery with the plus side fac-
ing up.
4.Press the cover on to close.
Take the old battery to a battery collec-
tion point or to your BMW Center.<
Windows
To prevent injuries, exercise care when
closing the windows and keep them in
your field of vision until they are shut.
Take the remote control with you when you
leave the car, otherwise children could operate
the electric windows and possibly injure them-
selves.<
Opening, closing
>Press the switch to the resistance point.
The window continues to open as long as
you keep the switch pressed.
>Press the switch beyond the resistance
point.
The window opens automatically. Press the
switch again to stop the opening move-
ment.
You can close the windows in the same manner
by pulling the switch.
There are separate switches in the rear seat
armrests.
After switching off the ignition
When the remote control is removed or the igni-
tion is switched off, you can still operate the
windows for approx. 1 minute as long as no
door is opened.
For information on convenient operation via the
remote control or the door lock, refer to page30
or32. For information on closing with conve-
nient access, refer to Locking on page30.
Take the remote control with you when
you leave the car, otherwise children
could operate the electric windows and possi-
bly injure themselves.<
Anti-trapping mechanism
If the closing force exceeds a specific value as
an electric window closes, the closing action is
interrupted immediately and the window
reopens slightly.
Despite the anti-trapping mechanism
check and clear the window's travel path
prior to closing it, otherwise the safety system
might fail to detect certain kinds of obstruc-
Page 40 of 246
Opening and closing
38 tions, such as thin objects, and the window
would continue closing.
Pulling the switch beyond the resistance point
and holding it limits the response of the anti-
trapping mechanism. In this case, if the closing
force exceeds a defined threshold, the window
will only open a few fractions of an inch/a few
millimeters.
If the switch is pulled past the resistance point
again within approx. 4 seconds, the anti-trap-
ping mechanism will be deactivated.<
Safety switch
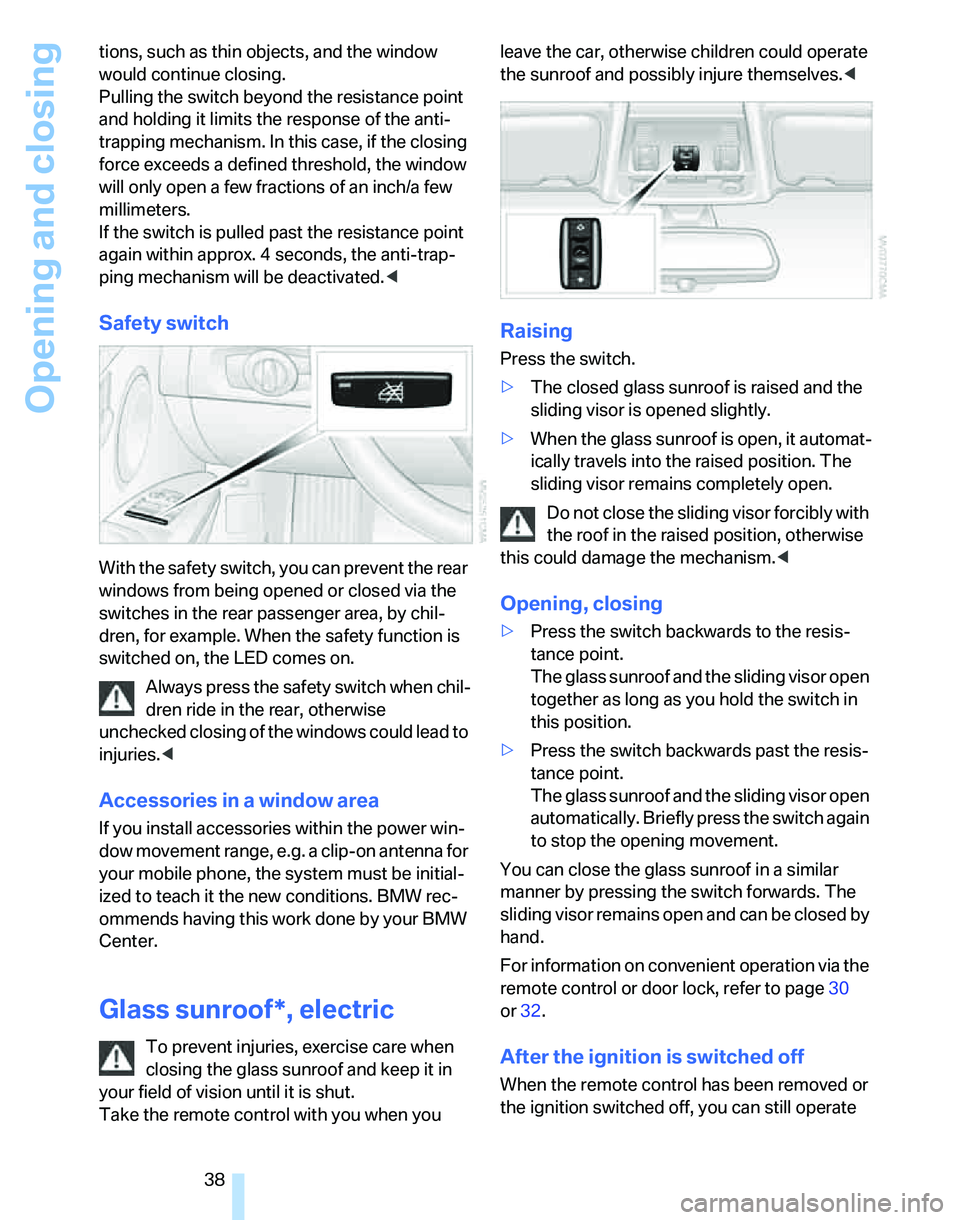
With the safety switch, you can prevent the rear
windows from being opened or closed via the
switches in the rear passenger area, by chil-
dren, for example. When the safety function is
switched on, the LED comes on.
Always press the safety switch when chil-
dren ride in the rear, otherwise
unchecked closing of the windows could lead to
injuries.<
Accessories in a window area
If you install accessories within the power win-
dow movement range, e.g. a clip-on antenna for
your mobile phone, the system must be initial-
ized to teach it the new conditions. BMW rec-
ommends having this work done by your BMW
Center.
Glass sunroof*, electric
To prevent injuries, exercise care when
closing the glass sunroof and keep it in
your field of vision until it is shut.
Take the remote control with you when you leave the car, otherwise children could operate
the sunroof and possibly injure themselves.<
Raising
Press the switch.
>The closed glass sunroof is raised and the
sliding visor is opened slightly.
>When the glass sunroof is open, it automat-
ically travels into the raised position. The
sliding visor remains completely open.
Do not close the sliding visor forcibly with
the roof in the raised position, otherwise
this could damage the mechanism.<
Opening, closing
>Press the switch backwards to the resis-
tance point.
The glass sunroof and the sliding visor open
together as long as you hold the switch in
this position.
>Press the switch backwards past the resis-
tance point.
The glass sunroof and the sliding visor open
automatically. Briefly press the switch again
to stop the opening movement.
You can close the glass sunroof in a similar
manner by pressing the switch forwards. The
sliding visor remains open and can be closed by
hand.
For information on convenient operation via the
remote control or door lock, refer to page30
or32.
After the ignition is switched off
When the remote control has been removed or
the ignition switched off, you can still operate
Page 42 of 246
Adjustments
40
Adjustments
Sitting safely
The ideal sitting position can make a vital con-
tribution to relaxed, fatigue-free driving. In con-
junction with the safety belts, the head
restraints and the airbags, the seated position
has a major influence on your safety in the event
of an accident. To ensure that the safety sys-
tems operate with optimal efficiency, we
strongly urge you to observe the instructions
contained in the following section.
For additional information on transporting chil-
dren safely, refer to page49.
Airbags
Always maintain an adequate distance
between yourself and the airbags. Always
grip the steering wheel on the rim, with your
hands in the 3 o'clock and 9 o'clock positions,
to minimize the risk of injury to the hands or
arms in the event of the airbag being triggered
off.
No one and nothing is to come between the air-
bags and the seat occupant.
Do not use the cover of the front airbag on the
front passenger side as a storage area. Make
sure that the front passenger is sitting correctly,
e.g. not resting feet or legs on the instrument
panel, otherwise leg injuries can occur if the
front airbag is triggered.
Make sure that passengers do not lean their
heads against the side or head airbags, other-
wise serious injuries could result if the side air-
bags suddenly deployed.<
Even if you follow all the instructions, injuries
resulting from contact with airbags cannot be
fully excluded, depending on the circum-
stances. The ignition and inflation noise may
provoke a mild hearing loss in extremely sensi-
tive individuals. This effect is usually only tem-
porary.
For airbag locations and additional information
on airbags, refer to page90.
Head restraint
A correctly adjusted head restraint reduces the
risk of neck injury in the event of an accident.
Adjust the head restraint in such a way
that its center is at approx. ear level. Oth-
erwise, there is an increased risk of injury in the
event of an accident.<
Head restraints, refer to page42.
Safety belt
Before every drive, make sure that all occupants
wear their safety belts. Airbags complement the
safety belt as an additional safety device, but
they do not represent a substitute.
Never allow more than one person to
wear a single safety belt. Never allow
infants or small children to ride in a passenger's
lap.
Expectant mothers should also wear the safety
belt, making sure that the strap in the pelvic
area is well down on the hips and does not press
against the abdominal region of the body.
Do not route the belt across your neck, or run it
across sharp edges. Be sure that the belt does
not become caught or jammed. The safety belt
should not be twisted and must be positioned
firmly over the pelvis and shoulder, as close to
the body as possible. It should not pass over
hard or fragile objects, otherwise the belt in the
pelvic area could slide over the hips in the event
of a head-on collision and injure the lower abdo-
men. Avoid wearing bulky clothing and regularly
pull the belt in the upper-body area taut, other-
wise its restraining effect could be impaired.<
Safety belts, refer to page45.
Seats
Note before adjusting
Never attempt to adjust your seat while
the vehicle is moving. The seat could
respond with unexpected movement, and the
Page 52 of 246
Transporting children safely
50
Child seat security
All rear safety belts and the front passenger's
safety belt can be prevented from being pulled
out in order to fasten child-restraint systems.
To lock the safety belt
1.Secure the child-restraint system with the
belt.
2.Pull the belt strap all the way out.
3.Allow the belt strap to retract and pull it taut
against the child-restraint system.
The safety belt is locked.
To unlock the safety belt
1.Open the belt buckle
2.Remove the child-restraint system.
3.Allow the safety belt strap to retract all the
way.
Child-restraint system with tether
strap
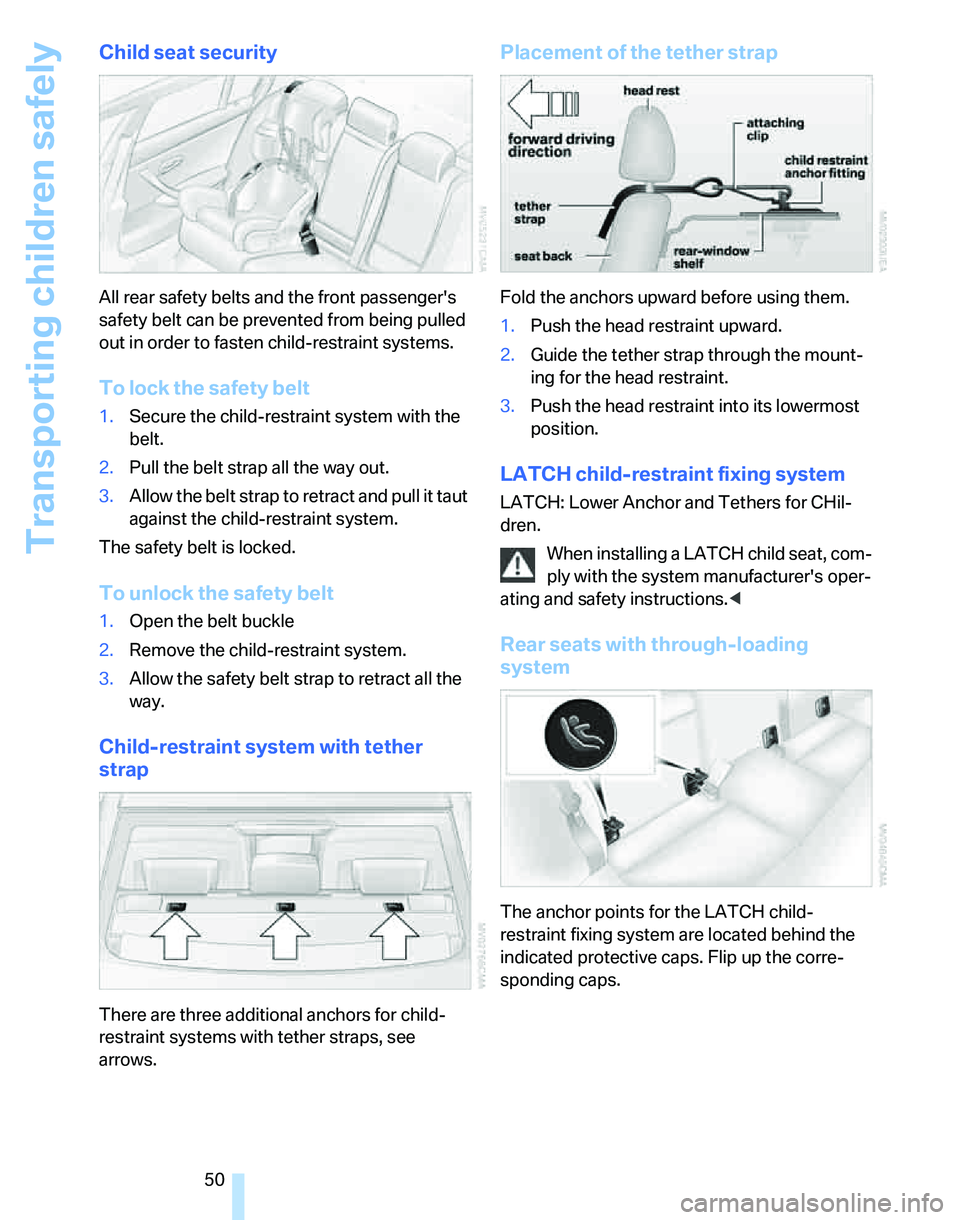
There are three additional anchors for child-
restraint systems with tether straps, see
arrows.
Placement of the tether strap
Fold the anchors upward before using them.
1.Push the head restraint upward.
2.Guide the tether strap through the mount-
ing for the head restraint.
3.Push the head restraint into its lowermost
position.
LATCH child-restraint fixing system
LATCH: Lower Anchor and Tethers for CHil-
dren.
When installing a LATCH child seat, com-
ply with the system manufacturer's oper-
ating and safety instructions.<
Rear seats with through-loading
system
The anchor points for the LATCH child-
restraint fixing system are located behind the
indicated protective caps. Flip up the corre-
sponding caps.
Page 53 of 246
Controls
51Reference
At a glance
Driving tips
Communications
Navigation
Entertainment
Mobility
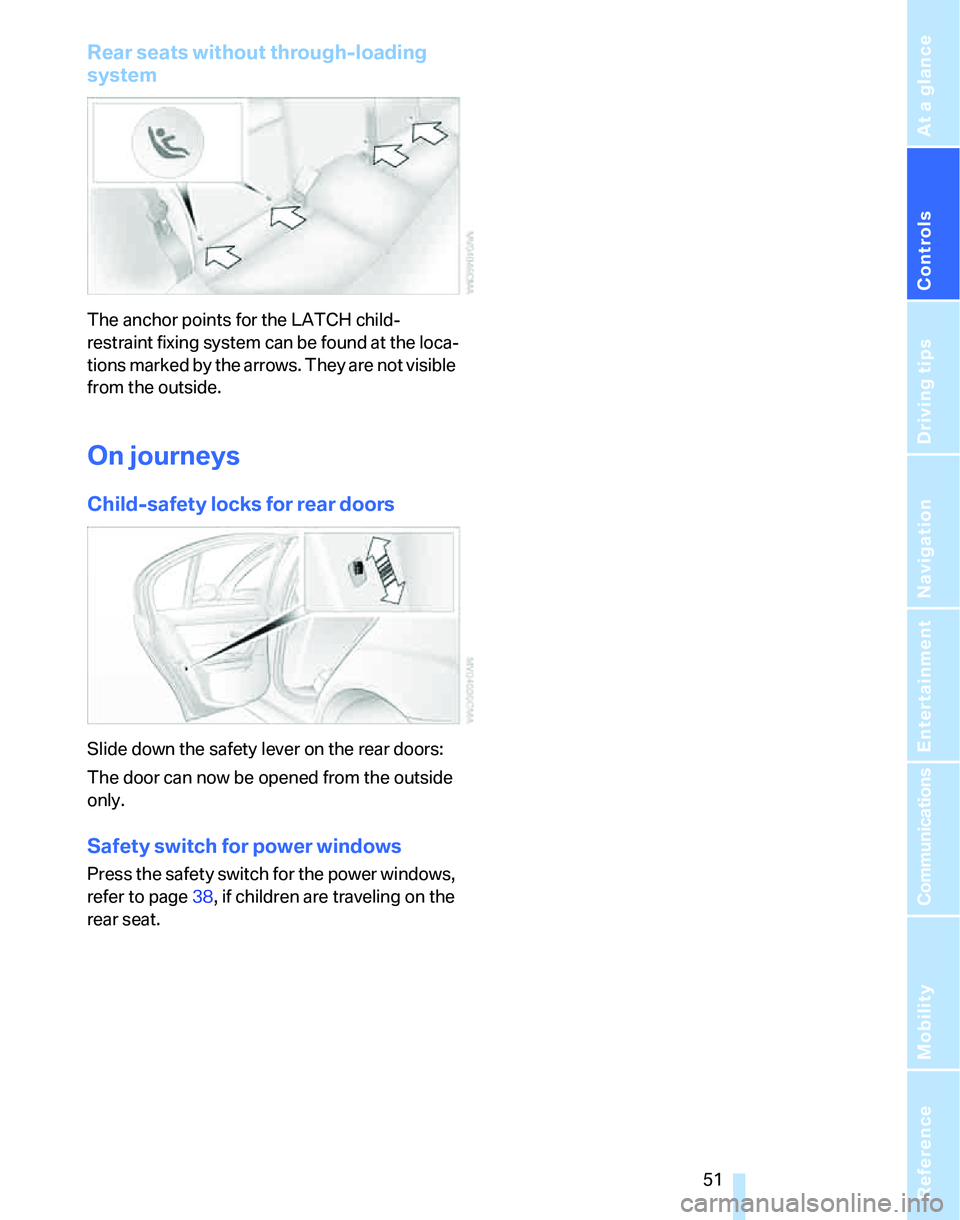
Rear seats without through-loading
system
The anchor points for the LATCH child-
restraint fixing system can be found at the loca-
tions marked by the arrows. They are not visible
from the outside.
On journeys
Child-safety locks for rear doors
Slide down the safety lever on the rear doors:
The door can now be opened from the outside
only.
Safety switch for power windows
Press the safety switch for the power windows,
refer to page38, if children are traveling on the
rear seat.
Page 101 of 246
Controls
99Reference
At a glance
Driving tips
Communications
Navigation
Entertainment
Mobility
side windows, towards the upper body area and
into the footwell for you. The air flow rate and
your temperature specifications will be adapted
to outside influences as a result of seasonal
changes, e.g. sunlight or window condensation.
The cooling is switched on automatically with
the AUTO program.
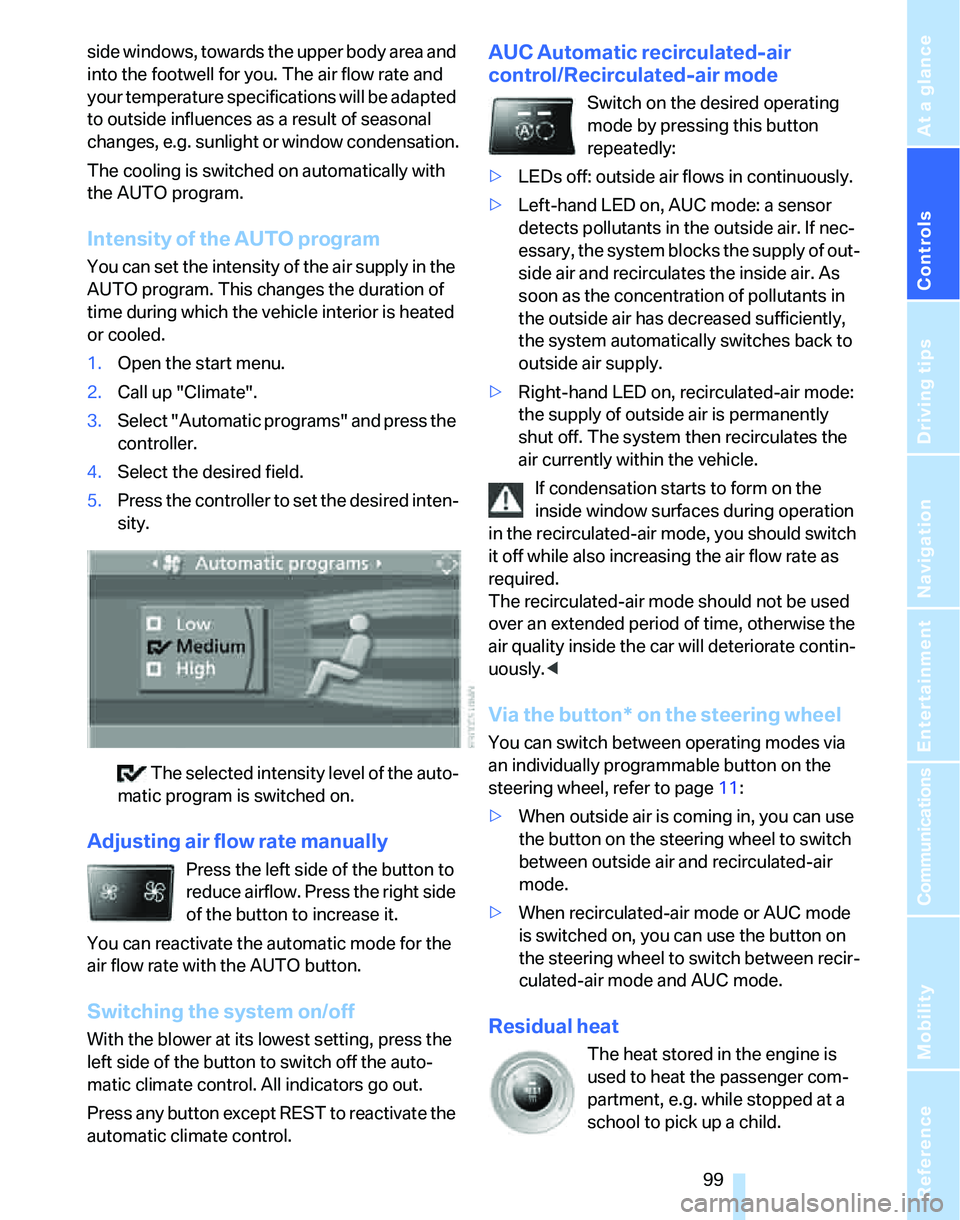
Intensity of the AUTO program
You can set the intensity of the air supply in the
AUTO program. This changes the duration of
time during which the vehicle interior is heated
or cooled.
1.Open the start menu.
2.Call up "Climate".
3.Select "Automatic programs" and press the
controller.
4.Select the desired field.
5.Press the controller to set the desired inten-
sity.
The selected intensity level of the auto-
matic program is switched on.
Adjusting air flow rate manually
Press the left side of the button to
reduce airflow. Press the right side
of the button to increase it.
You can reactivate the automatic mode for the
air flow rate with the AUTO button.
Switching the system on/off
With the blower at its lowest setting, press the
left side of the button to switch off the auto-
matic climate control. All indicators go out.
Press any button except REST to reactivate the
automatic climate control.
AUC Automatic recirculated-air
control/Recirculated-air mode
Switch on the desired operating
mode by pressing this button
repeatedly:
>LEDs off: outside air flows in continuously.
>Left-hand LED on, AUC mode: a sensor
detects pollutants in the outside air. If nec-
essary, the system blocks the supply of out-
side air and recirculates the inside air. As
soon as the concentration of pollutants in
the outside air has decreased sufficiently,
the system automatically switches back to
outside air supply.
>Right-hand LED on, recirculated-air mode:
the supply of outside air is permanently
shut off. The system then recirculates the
air currently within the vehicle.
If condensation starts to form on the
inside window surfaces during operation
in the recirculated-air mode, you should switch
it off while also increasing the air flow rate as
required.
The recirculated-air mode should not be used
over an extended period of time, otherwise the
air quality inside the car will deteriorate contin-
uously.<
Via the button* on the steering wheel
You can switch between operating modes via
an individually programmable button
on the
steering wheel, refer to page11:
>When outside air is coming in, you can use
the button on the steering wheel to switch
between outside air and recirculated-air
mode.
>When recirculated-air mode or AUC mode
is switched on, you can use the button on
the steering wheel to switch between recir-
culated-air mode and AUC mode.
Residual heat
The heat stored in the engine is
used to heat the passenger com-
partment, e.g. while stopped at a
school to pick up a child.
Page 203 of 246
Mobility
201Reference
At a glance
Controls
Driving tips
Communications
Navigation
Entertainment
Too much oil will harm the engine.
Have the vehicle checked without
delay.<
>"Please observe recalculated service inter-
val for engine oil"
Do not add engine oil. You can continue
your journey. Note the newly calculated dis-
tance remaining to the next oil service, refer
to page74. Have the system checked as
soon as possible.
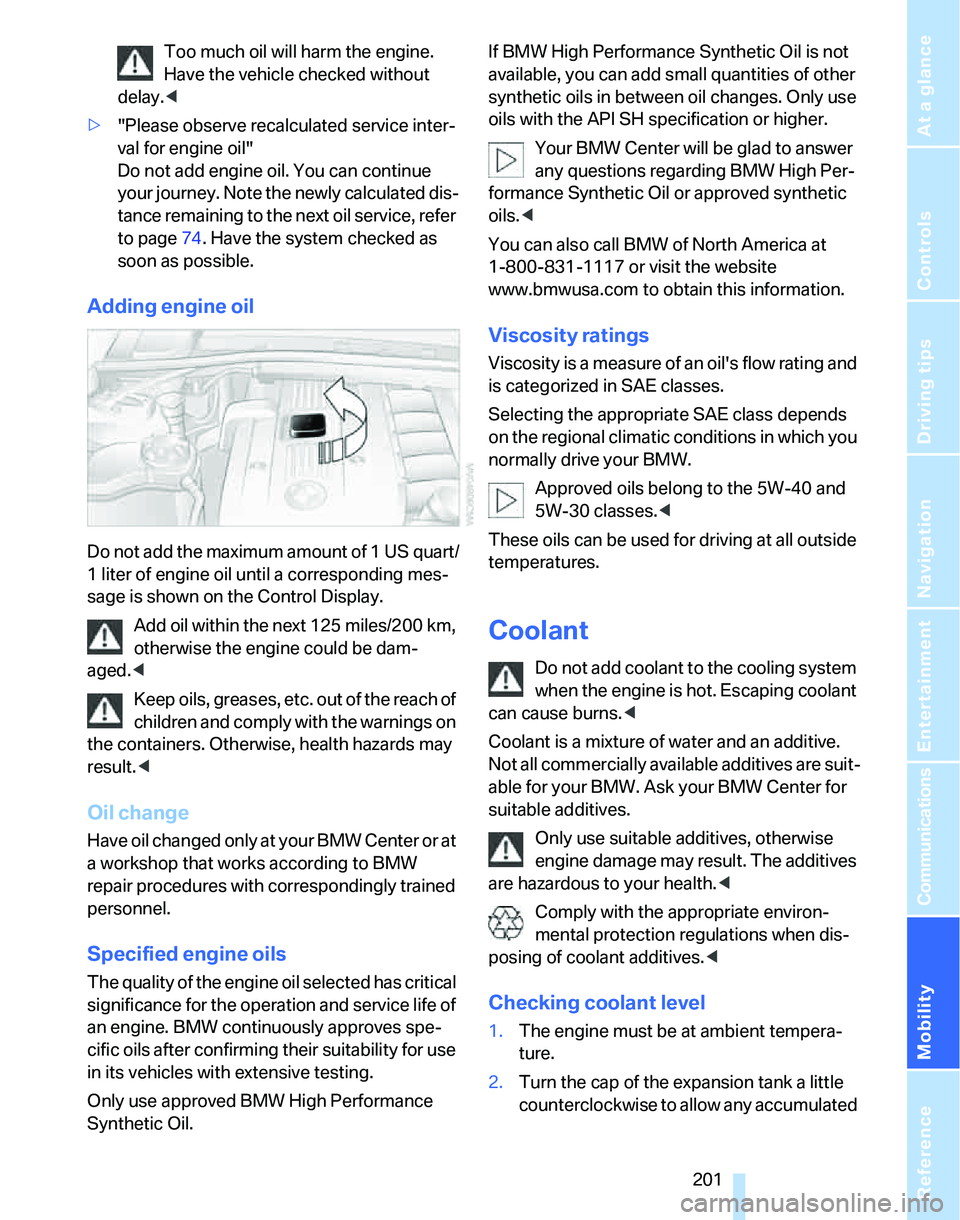
Adding engine oil
Do not add the maximum amount of 1 US quart/
1 liter of engine oil until a corresponding mes-
sage is shown on the Control Display.
Add oil within the next 125 miles/200 km,
otherwise the engine could be dam-
aged.<
Keep oils, greases, etc. out of the reach of
children and comply with the warnings on
the containers. Otherwise, health hazards may
result.<
Oil change
H a v e o i l c h a n g e d o n l y a t y o u r B M W C e n t e r o r a t
a workshop that works according to BMW
repair procedures with correspondingly trained
personnel.
Specified engine oils
The quality of the engine oil selected has critical
significance for the operation and service life of
an engine. BMW continuously approves spe-
cific oils after confirming their suitability for use
in its vehicles with extensive testing.
Only use approved BMW High Performance
Synthetic Oil.If BMW High Performance Synthetic Oil is not
available, you can add small quantities of other
synthetic oils in between oil changes. Only use
oils with the API SH specification or higher.
Your BMW Center will be glad to answer
any questions regarding BMW High Per-
formance Synthetic Oil or approved synthetic
oils.<
You can also call BMW of North America at
1-800-831-1117 or visit the website
www.bmwusa.com to obtain this information.
Viscosity ratings
Viscosity is a measure of an oil's flow rating and
is categorized in SAE classes.
Selecting the appropriate SAE class depends
on the regional climatic conditions in which you
normally drive your BMW.
Approved oils belong to the 5W-40 and
5W-30 classes.<
These oils can be used for driving at all outside
temperatures.
Coolant
Do not add coolant to the cooling system
when the engine is hot. Escaping coolant
can cause burns.<
Coolant is a mixture of water and an additive.
Not all commercially available additives are suit-
able for your BMW. Ask your BMW Center for
suitable additives.
Only use suitable additives, otherwise
engine damage may result. The additives
are hazardous to your health.<
Comply with the appropriate environ-
mental protection regulations when dis-
posing of coolant additives.<
Checking coolant level
1.The engine must be at ambient tempera-
ture.
2.Turn the cap of the expansion tank a little
counterclockwise to allow any accumulated
Page 230 of 246
Everything from A - Z
228 "Brightness"on the control
display82
Bulb changing, refer to Lamps
and bulbs205
Burned fuel
– refer to Average
consumption71
Button for starting engine52
Buttons on steering wheel11
C
California Proposition 65
warning6
"Call"172
Call
– accepting170
– displaying accepted172
– ending171
– in absence172
– starting171
Calling
– from phone book171
– from Top 8 list172
– redialing172
Can holders, refer to Cup
holders107
Capacities221
Capacity of luggage
compartment220
Car battery, refer to Vehicle
battery209
Car care, refer to Caring for
your vehicle brochure
Car-care products, refer to
Caring for your vehicle
brochure
"Car Data"71
Care, refer to Caring for your
vehicle brochure
Cargo, securing119
Cargo loading
– stowing cargo119
– vehicle118
Caring for artificial leather,
refer to Caring for your
vehicle brochureCaring for leather, refer to
Caring for your vehicle
brochure
Caring for light-alloy wheels,
refer to Caring for your
vehicle brochure
Caring for plastic, refer to
Caring for your vehicle
brochure
Caring for the carpet, refer to
Caring for your vehicle
brochure
Caring for the vehicle finish,
refer to Caring for your
vehicle brochure
Car jack
– jacking points209
Car key, refer to Integrated
key/remote control28
Car phone166
– installation location, refer to
Center armrest106
– refer to Mobile phone166
– refer to separate Owner's
Manual
Car radio, refer to Radio148
Car wash118
– also refer to Caring for your
vehicle brochure
Catalytic converter, refer to
Hot exhaust system116
"Categories"154
CBS Condition Based
Service203
"CD"144,156
CD changer156
– controls144
– fast forward/reverse
160
– installation location160
– playing a track158
– random order159
– repeating a track159
– selecting a CD156
– selecting a track157
– switching on/off144
– tone control145
– volume145CD player156
– controls144
– fast forward/reverse160
– playing a track158
– random order159
– repeating a track159
– selecting a track157
– switching on/off144
– tone control145
– volume145
Center armrest106
Center brake lamp
– replacing bulbs208
Center console, refer to
Around the center
console14
"Central locking"30
Central locking
– from inside32
– from outside29
Central locking system29
– convenient access35
Changing bulbs205
Changing the language on the
Control Display82
Changing the measurement
units on the Control
Display73
Changing wheels209
Chassis number, refer to
Engine compartment199
Check Control79
"Check Control
messages"80
Check Gas Cap186
Checking the air pressure,
refer to Tire inflation
pressure188
Child-restraint fixing system
LATCH50
Child-restraint systems49
Child-safety lock51
Child seats49
Chrome parts, care, refer to
Caring for your vehicle
brochure
Cigarette lighter108
– socket108