2006 BMW 325XI TOURING ignition
[x] Cancel search: ignitionPage 13 of 160

At a glance
Controls
Driving tips
Mobility Reference
11
7Instrument cluster12
10Ignition lock42
11Buttons
* on the steering wheel12Horn: the entire surface
13Steering wheel adjustment38
15Releasing the hood112
16Opening the tailgate
*
6
Turn signals46
High beams, headlamp flasher76
Roadside parking lamps
*76
Computer58
Settings and information about the
vehicle59
Instrument lighting76
8
Windshield wipers47
Rain sensor
*47
Rear window wiper48
9Switching the ignition on/off and
starting/stopping the engine42
Telephone
*:
>Press: accepting and ending a
call, starting dialing
* for a
selected phone number and
redialing if no phone number is
selected
>Press longer: redialing
Volume
Changing radio station
Selecting music track
Scrolling through phone book and
lists with stored phone numbers
Next entertainment source
Recirculated-air mode79
14
Cruise control
*48
Active cruise control
*50
Page 15 of 160

At a glance
Controls
Driving tips
Mobility Reference
13
Indicator and warning lamps
The concept
Indicator and warning lamps can light up in var-
ious combinations and colors in both the indica-
tor area 1 and the display 2.
Some lamps are checked for proper functioning
and thus come on briefly when the engine is
started or the ignition is switched on.
What to do in case of a malfunction
A list of all indicator and warning lamps, as well
as notes on possible causes of malfunctions
and on how to respond, can be found starting
on page130.
Page 20 of 160

Opening and closing
18
Opening and closing
Keys/remote controls
1Remote control with integrated key
2Spare key
3Adapter for spare key, in the glove compart-
ment
Remote control with integrated key
Each remote control contains a rechargeable
battery that is automatically recharged when it
is in the ignition lock while the car is being
driven. Use the remote control at least twice a
year in order to keep the batteries charged. In
cars equipped with convenient access
*, the
remote control contains a replaceable battery,
refer to page27.
The settings called up and implemented when
the car is unlocked depend on which remote
control is used to unlock the car, refer to Per-
sonal Profile, page19.
In addition, information about service require-
ments is stored in the remote control, refer to
Service data in the remote control, page117.
Integrated key
Press button1 to release the key.
The integrated key fits the following locks:
>Glove compartment, refer to page87
>Driver's door, refer to page22
New remote controls
Your BMW Center can supply new remote con-
trols with integrated keys as additional units or
as replacements in the event of loss.
Spare key
Spare key for storage in a safe place, such as in
your wallet. This key is not intended for regular
use.
The spare key and the integrated key fit the
same locks.
Adapter for spare key
The adapter is necessary for starting the car
with the spare key or switching on radio readi-
ness.
Page 27 of 160

Reference
At a glance
Controls
Driving tips
Mobility
25
Alarm system*
The concept
The vehicle alarm system responds:
>When a door, the hood or the tailgate is
opened
>To movements inside the vehicle: Interior
motion sensor, refer to the information fur-
ther below
>When the car's inclination changes, for
instance if an attempt is made to jack it up
and steal the wheels or to raise it prior to
towing away
>When there is an interruption in the power
supply from the battery
The alarm system signals unauthorized entry
attempts for a short time by means of:
>An acoustic alarm
>Switching on the hazard warning flashers
>Flashing the high beams
Arming and disarming
When you lock or unlock the vehicle, either with
the remote control or at the door lock, the alarm
system is armed or disarmed at the same time.
Even when the alarm system is armed, you can
open the tailgate by means of the button on
the remote control, refer to page21. When you
subsequently close the tailgate it is again
locked and monitored.
Switching off an alarm
>Unlock the car with the remote control, refer
to page20, or
>insert the remote control all the way into the
ignition lock.
Indicator lamp displays
>The indicator lamp under the inside rear-
view mirror flashes continuously: the sys-
tem is armed.
>The indicator lamp flashes after locking:
doors, hood or tailgate are not properly
closed. Even if you do not close the alerted
area, the system begins to monitor the
remaining areas, and the indicator lamp
flashes continuously after approx. 10 sec-
onds. However, the interior motion sensor
is not activated.
>The indicator lamp goes out after unlocking:
your vehicle has not been disturbed while
you were away.
>If the indicator lamp flashes after unlocking
until the remote control is inserted in the
ignition, but for no longer than approx.
5 minutes: your vehicle has been disturbed
while you were away.
Tilt alarm sensor
The tilt of the vehicle is monitored. The alarm
system reacts, e.g. to attempts to steal a wheel
or tow the vehicle.
Interior motion sensor
In order for the interior motion sensor to func-
tion properly, the windows and glass sunroof
must be completely closed.
Avoiding unintentional alarms
The tilt alarm sensor and interior motion sensor
may be switched off at the same time. This pre-
vents unintentional alarms, e.g. in the following
situations:
>In duplex garages
Page 29 of 160

Reference
At a glance
Controls
Driving tips
Mobility
27
Do not depress the brake or the clutch,
otherwise the engine will start immedi-
ately.<
Starting the engine
You can start the engine or switch on the igni-
tion when a remote control is inside the vehicle.
It is not necessary to insert a remote control into
the ignition switch, refer to page42.
Switching off the engine in vehicles
with automatic transmission
The engine can only be switched off when the
selector lever is in position P, refer to page43.
To switch the engine off when the selector lever
is in position N, the remote control must be in
the ignition switch.
Before driving a vehicle with automatic
transmission into a car wash
1.Insert remote control into ignition switch.
2.Depress the brake.
3.Move the selector lever to position N.
4.Switch off the engine.
The vehicle can roll.
Malfunction
Convenient access may malfunction due to
local radio waves. If this happens, open or close
the vehicle via the buttons on the remote con-
trol or using the integrated key. To start the
engine afterward, insert the remote control into
the ignition switch.
Warning lamps
The warning lamp in the instrument
cluster lights up when you attempt to
start the engine: the engine cannot
be started. The remote control is not inside the
vehicle or is malfunctioning. Take the remote
control with you inside the vehicle or have it
checked. If necessary, insert another remote
control into the ignition switch.
The warning lamp in the instrument
cluster lights up while the engine is
running: the remote control is no longer inside the vehicle. After the engine is
switched off, the engine can only be restarted
within approx. 10 seconds.
The indicator lamp in the instrument
cluster comes on: replace the battery
in the remote control.
Replacing the battery
The remote control for convenient access con-
tains a battery that will need to be replaced from
time to time.
1.Take the integrated key out of the remote
control, refer to page18.
2.Remove the cover.
3.Insert the new battery with the plus side fac-
ing up.
4.Press the cover on to close.
Take the old battery to a battery collec-
tion point or to your BMW Center.<
Windows
To prevent injuries, exercise care when
closing the windows and keep them in
your field of vision until they are shut.
Take the remote control with you when you
leave the car, otherwise children could operate
the electric windows and possibly injure them-
selves.<
Page 30 of 160

Opening and closing
28
Opening, closing
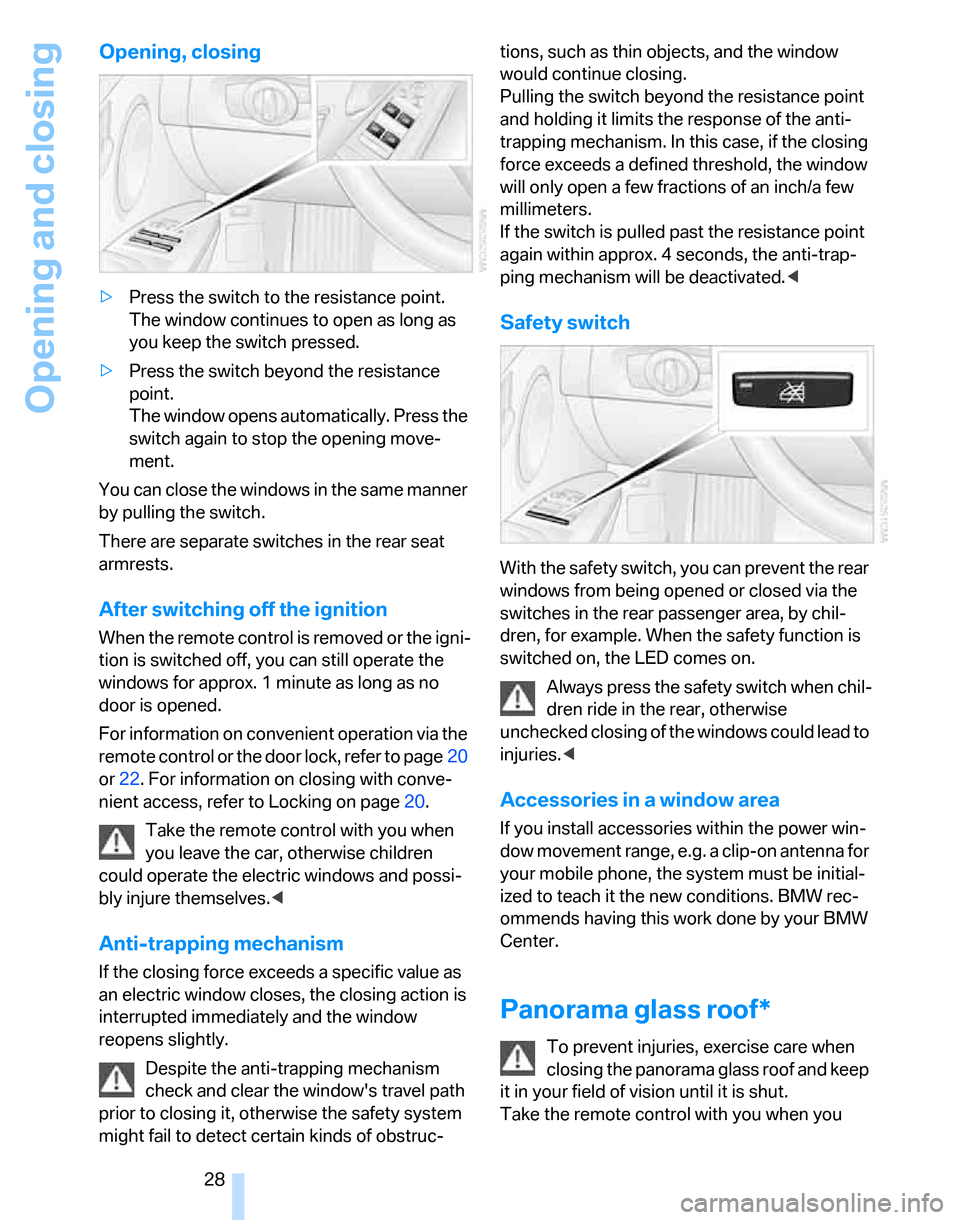
>Press the switch to the resistance point.
The window continues to open as long as
you keep the switch pressed.
>Press the switch beyond the resistance
point.
The window opens automatically. Press the
switch again to stop the opening move-
ment.
You can close the windows in the same manner
by pulling the switch.
There are separate switches in the rear seat
armrests.
After switching off the ignition
When the remote control is removed or the igni-
tion is switched off, you can still operate the
windows for approx. 1 minute as long as no
door is opened.
For information on convenient operation via the
remote control or the door lock, refer to page20
or22. For information on closing with conve-
nient access, refer to Locking on page20.
Take the remote control with you when
you leave the car, otherwise children
could operate the electric windows and possi-
bly injure themselves.<
Anti-trapping mechanism
If the closing force exceeds a specific value as
an electric window closes, the closing action is
interrupted immediately and the window
reopens slightly.
Despite the anti-trapping mechanism
check and clear the window's travel path
prior to closing it, otherwise the safety system
might fail to detect certain kinds of obstruc-tions, such as thin objects, and the window
would continue closing.
Pulling the switch beyond the resistance point
and holding it limits the response of the anti-
trapping mechanism. In this case, if the closing
force exceeds a defined threshold, the window
will only open a few fractions of an inch/a few
millimeters.
If the switch is pulled past the resistance point
again within approx. 4 seconds, the anti-trap-
ping mechanism will be deactivated.<
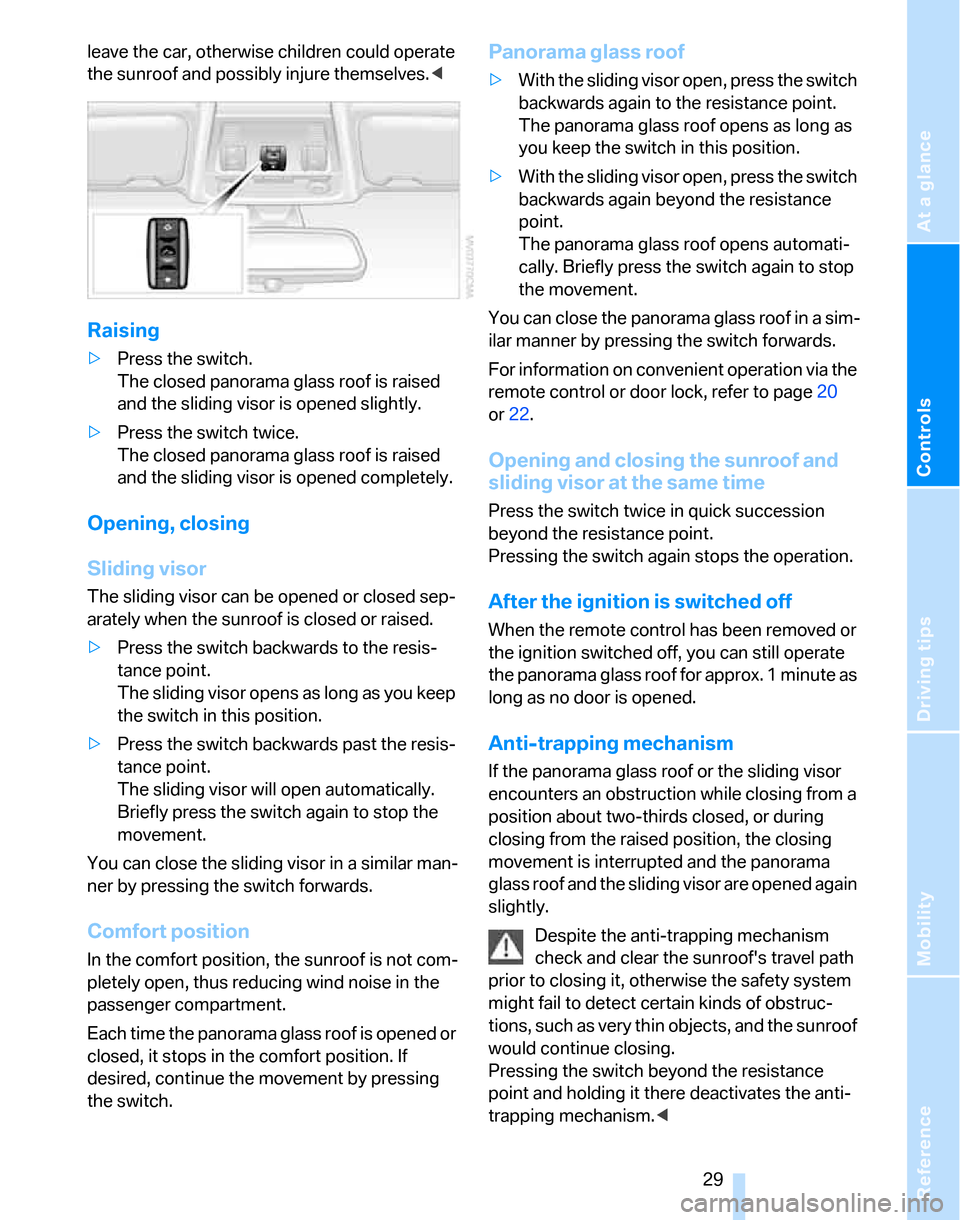
Safety switch
With the safety switch, you can prevent the rear
windows from being opened or closed via the
switches in the rear passenger area, by chil-
dren, for example. When the safety function is
switched on, the LED comes on.
Always press the safety switch when chil-
dren ride in the rear, otherwise
unchecked closing of the windows could lead to
injuries.<
Accessories in a window area
If you install accessories within the power win-
dow movement range, e.g. a clip-on antenna for
your mobile phone, the system must be initial-
ized to teach it the new conditions. BMW rec-
ommends having this work done by your BMW
Center.
Panorama glass roof*
To prevent injuries, exercise care when
closing the panorama glass roof and keep
it in your field of vision until it is shut.
Take the remote control with you when you
Page 31 of 160

Reference
At a glance
Controls
Driving tips
Mobility
29
leave the car, otherwise children could operate
the sunroof and possibly injure themselves.<
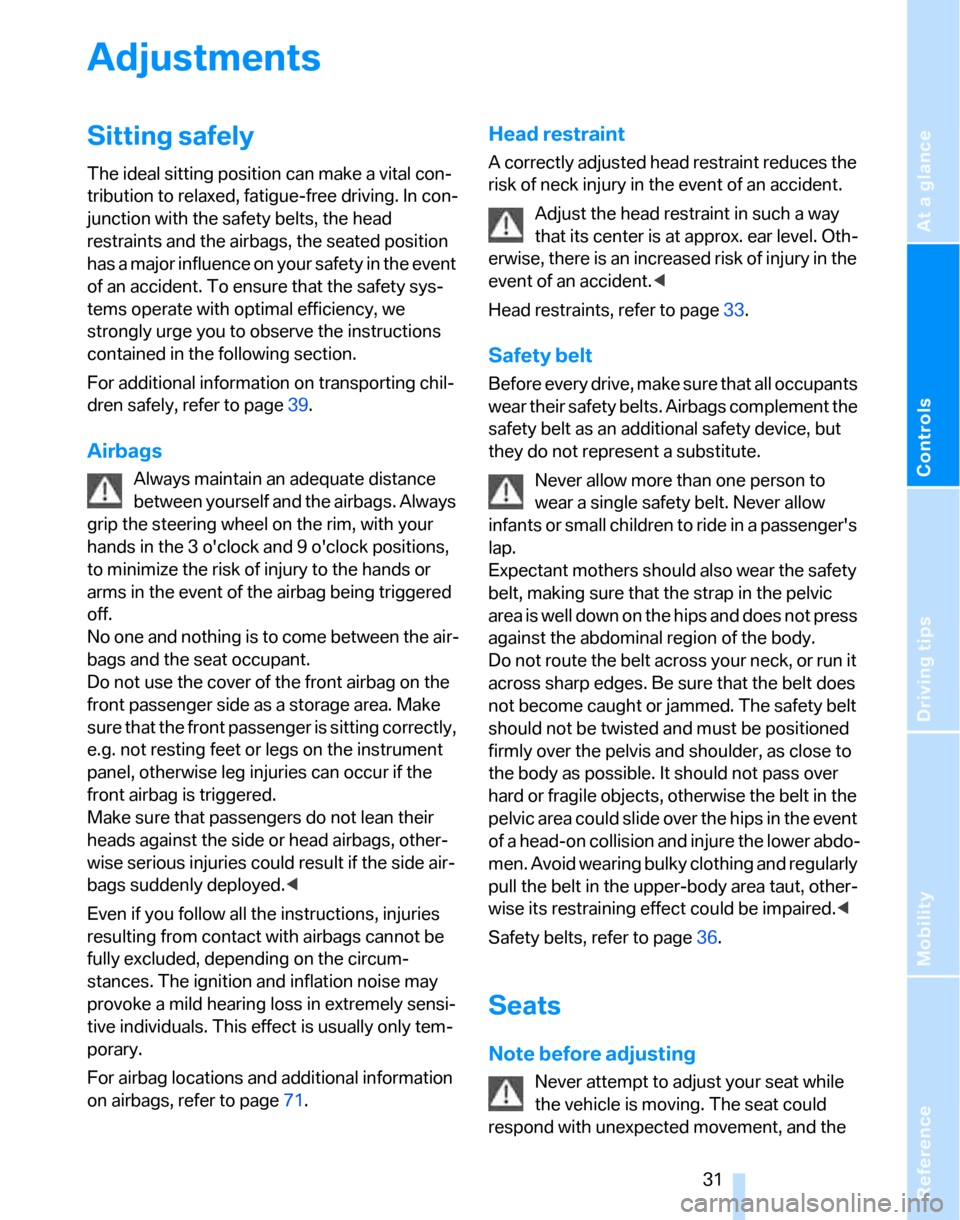
Raising
>Press the switch.
The closed panorama glass roof is raised
and the sliding visor is opened slightly.
>Press the switch twice.
The closed panorama glass roof is raised
and the sliding visor is opened completely.
Opening, closing
Sliding visor
The sliding visor can be opened or closed sep-
arately when the sunroof is closed or raised.
>Press the switch backwards to the resis-
tance point.
The sliding visor opens as long as you keep
the switch in this position.
>Press the switch backwards past the resis-
tance point.
The sliding visor will open automatically.
Briefly press the switch again to stop the
movement.
You can close the sliding visor in a similar man-
ner by pressing the switch forwards.
Comfort position
In the comfort position, the sunroof is not com-
pletely open, thus reducing wind noise in the
passenger compartment.
E a c h t i m e t h e p a n o r a m a g l a ss r o o f i s o p e n e d o r
closed, it stops in the comfort position. If
desired, continue the movement by pressing
the switch.
Panorama glass roof
>With the sliding visor open, press the switch
backwards again to the resistance point.
The panorama glass roof opens as long as
you keep the switch in this position.
>With the sliding visor open, press the switch
backwards again beyond the resistance
point.
The panorama glass roof opens automati-
cally. Briefly press the switch again to stop
the movement.
You can close the panorama glass roof in a sim-
ilar manner by pressing the switch forwards.
For information on convenient operation via the
remote control or door lock, refer to page20
or22.
Opening and closing the sunroof and
sliding visor at the same time
Press the switch twice in quick succession
beyond the resistance point.
Pressing the switch again stops the operation.
After the ignition is switched off
When the remote control has been removed or
the ignition switched off, you can still operate
the panorama glass roof for approx. 1 minute as
long as no door is opened.
Anti-trapping mechanism
If the panorama glass roof or the sliding visor
encounters an obstruction while closing from a
position about two-thirds closed, or during
closing from the raised position, the closing
movement is interrupted and the panorama
glass roof and the sliding visor are opened again
slightly.
Despite the anti-trapping mechanism
check and clear the sunroof's travel path
prior to closing it, otherwise the safety system
might fail to detect certain kinds of obstruc-
tions, such as very thin objects, and the sunroof
would continue closing.
Pressing the switch beyond the resistance
point and holding it there deactivates the anti-
trapping mechanism.<
Page 33 of 160

Reference
At a glance
Controls
Driving tips
Mobility
31
Adjustments
Sitting safely
The ideal sitting position can make a vital con-
tribution to relaxed, fatigue-free driving. In con-
junction with the safety belts, the head
restraints and the airbags, the seated position
has a major influence on your safety in the event
of an accident. To ensure that the safety sys-
tems operate with optimal efficiency, we
strongly urge you to observe the instructions
contained in the following section.
For additional information on transporting chil-
dren safely, refer to page39.
Airbags
Always maintain an adequate distance
between yourself and the airbags. Always
grip the steering wheel on the rim, with your
hands in the 3 o'clock and 9 o'clock positions,
to minimize the risk of injury to the hands or
arms in the event of the airbag being triggered
off.
No one and nothing is to come between the air-
bags and the seat occupant.
Do not use the cover of the front airbag on the
front passenger side as a storage area. Make
sure that the front passenger is sitting correctly,
e.g. not resting feet or legs on the instrument
panel, otherwise leg injuries can occur if the
front airbag is triggered.
Make sure that passengers do not lean their
heads against the side or head airbags, other-
wise serious injuries could result if the side air-
bags suddenly deployed.<
Even if you follow all the instructions, injuries
resulting from contact with airbags cannot be
fully excluded, depending on the circum-
stances. The ignition and inflation noise may
provoke a mild hearing loss in extremely sensi-
tive individuals. This effect is usually only tem-
porary.
For airbag locations and additional information
on airbags, refer to page71.
Head restraint
A correctly adjusted head restraint reduces the
risk of neck injury in the event of an accident.
Adjust the head restraint in such a way
that its center is at approx. ear level. Oth-
erwise, there is an increased risk of injury in the
event of an accident.<
Head restraints, refer to page33.
Safety belt
Before every drive, make sure that all occupants
wear their safety belts. Airbags complement the
safety belt as an additional safety device, but
they do not represent a substitute.
Never allow more than one person to
wear a single safety belt. Never allow
infants or small children to ride in a passenger's
lap.
Expectant mothers should also wear the safety
belt, making sure that the strap in the pelvic
area is well down on the hips and does not press
against the abdominal region of the body.
Do not route the belt across your neck, or run it
across sharp edges. Be sure that the belt does
not become caught or jammed. The safety belt
should not be twisted and must be positioned
firmly over the pelvis and shoulder, as close to
the body as possible. It should not pass over
hard or fragile objects, otherwise the belt in the
pelvic area could slide over the hips in the event
of a head-on collision and injure the lower abdo-
men. Avoid wearing bulky clothing and regularly
pull the belt in the upper-body area taut, other-
wise its restraining effect could be impaired.<
Safety belts, refer to page36.
Seats
Note before adjusting
Never attempt to adjust your seat while
the vehicle is moving. The seat could
respond with unexpected movement, and the