2006 BMW 325XI TOURING door lock
[x] Cancel search: door lockPage 30 of 160
Opening and closing
28
Opening, closing
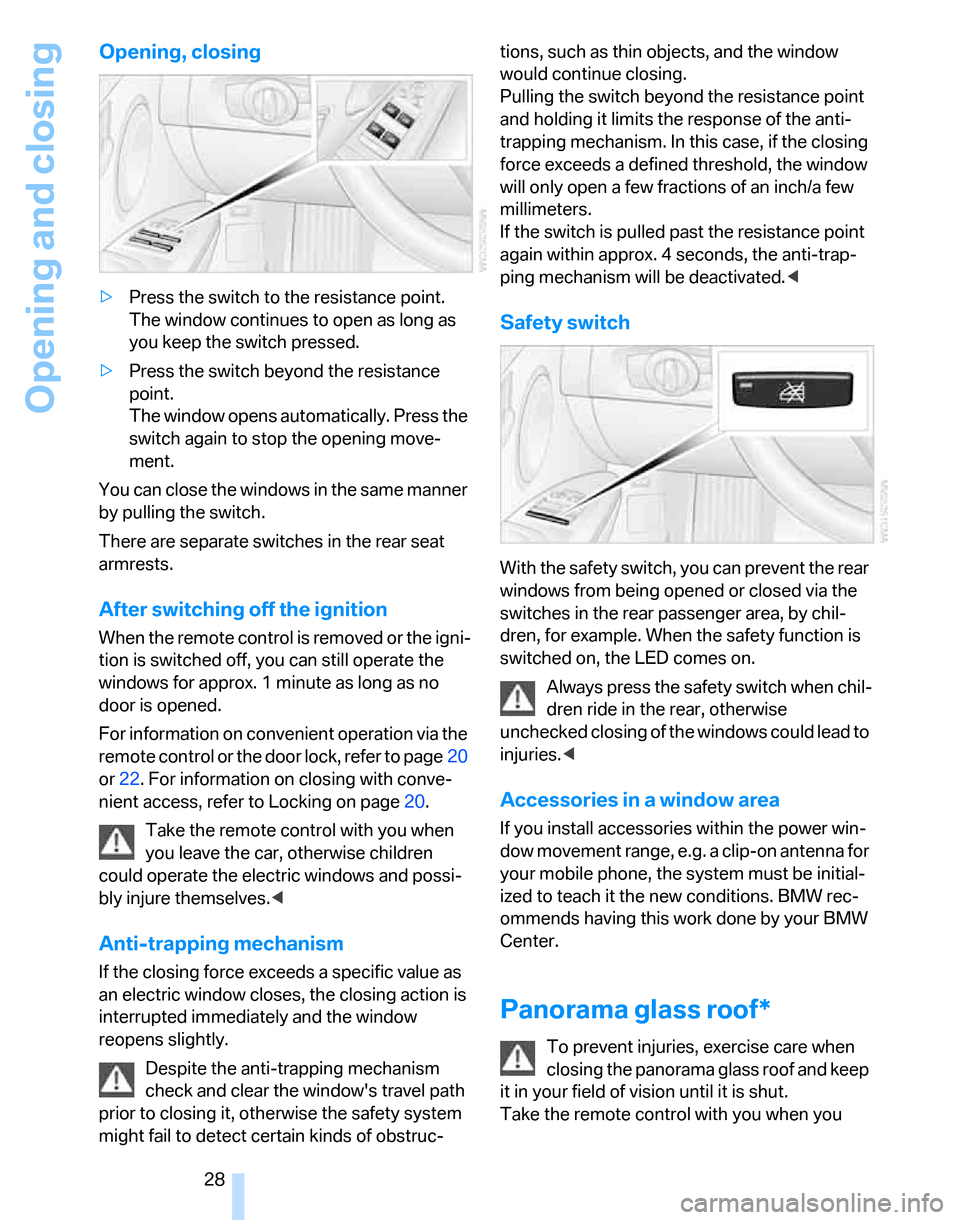
>Press the switch to the resistance point.
The window continues to open as long as
you keep the switch pressed.
>Press the switch beyond the resistance
point.
The window opens automatically. Press the
switch again to stop the opening move-
ment.
You can close the windows in the same manner
by pulling the switch.
There are separate switches in the rear seat
armrests.
After switching off the ignition
When the remote control is removed or the igni-
tion is switched off, you can still operate the
windows for approx. 1 minute as long as no
door is opened.
For information on convenient operation via the
remote control or the door lock, refer to page20
or22. For information on closing with conve-
nient access, refer to Locking on page20.
Take the remote control with you when
you leave the car, otherwise children
could operate the electric windows and possi-
bly injure themselves.<
Anti-trapping mechanism
If the closing force exceeds a specific value as
an electric window closes, the closing action is
interrupted immediately and the window
reopens slightly.
Despite the anti-trapping mechanism
check and clear the window's travel path
prior to closing it, otherwise the safety system
might fail to detect certain kinds of obstruc-tions, such as thin objects, and the window
would continue closing.
Pulling the switch beyond the resistance point
and holding it limits the response of the anti-
trapping mechanism. In this case, if the closing
force exceeds a defined threshold, the window
will only open a few fractions of an inch/a few
millimeters.
If the switch is pulled past the resistance point
again within approx. 4 seconds, the anti-trap-
ping mechanism will be deactivated.<
Safety switch
With the safety switch, you can prevent the rear
windows from being opened or closed via the
switches in the rear passenger area, by chil-
dren, for example. When the safety function is
switched on, the LED comes on.
Always press the safety switch when chil-
dren ride in the rear, otherwise
unchecked closing of the windows could lead to
injuries.<
Accessories in a window area
If you install accessories within the power win-
dow movement range, e.g. a clip-on antenna for
your mobile phone, the system must be initial-
ized to teach it the new conditions. BMW rec-
ommends having this work done by your BMW
Center.
Panorama glass roof*
To prevent injuries, exercise care when
closing the panorama glass roof and keep
it in your field of vision until it is shut.
Take the remote control with you when you
Page 31 of 160
Reference
At a glance
Controls
Driving tips
Mobility
29
leave the car, otherwise children could operate
the sunroof and possibly injure themselves.<
Raising
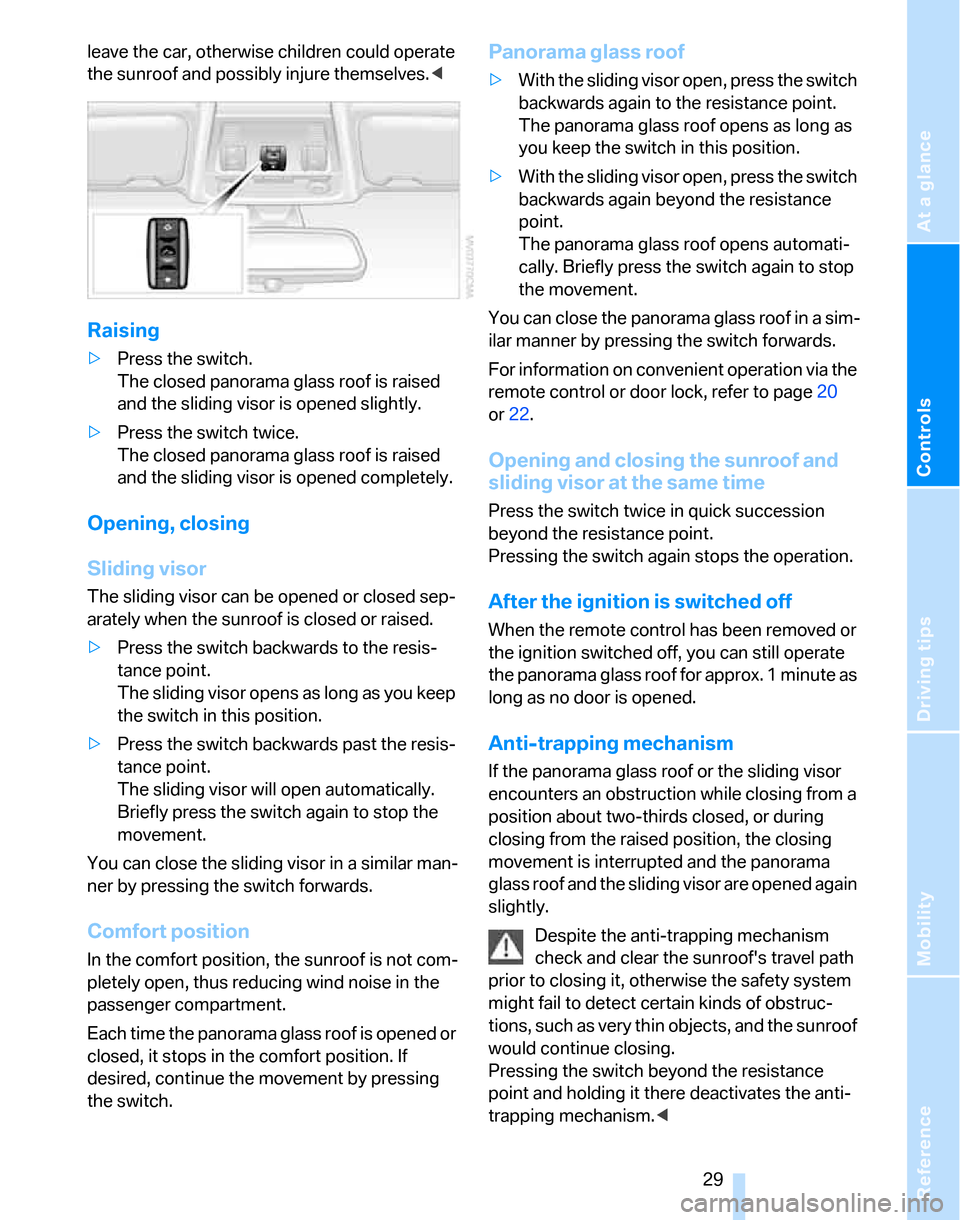
>Press the switch.
The closed panorama glass roof is raised
and the sliding visor is opened slightly.
>Press the switch twice.
The closed panorama glass roof is raised
and the sliding visor is opened completely.
Opening, closing
Sliding visor
The sliding visor can be opened or closed sep-
arately when the sunroof is closed or raised.
>Press the switch backwards to the resis-
tance point.
The sliding visor opens as long as you keep
the switch in this position.
>Press the switch backwards past the resis-
tance point.
The sliding visor will open automatically.
Briefly press the switch again to stop the
movement.
You can close the sliding visor in a similar man-
ner by pressing the switch forwards.
Comfort position
In the comfort position, the sunroof is not com-
pletely open, thus reducing wind noise in the
passenger compartment.
E a c h t i m e t h e p a n o r a m a g l a ss r o o f i s o p e n e d o r
closed, it stops in the comfort position. If
desired, continue the movement by pressing
the switch.
Panorama glass roof
>With the sliding visor open, press the switch
backwards again to the resistance point.
The panorama glass roof opens as long as
you keep the switch in this position.
>With the sliding visor open, press the switch
backwards again beyond the resistance
point.
The panorama glass roof opens automati-
cally. Briefly press the switch again to stop
the movement.
You can close the panorama glass roof in a sim-
ilar manner by pressing the switch forwards.
For information on convenient operation via the
remote control or door lock, refer to page20
or22.
Opening and closing the sunroof and
sliding visor at the same time
Press the switch twice in quick succession
beyond the resistance point.
Pressing the switch again stops the operation.
After the ignition is switched off
When the remote control has been removed or
the ignition switched off, you can still operate
the panorama glass roof for approx. 1 minute as
long as no door is opened.
Anti-trapping mechanism
If the panorama glass roof or the sliding visor
encounters an obstruction while closing from a
position about two-thirds closed, or during
closing from the raised position, the closing
movement is interrupted and the panorama
glass roof and the sliding visor are opened again
slightly.
Despite the anti-trapping mechanism
check and clear the sunroof's travel path
prior to closing it, otherwise the safety system
might fail to detect certain kinds of obstruc-
tions, such as very thin objects, and the sunroof
would continue closing.
Pressing the switch beyond the resistance
point and holding it there deactivates the anti-
trapping mechanism.<
Page 37 of 160

Reference
At a glance
Controls
Driving tips
Mobility
35
Settings for the seat back width and lumbar
support are not stored in memory.
Storing
1.Switch on radio readiness or the ignition,
refer to page42.
2.Adjust the seat and exterior mirrors to the
desired positions.
3.Press the button.
The LED in the button lights up.
4.Press the desired memory key 1 or 2.
The LED goes out.
The driver's seat and exterior mirror posi-
tions are stored for the remote control cur-
rently in use.
Automatic call-up
You can select at what occasion the stored
positions of the driver's seat and exterior mir-
rors are to be called up.
>Call-up when the vehicle is unlocked
>Call-up when the driver's door is opened.
When this Personal Profile function is
used, first ensure that the footwell behind
the driver's seat is free of obstacles. Failure to
do so could cause injury to persons or damage
to objects as a result of a rearward movement of
the seat.<
The adjusting procedure is immediately halted
when you press a seat adjustment switch or one
of the MEMORY buttons.
Activating/deactivating automatic call-
up
Operating principle, refer to page59.1.Lightly push button1 in the turn indicator
stalk up or down repeatedly until the symbol
appears in the display accompanied by the
word "SET".
2.Press button 2.
3.Lightly push button1 in the turn indicator
stalk down repeatedly until the symbol
appears in the display.
4.Press button 2.
5.Use button 1 to select:
>
Call-up when the vehicle is unlocked.
>
Call-up when the driver's door is
opened.
>
Switch off automatic function.
6.Press button 2.
The setting is stored.
Manual call-up
Do not call up memory while you are driv-
ing, otherwise unexpected seat move-
ment could result in an accident.<
Page 38 of 160
Adjustments
36
Convenience mode
1.Unlock and open the driver's door or switch
on radio readiness, refer to page42.
2.Briefly press the desired memory button1
or 2.
The adjusting procedure is immediately halted
when you touch a seat adjustment switch or
one of the MEMORY buttons.
Safety feature
1.Close the driver's door and switch the igni-
tion on or off, refer to page42.
2.Press the desired memory button1 or2
and maintain pressure until the adjustment
process has been completed.
If the button was pressed accidentally:
press the button again; the LED goes out.
Safety belts
Observe the adjustment instructions on
page31 to ensure the best possible per-
sonal protection.<
Before every drive, make sure that all occupants
wear their safety belts. Airbags complement the
safety belt as an additional safety device, but
they do not represent a substitute.
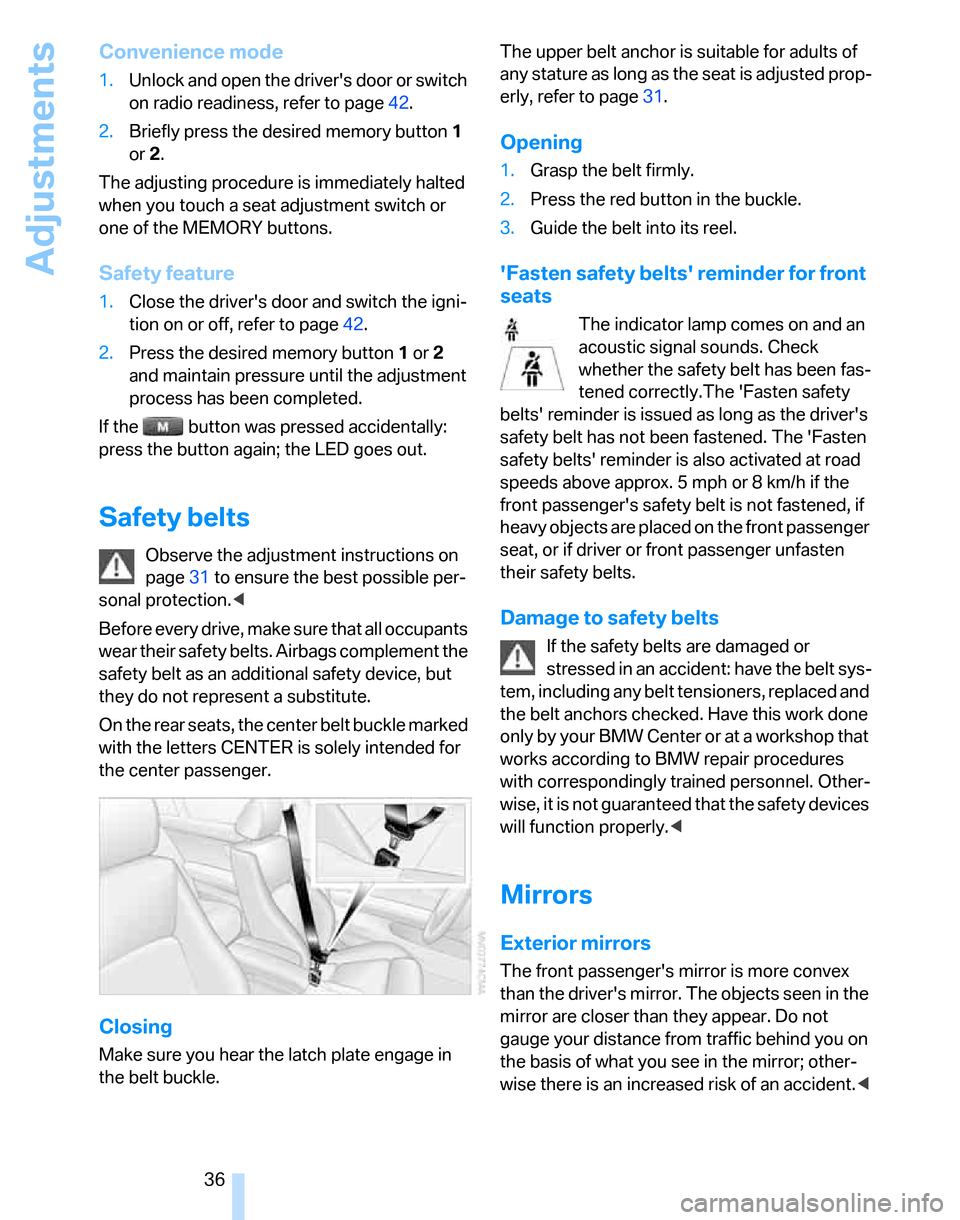
On the rear seats, the center belt buckle marked
with the letters CENTER is solely intended for
the center passenger.
Closing
Make sure you hear the latch plate engage in
the belt buckle.The upper belt anchor is suitable for adults of
any stature as long as the seat is adjusted prop-
erly, refer to page31.
Opening
1.Grasp the belt firmly.
2.Press the red button in the buckle.
3.Guide the belt into its reel.
'Fasten safety belts' reminder for front
seats
The indicator lamp comes on and an
acoustic signal sounds. Check
whether the safety belt has been fas-
tened correctly.The 'Fasten safety
belts' reminder is issued as long as the driver's
safety belt has not been fastened. The 'Fasten
safety belts' reminder is also activated at road
speeds above approx. 5 mph or 8 km/h if the
front passenger's safety belt is not fastened, if
heavy objects are placed on the front passenger
seat, or if driver or front passenger unfasten
their safety belts.
Damage to safety belts
If the safety belts are damaged or
stressed in an accident: have the belt sys-
tem, including any belt tensioners, replaced and
the belt anchors checked. Have this work done
only by your BMW Center or at a workshop that
works according to BMW repair procedures
with correspondingly trained personnel. Other-
wise, it is not guaranteed that the safety devices
will function properly.<
Mirrors
Exterior mirrors
The front passenger's mirror is more convex
than the driver's mirror. The objects seen in the
mirror are closer than they appear. Do not
gauge your distance from traffic behind you on
the basis of what you see in the mirror; other-
wise there is an increased risk of an accident.<
Page 43 of 160
Reference
At a glance
Controls
Driving tips
Mobility
41
Rear seats
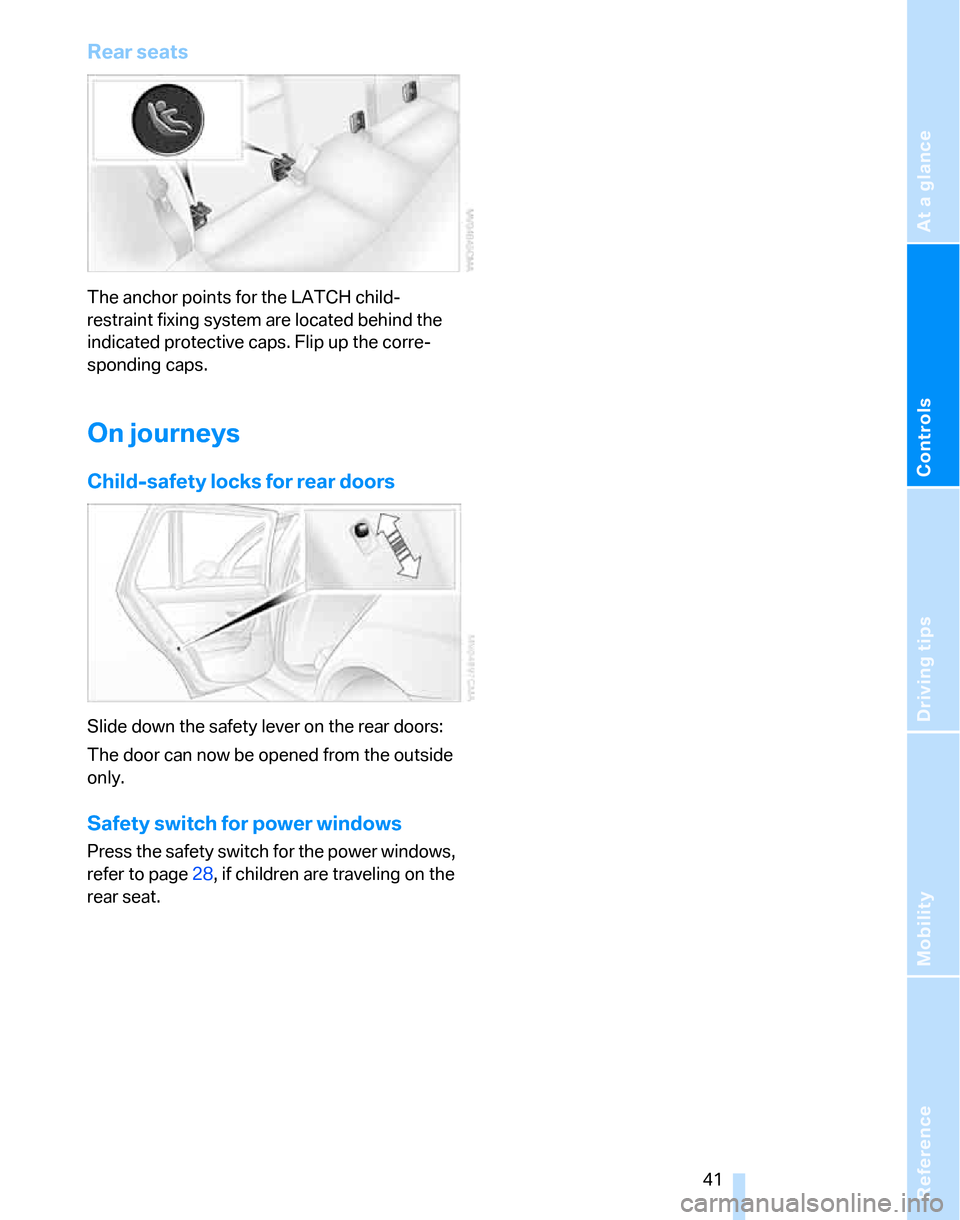
The anchor points for the LATCH child-
restraint fixing system are located behind the
indicated protective caps. Flip up the corre-
sponding caps.
On journeys
Child-safety locks for rear doors
Slide down the safety lever on the rear doors:
The door can now be opened from the outside
only.
Safety switch for power windows
Press the safety switch for the power windows,
refer to page28, if children are traveling on the
rear seat.
Page 44 of 160
Driving
42
Driving
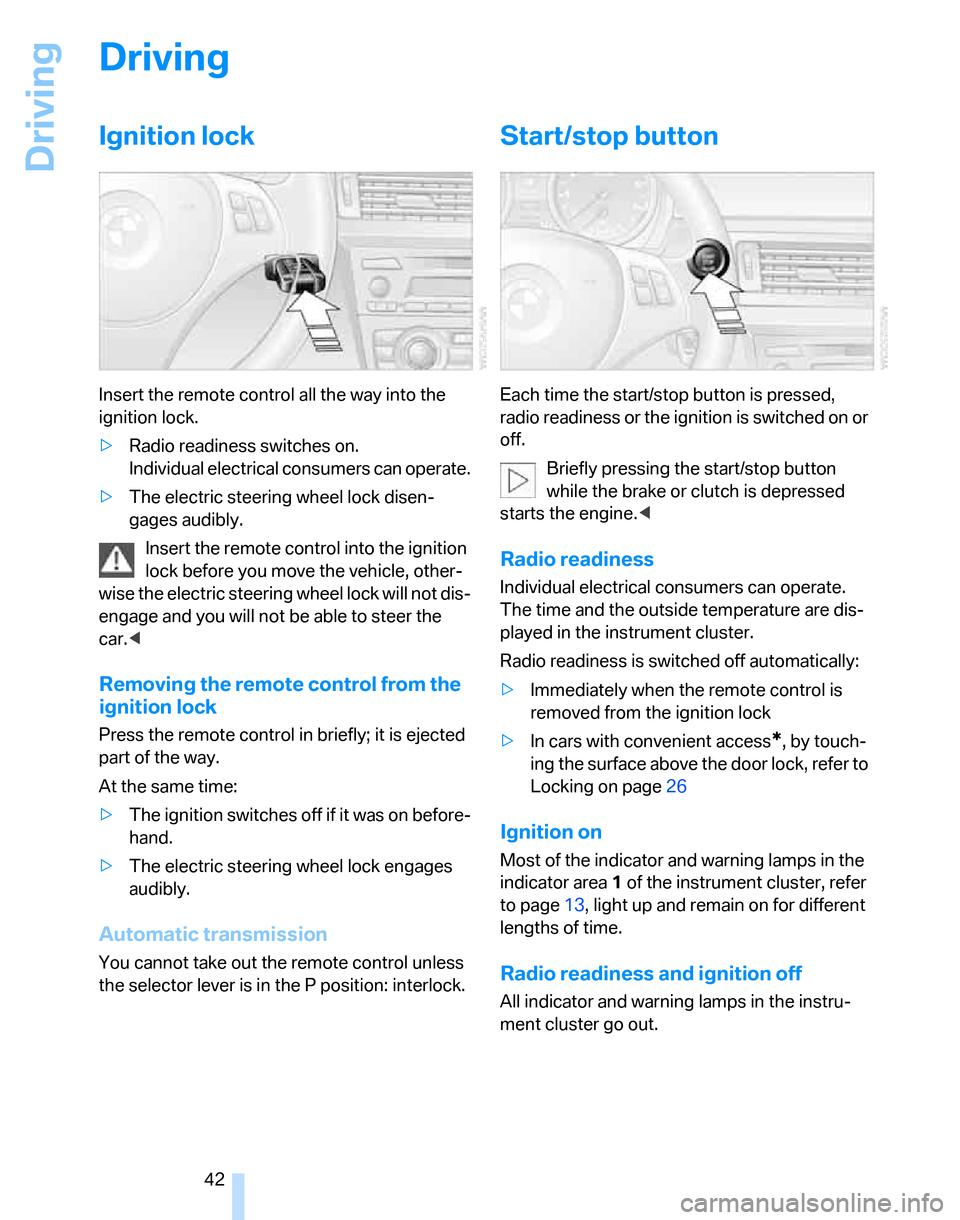
Ignition lock
Insert the remote control all the way into the
ignition lock.
>Radio readiness switches on.
Individual electrical consumers can operate.
>The electric steering wheel lock disen-
gages audibly.
Insert the remote control into the ignition
lock before you move the vehicle, other-
wise the electric steering wheel lock will not dis-
engage and you will not be able to steer the
car.<
Removing the remote control from the
ignition lock
Press the remote control in briefly; it is ejected
part of the way.
At the same time:
>The ignition switches off if it was on before-
hand.
>The electric steering wheel lock engages
audibly.
Automatic transmission
You cannot take out the remote control unless
the selector lever is in the P position: interlock.
Start/stop button
Each time the start/stop button is pressed,
radio readiness or the ignition is switched on or
off.
Briefly pressing the start/stop button
while the brake or clutch is depressed
starts the engine.<
Radio readiness
Individual electrical consumers can operate.
The time and the outside temperature are dis-
played in the instrument cluster.
Radio readiness is switched off automatically:
>Immediately when the remote control is
removed from the ignition lock
>In cars with convenient access
*, by touch-
ing the surface above the door lock, refer to
Locking on page26
Ignition on
Most of the indicator and warning lamps in the
indicator area1 of the instrument cluster, refer
to page13, light up and remain on for different
lengths of time.
Radio readiness and ignition off
All indicator and warning lamps in the instru-
ment cluster go out.
Page 106 of 160
Refueling
104
Refueling
Always switch off the engine before refu-
eling, otherwise, fuel cannot be added to
the tank and a message will be displayed.<
Take all precautionary measures and
observe all applicable regulations when
handling fuel. Do not carry any spare fuel con-
tainers in your vehicle. They can develop a leak
and cause an explosion or cause a fire in the
event of an accident.<
Gas cap
Opening
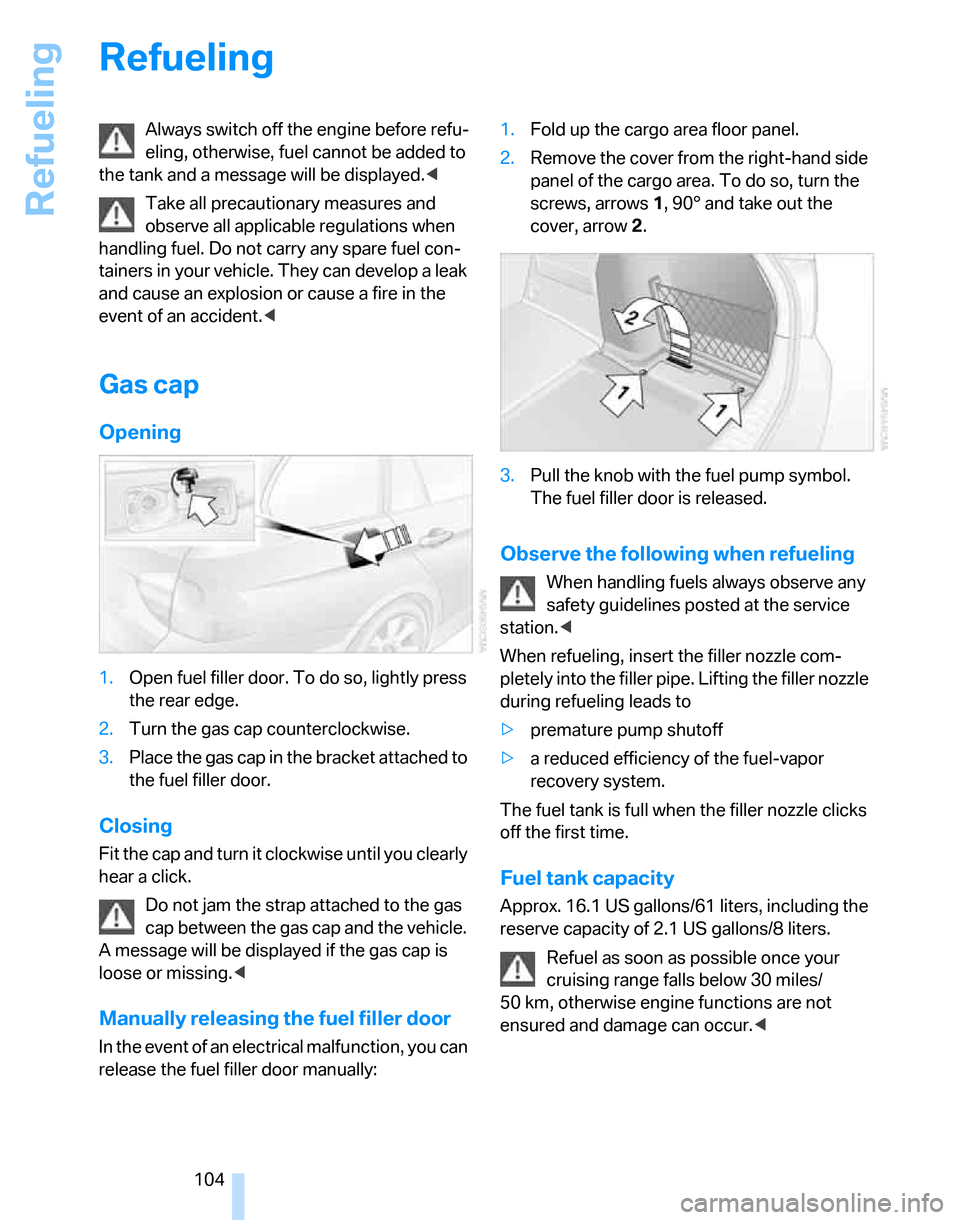
1.Open fuel filler door. To do so, lightly press
the rear edge.
2.Turn the gas cap counterclockwise.
3.Place the gas cap in the bracket attached to
the fuel filler door.
Closing
Fit the cap and turn it clockwise until you clearly
hear a click.
Do not jam the strap attached to the gas
cap between the gas cap and the vehicle.
A message will be displayed if the gas cap is
loose or missing.<
Manually releasing the fuel filler door
In the event of an electrical malfunction, you can
release the fuel filler door manually:1.Fold up the cargo area floor panel.
2.Remove the cover from the right-hand side
panel of the cargo area. To do so, turn the
screws, arrows 1, 90° and take out the
cover, arrow 2.
3.Pull the knob with the fuel pump symbol.
The fuel filler door is released.
Observe the following when refueling
When handling fuels always observe any
safety guidelines posted at the service
station.<
When refueling, insert the filler nozzle com-
pletely into the filler pipe. Lifting the filler nozzle
during refueling leads to
>premature pump shutoff
>a reduced efficiency of the fuel-vapor
recovery system.
The fuel tank is full when the filler nozzle clicks
off the first time.
Fuel tank capacity
Approx. 16.1 US gallons/61 liters, including the
reserve capacity of 2.1 US gallons/8 liters.
Refuel as soon as possible once your
cruising range falls below 30 miles/
50 km, otherwise engine functions are not
ensured and damage can occur.<
Page 150 of 160

Everything from A to Z
148 Center brake lamp
– replacing bulbs123
Center console, refer to
Around the center
console14
Central locking
– from inside22
– from outside19
Central locking system19
– convenient access26
Changing bulbs119
Changing wheels123
Chassis number, refer to
Engine compartment113
Check Control63
Check Gas Cap104
Checking the air pressure,
refer to Tire inflation
pressure106
Child-restraint fixing system
LATCH40
Child-restraint systems39
Child-safety lock41
Child seats39
Chrome parts, care, refer to
Caring for your vehicle
brochure
Cigarette lighter89
– socket89
Cleaning, refer to Caring for
your vehicle brochure
Cleaning headlamps48
– washer fluid48
Clock57
– 12h/24h mode60
– setting time62
Closing
– from inside22
– from outside20
Clothes hooks88
Cockpit10
Cold start, refer to Starting the
engine43
Combined instrument, refer to
Instrument cluster12
Comfort Access, refer to
Convenient access26
Comfort area, refer to Around
the center console14Compartment for remote
control, refer to Ignition
lock42
Compass85
Computer58
Condensation, refer to When
the vehicle is parked98
Configuring settings, refer to
Personal Profile19
Confirmation signals for
locking/unlocking of the
vehicle21
Connecting vacuum cleaner,
refer to Connecting
electrical appliances
89
Consumption display
– average consumption58
Consumption indicator
– Energy Control58
Control Display
– settings59
Controls and displays10
Convenience operation
– windows20
Convenience start, refer to
Starting the engine43
Convenient access26
– replacing the battery27
– what to observe before
entering a car wash27
Convenient operation
– windows with convenient
access26
– with convenient access26
Coolant115
– adding115
– checking level115
Coolant temperature57
Cooling, maximum81
Cooling fluid, refer to
Coolant115
Cornering lamps, refer to
Adaptive Head Light75
Courtesy lamps77
Cruise control48
– active50
– malfunction50
Cruising range58
Cup holders88Curb weight, refer to
Weights144
Current consumption, refer to
Energy Control58
D
Dashboard, refer to
Cockpit10
Dashboard, refer to
Instrument cluster12
Dashboard lighting, refer to
Instrument lighting76
Data142
– capacities145
– dimensions143
– engine142
– weights144
Date
– setting63
Daytime driving lamps75
DBC Dynamic Brake
Control66
DCC, refer to Cruise
control48
Deactivating front passenger
airbags72
Deadlocking, refer to
Locking20
Decommissioning the vehicle
– refer to Caring for your
vehicle brochure
Defect
– door lock22
– fuel filler door104
– panorama glass roof30
Defogging windows80,83
Defrosting windows80,83
Defrosting windows and
removing condensation
– air conditioner80
– automatic climate control83
Defrosting windshield, refer to
Defrosting windows80,83
Defrost position, refer to
Defrosting windows80,83
Digital clock57
Digital compass85
Dimensions143