2006 BMW 325XI TOURING stop start
[x] Cancel search: stop startPage 13 of 160

At a glance
Controls
Driving tips
Mobility Reference
11
7Instrument cluster12
10Ignition lock42
11Buttons
* on the steering wheel12Horn: the entire surface
13Steering wheel adjustment38
15Releasing the hood112
16Opening the tailgate
*
6
Turn signals46
High beams, headlamp flasher76
Roadside parking lamps
*76
Computer58
Settings and information about the
vehicle59
Instrument lighting76
8
Windshield wipers47
Rain sensor
*47
Rear window wiper48
9Switching the ignition on/off and
starting/stopping the engine42
Telephone
*:
>Press: accepting and ending a
call, starting dialing
* for a
selected phone number and
redialing if no phone number is
selected
>Press longer: redialing
Volume
Changing radio station
Selecting music track
Scrolling through phone book and
lists with stored phone numbers
Next entertainment source
Recirculated-air mode79
14
Cruise control
*48
Active cruise control
*50
Page 28 of 160

Opening and closing
26 >When transporting on car-carrying trains
>When animals are to remain in the vehicle
Switching off tilt alarm sensor and
interior motion sensor
Press the button on the remote control
twice in a row.
The indicator lamp comes on for approx. two
seconds, then begins to flash steadily. The tilt
alarm sensor and the interior motion sensor are
switched off until the next time the vehicle is
unlocked and subsequently locked again.
Convenient access*
Convenient access enables you to enter your
vehicle without needing to hold the remote con-
trol in your hand. All you need to do is wear the
remote control close to your body, e.g. in your
jacket pocket. The vehicle automatically
detects the corresponding remote control
within the immediate vicinity or in the passen-
ger compartment.
Convenient access supports the following
functions:
>Unlocking/locking the vehicle
>Unlocking the tailgate separately
>Engine starting
>Convenient closure
Functional requirement
>The vehicle or the tailgate can only be
locked when the vehicle detects that the
remote control currently in use is outside of
the vehicle.
>The vehicle cannot be locked or unlocked
again until after approx. 2 seconds.
>The engine can only be started when the
vehicle detects that the remote control cur-
rently in use is inside the vehicle.
Special features in comparison to
conventional remote controls
In general, there is no difference between using
convenient access or pressing the buttons on the remote control to carry out the functions
mentioned above. You should therefore first
familiarize yourself with the instructions on
opening and closing starting on page18.
Special features regarding the use of conve-
nient access are described below.
Unlocking
Grasp the handle on the driver's or front pas-
senger's door completely, arrow 1. This corre-
sponds to pressing the button.
If a remote control is detected inside the car
after the vehicle is unlocked, the electric steer-
ing wheel lock is released, refer to page42.
Locking
Touch the surface, arrow 2, with your finger for
approx. 1 second. This corresponds to pressing
the button.
For convenient closure, keep your finger on the
surface, arrow 2.
If the vehicle detects that a remote con-
trol has been accidentally left inside the
locked vehicle's cargo area after the tailgate is
closed, the tailgate will reopen slightly. The haz-
ard warning flashers flash and an acoustic sig-
nal
* sounds.<
Unlocking just the tailgate
Press the button on the outside of the tailgate.
This corresponds to pressing the button.
Switching on radio readiness
Radio readiness is switched on by pressing the
start/stop button, refer to page42.
Page 44 of 160

Driving
42
Driving
Ignition lock
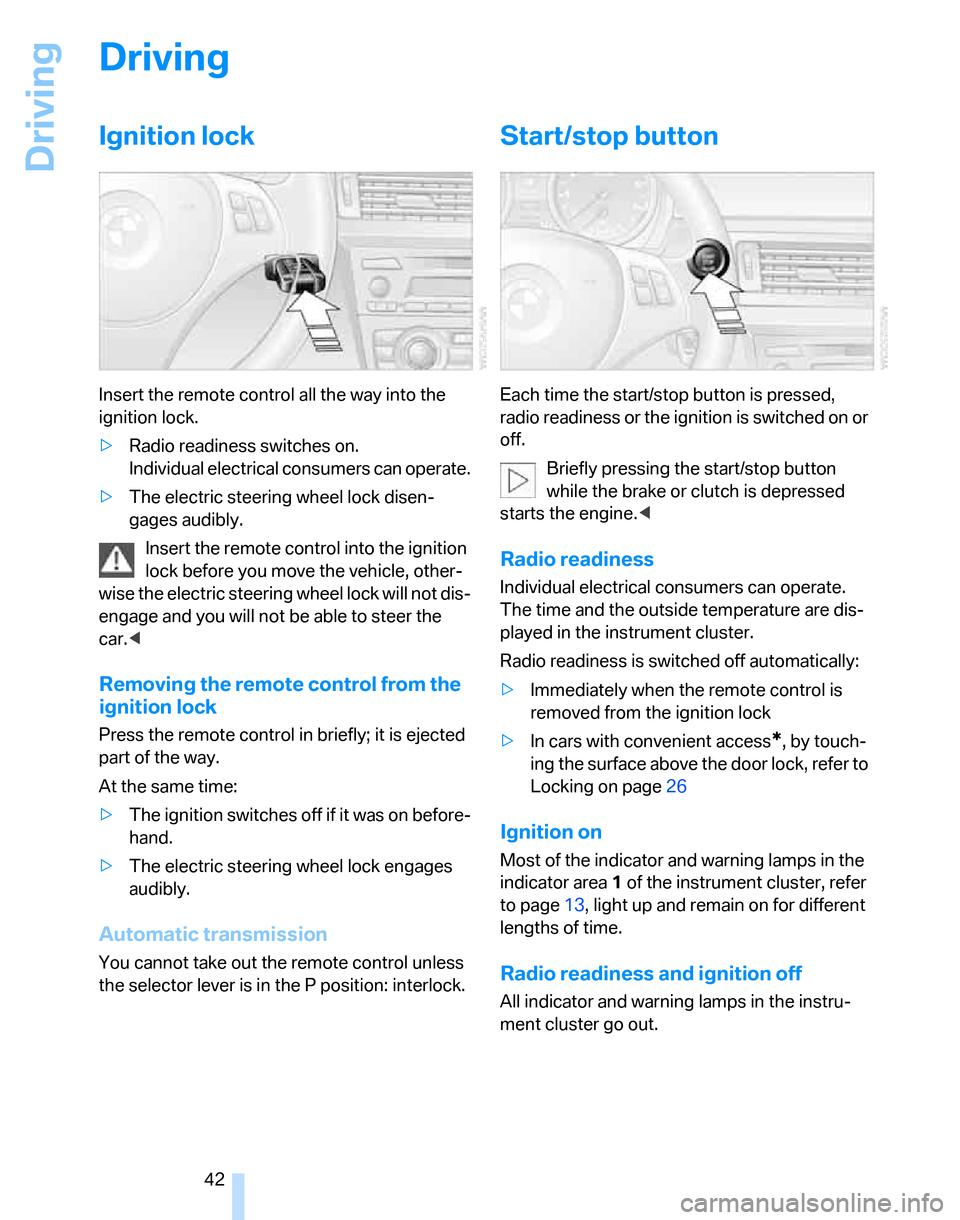
Insert the remote control all the way into the
ignition lock.
>Radio readiness switches on.
Individual electrical consumers can operate.
>The electric steering wheel lock disen-
gages audibly.
Insert the remote control into the ignition
lock before you move the vehicle, other-
wise the electric steering wheel lock will not dis-
engage and you will not be able to steer the
car.<
Removing the remote control from the
ignition lock
Press the remote control in briefly; it is ejected
part of the way.
At the same time:
>The ignition switches off if it was on before-
hand.
>The electric steering wheel lock engages
audibly.
Automatic transmission
You cannot take out the remote control unless
the selector lever is in the P position: interlock.
Start/stop button
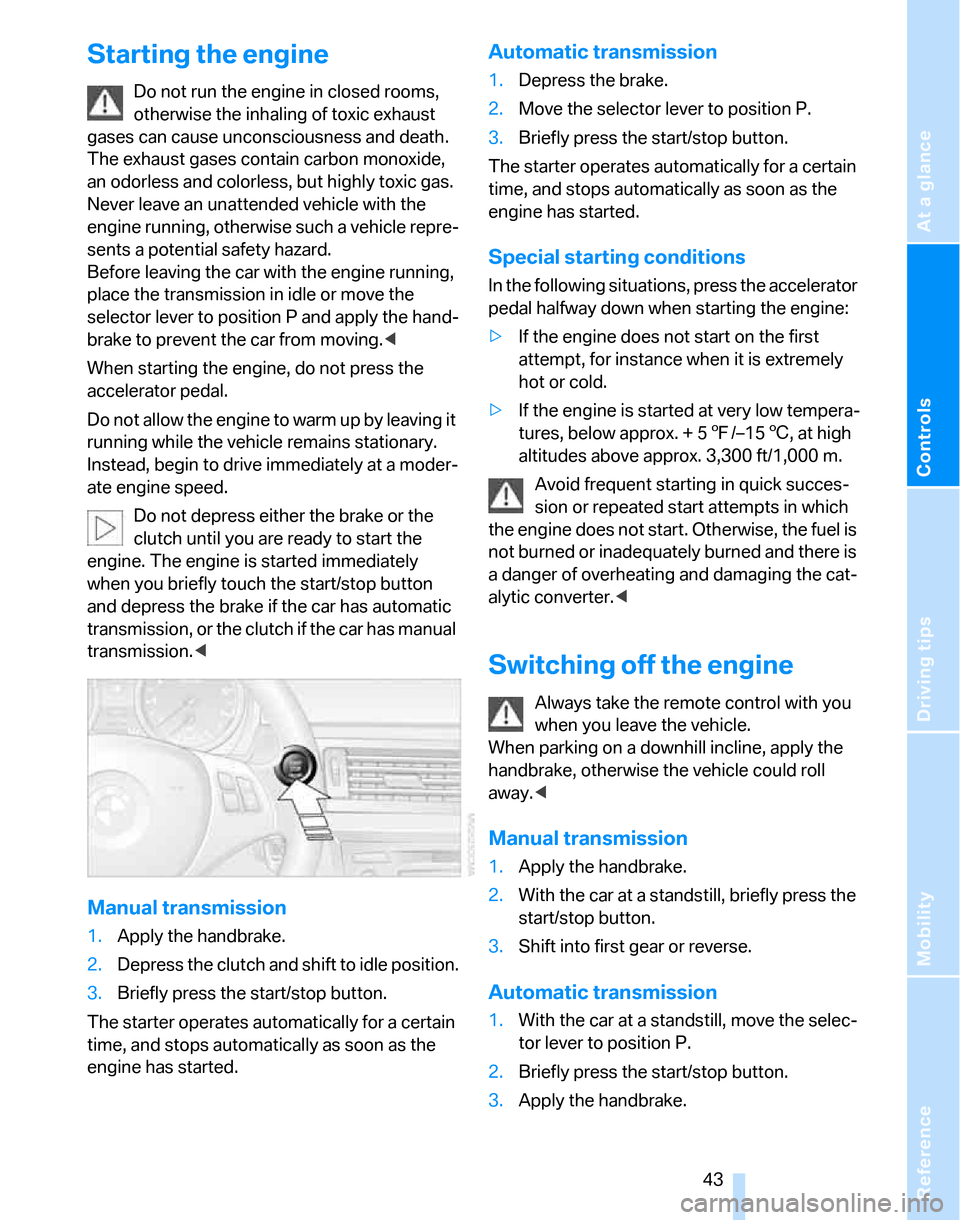
Each time the start/stop button is pressed,
radio readiness or the ignition is switched on or
off.
Briefly pressing the start/stop button
while the brake or clutch is depressed
starts the engine.<
Radio readiness
Individual electrical consumers can operate.
The time and the outside temperature are dis-
played in the instrument cluster.
Radio readiness is switched off automatically:
>Immediately when the remote control is
removed from the ignition lock
>In cars with convenient access
*, by touch-
ing the surface above the door lock, refer to
Locking on page26
Ignition on
Most of the indicator and warning lamps in the
indicator area1 of the instrument cluster, refer
to page13, light up and remain on for different
lengths of time.
Radio readiness and ignition off
All indicator and warning lamps in the instru-
ment cluster go out.
Page 45 of 160

Reference
At a glance
Controls
Driving tips
Mobility
43
Starting the engine
Do not run the engine in closed rooms,
otherwise the inhaling of toxic exhaust
gases can cause unconsciousness and death.
The exhaust gases contain carbon monoxide,
an odorless and colorless, but highly toxic gas.
Never leave an unattended vehicle with the
engine running, otherwise such a vehicle repre-
sents a potential safety hazard.
Before leaving the car with the engine running,
place the transmission in idle or move the
selector lever to position P and apply the hand-
brake to prevent the car from moving.<
When starting the engine, do not press the
accelerator pedal.
Do not allow the engine to warm up by leaving it
running while the vehicle remains stationary.
Instead, begin to drive immediately at a moder-
ate engine speed.
Do not depress either the brake or the
clutch until you are ready to start the
engine. The engine is started immediately
when you briefly touch the start/stop button
and depress the brake if the car has automatic
transmission, or the clutch if the car has manual
transmission.<
Manual transmission
1.Apply the handbrake.
2.Depress the clutch and shift to idle position.
3.Briefly press the start/stop button.
The starter operates automatically for a certain
time, and stops automatically as soon as the
engine has started.
Automatic transmission
1.Depress the brake.
2.Move the selector lever to position P.
3.Briefly press the start/stop button.
The starter operates automatically for a certain
time, and stops automatically as soon as the
engine has started.
Special starting conditions
In the following situations, press the accelerator
pedal halfway down when starting the engine:
>If the engine does not start on the first
attempt, for instance when it is extremely
hot or cold.
>If the engine is started at very low tempera-
tures, below approx. + 57/–156, at high
altitudes above approx. 3,300 ft/1,000 m.
Avoid frequent starting in quick succes-
sion or repeated start attempts in which
the engine does not start. Otherwise, the fuel is
not burned or inadequately burned and there is
a danger of overheating and damaging the cat-
alytic converter.<
Switching off the engine
Always take the remote control with you
when you leave the vehicle.
When parking on a downhill incline, apply the
handbrake, otherwise the vehicle could roll
away.<
Manual transmission
1.Apply the handbrake.
2.With the car at a standstill, briefly press the
start/stop button.
3.Shift into first gear or reverse.
Automatic transmission
1.With the car at a standstill, move the selec-
tor lever to position P.
2.Briefly press the start/stop button.
3.Apply the handbrake.
Page 56 of 160

Driving
54 are currently not met. Calling up Check Control
messages, refer to page64.<
Warning lamps
The indicator2 flashes in red; a
signal sounds.
The system indicates that you
must brake and/or maneuver the
vehicle yourself. Active cruise con-
trol cannot automatically restore the distance to
the vehicle ahead.
This indicator does not release you from your
responsibility to adapt your desired speed and
driving style to prevailing driving conditions.
The indicator 2 flashes in yellow.
The prerequisites for operating
active cruise control are not met,
e.g. as a result of ABS or DSC
interventions. Active cruise control
is deactivated. You can reactivate the system, if
desired, by tapping or pulling the lever when
road and traffic conditions permit. It is not pos-
sible to resume a stored speed.
Radar sensor
The sensor's ability to detect vehicles ahead
may be restricted as a result of heavy rain, dirt,
snow or ice. If necessary, clean the radar sensor
located in the front bumper, see arrow. Be sure
to use particular care when removing any layers
of snow or ice from the sensor.
When the radar sensor is not properly posi-
tioned, active cruise control cannot be activated
at all.
Malfunction
The warning lamp comes on when
the system has failed. You can find
more information starting on
page130.
System limitations
Always remember that the range and abil-
ity of the system does have physical limi-
tations. It will not apply the brakes or decelerate
your vehicle when there is a slow-moving vehi-
cle, stopped vehicle or stationary object ahead
of you, as for example, at a traffic light or a
parked vehicle. Also, the system does not react
to oncoming traffic, pedestrians or other types
of potential traffic such as a rider on horseback.
It is also possible that the system may not detect smaller moving objects such as motor-
cycles or bicycles. Be especially alert when
encountering any of these situations as the sys-
tem will neither automatically brake, nor provide
a warning to you. Also, be aware that every
decrease in the distance setting allows your
vehicle to come closer to a vehicle in front of
you and requires a heightened amount of alert-
ness.<
Page 79 of 160

Reference
At a glance
Controls
Driving tips
Mobility
77
the display, accompanied by the brightness
and the word "SET".
2.Press button 2.
3.Lightly push button 1 up or down to select
the brightness; the setting is stored imme-
diately.
4.Press button 2 in the turn indicator stalk.
The display again shows the outside tem-
perature and the time.
Interior lamps
The interior lamps, the footwell lamps*, the
cargo area lamp and the courtesy lamps
* are
controlled automatically.
The LEDs for the courtesy lamps
are set in the
door handles and illuminate the ground in front
of the doors.
To avoid draining the battery, all lamps
inside the car are switched off about
15 minutes after the ignition is switched off,
refer to Start/stop button on page42.<
Switching interior lamps on/off
manually
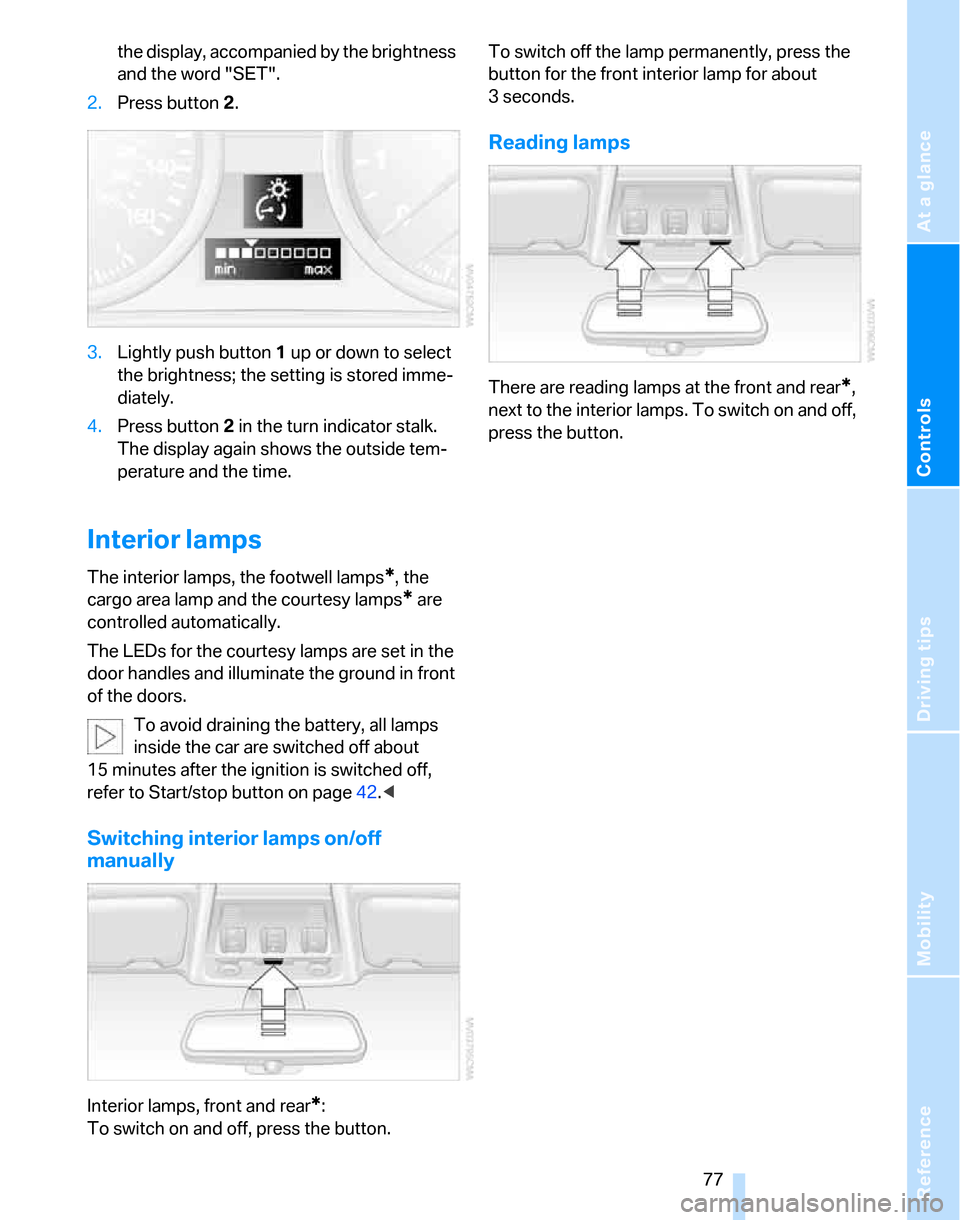
Interior lamps, front and rear*:
To switch on and off, press the button.To switch off the lamp permanently, press the
button for the front interior lamp for about
3seconds.
Reading lamps
There are reading lamps at the front and rear*,
next to the interior lamps. To switch on and off,
press the button.
Page 84 of 160

Climate
82 should therefore open them for maximum cool-
ing.
AUTO program
The AUTO program adjusts the air
distribution to the windshield and
side windows, towards the upper
body area and into the footwell for you. The air
flow rate and your temperature specifications
will be adapted to outside influences as a result
of seasonal changes, e.g. sunlight or window
condensation.
The cooling is switched on automatically with
the AUTO program.
Adjusting air flow rate manually
Press the left side of the button to
reduce airflow. Press the right side
of the button to increase it.
You can reactivate the automatic mode for the
air flow rate with the AUTO button.
Switching the system on/off
With the blower at its lowest setting, press the
left side of the button to switch off the auto-
matic climate control. All indicators go out.
Press any button except REST to reactivate the
automatic climate control.
AUC Automatic recirculated-air
control/Recirculated-air mode
Switch on the desired operating
mode by pressing this button
repeatedly:
>LEDs off: outside air flows in continuously.
>Left-hand LED on, AUC mode: a sensor
detects pollutants in the outside air. If nec-
essary, the system blocks the supply of out-
side air and recirculates the inside air. As
soon as the concentration of pollutants in
the outside air has decreased sufficiently,
the system automatically switches back to
outside air supply.
>Right-hand LED on, recirculated-air mode:
the supply of outside air is permanently shut off. The system then recirculates the
air currently within the vehicle.
If condensation starts to form on the
inside window surfaces during operation
in the recirculated-air mode, you should switch
it off while also increasing the air flow rate as
required.
The recirculated-air mode should not be used
over an extended period of time, otherwise the
air quality inside the car will deteriorate contin-
uously.<
Via the button* on the steering wheel
You can switch between operating modes via a
button
on the steering wheel, refer to page11:
>When outside air is coming in, you can use
the button on the steering wheel to switch
between outside air and recirculated-air
mode.
>When recirculated-air mode or AUC mode
is switched on, you can use the button on
the steering wheel to switch between recir-
culated-air mode and AUC mode.
Residual heat
The heat stored in the engine is
used to heat the passenger com-
partment, e.g. while stopped at a
school to pick up a child.
The function can be switched on when the fol-
lowing conditions are met:
>Up to 15 minutes after the engine has been
switched off
>While the engine is at operating tempera-
ture
>As long as battery voltage is sufficient
>At an outside temperature below 777/
256
The LED is lit when the function is on.
As of radio readiness, you can set the interior
temperature, the air flow rate and the air distri-
bution.
Page 131 of 160

Reference
At a glance
Controls
Driving tips
Mobility
129
1.Switch on the hazard warning flashers,
comply with local regulations.
2.Switch on the ignition, refer to page42.
3.Shift into 3rd gear.
4.Have the vehicle tow-started with the clutch
completely depressed and slowly release
the clutch. After the engine starts, immedi-
ately depress the clutch completely again.
5.Stop at a suitable location, remove the tow
bar or rope and switch off the hazard warn-
ing flashers.
6.Have the vehicle checked.