Page 81 of 174
81
Dynamic Stability Control (DSC)The conceptDSC supports vehicle stability, even in
critical driving situations.
The DSC is operational every time you
start the engine.
DSC incorporates the Dynamic Traction
Control (DTC) and Cornering Brake
Control (CBC) functions.Indicator lamps
The indicator lamp in the instru-
ment cluster goes out shortly
after you switch on the ignition,
refer to page 19.
>The indicator lamp flashes: DSC is
actively controlling drive torque and
braking intervention
>The indicator lamp stays lit: DSC has
been switched off with the button;
DTC and DBC are operational. DTC
control intervention is not indicated.
The indicator lamp and the
brake warning lamp continu-
ously light up in yellow:
The DSC, DTC and DBC have
been switched off manually or
there is a system malfunction.
The vehicle will remain completely
operational, however, without DSC. In
the event of a fault, please consult your
BMW center.
Indicator and warning lamps for
Canadian models.
Deactivating the DSC/activating
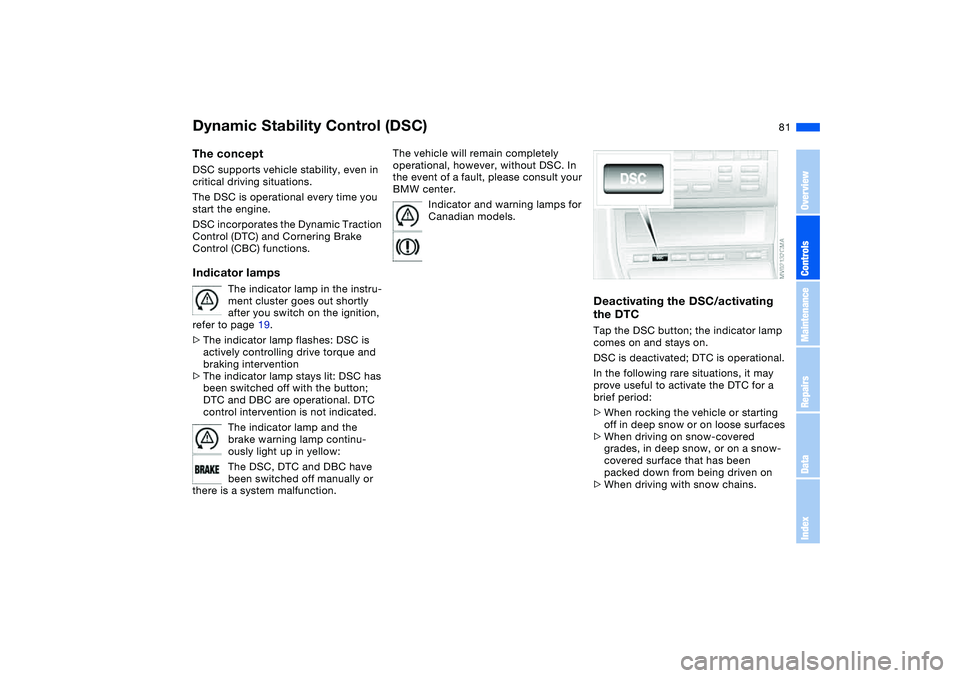
the DTCTap the DSC button; the indicator lamp
comes on and stays on.
DSC is deactivated; DTC is operational.
In the following rare situations, it may
prove useful to activate the DTC for a
brief period:
>When rocking the vehicle or starting
off in deep snow or on loose surfaces
>When driving on snow-covered
grades, in deep snow, or on a snow-
covered surface that has been
packed down from being driven on
>When driving with snow chains.
OverviewControlsMaintenanceRepairsDataIndex
Page 82 of 174
82
Under these special circumstances
traction is increased by deactivating the
control systems that enhance traction
under normal conditions.Deactivating the DSC and the
DTCPress the DSC button as long as you
need to until the indicator lamp and the
yellow brake warning lamp light up, but
no more than 10 seconds.
The systems for enhancing stability and
traction are deactivated, and there is no
active braking intervention or torque
control.
To maintain vehicle stability,
always drive with the DSC acti-
vated whenever possible.
or the indicator lamps will go out. DTC
is deactivated.
The laws of physics cannot be
repealed even with DSC. It will
always be the driver's responsibility to
drive in a manner that matches road
conditions. This is why you should not
use the additional safety margin the
system provides as an excuse to take
risks.
Whenever the DTC is activated, the
DSC is switched off and DTC performs
minor stabilizing intervention.
Do not make any modifications to the
DSC system. Allow only authorized
technicians to perform service proce-
dures on the DSC.<
Flat Tire Monitor*The conceptAs you drive, the Flat Tire Monitor
keeps track of pressure levels in all four
tires. The system alerts you whenever
the inflation pressure of a tire falls sig-
nificantly below the pressure of another
tire.
The system actually detects pressure
loss by monitoring differences in the
relative speeds of the four wheels. It
interprets variations outside specified
limits as severe pressure loss, and then
responds by generating a warning.Functional requirementsIn order for the Flat Tire Monitor to learn
the correct tire inflation pressure,
please do the following:
1. Check the tire inflation pressures in
all tires
2. Compare them with the tire inflation
pressure table, refer to page 116,
and correct them, if necessary
3. Initialize the system.
Dynamic Stability Control (DSC)
Page 83 of 174
83
System limitations
The Flat Tire Monitor cannot pro-
vide you with advance warning of
sudden and severe tire damage caused
by external factors and does not detect
the balanced and very gradual pressure
loss that takes place in all four tires
over an extended period of time.<
On the other hand, the following situa-
tions can lead to a delayed detection of
pressure loss and even to the system
not functioning:
>Driving on snow-covered or slippery
roads
>Performance-oriented driving: slip at
the drive wheels, high levels of lateral
acceleration
>When driving with snow chains, false
warnings and undetected pressure
losses may occur
>When driving with a space-saver
spare tire, the Flat Tire Monitor can-
not function.
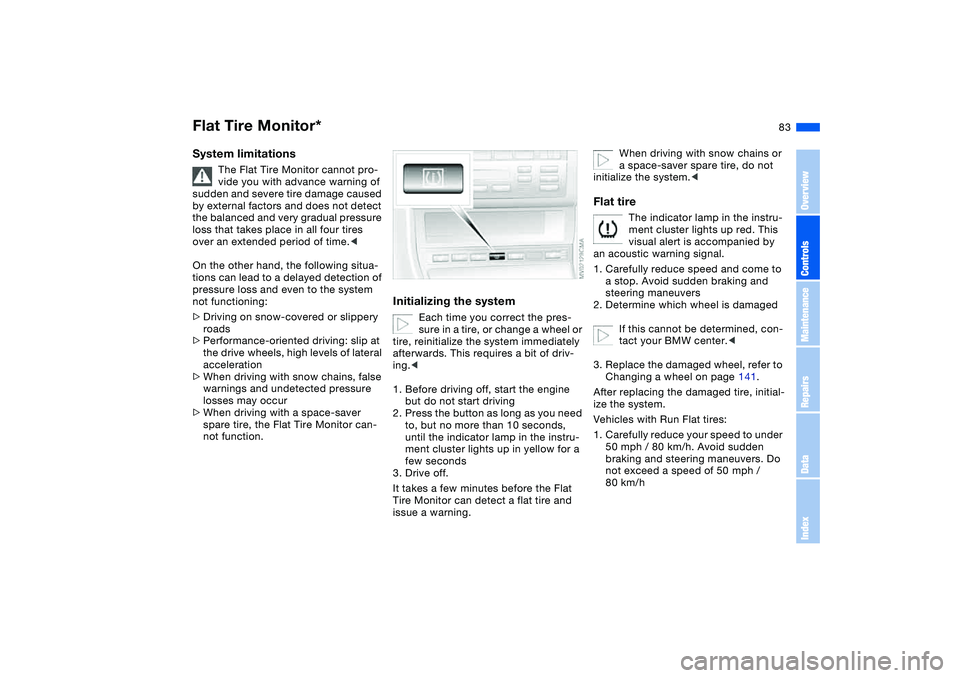
Initializing the system
Each time you correct the pres-
sure in a tire, or change a wheel or
tire, reinitialize the system immediately
afterwards. This requires a bit of driv-
ing.<
1. Before driving off, start the engine
but do not start driving
2. Press the button as long as you need
to, but no more than 10 seconds,
until the indicator lamp in the instru-
ment cluster lights up in yellow for a
few seconds
3. Drive off.
It takes a few minutes before the Flat
Tire Monitor can detect a flat tire and
issue a warning.
When driving with snow chains or
a space-saver spare tire, do not
initialize the system.<
Flat tire
The indicator lamp in the instru-
ment cluster lights up red. This
visual alert is accompanied by
an acoustic warning signal.
1. Carefully reduce speed and come to
a stop. Avoid sudden braking and
steering maneuvers
2. Determine which wheel is damaged
If this cannot be determined, con-
tact your BMW center.<
3. Replace the damaged wheel, refer to
Changing a wheel on page 141.
After replacing the damaged tire, initial-
ize the system.
Vehicles with Run Flat tires:
1. Carefully reduce your speed to under
50 mph / 80 km/h. Avoid sudden
braking and steering maneuvers. Do
not exceed a speed of 50 mph /
80 km/h
Flat Tire Monitor*
OverviewControlsMaintenanceRepairsDataIndex
Page 84 of 174
84
Because the sides of Run Flat
tires are reinforced, a drop in infla-
tion pressure usually cannot be
detected from the outside, refer to Run
Flat tires, page 120.<
2. To continue driving, follow the
instructions under Driving with a
damaged tire on page 120.
System malfunction
The indicator lamp in the instru-
ment cluster lights up yellow.
The Flat Tire Monitor is malfunc-
tioning or out of order. Please refer the
problem to your BMW center.
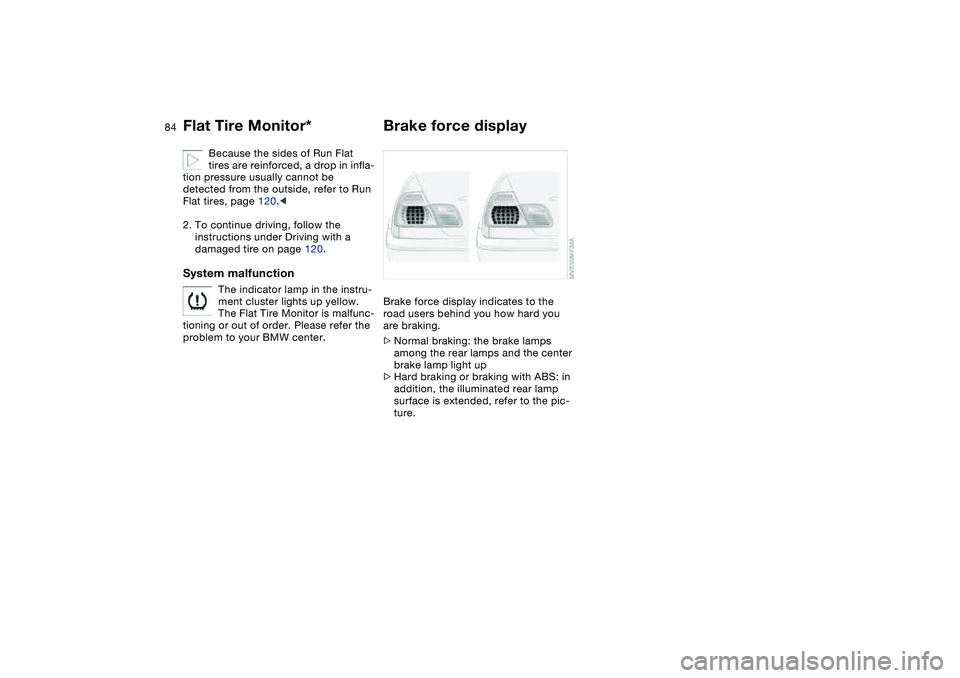
Brake force displayBrake force display indicates to the
road users behind you how hard you
are braking.
>Normal braking: the brake lamps
among the rear lamps and the center
brake lamp light up
>Hard braking or braking with ABS: in
addition, the illuminated rear lamp
surface is extended, refer to the pic-
ture.
Flat Tire Monitor*
Page 85 of 174
85 Lamps
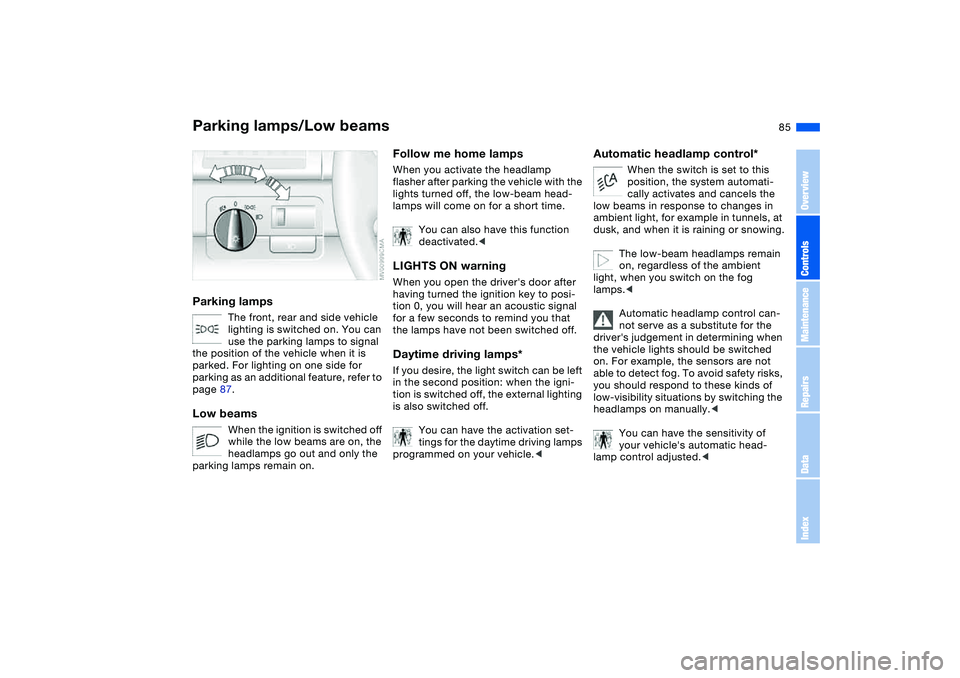
Parking lamps/Low beamsParking lamps
The front, rear and side vehicle
lighting is switched on. You can
use the parking lamps to signal
the position of the vehicle when it is
parked. For lighting on one side for
parking as an additional feature, refer to
page 87.
Low beams
When the ignition is switched off
while the low beams are on, the
headlamps go out and only the
parking lamps remain on.
Follow me home lampsWhen you activate the headlamp
flasher after parking the vehicle with the
lights turned off, the low-beam head-
lamps will come on for a short time.
You can also have this function
deactivated.
having turned the ignition key to posi-
tion 0, you will hear an acoustic signal
for a few seconds to remind you that
the lamps have not been switched off.Daytime driving lamps*If you desire, the light switch can be left
in the second position: when the igni-
tion is switched off, the external lighting
is also switched off.
You can have the activation set-
tings for the daytime driving lamps
programmed on your vehicle.<
Automatic headlamp control*
When the switch is set to this
position, the system automati-
cally activates and cancels the
low beams in response to changes in
ambient light, for example in tunnels, at
dusk, and when it is raining or snowing.
The low-beam headlamps remain
on, regardless of the ambient
light, when you switch on the fog
lamps.<
Automatic headlamp control can-
not serve as a substitute for the
driver's judgement in determining when
the vehicle lights should be switched
on. For example, the sensors are not
able to detect fog. To avoid safety risks,
you should respond to these kinds of
low-visibility situations by switching the
headlamps on manually.<
You can have the sensitivity of
your vehicle's automatic head-
lamp control adjusted.<
OverviewControlsMaintenanceRepairsDataIndex
Page 86 of 174
86
Adaptive headlights*The conceptAdaptive headlights is a variable head-
lamp control system for dynamically
illuminating the road. Depending on the
steering angle and other factors the
light from the headlamps follows the
course of the road.Activating Adaptive headlights
With the ignition key in position
2, turn the light switch to the
automatic headlamp control
position, refer to page 85. The LED next
to the symbol lights up.
To avoid blinding oncoming traffic,
adaptive headlights are
>not active while reversing,
>active only towards the front passen-
ger side while the vehicle is at a
standstill.
System malfunctionThe LED next to the symbol for auto-
matic headlamp control flashes. The
adaptive headlight system is malfunc-
tioning or out of order. Have the system
checked as soon as possible.
Instrument lightingTurn the rotary dial to adjust the illumi-
nation intensity.
Page 87 of 174
87
High beams/Standing lamps1High beams
2Headlamp flasher
3Standing lampsStanding lamps, left or rightAs an additional feature, you can illumi-
nate your vehicle on either side for
parking:
With the ignition key in position 0,
engage the lever in the appropriate
turn-signal position.
Front fog lampsTap the button to switch on or off.
The parking lamps or low-beam
headlamps must be switched
on. The green indicator lamp in
the instrument cluster lights up to indi-
cate that the front fog lamps are on.
If the automatic headlamp control
is on, the low beams will come on
automatically whenever you activate
the front fog lamps.<
OverviewControlsMaintenanceRepairsDataIndex
Page 88 of 174
88
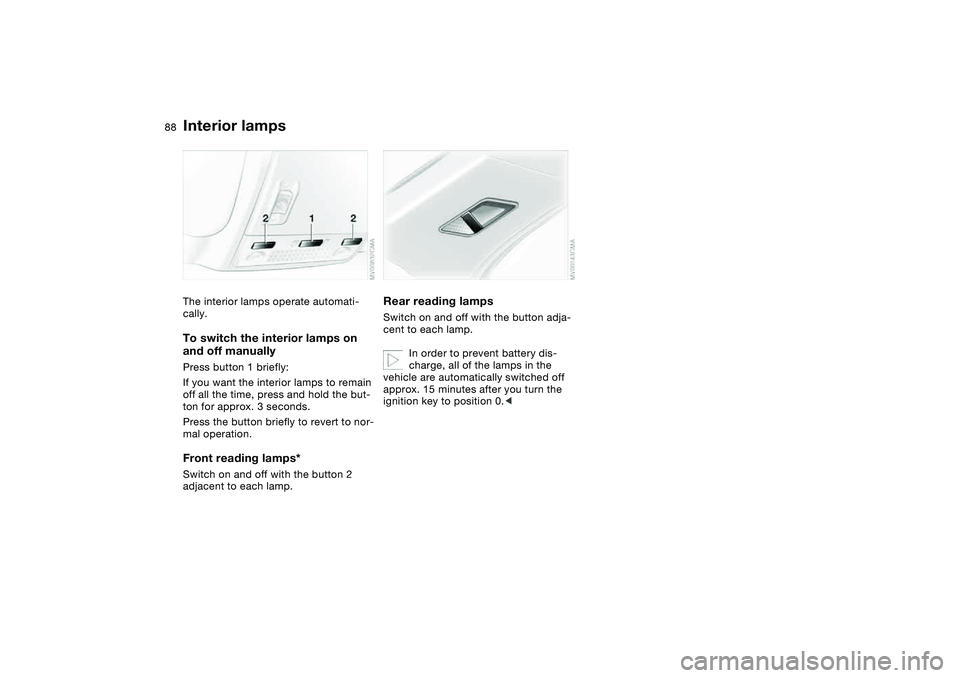
Interior lampsThe interior lamps operate automati-
cally.To switch the interior lamps on
and off manuallyPress button 1 briefly:
If you want the interior lamps to remain
off all the time, press and hold the but-
ton for approx. 3 seconds.
Press the button briefly to revert to nor-
mal operation.Front reading lamps*Switch on and off with the button 2
adjacent to each lamp.
Rear reading lampsSwitch on and off with the button adja-
cent to each lamp.
In order to prevent battery dis-
charge, all of the lamps in the
vehicle are automatically switched off
approx. 15 minutes after you turn the
ignition key to position 0.<