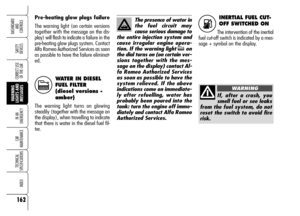
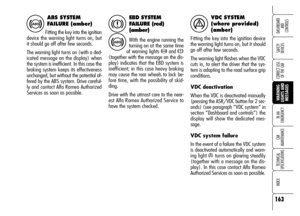
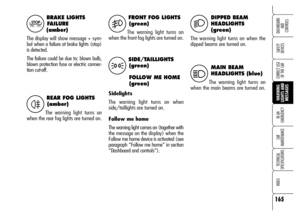
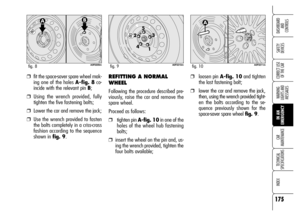
Page 89 of 267

Using the “Setup Menu” (or the Ra-
dionavigation System on certain ver-
sions) of the car it is possible to activate
automatic door locking when exceeding
20 km/h (see paragraph “Reconfig-
urable multifunction display” in this sec-
tion).
Button
qwill be deactivated by locking
the doors by remote control, revolving
plug or automatic locking after about
2.5 minutes and it will be reactivated
after pressing the key button
Ëturning
the key metal insert into the driver’s
door lock or fitting the key into the ig-
nition device. IMPORTANT With central locking sys-
tem on, pulling the internal door handle
will unlock all the doors. Lacking pow-
er (blown fuse, battery disconnected,
etc.) it is however possible to lock the
doors manually.
IMPORTANTAfter disconnecting the
battery or failing the protection fuse,
door locking/unlocking mechanism shall
be “initialised” again, proceed as fol-
lows:❒close all the doors;
❒press remote control button Áor but-
ton
qon the central console;
❒press remote control button Ëor but-
ton
qon the central console.
87
SAFETY
DEVICES
WARNING
LIGHTS AND
MESSAGES
IN AN
EMERGENCY
CAR
MAINTENANCE
TECHNICAL
SPECIFICATIONS
INDEX
DASHBOARD
AND
CONTROLS
CORRECT USE
OF THE CAR
Door locking/unlocking from
the inside
Press button
q(fig. 69) to lock/ un-
lock all the doors.
The button has a round led showing the
door condition (locked or unlocked).
When doors are locked the button led is
on: pressing the button again will obtain
central unlocking of the doors and turn-
ing off of the led. With key removed,
the led will turn off 2 minutes after.
When doors are unlocked, the button
led is off and pressing the button will ob-
tain central locking of the doors. Door
locking is activated only if all the doors
are perfectly closed.
Page 90 of 267

88
SAFETY
DEVICES
WARNING
LIGHTS AND
MESSAGES
IN AN
EMERGENCY
CAR
MAINTENANCE
TECHNICAL
SPECIFICATIONS
INDEX
DASHBOARD
AND
CONTROLS
CORRECT USE
OF THE CAR
IMPORTANTIn the event the anti-
crushing function is activated 5 times in
only 1 minute, the system will auto-
matically enter the “recovery” mode
(self-protection). To restore correct sys-
tem operation, press the control button:
the window will close jerkily till complete
closing. If no malfunction is present, the
window returns to its normal operation
automatically; otherwise contact Alfa
Romeo Authorized Services.
IMPORTANTAfter switching the en-
gine off, power windows will be active
for about 3 minutes and they will de-
activate when opening a door.IMPORTANT Power windows are pro-
vided with “automatic continuous op-
eration” device for opening and closing
the window. Just press briefly the upper
or lower part of the button to
open/close the window automatically:
press the button again (the upper or the
lower part of the button, it doesn't mat-
ter) to stop the window at the required
height.
IMPORTANTKeeping the door lock-
ing/unlocking button on the remote
control pressed for about 2 seconds will
obtain automatic window opening/clos-
ing. Keep the remote control button
pressed until opening/closing the win-
dow completely otherwise the window
will stop at the height it has when you
release the button.POWER WINDOWS
Power windows are fitted with anti-
crushing safety device. The electronic
control unit that conrols the system can
detect the presence of an obstacle in the
last 20 cm of the window closing stroke.
When an obstacle is detected, the safe-
ty system will stop the window and re-
verse its stroke.
Page 91 of 267

89
SAFETY
DEVICES
WARNING
LIGHTS AND
MESSAGES
IN AN
EMERGENCY
CAR
MAINTENANCE
TECHNICAL
SPECIFICATIONS
INDEX
DASHBOARD
AND
CONTROLS
CORRECT USE
OF THE CAR
The system complies
with the forthcoming
Standard 2000/4/ EC
concerning the safety of pas-
sengers leaning out of the pas-
senger compartment.
For all versions, after unlocking the
doors, keeping the remote control but-
ton pressed for about 2 seconds will ob-
tain window and sunroof (where pro-
vided) opening.
A0F0051mfig. 70
CONTROLS
Driver side
On the driver’s door panel are set the
buttons fig. 70 for controlling, with
electronic key fitted into the ignition de-
vice:
A: left window opening/closing; win-
dow opening or closing in “automatic
continuous” mode;
B: right window opening/closing; win-
dow opening or closing in “automatic
continuous” mode;IMPORTANTWindow automatism
shall be restored after replacing or dis-
connecting the battery or after replacing
the power window control unit protec-
tion fuses.
Restoring procedure shall be performed
with doors closedas follows:
1.open the driver’s window complete-
ly and then keep the button
pressedfor at least 3 seconds af-
ter opening the window;
2.close the driver’s window complete-
ly and then keep the button
pressedfor at least 3 seconds af-
ter closing the window;
3.repeat operations described at points
1and 2on the passenger’s window;
4.operate the windows to check for
proper intialisation.
Page 92 of 267

90
SAFETY
DEVICES
WARNING
LIGHTS AND
MESSAGES
IN AN
EMERGENCY
CAR
MAINTENANCE
TECHNICAL
SPECIFICATIONS
INDEX
DASHBOARD
AND
CONTROLS
CORRECT USE
OF THE CAR
Passenger’s door
The passenger's door is provided with the
button for opening/closing manually/au-
tomatically the passenger's window.Improper use of the
power windows can be
dangerous. Before and
during its operation ensure that
any passengers are not at risk
from the moving glass either by
personal objects getting caught
in the mechanism or by being in-
jured by it directly. Always re-
move the ignition key when get-
ting out of the car to prevent the
power windows being operated
accidentally and constituting a
danger to the passengers in the
car.Press buttons Aor Bto open/close the
required window.
Pressing briefly one of the buttons the
window “jerks” whereas a prolonged
pressing makes the window opening or
closing in “automatic continuous”
mode.
Pressing button Aor Bagain will stop
the window in the required position.
Page 93 of 267

91
SAFETY
DEVICES
WARNING
LIGHTS AND
MESSAGES
IN AN
EMERGENCY
CAR
MAINTENANCE
TECHNICAL
SPECIFICATIONS
INDEX
DASHBOARD
AND
CONTROLS
CORRECT USE
OF THE CARImproper boot closing is indicated by
symbol
Rand a message on the dis-
play (see section “Warning lights and
messages”).
OPENING FROM THE INSIDE
Press button A-fig. 71set under the
central armrest.
Button A-fig. 71is disabled when
locking the doors:
❒by pressing the electronic key button
Á;
❒by turning the metal insert of the key
into the driver’s door lock revolving
plug;
❒by automatic door locking after
about 2.5 minutes.
Tailgate raising is facilitated by the side
gas shock springs.
Opening the boot its internal light will
turn on and it will go off automatically
when re-closing the tailgate. Leaving the
tailgate inadvertently open, the light will
turn off automatically after a few min-
utes.
BOOT
Boot unlocking is electric and it is dis-
abled when the car is running.
Using the “Setup Menu” (or the Ra-
dionavigation System on certain ver-
sions) boot opening can be set by se-
lecting the option “Indep. boot” (see
paragraph “Reconfigurable multifunction
display” in this section): the boot can
only be opened by pressing the elec-
tronic key button
`, thus inhibit-
ing the boot opening button A-fig. 71
set under the central armrest.
A0F0096mfig. 71
Page 94 of 267

92
SAFETY
DEVICES
WARNING
LIGHTS AND
MESSAGES
IN AN
EMERGENCY
CAR
MAINTENANCE
TECHNICAL
SPECIFICATIONS
INDEX
DASHBOARD
AND
CONTROLS
CORRECT USE
OF THE CAREMERGENCY OPENING OF
THE BOOT FROM THE
PASSENGER COMPARTMENT
To open the tailgate from the inside if
the battery is flat or the electric tailgate
lock is failing, proceed as follows:
❒tilt the rear seats as described in
paragraph “Extending the boot” in
this section;
❒remove rear head restraints;
❒working inside the boot, remove
cover A-fig. 72and then operate
lever B-fig. 73. IMPORTANTAfter disconnecting the
battery or failing the protection fuse, tail-
gate locking/unlocking mechanism shall
be “initialised” again, proceed as fol-
lows:
❒close all the doors and the tailgate;
❒press remote control button Áor but-
ton
qon the central console;
❒press remote control button Ëor but-
ton
qon the central console.
A0F0250mfig. 72
OPENING THE TAILGATE BY
REMOTE CONTROL
Press the electronic key button `.
Opening is indicated by double flashing
of direction indicators.
Opening the boot with alarm on (where
provided), will deactivate:
❒volumetric protection ;
❒anti-raising protection;
❒tailgate monitoring sensor.
Re-closing the tailgate will restore all the
above functions and direction indicators
will turn on for about 1 second.
A0F0251mfig. 73
Page 95 of 267

93
SAFETY
DEVICES
WARNING
LIGHTS AND
MESSAGES
IN AN
EMERGENCY
CAR
MAINTENANCE
TECHNICAL
SPECIFICATIONS
INDEX
DASHBOARD
AND
CONTROLS
CORRECT USE
OF THE CAR
TAILGATE CLOSING
Lower the tailgate pressing the lock un-
til hearing the locking click.
IMPORTANT Before closing the boot,
check whether you have with you the
ignition key since the tailgate will be
locked automatically.
The addition of objects
(speakers, spoilers, etc.)
on the rear shelf or boot
lid, except those envisaged by
the manufacturer, may prevent
the gas filled struts at the sides
of the boot from working prop-
erly.
When using the boot,
make sure the loads do
not exceed the permitted
weight (see “Technical specifi-
cations” chapter). Also make
sure the items in the boot are
arranged properly to prevent
them being thrown forwards
and injuring passengers should
you brake sharply.
WARNING
Never travel with ob-
jects on the rear shelf
to prevent them being thrown
forwards and injuring passen-
gers in case of accident or
sharp braking.
WARNING
EXTENDING THE BOOT
The double rear seat enables to extend
the boot totally or partially by splitting
one of the two seat section, thus ob-
taining different loading spaces accord-
ing to the number of rear passengers.
When driving at night
with heavy loads in the
boot, check and adjust, if re-
quired, the low beams
height (see paragraph “Head-
lights” in this section).
WARNING
Page 96 of 267

❒raise backrest retaining levers A-
fig. 76and tilt the backrests for-
ward in order to obtain a single load-
ing surface fig. 77(when raising
lever Athe “red band” Bwill ap-
pear).
Partial extension
Proceed as follows:
❒move seat belt aside; check that the
seat belt is not twisted;
❒lower completely the rear seat head
restraint;
❒raise backrest retaining lever A-fig.
76and tilt the backrest forward
(when raising lever Athe “red
band” Bwill appear). Removing the rear parcel
shelf
Proceed as follows:
❒release both rod ends A-fig. 74
supporting the rear parcel shelf Bby
removing the eyelets Cfrom pins D;
❒release the pins E-fig. 75set out-
side the shelf from their seats Fon
side supports, then remove the rear
parcel shelf.Total extension
Proceed as follows:
❒move seat belts aside; check that the
seat belt is not twisted;
❒lower completely the rear seat head
restraints;
94
SAFETY
DEVICES
WARNING
LIGHTS AND
MESSAGES
IN AN
EMERGENCY
CAR
MAINTENANCE
TECHNICAL
SPECIFICATIONS
INDEX
DASHBOARD
AND
CONTROLS
CORRECT USE
OF THE CAR
A0F0243mfig. 74A0F0244mfig. 75
A0F0085mfig. 76
A0F0253mfig. 77