Page 62 of 295

This indicator normally comes on f or
a f ew seconds when you turn the
ignition switch to ON (II), and when
the ignition switch is turned to
START (III). If it comes on at any
other time, there is a problem in the
ABS. If this happens, take your
vehicle to a dealer to have it checked.
With this indicator on, your vehicle
still has normal braking ability but no
anti-lock. For more inf ormation, see
page .This indicator comes on when you
turn the ignition switch to ON (II). If
it comes on at any other time, it
indicates a potential problem with
your f ront airbags or automatic seat
belt tensioners. This indicator will
also alert you to a potential problem
with your side airbags, passenger’s
side airbag automatic cutoff system,
driver’s seat position sensor, f ront
passenger’s weight sensors, or side
curtain airbags. For complete
inf ormation, see page .This indicator comes on when you
turn the ignition switch to the ON
(II) position. If it comes on at any
other time, it indicates that the
passenger’s side airbag has
automatically shut off. For more
inf ormation, see page .
30 31
201
Instrument Panel Indicators
Anti-lock Brake System
(A BS) Indicator Supplemental Restraint
System Indicator
Side A irbag Of f
Indicator
Inst rument s and Cont rols
61
U. S. Canada
Page 68 of 295

The multi-inf ormation display in the
instrument panel displays various
inf ormation and messages when the
ignition switch is in the ON (II)
position. Some of the messages help
you operate your vehicle more
comf ortably.
Others help to keep you aware of the
periodic maintenance your vehicle
needs f or continued trouble-f ree
driving.Driver 1 or 2 Detected
Door and Trunk Open
Fasten Seat Belt
Release Parking Brake
Odometer
Trip Meter
Outside Temperature
Engine Oil Lif e Maintenance Messages
Auto door lock conditions
Auto door unlock conditions
Whenever unlocking (driver’s
door, or all doors)
Keyless lock acknowledgment
conditions
Security relock timer
Headlight auto of f timer
Interior light dimming time
To customize these control settings,
see page .
Low Windshield Washer Fluid
Level (Canada only)
Here is a list of the messages you
can see. The f ollowing pages give
you more inf ormation on these
messages.
Tighten Fuel Cap With the multi-information display
and the two buttons next to it, you
can also customize these vehicle
control settings to your liking.Language Selection (Canada only) HandsFree Link
Keyless Memory Settings
Trip Computer
Tire Pressure
76
Multi-Inf ormation Display
67
SELECT/
RESET
BUTTON
INFO
BUTTON
TMTM
Page 70 of 295
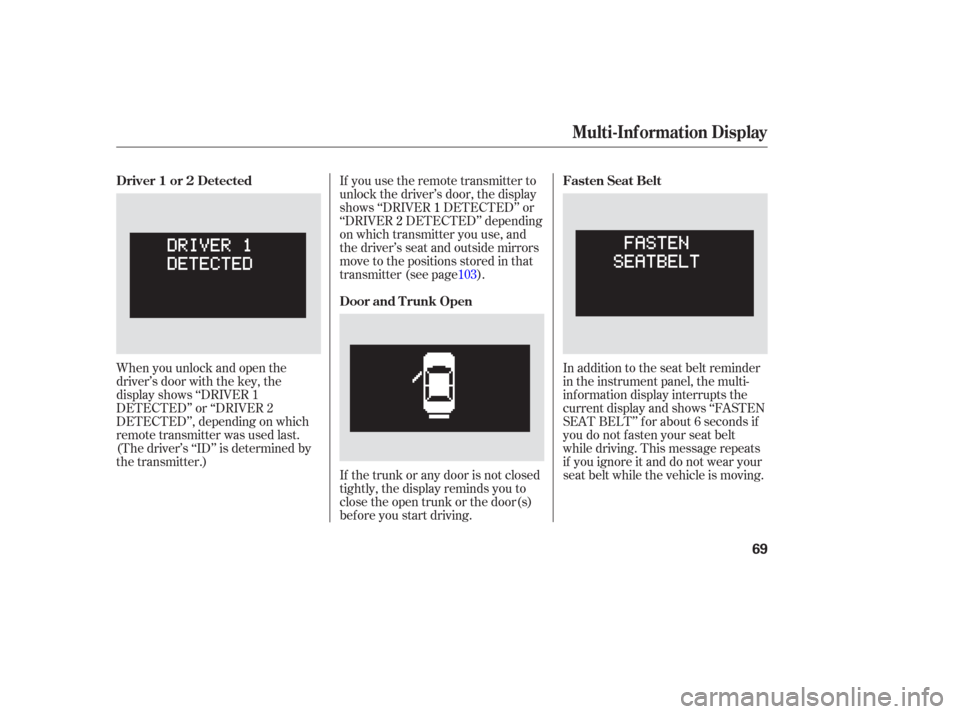
When you unlock and open the
driver’s door with the key, the
display shows ‘‘DRIVER 1
DETECTED’’ or ‘‘DRIVER 2
DETECTED’’, depending on which
remote transmitter was used last.
(The driver’s ‘‘ID’’ is determined by
the transmitter.)If you use the remote transmitter to
unlock the driver’s door, the display
shows ‘‘DRIVER
1DETECTED’’ or
‘‘DRIVER 2DETECTED’’ depending
on which transmitter you use, and
the driver’s seat and outside mirrors
move to the positions stored in that
transmitter (see page ).
If the trunk or any door is not closed
tightly, the display reminds you to
close the open trunk or the door(s)
bef ore you start driving. In addition to the seat belt reminder
in the instrument panel, the multi-
inf ormation display interrupts the
current display and shows ‘‘FASTEN
SEAT BELT’’ f or about 6 seconds if
you do not f asten your seat belt
while driving. This message repeats
if you ignore it and do not wear your
seat belt while the vehicle is moving.
103
Driver 1 or 2 Detected
Door and T runk OpenFasten Seat Belt
Multi-Inf ormation Display
69
Page 117 of 295
Open the glove box by squeezing the
handle. Close it with a f irm push.
Lock or unlock the glove box with
the master key.You can put small items in the tray
located in the console compartment
lid. To use the tray, pull up on the
lef t lever and lif t up the armrest.
The coin holder inside the console
compartment is removable. To
remove it, pull it up. The coin holder
canalsobestoredineitherfront
door pocket.
To open the console compartment,
pull up on the right lever, and lif t the
armrest. To open the console
compartment storage area, pull up
on the lef t lever, and lif t the armrest.
To close, lower the armrest, and
push it down until it latches.
Glove Box
Console Compartment
Interior Convenience Items
116
An open glove box can cause
serious injury to your passenger
inacrash,evenifthe
passenger is wearing the seat
belt.
Always keep the glove box
closed while driving.
Page 189 of 295
Youshoulddothefollowingchecks
and adjustments every day bef ore
you drive your vehicle.Make sure all windows, mirrors,
and outside lights are clean and
unobstructed. Remove f rost, snow,
or ice.
Check that the hood and trunk are
f ully closed.
Visually check the tires. If a tire
looks low, use a gauge to check its
pressure. Check the seat adjustment (see
page ).
Check the adjustment of the
inside and outside mirrors (see
page ).
Check the steering wheel
adjustment (see page ).
Make sure the doors are securely
closed and locked.
Fasten your seat belt. Check that
your passengers have f astened
their seat belts (see page ).
Check that any items you may be
carrying are stored properly or
f astened down securely. When you start the engine, check
the gauges and indicators in the
instrument panel, and the
messages on the multi-inf ormation
display (see page , and
).
3. 2.
1.
4. 5.
6.
7.
8.
16 59 68
9. 10.
98
101 88 73
Preparing to Drive
Driving188
Page 208 of 295

This section explains why it is
important to keep your vehicle well
maintained and how to f ollow basic
maintenance saf ety precautions.
If you have the skills and tools to
perf orm more complex maintenance
tasks on your vehicle, you may want
to purchase the service manual. See
page f or inf ormation on how to
obtain a copy, or see your dealer. This section also includes
instructions on how to read the
maintenance messages in the multi-
inf ormation display, a maintenance
record, and instructions f or simple
maintenance tasks you may want to
take care of yourself .......................
Maintenance Saf ety .208
....................
Maintenance Minder .209
....................
Maintenance Record .214
..............................
Fluid Locations .216
......
Engine Compartment Covers .217
........................
Adding Engine Oil .218
.........
Changing the Oil and Filter .219
..............................
Engine Coolant .221
....................
Windshield Washers .222
....
Automatic Transmission Fluid .223
........
Manual Transmission Fluid .224
................
Brake and Clutch Fluid .225
....................
Power Steering Fluid .226
.............................................
Lights .227
................
Cleaning the Seat Belts .231
.....................................
Floor Mats .232
.................................
Wiper Blades .232
...............................................
Tires .234
...................
Checking the Battery .240
.............................
Vehicle Storage .241
283
Maintenance
Maint enance
207
Page 214 of 295

�Î
�Ì �Ì
�Ì
�Ì
�Î
Maintenance Minder
213
:
If the message ‘‘SERVICE DUE NOW’’ does not appear more than 12 months
after the display is reset, change the engine oil every year.
See information on maintenance and emissions warranty in the first column
on page .Inspect idle speed every 160,000 miles (256,000 km).
Adjust the valves during services A, B, 1, 2, or 3 if they are noisy. Independent of the maintenance messages in the multi-information
display, replace the brake fluid every 3 years.
NOTE: 1:
212
Maintenance Main Items
Replace engine oil
Replace engine oil and oil filter
Rotate tires
Inspect front and rear brakes
Check parking brake adjustment
Visually inspect these items: Tie rod ends, steering gear box, and boots
Suspension components
Driveshaft boots
Brake hoses and line (including ABS)
All fluid levels and condition of fluids
Exhaust system
Fuel lines and connections Maintenance Sub Items
Rotate tires
Replace air cleaner element If you drive primarily in dusty conditions, replace
every 15,000 miles (24,000 km).
Replace dust and pollen filter If you drive primarily in urban areas that have high
concentrations of soot in the air from industry and
from diesel-powered vehicles, replace every 15,000
miles (24,000 km).
Inspect drive belt
Replace transmission fluid Driving in mountainous areas at very low vehicle
speeds results in higher transmission temperatures.
This requires transmission fluid changes more
frequently than recommended by the Maintenance
Minder. If you regulary drive your vehicle under these
conditions, have the transmission fluid changed at
60,000 miles (100,000 km), then every 30,000 miles
(48,000 km).
Replace spark plugs
Replace timing belt and inspect water pump If you drive regularly in very high temperatures (over
110°F, 43°C), or in very low temperatures (under-20°F,
29°C), replace every 60,000 mile (U.S.)/100,000 km
(Canada)
Inspect valve clearance
Replace engine coolant
A
B
Symbol
Symbol
1
2
3
4
51
Maintenance Minder
Page 232 of 295
Test the lights to make sure the
new bulb is working.
Reinstall the trunk lid lining. Make
sure it is installed under the edge
of the trunk seal. Insert the socket into the light
assembly. Turn it clockwise to
lock it in place.
Install all removed parts.
Remove the socket by turning it
one-quarter turn counterclockwise.
Pull the bulb straight out of its
socket. Push the new bulb straight
into the socket until it bottoms. If your seat belts get dirty, use a sof t
brush with a mixture of mild soap
and warm water to clean them. Do
not use bleach, dye, or cleaning
solvents. Let the belts air-dry bef ore
you use the vehicle.
Dirt build-up in the loops of the seat
belt anchors can cause the belts to
retract slowly. Wipe the insides of
the loops with a clean cloth
dampened in mild soap and warm
water, or isopropyl alcohol.
2.
3. 4.
5.
6.
7.
Cleaning the Seat Belts
Lights, Cleaning the Seat Belts
Maint enance
231
LOOP


