Page 336 of 400
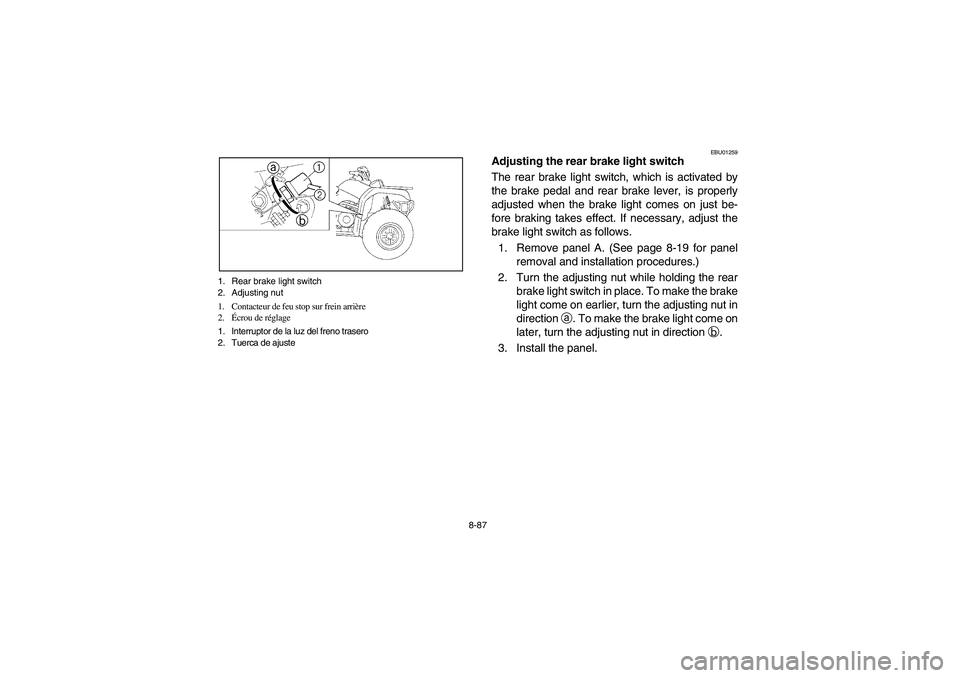
8-87 1. Rear brake light switch
2. Adjusting nut
1. Contacteur de feu stop sur frein arrière
2.Écrou de réglage
1. Interruptor de la luz del freno trasero
2. Tuerca de ajuste
EBU01259
Adjusting the rear brake light switch
The rear brake light switch, which is activated by
the brake pedal and rear brake lever, is properly
adjusted when the brake light comes on just be-
fore braking takes effect. If necessary, adjust the
brake light switch as follows.
1. Remove panel A. (See page 8-19 for panel
removal and installation procedures.)
2. Turn the adjusting nut while holding the rear
brake light switch in place. To make the brake
light come on earlier, turn the adjusting nut in
direction
a. To make the brake light come on
later, turn the adjusting nut in direction
b.
3. Install the panel.
U5UH61.book Page 87 Tuesday, April 20, 2004 10:10 AM
Page 340 of 400
8-91
EBU12600
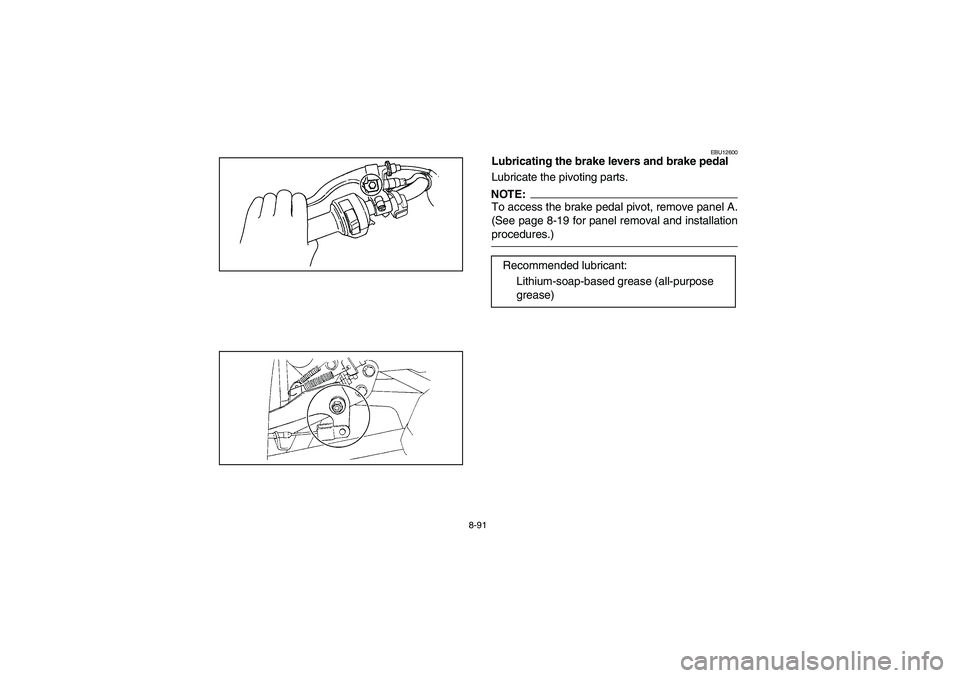
Lubricating the brake levers and brake pedal
Lubricate the pivoting parts.NOTE:_ To access the brake pedal pivot, remove panel A.
(See page 8-19 for panel removal and installation
procedures.) _
Recommended lubricant:
Lithium-soap-based grease (all-purpose
grease)
U5UH61.book Page 91 Tuesday, April 20, 2004 10:10 AM
Page 342 of 400
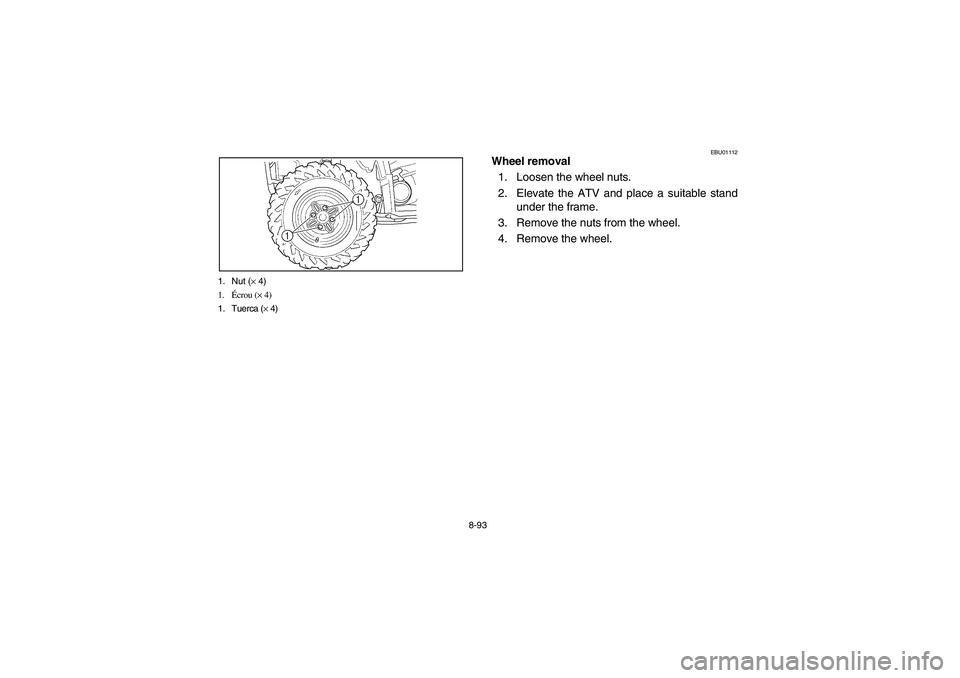
8-93 1. Nut (× 4)
1.Écrou (× 4)
1. Tuerca (× 4)
EBU01112
Wheel removal
1. Loosen the wheel nuts.
2. Elevate the ATV and place a suitable stand
under the frame.
3. Remove the nuts from the wheel.
4. Remove the wheel.
U5UH61.book Page 93 Tuesday, April 20, 2004 10:10 AM
Page 346 of 400
8-97
EBU00381
Battery
This machine is equipped with a sealed-type bat-
tery. Therefore it is not necessary to check the
electrolyte or add distilled water in the battery. If
the battery seems to have discharged, consult a
Yamaha dealer.CAUTION:
Do not try to remove the sealing caps of the
battery cells. You may damage the battery.
U5UH61.book Page 97 Tuesday, April 20, 2004 10:10 AM
Page 350 of 400
8-101
EBU00385
Battery maintenance
1. When the machine is not used for a month or
longer, remove the battery and store it in a
cool, dark place. Completely recharge the
battery before reinstallation.CAUTION:
A special battery charger (constant voltage/
ampere or constant voltage) is required for re-
charging a sealed-type battery. Using a con-
ventional battery charger may shorten the
battery life.2. Always make sure the connections are cor-
rect when putting the battery back in the ma-
chine.
U5UH61.book Page 101 Tuesday, April 20, 2004 10:10 AM
Page 356 of 400
8-107 1. Headlight bulb holder cover
1. Cache de la fixation de l’ampoule de phare
1. Cubierta del portabombillas de la bombilla del faro
1. Headlight bulb holder
1. Fixation d’ampoule
1. Porta bombillas del faro
EBU14680
Replacing a headlight bulb
If a headlight bulb burns out, replace it as follows.
1. Remove the bulb holder cover at the rear of
the headlight by pulling it off.
2. Remove the headlight bulb holder by turning
it counterclockwise.
U5UH61.book Page 107 Tuesday, April 20, 2004 10:10 AM
Page 358 of 400

8-109 1. Headlight bulb holder tab (× 2)
1. Languette de fixation d’ampoule de phare (× 2)
1. Lengüeta del portabombillas del faro (× 2)
1. Do not touch the glass part of the bulb.
1. Ne pas toucher le verre de l’ampoule.
1. No tocar la parte de cristal de la bombilla.
3. Remove the defective bulb by unhooking the
headlight bulb holder tabs.
WARNING
_ A headlight bulb is hot when it is on and imme-
diately after it is turned off. Wait for the bulb to
cool before touching or removing it. You can
be burned or a fire could start if the bulb touch-
es something flammable. _4. Insert a new headlight bulb into the bulb hold-
er, and then secure the bulb by hooking the
tabs onto the bulb.CAUTION:_ Do not touch the glass part of the headlight
bulb to keep it free from oil, otherwise the
transparency of the glass, the luminosity of the
bulb, and the bulb life will be adversely affect-
ed. Thoroughly clean off any dirt and finger-
prints on the headlight bulb using a cloth
moistened with alcohol or thinner. _5. Install the headlight bulb holder by turning it
clockwise.
6. Install the headlight bulb holder cover at the
rear of the headlight.
U5UH61.book Page 109 Tuesday, April 20, 2004 10:10 AM
Page 364 of 400

8-115
EBU04400Troubleshooting chart1. Fuel
Check if there is fuel
in the fuel tank.There is fuel.Turn the fuel cock
lever to “OFF”.No fuel.Fuel cock is
clogged.
Clean the
fuel cock. Some fuel.Turn the fuel cock
lever to “RES”.Restart the engine.
No fuel.Supply fuel.
2. Compression
Use the electric
starter to see if
there is compression.There is compression.
Compression normal.
No compression.Ask a Yamaha dealer to
inspect.
3. Ignition
Remove the
spark plug and
check the electrodes.WetWipe clean with dry cloth.
DryAttach spark plug cap and
ground to chassis.Use the
electric starter.Spark is good.Ignition system is
normal.
Spark is weak.
Adjust the spark plug gap
or replace the spark plug. No spark.
Ask a Yamaha dealer to
inspect. 4. Battery
Use the electric starter.Engine turns over
quickly.Battery is good.
Engine turns over
slowly.Check the battery lead connections,
and charge the battery if necessary.Check the
fuel flow.
Turn the fuel cock
lever to “ON”.
Remove the fuel hose
from the fuel cock.
U5UH61.book Page 115 Tuesday, April 20, 2004 10:10 AM