Page 28 of 351

18
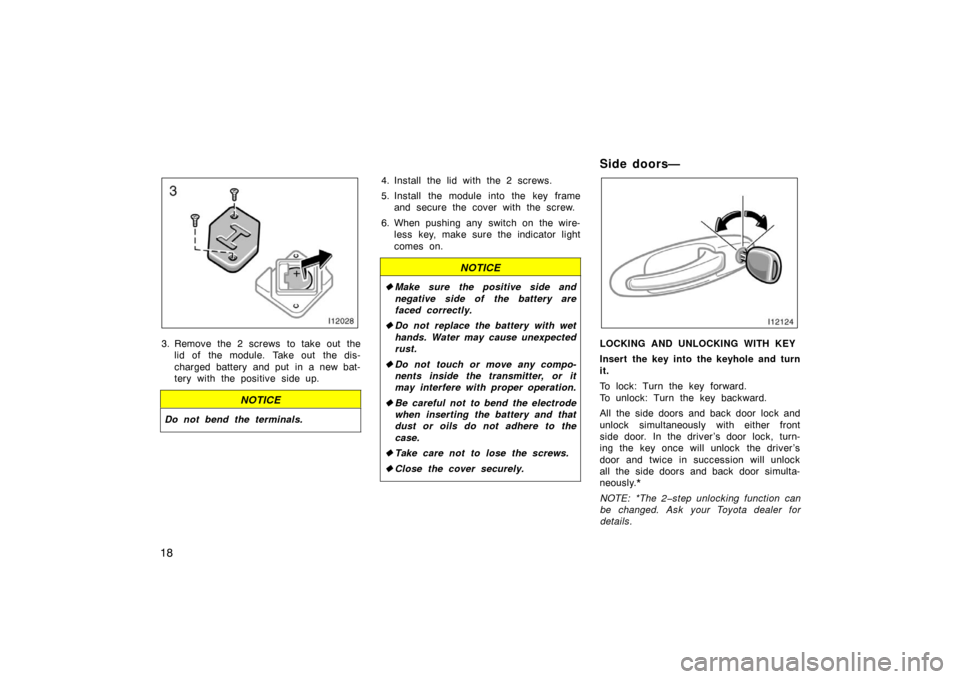
3. Remove the 2 screws to take out thelid of the module. Take out the dis-
charged battery and put in a new bat-
tery with the positive side up.
NOTICE
Do not bend the terminals.
4. Install the lid with the 2 screws.
5. Install the module into the key frameand secure the cover with the screw.
6. When pushing any switch on the wire- less key, make sure the indicator light
comes on.
NOTICE
�Make sure the positive side and
negative side of the battery are
faced correctly.
� Do not replace the battery with wet
hands. Water may cause unexpected
rust.
� Do not touch or move any compo-
nents inside the transmitter, or it
may interfere with proper operation.
� Be careful not to bend the electrode
when inserting the battery and that
dust or oils do not adhere to the
case.
� Take care not to lose the screws.
� Close the cover securely.
Side doors—
LOCKING AND UNLOCKING WITH KEY
Insert the key into the keyhole and turn
it.
To lock: Turn the key forward.
To unlock: Turn the key backward.
All the side doors and back door lock and
unlock simultaneously with either front
side door. In the driver’s door lock, turn-
ing the key once will unlock the driver’s
door and twice in succession will unlock
all the side doors and back door simulta-
neously.*
NOTE: *The 2�step unlocking function can
be changed. Ask your Toyota dealer for
details.
Page 119 of 351

109
When the headlight switch is on with all
the doors locked, pushing the “LOCK” but-
ton on the wireless remote control key
turns off the headlights.
NOTE: *The time before turning off the
lights can be changed. Ask your Toyota
dealer for details.
NOTICE
To prevent the battery from being dis-
charged, do not leave the lights on
for a long period when the engine is
not running.
Daytime running light system
The headlights turn on at reduced intensi-
ty when the parking brake is released with
the engine started, even with the light
switch in the “OFF” position. They will not
go off until the ignition switch is turned
off.
To turn on the other exterior lights and
instrument panel lights, twist the knob to
the position 1.
Twist the knob to the position 2 to turn
the headlights to full intensity for driving
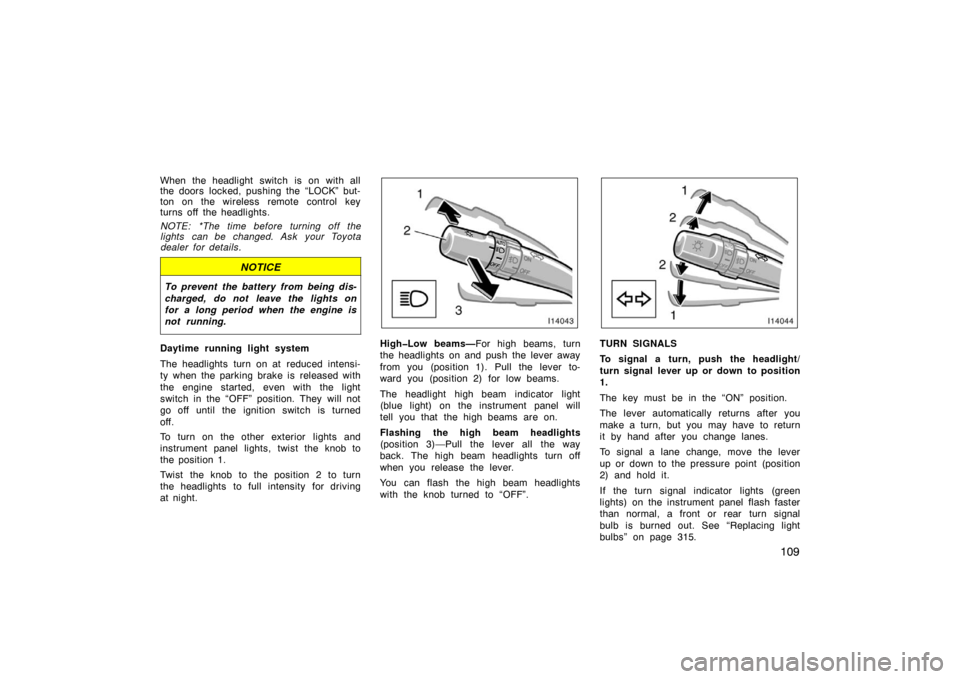
at night.High�Low beams—For high beams, turn
the headlights on and push the lever away
from you (position 1). Pull the lever to-
ward you (position 2) for low beams.
The headlight high beam indicator light
(blue light) on the instrument panel will
tell you that the high beams are on.
Flashing the high beam headlights
(position 3)—Pull the lever all the way
back. The high beam headlights turn off
when you release the lever.
You can flash the high beam headlights
with the knob turned to “OFF”.TURN SIGNALS
To signal a turn, push the headlight/
turn signal lever up or down to position
1.
The key must be in the “ON” position.
The lever automatically returns after you
make a turn, but you may have to return
it by hand after you change lanes.
To signal a lane change, move the lever
up or down to the pressure point (position
2) and hold it.
If the turn signal indicator lights (green
lights) on the instrument panel flash faster
than normal, a front or rear turn signal
bulb is burned out. See “Replacing light
bulbs” on page 315.
Page 205 of 351

195
Glove box
To use the glove box, do this.
To open: Pull the lever.
With the instrument panel lights on, the
glove box light will come on when the
glove box is open.
To lock: Insert the master key and turn it
clockwise.
CAUTION
To reduce the chance of injury in
case of an accident or a sudden stop,
always keep the glove box door
closed while driving.
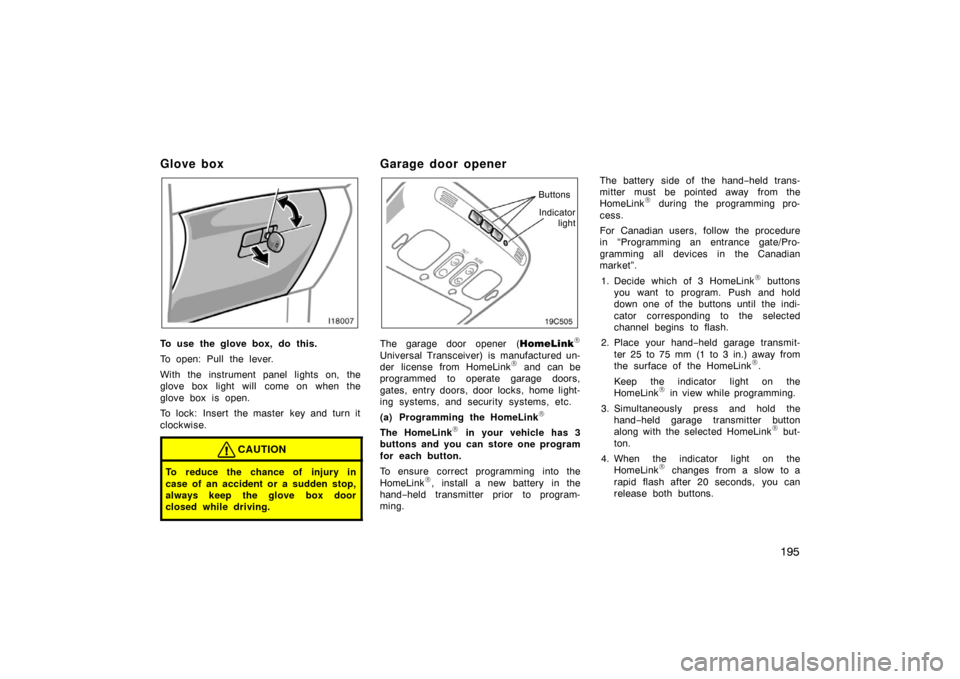
Garage door opener
Indicatorlight
Buttons
The garage door opener (
HomeLink\b
Universal Transceiver) is manufactured un-
der license from HomeLink\b and can be
programmed to operate garage doors,
gates, entry doors, door locks, home light-
ing systems, and security systems, etc.
(a) Programming the HomeLink
\b
The HomeLink\b in your vehicle has 3
buttons and you can store one program
for each button.
To ensure correct programming into the
HomeLink
\b, install a new battery in the
hand− held transmitter prior to program-
ming. The battery side of the hand
−held trans-
mitter must be pointed away from the
HomeLink
\b during the programming pro-
cess.
For Canadian users, follow the procedure
in “Programming an entrance gate/Pro-
gramming all devices in the Canadian
market”.
1. Decide which of 3 HomeLink
\b buttons
you want to program. Push and hold
down one of the buttons until the indi-
cator corresponding to the selected
channel begins to flash.
2. Place your hand −held garage transmit-
ter 25 to 75 mm (1 to 3 in.) away from
the surface of the HomeLink
\b.
Keep the indicator light on the
HomeLink
\b in view while programming.
3. Simultaneously press and hold the hand− held garage transmitter button
along with the selected HomeLink
\b but-
ton.
4. When the indicator light on the HomeLink
\b changes from a slow to a
rapid flash after 20 seconds, you can
release both buttons.
Page 335 of 351

325
Service specifications
ENGINE
Valve clearance (engine cold), mm (in.):Intake 0.15 – 0.25 (0.006 – 0.010)
Exhaust 0.25 – 0.35 (0.010 – 0.014)
Spark plug type: DENSO SK20R11
NGK IFR6A11
Spark plug gap, mm (in.): 1.1 (0.043)
ENGINE LUBRICATION
Oil capacity (drain and refill), L (qt.,
Imp.qt.) With filter 6.8 (7.2, 6.0)
Without filter 6.4 (6.8, 5.6)
Oil grade:
“Toyota Genuine Motor Oil” is used in
your Toyota vehicle. Use Toyota ap-
proved “Toyota Genuine Motor Oil” or
equivalent to satisfy the following grade
and viscosity.
Oil grade:
API grade, SL “Energy −Conserving” or
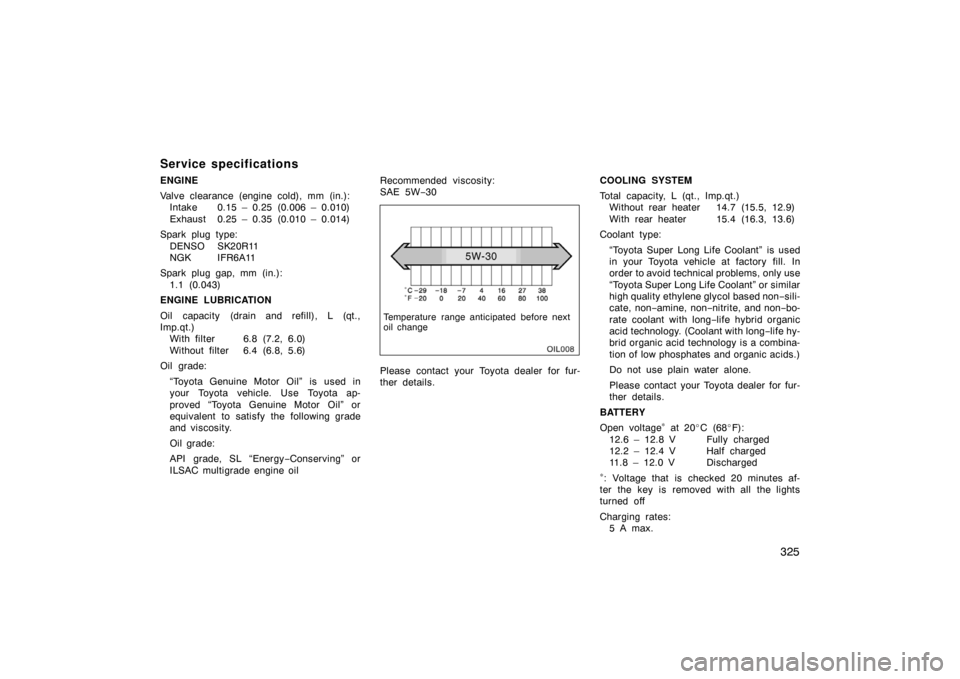
ILSAC multigrade engine oil Recommended viscosity:
SAE 5W
−30
Temperature range anticipated before next
oil change
Please contact your Toyota dealer for fur-
ther details. COOLING SYSTEM
Total capacity, L (qt., Imp.qt.)
Without rear heater 14.7 (15.5, 12.9)
With rear heater 15.4 (16.3, 13.6)
Coolant type:
“Toyota Super Long Life Coolant” is used
in your Toyota vehicle at factory fill. In
order to avoid technical problems, only use
“Toyota Super Long Life Coolant” or similar
high quality ethylene glycol based non −sili-
cate, non −amine, non− nitrite, and non− bo-
rate coolant with long −life hybrid organic
acid technology. (Coolant with long −life hy-
brid organic acid technology is a combina-
tion of low phosphates and organic acids.)
Do not use plain water alone.
Please contact your Toyota dealer for fur-
ther details.
BATTERY
Open voltage
∗ at 20 C (68 F):
12.6 – 12.8 V Fully charged
12.2 – 12.4 V Half charged
11.8 – 12.0 V Discharged
∗: Voltage that is checked 20 minutes af-
ter the key is removed with all the lights
turned off
Charging rates: 5 A max.