Page 333 of 426

’05 4Runner_U (L/O 0504)
323
MAINTENANCE
�If you tow a trailer, your vehicle will
require more frequent maintenance due
to the additional load. For this informa-
tion, please refer to the scheduled
maintenance information in the “Sched-
uled Maintenance Guide” or “Owner ’s
Manual Supplement”.
�Retighten all fixing bolts of the towing
ball and bracket after approximately
1000 km (600 miles) of trailer driving.
CONNECTING A TRAILER (models with
rear height control air suspension)
Stop your vehicle and a trailer in line and
perform the following: 1. Put the rear height control air suspen- sion in the “LO” (low) mode. Turn the
ignition switch off or push the “HEIGHT
CONTROL OFF” switch to turn off the
rear height control air suspension.
2. Connect a trailer.
3. Turn the ignition switch on or push the “HEIGHT CONTROL OFF” switch to
turn on the rear height control air sus-
pension. Select the “N” (normal) mode
with the height select switch. DISCONNECTING A TRAILER (models
with rear height control air suspension)
Stop your vehicle and a trailer in line and
perform the following:
1. Put the rear height control air suspen- sion in the “LO” (low) mode. (Make
sure the vehicle height is in the “LO”
(low) mode by pushing the height se-
lect switch on the “ �” side.)
2. Turn the ignition switch off or push the “HEIGHT CONTROL OFF” switch to
turn off the rear height control air sus-
pension.
3. Set the supporting leg of a trailer on the ground and raise the hitch by 100
mm (4 in.).
4. Turn the ignition switch on or push the “HEIGHT CONTROL OFF” switch to
turn on the rear height control air sus-
pension.
5. Wait for about 20 seconds until the rear vehicle height is lowered by the
automatic leveling function.
6. Make sure the hitch is disconnected. If not, raise the hitch higher and repeat
steps 2 through 5. 7. Move the vehicle forward in the “LO”
(low) mode where the hitch does not
touch anything in the “N” (normal)
mode.
8. Put the rear height control air suspen- sion in the “N” (normal) mode.
PRE�TOWING SAFETY CHECK�Check that your vehicle remains level
when a loaded or unloaded trailer is
hitched. Do not drive if the vehicle has
an abnormal nose −up or nose −down
condition, and check for improper
tongue load, overload, worn suspension
or other possible causes.
�Make sure the trailer cargo is securely
loaded so that it cannot shift.
�Check that your rear view mirrors con-
form to any applicable federal, state/
provincial or local regulations. If not,
install the rear view mirrors required
for towing purpose.
Page 346 of 426

’05 4Runner_U (L/O 0504)
336�
Make sure to set the jack prop-
erly in the jack point. Raising
the vehicle with jack improper-
ly positioned will damage the
vehicle or may allow the ve-
hicle to fall off the jack and
cause personal injury.
� Never get under the vehicle
when the vehicle is supported
by the jack alone.
� Use the jack only for lifting
your vehicle during wheel
changing.
� Do not raise the vehicle with
someone in the vehicle.
� When raising the vehicle, do
not place any objects on top
of or underneath the jack.
� Raise the vehicle only high
enough to remove and change
the tire.
NOTICE
� Do not continue driving with
a deflated tire. Driving even a
short distance can damage a
tire and wheel beyond repair.
� Vehicles with rear height con-
trol air suspension: When
jacking up or insta lling the
tire chains, be sure to turn
off the rear height control
and stop the engine. Other-
wise, the vehicle height may
change in the automatic lev-
eling function, resulting in
accident.
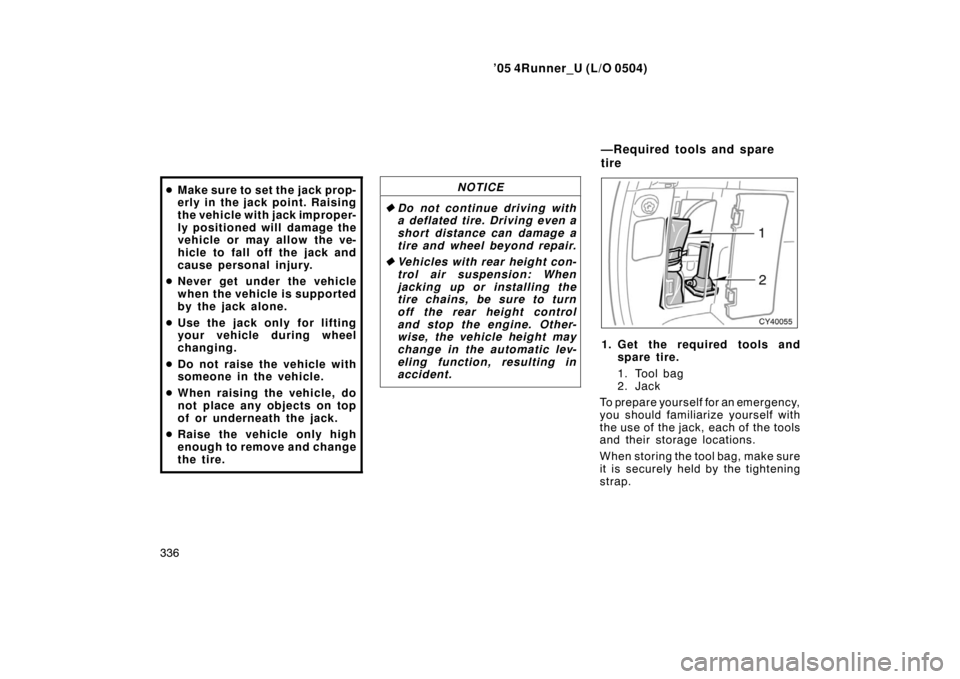
1. G et th e req u i red to o l s an d
spare tire.
1. Tool bag
2. Jack
To prepare yourself for an emergency,
you should familiarize yourself with
the use of the jack, each of the tools
and their storage locations.
When storing the tool bag, make sure
it is securely held by the tightening
strap.
—Required tools and spare
tire
Page 347 of 426
’05 4Runner_U (L/O 0504)
337
Turn the jack joint by hand.
To rem ov e: Tur n the joint in direction
1 until the jack is free.
To store: Turn the joint in direction 2
until the jack is fi rmly secured to pre-
vent it flying forward during a collision
or sudden braking.To remove the spare tire under the
luggage compartment:
1. Put a jack handle and jack handle extensions together as shown in
the illustration.
1. Jack handle extensions
2. Jack handleWhen connecting the jack handle ex-
tensions, use the jack handle to tight-
en the square head bolt. Make sure
that the bolt fits into the depression
on the joint.
When connecting the jack handle ex-
tension with the jack handle, tighten
the round head bolt by hand.
NOTICE
Tighten the square head bolt
securely. Otherwise, the exten-
sion may come off and it may
damage the paint or vehicle
body.
Page 348 of 426

’05 4Runner_U (L/O 0504)
338
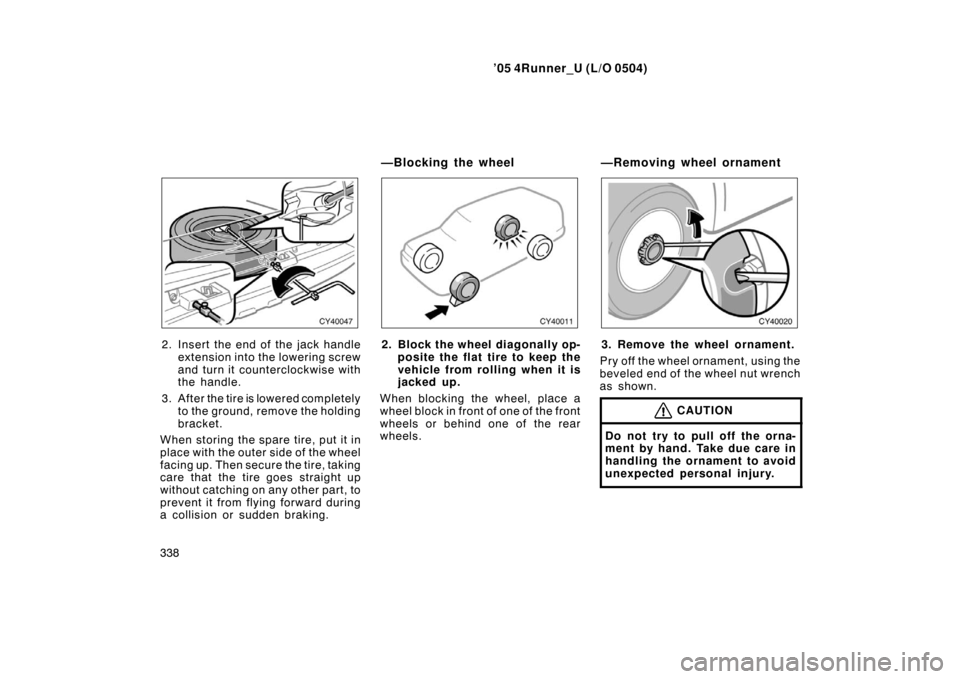
2. Insert the end of the jack handle
extension into the lowering screw
and turn it counterclockwise with
the handle.
3. After the tire is lowered completely to the ground, remove the holding
bracket.
When storing the spare tire, put it in
place with the outer side of the wheel
facing up. Then secure the tire, taking
care that the tire goes straight up
without catching on any other part, to
prevent it from flying forward during
a collision or sudden braking.2. Block the wheel diagonally op- posite the flat tire to keep the
vehicle from rolling when it is
jacked up.
When blocking the wheel, place a
wheel block in front of one of the front
wheels or behind one of the rear
wheels.3. Remove the wheel ornament.
Pry off the wheel ornament, using the
beveled end of the wheel nut wrench
as shown.
CAUTION
Do not try to pull off the orna-
ment by hand. Take due care in
handling the ornament to avoid
unexpected personal injury.
—Blocking the wheel —Removing wheel ornament
Page 350 of 426
’05 4Runner_U (L/O 0504)
340
Put a jack handle, jack handle exten-
sions and jack handle end together
as shown in the illustration.
1. Jack handle end
2. Jack handle extensions
3. Jack handleWhen connecting the jack handle ex-
tension(s) and jack handle end, use
the jack handle to tighten the square
head bolt. Make sure that the bolt fits
into the depression on the joint.
When connecting the jack handle ex-
tension with the jack handle, tighten
the round head bolt by hand.
NOTICE
Tighten the square head bolt
securely. Otherwise, the exten-
sion may come off and it may
damage the paint or vehicle
body.
Front of
vehicle
6. After making sure that no one is in the vehicle, as the jack
touches the vehicle and begins
to fit, double�check that it is
properly positioned.
Rear side only—
When positioning the jack under the
rear axle housing, make sure the
groove on the top of the jack fits with
the rear axle housing.
—Raising your vehicle
Page 353 of 426

’05 4Runner_U (L/O 0504)
343
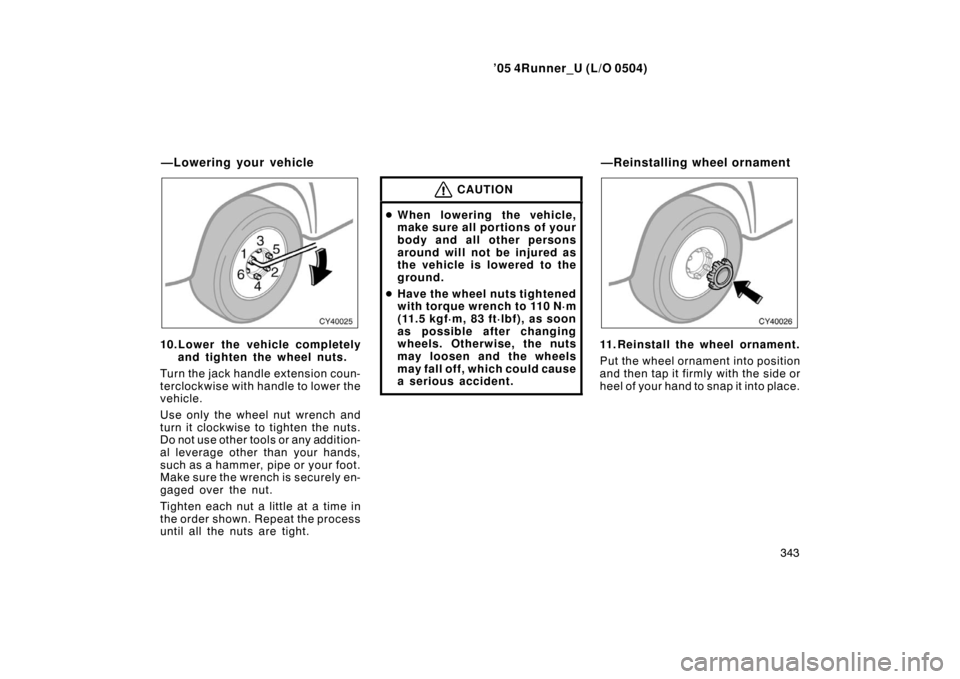
10.Lower the vehicle completely
and tighten the wheel nuts.
Turn the jack handle extension coun-
terclockwise with handle to lower the
vehicle.
Use only the wheel nut wrench and
turn it clockwise to tighten the nuts.
Do not use other tools or any addition-
al leverage other than your hands,
such as a hammer, pipe or your foot.
Make sure the wrench is securely en-
gaged over the nut.
Tighten each nut a little at a time in
the order shown. Repeat the process
until all the nuts are tight.
CAUTION
� When lowering the vehicle,
make sure all portions of your
body and all other persons
around will not be injured as
the vehicle is lowered to the
ground.
� Have the wheel nuts tightened
with torque wrench to 110 N·m
(11.5 kgf·m, 83 ft·lbf), as soon
as possible after changing
wheels. Otherwise, the nuts
may loosen and the wheels
may fall off, which could cause
a serious accident.
11. Reinstall the wheel ornament.
Put the wheel ornament into position
and then tap it firmly with the side or
heel of your hand to snap it into place.
—Lowering your vehicle —Reinstalling wheel ornament
Page 354 of 426

’05 4Runner_U (L/O 0504)
344
CAUTION
�Do not attach a heavily dam-
aged plastic wheel ornament.
It may fly off the wheel and
cause accidents while the ve-
hicle is moving.
� Take due care in handling the
ornament to avoid unexpected
personal injury.
12.Check the air pressure of the re-
placed tire.
Adjust the air pressu re to the specifi-
cation designated on page 406 in
Section 8. If the pressure is lower,
drive slowly to the nearest service
station and fill to the correct pressure.
Do not forget to reinstall the tire infla-
tion valve cap as dirt and moisture
could get into th e valve core and
possibly cause air leakage. If the cap
is missing, have a new one put on as
soon as possible.
13.Restow all the tools, jack and flat tire securely.
As soon after changing wheels as
possible, tighten the wheel nuts to the
torque specified on page 406 in Sec-
tion 8 with a torque wrench. Have a
technician repair the flat tire.CAUTION
Before driving, make sure all the
tools, jack and flat tire are se-
curely in place in their storage
location to reduce the possibility
of personal injury during a colli-
sion or sudden braking.
—After changing wheels
Page 359 of 426

’05 4Runner_U (L/O 0504)
349
NOTICE
Use only a cable or chain specifically
intended for use in towing vehicles.
Securely fasten the cable or chain to
the towing eyelet provided.
Before towing, release the parking brake
and put the transmission in “N”. The key
must be in “ACC” (engine off) or “ON”
(engine running).
Four−wheel drive models—On multi −mode
four −wheel drive models, put the multi −
mode control switch knob in “H2”. On full −
time four −wheel drive models, unlock the
center differential.
CAUTION
If the engine is not running, the pow-
er assist for the brakes and steering
will not work so steering and braking
will be much harder than usual.
�Before emergency towing, check that
the eyelet is not broken or damaged
and that the installation bolts are not
loose.
�Fasten the towing cable or chain se-
curely to the eyelet.
�Do not jerk the eyelet. Apply steady
and even force.
�To avoid damaging the eyelet, do not
pull from the side or at a vertical
angle. Always pull straight ahead.
CAUTION
If the emergency towing eyelet is
used to get out when your vehicle
becomes struck in mud, sand or oth-
er condition from which the vehicle
cannot be driven out under its own
power, make sure to observe the pre-
cautions mentioned below. Otherwise,
excessive stress will be put on the
eyelet and the towing cable or chain
may break, causing serious injury or
damage.
�If the towing vehicle can hardly
move, do not forcibly continue the
towing. Contact your Toyota dealer
or a commercial tow truck service
for assistance.
�Tow the vehicle as straight ahead
as possible.
�Keep away from the vehicle during
towing.
—Emergency towing eyelet
precautions