Page 264 of 426

’05 4Runner_U (L/O 0504)
254
CAUTION
�When doing the circling calibration,
be sure to secure a wide space,
and watch out for people and ve-
hicles in the neighborhood. Do not
violate any local traffic rules while
performing circling calibration.
�Do not adjust the display while the
vehicle is moving. Be sure to adjust
the display only when the vehicle is
stopped.
The rear view monitor system assists
the driver by displaying images of the
rear of the vehicle during backing up.
The displayed image on the screen is
a horizontally reversed mirror image of
the inside rear view mirror.
To display the rear view on the screen,
place the selector lever in the “R” posi-
tion when the ignition switch in the
“ON” position.
If you move the selector lever out of the
“R” position, the screen returns to the
previous screen. Operating another func-
tion of the navigation system will display
another screen.
The rear view monitor system is an auxil-
iary device intended to back up. When
backing up, be sure to check behind and
all around the vehicle visually.
CAUTION
�Do not rely entirely on the rear
view monitor system.
Use caution just as you would when
backing up any vehicle.
�Never back up while looking only at
the screen. The image on the
screen may differ from actual con-
ditions. If you back up while look-
ing only at the screen, you may hit
a vehicle or have an unexpected
accident. When backing up, be sure
to check behind and all around the
vehicle visually and with mirrors
before proceeding.
NOTICE
�Do not use the system when the
back door is not completely closed.
� If the back of the vehicle is hit, the
position and mounting angle of the
camera may slip. Be sure to have
the camera’s position and mounting
angle checked at your Toyota deal-
er.
� If the temperature changes rapidly,
such as when hot water is poured
on it in cold weather, the system
may not operate normally.
Rear view monitor system
Page 267 of 426

’05 4Runner_U (L/O 0504)
257
THE REAR VIEW MONITOR SYSTEM
CAMERA
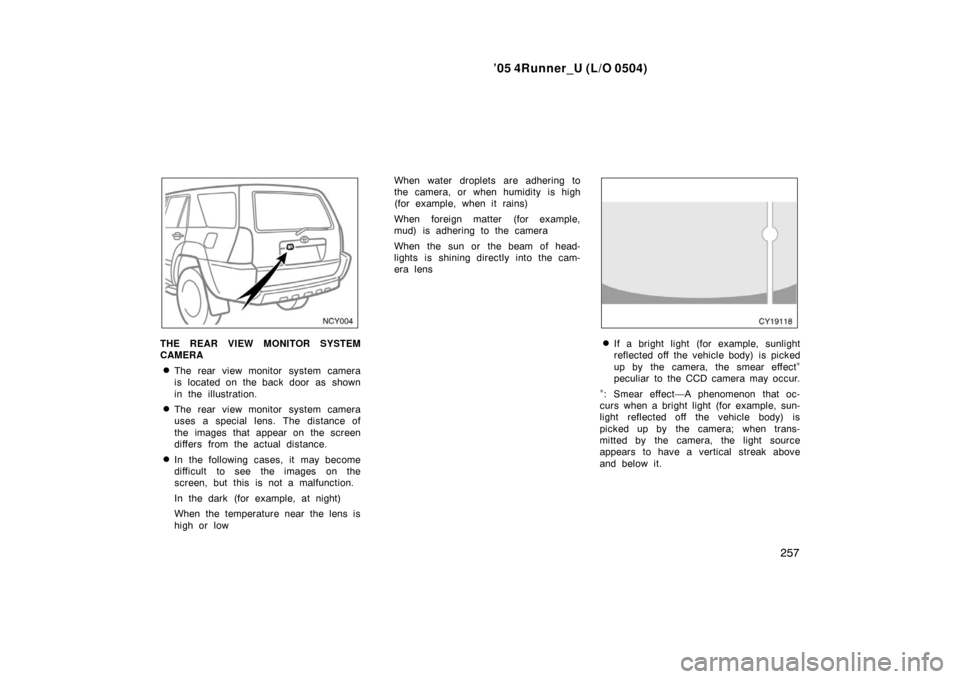
�The rear view monitor system camera
is located on the back door as shown
in the illustration.
�The rear view monitor system camera
uses a special lens. The distance of
the images that appear on the screen
differs from the actual distance.
�In the following cases, it may become
difficult to see the images on the
screen, but this is not a malfunction.
In the dark (for example, at night)
When the temperature near the lens is
high or low When water droplets are adhering to
the camera, or when humidity is high
(for example, when it rains)
When foreign matter (for example,
mud) is adhering to the camera
When the sun or the beam of head-
lights is shining directly into the cam-
era lens
�If a bright light (for example, sunlight
reflected off the vehicle body) is picked
up by the camera, the smear effect
∗
peculiar to the CCD camera may occur.
∗: Smear effect—A phenomenon that oc-
curs when a bright light (for example, sun-
light reflected off the vehicle body) is
picked up by the camera; when trans-
mitted by the camera, the light source
appears to have a vertical streak above
and below it.
Page 271 of 426

’05 4Runner_U (L/O 0504)
261
On some models, an auxiliary box is
located inside the glove box.
To increase the capacity of the glove box,
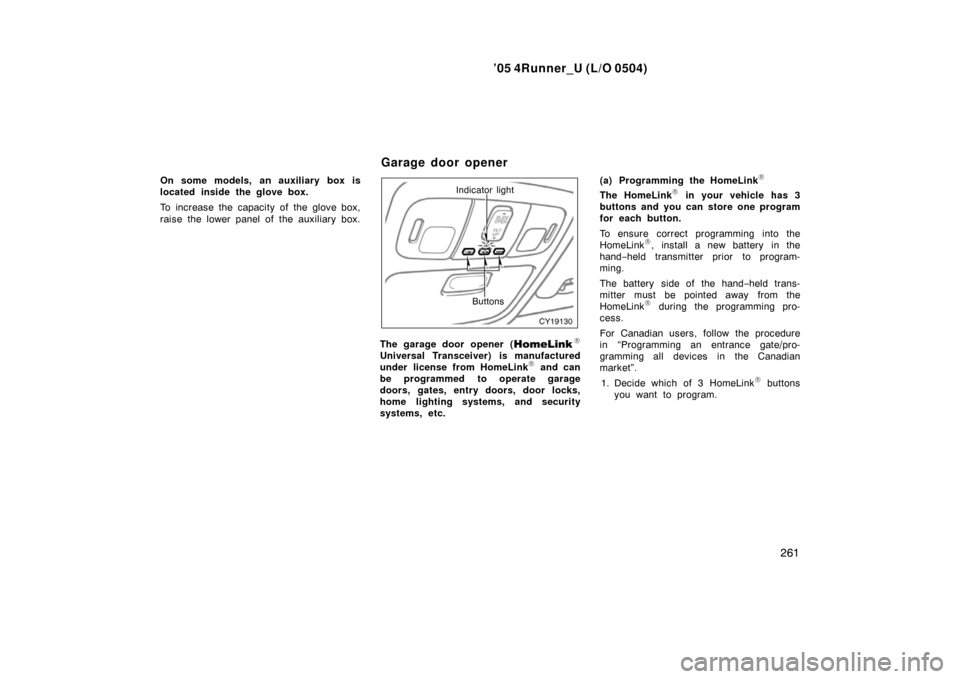
raise the lower panel of the auxiliary box.Indicator light
Buttons
The garage door opener (�
Universal Transceiver) is manufactured
under license from HomeLink� and can
be programmed to operate garage
doors, gates, entry doors, door locks,
home lighting systems, and security
systems, etc. (a) Programming the HomeLink
�
The HomeLink� in your vehicle has 3
buttons and you can store one program
for each button.
To ensure correct programming into the
HomeLink
�, install a new battery in the
hand− held transmitter prior to program-
ming.
The battery side of the hand −held trans-
mitter must be pointed away from the
HomeLink
� during the programming pro-
cess.
For Canadian users, follow the procedure
in “Programming an entrance gate/pro-
gramming all devices in the Canadian
market”.
1. Decide which of 3 HomeLink
� buttons
you want to program.
Garage door opener
Page 273 of 426

’05 4Runner_U (L/O 0504)
263
6. Repeat steps 2 through 5 for each re-
maining HomeLink� button to program
another device.
Programming a rolling code system
If your device is “Rolling Code”
equipped, it is necessary to follow
steps 1 through 4 under the heading
“Programming the HomeLink
�” before
proceeding with the steps listed below.
1. Locate the “training” button on the ceil- ing mounted garage door opener motor.
The exact location and color of the
button may vary by brand of garage
door opener. Refer to the owner ’s
guide supplied by the garage door
opener manufacturer for the location of
this “training” button.
2. Press the “training” button on the ceil- ing mounted garage door opener motor.
Following this step, you have 30 seconds
in which to initiate step 3 below. 3. Press and release the vehicle’s pro- grammed HomeLink
� button twice. The
garage door may open. If the door
does open, the programming process is
complete. If the door does not open,
press and release the button a third
time. This third press and release will
complete the programming process by
opening the garage door. The ceiling mounted garage door opener
motor should now recognize the
HomeLink
� unit and be able activate the
garage door up/down.
4. Repeat steps 1 through 3 for each re- maining HomeLink
� button to program
another rolling code system.
Programming an entrance gate/program-
ming all devices in the Canadian market 1. Decide which of the 3 HomeLink
� but-
tons you want to program.
2. Place your hand −held gate/device
transmitter 25 to 75 mm (1 to 3 in.)
away from the surface of the
HomeLink
�.
Keep the indicator light on the HomeLink
�
in view while programming. 3. Press and hold the selected HomeLink
� button.
4. Continuously press and release ( cycle)
the hand− held gate/device transmitter
button every two seconds until step 5
is complete.
5. When the indicator light on the HomeLink
� changes from a slow to a
rapid flash after 20 seconds, you can
release both buttons. 6. Test the operation of the HomeLink
� by
pressing the newly programmed button.
Check to see if the gate/device oper-
ates correctly.
7. Repeat steps 1 through 6 for each re- maining HomeLink
� button to program
another device.
Programming other devices
To program other devices such as home
security systems, home door locks or
lighting, contact your authorized Toyota
dealer for assistance.
Reprogramming a button
Individual HomeLink
� buttons cannot be
erased, however, to reprogram a single
button, follow the procedure “Programming
the HomeLink
�”.
(b) Operating the HomeLink
�
To operate the HomeLink�, press the
appropriate HomeLink� button to activate
the programmed device. The HomeLink�
indicator light should come on. The
HomeLink� continues to send the signal
for up to 20 seconds as long as the
button is pressed.
Page 276 of 426
’05 4Runner_U (L/O 0504)
266
Type C (rear console box)
Type D (rear tire house)
Type E (right side of luggage compart-
ment)The right side of luggage compartment
auxiliary box is equipped with a belt to
hold the objects.
To use the belt, do the following.
1. To loosen: Pull the buckle forward.
2. To tighten: Pull on the belt.
Make sure the objects are securely held.
—Using the holding belts
Page 280 of 426
’05 4Runner_U (L/O 0504)
270
If the trash holder is pulled strongly or
stepped on, it will detach from the rear
console box to protect it from damag-
ing.
If the trash holder becomes detached, re-
install it in a horizontal direction as indi-
cated in the illustration. It cannot be
installed in any other direction.
NOTICE
Do not deliberately pull or step on
the trash holder, as it may be dam-
aged or broken.
The cup holders are designed for hold-
ing cups or drink�cans securely.
The cup holder can be adjustable to the
size of the cups or drink�cans by
changing the holder position and the
arm position, as shown.
With the instrument panel lights on, the
front cup holder position indicator lights
will come on.
CAUTION
Do not place anything else other than
cups or drink�cans in the cup holder,
as such items may be thrown about
in the compartment and possibly in-
jured people in the vehicle during
sudden braking or in an accident.
Front cup holders
Page 281 of 426
’05 4Runner_U (L/O 0504)
271
The rear cup holders and tray are
housed in the armrest.
The cup holders are designed to hold
cups or beverage cans securely.
1. To use the rear cup holders and tray, pull the armrest out.
2. To use the rear cup holder, push andpull it out.
Rear cup holders and tray
(vehicles without third seats)
Page 283 of 426

’05 4Runner_U (L/O 0504)
273
The cup holders are designed for hold-
ing cups or drink�cans securely.
Type A—To use the holder, pull the arm-
rest out and push the lid.
CAUTION
�Do not place anything else other
than cups or drink�cans in the cup
holder, as such items may be
thrown about in the compartment
and possibly injure people in the
vehicle during sudden braking or in
an accident.
�Type A—To reduce the chance of
injury in case of an accident or
sudden stop while driving, keep the
cup holder closed when it is not in
use.
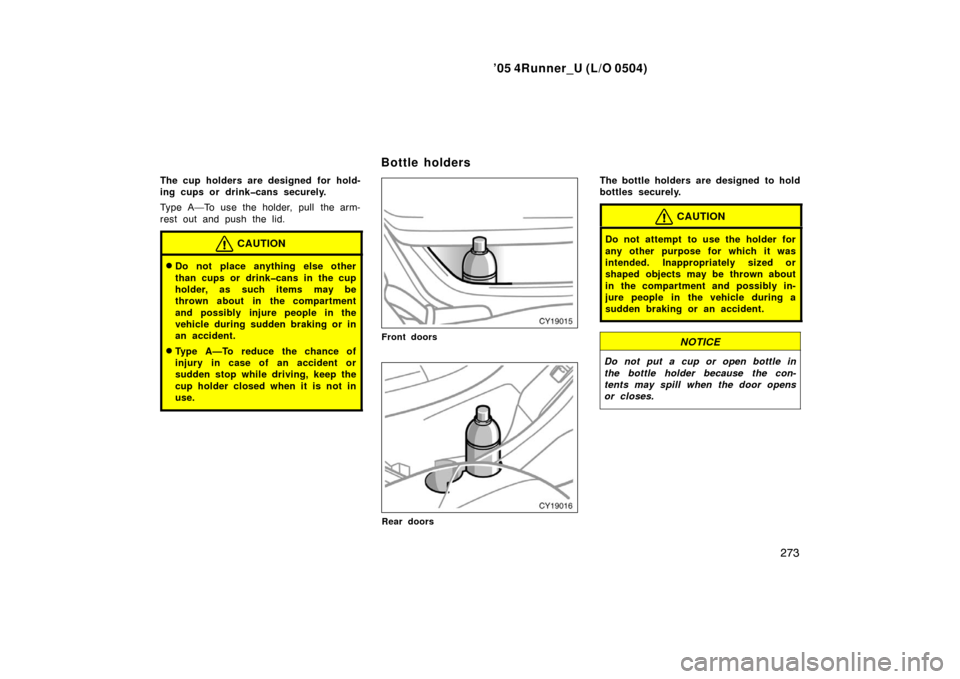
Front doors
Rear doors
The bottle holders are designed to hold
bottles securely.
CAUTION
Do not attempt to use the holder for
any other purpose for which it was
intended. Inappropriately sized or
shaped objects may be thrown about
in the compartment and possibly in-
jure people in the vehicle during a
sudden braking or an accident.
NOTICE
Do not put a cup or open bottle in
the bottle holder because the con-
tents may spill when the door opens
or closes.
Bottle holders