Page 223 of 477

5-20
Audio
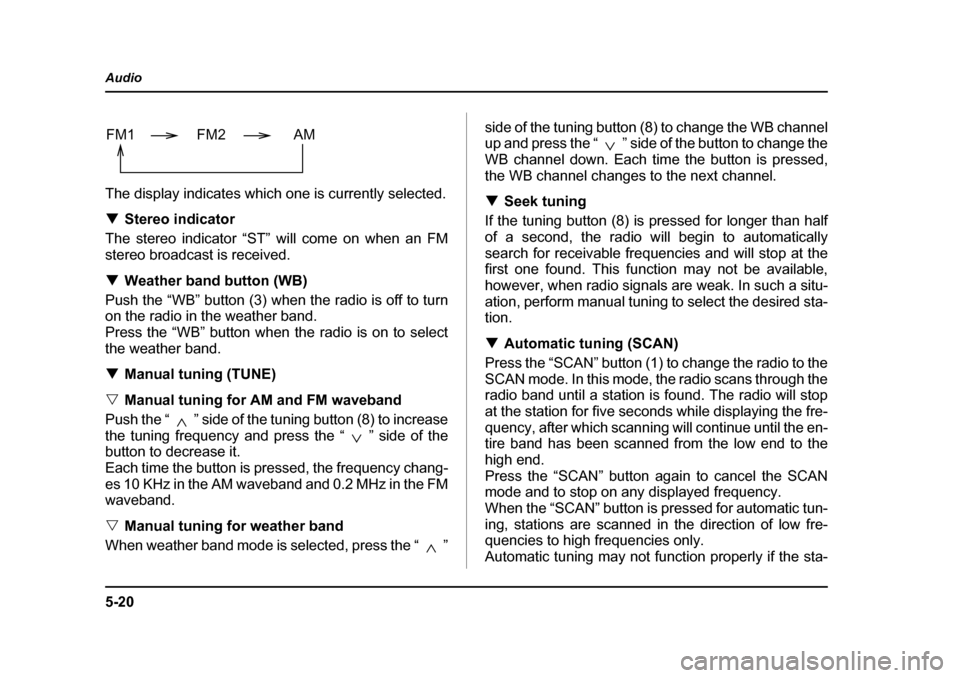
The display indicates which one is currently selected. �T
Stereo indicator
The stereo indicator “ST” will come on when an FM
stereo broadcast is received. �T Weather band button (WB)
Push the “WB” button (3) when the radio is off to turn
on the radio in the weather band.
Press the “WB” button when the radio is on to select
the weather band. �T Manual tuning (TUNE)
�V Manual tuning for AM and FM waveband
Push the “ ” side of the tuning button (8) to increase
the tuning frequency and press the “ ” side of the
button to decrease it.
Each time the button is pressed, the frequency chang-
es 10 KHz in the AM waveband and 0.2 MHz in the FM
waveband. �V Manual tuning for weather band
When weather band mode is selected, press the “ ” side of the tuning button (8) to change the WB channel
up and press the “ ” side of the button to change the
WB channel down. Each time the button is pressed,
the WB channel changes to the next channel. �T
Seek tuning
If the tuning button (8) is pressed for longer than half
of a second, the radio will begin to automatically
search for receivable frequencies and will stop at the
first one found. This function may not be available,
however, when radio signals are weak. In such a situ-
ation, perform manual tuning to select the desired sta- tion. �T Automatic tuning (SCAN)
Press the “SCAN” button (1) to change the radio to the
SCAN mode. In this mode, the radio scans through the
radio band until a station is found. The radio will stop
at the station for five seconds while displaying the fre-
quency, after which scanning will continue until the en-
tire band has been scanned from the low end to the
high end.
Press the “SCAN” button again to cancel the SCAN
mode and to stop on any displayed frequency.
When the “SCAN” button is pressed for automatic tun-
ing, stations are scanned in the direction of low fre-
quencies to high frequencies only.
Automatic tuning may not function properly if the sta-
FM1 FM2 AM
Page 325 of 477

8-24
Driving tips
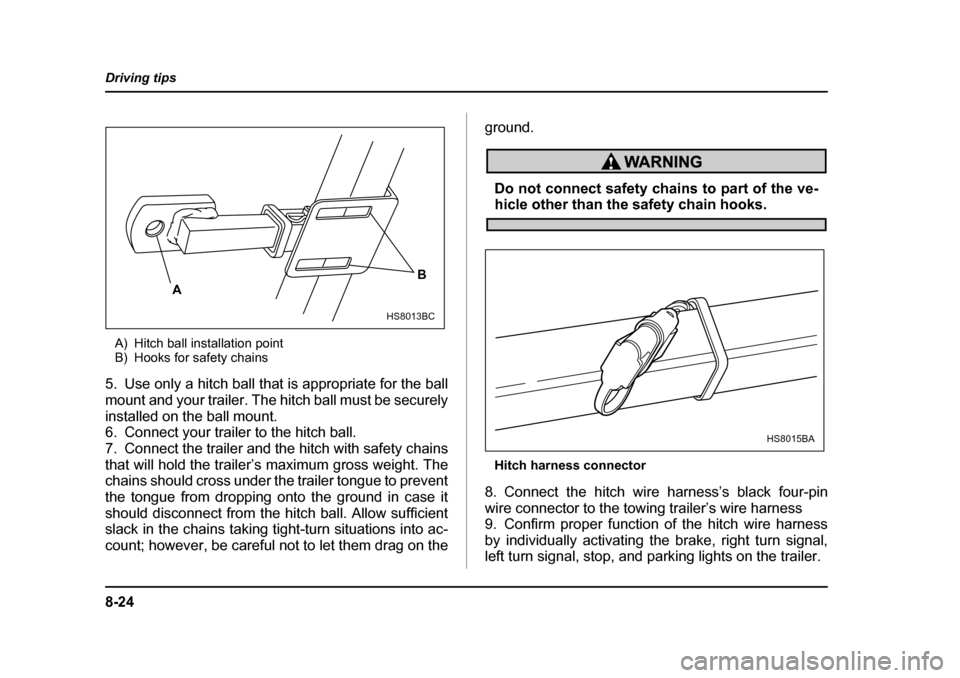
A) Hitch ball installation point
B) Hooks for safety chains
5. Use only a hitch ball that is appropriate for the ball
mount and your trailer. The hitch ball must be securely
installed on the ball mount.
6. Connect your trailer to the hitch ball.
7. Connect the trailer and the hitch with safety chains
that will hold the trailer’s maximum gross weight. The
chains should cross under the trailer tongue to prevent
the tongue from dropping onto the ground in case it
should disconnect from the hitch ball. Allow sufficient
slack in the chains taking tight-turn situations into ac-
count; however, be careful not to let them drag on the ground.
Do not connect safety chains to part of the ve-hicle other than the safety chain hooks.
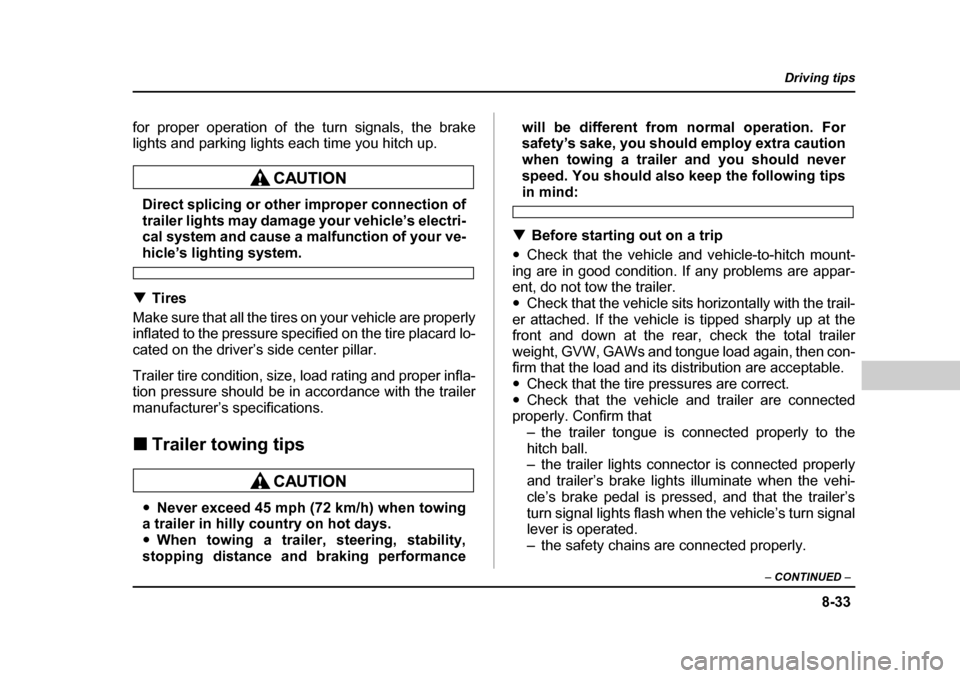
Hitch harness connector
8. Connect the hitch wire harness’s black four-pin
wire connector to the towing trailer’s wire harness
9. Confirm proper function of the hitch wire harness
by individually activating the brake, right turn signal,
left turn signal, stop, and parking lights on the trailer.
A B
HS8013BC
HS8015BA
Page 334 of 477

8-33
Driving tips
– CONTINUED –
for proper operation of the turn signals, the brake
lights and parking lights each time you hitch up.
Direct splicing or other improper connection of
trailer lights may damage your vehicle’s electri-
cal system and cause a malfunction of your ve-
hicle’s lighting system.
�T Tires
Make sure that all the tires on your vehicle are properly
inflated to the pressure specified on the tire placard lo-
cated on the driver’s side center pillar.
Trailer tire condition, size, load rating and proper infla-
tion pressure should be in accordance with the trailer
manufacturer’s specifications. �„ Trailer towing tips
�yNever exceed 45 mph (72 km/h) when towing
a trailer in hilly country on hot days. �y When towing a trailer, steering, stability,
stopping distance and braking performance will be different from normal operation. For
safety’s sake, you should employ extra caution
when towing a trailer and you should never
speed. You should also keep the following tips
in mind:
�T Before starting out on a trip
�y Check that the vehicle and vehicle-to-hitch mount-
ing are in good condition. If any problems are appar-
ent, do not tow the trailer.�y Check that the vehicle sits horizontally with the trail-
er attached. If the vehicle is tipped sharply up at the
front and down at the rear, check the total trailer
weight, GVW, GAWs and tongue load again, then con-
firm that the load and its distribution are acceptable. �y Check that the tire pressures are correct.
�y Check that the vehicle and trailer are connected
properly. Confirm that
– the trailer tongue is connected properly to the
hitch ball.
– the trailer lights connector is connected properly
and trailer’s brake lights illuminate when the vehi-
cle’s brake pedal is pressed, and that the trailer’s
turn signal lights flash when the vehicle’s turn signal
lever is operated.
– the safety chains are connected properly.
Page 339 of 477
9-2
In case of emergency
In case of emergencyIf you park your vehicle in case of an
emergency
The hazard warning flasher should be used in day or
night to warn other drivers when you have to park your
vehicle under emergency conditions.
Avoid stopping on the road. It is best to safely pull off
the road if a problem occurs.
The hazard warning flasher can be activated regard-
less of the ignition switch position.
Turn on the hazard warning by pushing the hazard
warning flasher switch. Turn it off by pushing the
switch again.
NOTE
When the hazard warning flasher is on, the turn
signals do not work.
HS3019AA
Page 367 of 477

11 - 2
Maintenance and service
Tires and wheels .......................................... 11-43Types of tires .................................................... 11-43
Tire inspection .................................................. 11-43
Tire pressures and wear .................................. 11-44
Wheel balance ................................................... 11-46
Wear indicators ................................................. 11-47
Tire rotation ....................................................... 11-48
Tire replacement ............................................... 11-48
Wheel replacement ........................................... 11-49
Aluminum wheels (if equipped) .................. 11-50
Windshield washer fluid .............................. 11-50
Replacement of wiper blades ...................... 11-51 Windshield wiper blades .................................. 11-52
Rear window wiper blade ................................. 11-54
Battery ........................................................... 11-58
Fuses ............................................................. 11-60
Main fuse ....................................................... 11-62
Installation of accessories .......................... 11-63
Replacing bulbs ............................................ 11-63 Headlight ........................................................... 11-64
Front turn signal, side marker light and parking lights ................................................. 11-66
Front fog light ................................................... 11-70
Rear combination lights ................................... 11-70
License plate light ............................................ 11-72
Dome light, map light and cargo area light .... 11-72
High mount stop light ...................................... 11-74
Page 429 of 477
11 - 6 4
Maintenance and service
�„
Headlight
Halogen headlight bulbs become very hot while
in use. If you touch the bulb surface with bare
hands or greasy gloves, finger prints or grease
on the bulb surface will develop into hot spots
and cause the bulb to break. If there are finger
prints or grease on the bulb surface, wipe them
away with a soft cloth moistened with alcohol.
NOTE
If headlight aiming is required, consult your
SUBARU dealer for proper adjustment of the head-
light aim.
Wattage Bulb No.
1) Headlight 12V-60/ 55WHB2 (H4)
2) Parking light 12V-5W 168
3) Map light 12V-8W –
4) Dome light 12V-8W –
5) Side marker light (Front) 12V-5W 168
6) Front turn signal 12V-21W (Amber)1474
7) Front fog light 12V-55W –
8) High mount stop light 12V-13W 912
9) Cargo area light 12V-15W –
10) Tail/stop light 12V-21/ 5W7443
11) Rear turn signal 12V-21W (Amber)1474
12) Backup light 12V-16W 921
13) Tail/stop light 12V-21/ 5W7443
14) License plate light 12V-5W 168
Page 431 of 477
11 - 6 6
Maintenance and service
3. Remove the bulb from the headlight assembly.
4. Install the new bulb, then set the retainer spring se-
curely.
5. Install the rubber cover with the top mark facing up,
then reconnect the electrical connector.
�„
Front turn signal, side marker light and
parking lights
A) Front turn signal light
B) Parking light
C) Front side marker light
The headlight assembly must be removed before the
parking light and front turn signal light bulbs can be re-
placed. When the headlight assembly has been re-
moved and then reinstalled, it may become necessary
to make a headlight aiming adjustment. It may be dif-
ficult to replace the bulbs. Have your SUBARU dealer
replace the bulbs if necessary.
HSB072BA
A
C B
HSB073BC
Page 434 of 477
11 -6 9
Maintenance and service
– CONTINUED –
A) Rubber cover
B) Electrical connector
C) “Top” mark
4. Disconnect the connectors from the headlight as-
sembly. 5. Pull the headlight assembly slightly toward you,
then hold down the lock release tabs on the connec-
tors for the front turn signal light, parking light, and
front side marker light and pull out the headlight as-
sembly completely.
HSB070BC
A
B
C
HSB079BA