2005 Seat Ibiza 5D brake
[x] Cancel search: brakePage 202 of 252

If and when
200
22 Main beam headlight, left 10
23 Number plate light/si de light indicator 5
24 Rear windscreen wiper 10
25 Injectors(fuel) 10
26 Brake light switch /ESP (Turn sensor) 10
27 Instrument panel/Diagnosis 5
28 Unit: glovebox light, boot light, interior light 10
29 Climatronic 5
30 Power supply central locking unit 5
31 Left front window control 25
32 Vacant
33 Self powered alarm horn 15
34 Engine control unit 15
35 Sunroof 20
36 Engine ventilator heating /blower 25
37 Headlight washer pump 20
38 Front and rear fog lights 15
39 Engine control unit (petrol) 15
40 Engine control unit diesel + SDI Fuel pump 30
41 Fuel gauge 15
42 Ignition transformer+ Engine control unit T70 15
43 Dipped headlight (right side) 15
44 Left rear window control 25
45 Front right window control 25
Number
Electrical equipment Amperes
ibiza_ingles Seite 200 Mittwoch, 5. Oktober 2005 5:17 17
Page 206 of 252

If and when
204Some of the electrical items listed in the table are only fitted on certain
models or are optional extras.
Please note that the above list, while corr ect at the time of printing, is subject
to alterations.Lamp changeGeneral notesBefore changing any lamp first turn off the equipment concerned.
Do not touch the lamp glass. Fingerprints vaporise in the heat, causing a
reduction in the lamp life and conden sation on the mirror surface, thus
reducing efficiency.
A lamp should only be placed by one of the same type. The designation is
inscribed on the bulb, either on the glass part or on the base.
It is highly recommended to keep a box of spare lamps in the vehicle. At the
very least, the lamps that most affect road safety should have spares in the
vehicle.
Rear lights on frame
Brake/position 12V/P21/5W
Indicator 12V/P21W Rear lights on tailgate
small position light 12V/W5W
foglight 12V/P21W
reverse light 12V/P21W
Single reflector headlamps
Full / dipped beam 12V 60/55W (H4)
indicator 12V/PY21W
position 12/W5W
Double reflector headlamps
dipped beam 12V/55W (H7)
full lights 12V/55W (H3)
indicator 12V/PY21W
position 12V/W5W
Xenon headlights
7)
Dipped beam 12V/35W (D1S)
8)
full beam 12V/55W (H7)
indicator 12V/PY21W
position lights 12V/W5W
F1
Multi-terminal voltage supply “30”. Internal fuse box 100
G1 Trailer fuse voltage supply in internal fuse box 50
H1 Vacant
Number
Electrical equipment Amperes7)For these type of headlights, the bulbs must be changed by an Authorised Service
Centre, given that complex elements of the vehicle must be removed and that the au-
tomatic control system must be reset.8)Xenon discharge lamps emit 2.5 times as much light flux and have a useful life five
times greater than halogen lamps, this means that, except in case of an abnormal
fault, there is no need to change the bulbs during the vehicle life.
ibiza_ingles Seite 204 Mittwoch, 5. Oktober 2005 5:17 17
Page 215 of 252
If and when213
Safety First
Operating instructions
Tips and Maintenance
Te c h n i c a l D a t a
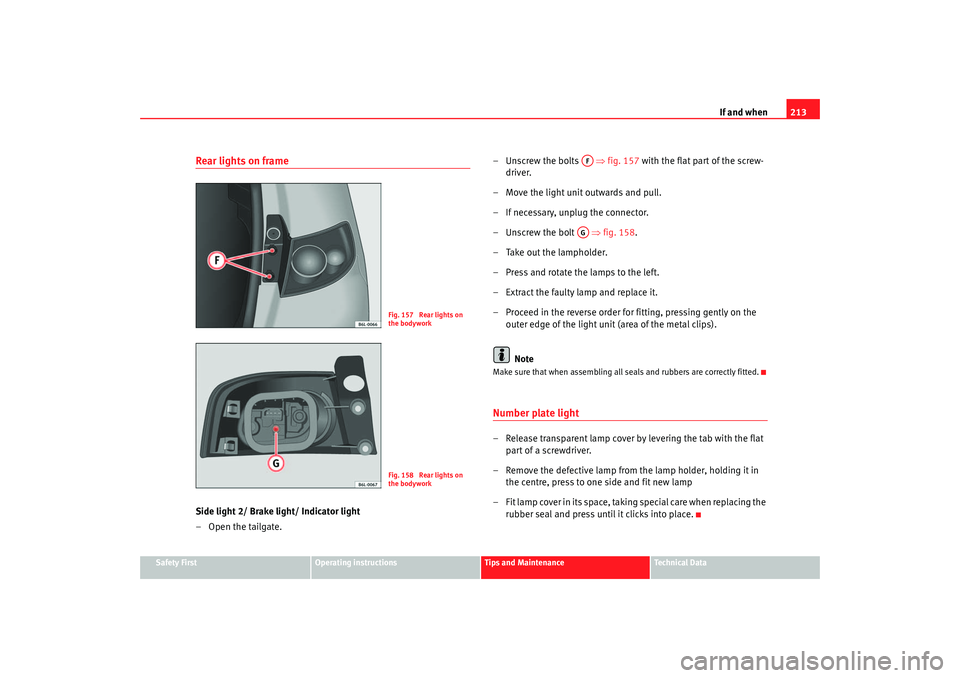
Rear lights on frameSide light 2/ Brake light/ Indicator light
– Open the tailgate. –
Unscrew the bolts ⇒ fig. 157 wi th the flat part of the screw-
driver.
– Move the light unit outwards and pull.
– If necessary, unplug the connector.
– Unscrew the bolt ⇒fig. 158 .
– Take out the lampholder.
– Press and rotate the lamps to the left.
– Extract the faulty lamp and replace it.
– Proceed in the reverse order for fitting, pressing gently on the outer edge of the light unit (area of the metal clips).
Note
Make sure that when assembling all seals and rubbers are correctly fitted.Number plate light– Release transparent lamp cover by levering the tab with the flat part of a screwdriver.
– Remove the defective lamp from the lamp holder, holding it in the centre, press to one side and fit new lamp
– Fit lamp cover in its space, taking special care when replacing the rubber seal and press until it clicks into place.
Fig. 157 Rear lights on
the bodyworkFig. 158 Rear lights on
the bodywork
AFAG
ibiza_ingles Seite 213 Mittwoch, 5. Oktober 2005 5:17 17
Page 216 of 252
If and when
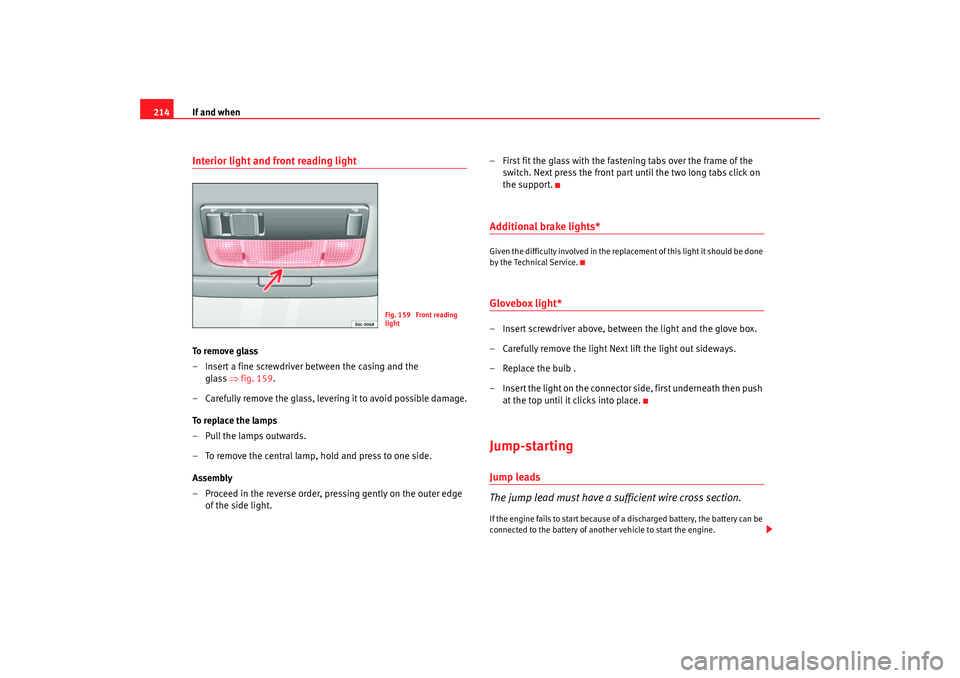
214Interior light and front reading light To r e m o v e g l a s s
– Insert a fine screwdriver between the casing and the
glass ⇒ fig. 159.
– Carefully remove the glass, levering it to avoid possible damage.
To replace the lamps
– Pull the lamps outwards.
– To remove the central lamp, hold and press to one side.
Assembly
– Proceed in the reverse order, pressing gently on the outer edge of the side light. – First fit the glass with the fastening tabs over the frame of the
switch. Next press the front part until the two long tabs click on
the support.
Additional brake lights*Given the difficulty involved in the replacement of this light it should be done
by the Technical Service.Glovebox light*– Insert screwdriver above, between the light and the glove box.
– Carefully remove the light Next lift the light out sideways.
– Replace the bulb .
– Insert the light on the connector side, first underneath then push at the top until it clicks into place.Jump-startingJump leads
The jump lead must have a sufficient wire cross section.If the engine fails to start because of a discharged battery, the battery can be
connected to the battery of anot her vehicle to start the engine.
Fig. 159 Front reading
light
ibiza_ingles Seite 214 Mittwoch, 5. Oktober 2005 5:17 17
Page 218 of 252
If and when
216
10. When the engine is running, disconnect the leads in reverse order to the details given above.Connect the battery clamps so they have good metal-to-metal contact with
the battery terminals.
If the engine fails to start, switch off the starter after about 10 seconds and
try again after about half a minute.
WARNING
•
Please note the safety warnings referring to working in the engine
compartment ⇒page 169, “Working in the engine compartment”.
•
The battery providing assistance must have the same voltage as the flat
battery (12V) and approximately the same capacity (see imprint on
battery). Failure to comply could result in an explosion.
•
Never use jump leads when one of the batteries is frozen. Danger of
explosion! Even after the battery has thawed, battery acid could leak and
cause chemical burns. If a battery freezes, it should be replaced.
•
Keep sparks, flames and lighted cigarettes away from batteries, danger
of explosion. Failure to comply could result in an explosion.
•
Observe the instructions provided by the manufacturer of the jump
leads.
•
Do not connect the negative cable from the other vehicle directly to the
negative terminal of the flat battery. The gas emitted from the battery could
be ignited by sparks. Danger of explosion.
•
Do not attach the negative cable from the other vehicle to parts of the
fuel system or to the brake line.
•
The non-insulated parts of the battery clamps must not be allowed to
touch. The jump lead atta ched to the positive battery terminal must not
touch metal parts of the vehicle, this can cause a short circuit.
•
Position the leads in such a way that they cannot come into contact
with any moving parts in the engine compartment.
•
Do not bend over the batteries. This could result in chemical burns.Note
The vehicles must not touch each other, otherwise electricity could flow as
soon as the positive terminals are connected.
WARNING (continued)
ibiza_ingles Seite 216 Mittwoch, 5. Oktober 2005 5:17 17
Page 219 of 252

If and when217
Safety First
Operating instructions
Tips and Maintenance
Te c h n i c a l D a t a
Towing and tow-startingTo w - s t a r t i n g *
The use of jump leads is preferable to tow-starting.We recommend that you do not tow-start your vehicle. Jump-starting
is preferable ⇒page 214.
However, if your vehicle has to be tow-started:
–Engage the 2
ndor the 3
rd gear.
– Keep the clutch pressed down.
– Switch on the ignition.
– Once both vehicles are mo ving, release the clutch.
– As soon as the engine starts, press the clutch and move the gear lever into neutral. This helps to prevent driving into the towing
vehicle.
WARNING
The risk of accidents is high when tow-starting. The vehicle being towed
can easily collide with the towing vehicle.
Caution
When tow-starting, fuel could enter the catalytic converter and damage it.
Towing eyesPlease observe the following points if you use a tow-rope:
Notes for the driver of the towing vehicle
– Drive slowly at first until the tow-rope is taut. Then accelerate gradually.
– Begin and change gears cautiously. If you are driving an auto- matic vehicle, accelerate gently.
– Remember that the brake servo and power steering are not working in the vehicle you are towing. Brake earlier than you
would normally, but with a more gentle pressure on the brake.
Notes for the driver of the towed vehicle
– Ensure that the tow-rope remains taut at all times when towing.
Fig. 161 Towing eye at
the front of the vehicle
ibiza_ingles Seite 217 Mittwoch, 5. Oktober 2005 5:17 17
Page 220 of 252
If and when
218
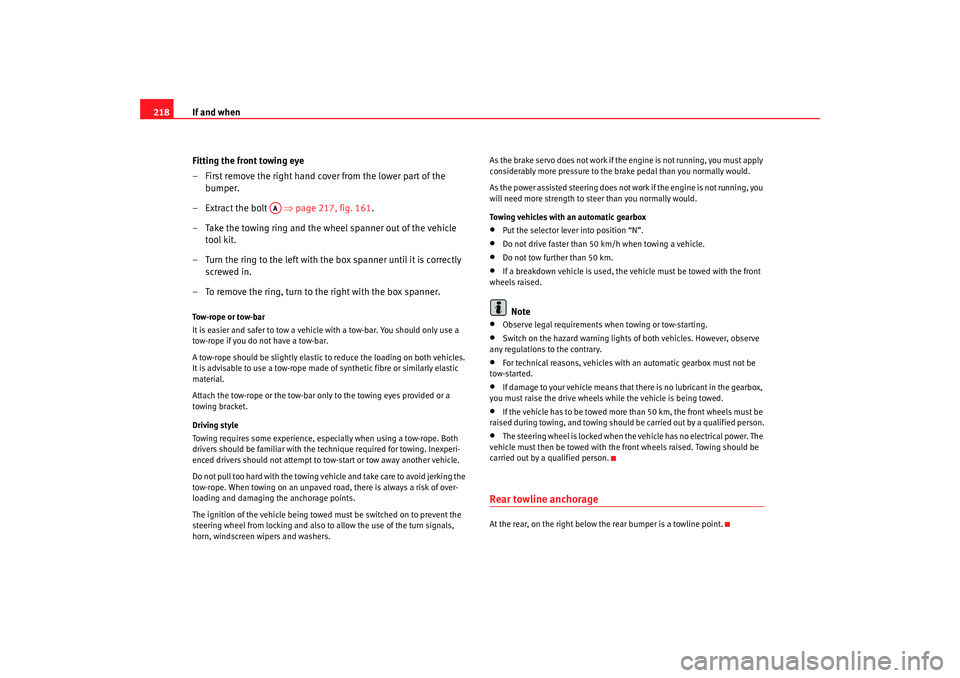
Fitting the front towing eye
– First remove the right hand cover from the lower part of the bumper.
– Extract the bolt ⇒page 217, fig. 161 .
– Take the towing ring and the wheel spanner out of the vehicle tool kit.
– Turn the ring to the left with the box spanner until it is correctly screwed in.
– To remove the ring, turn to the right with the box spanner.Tow-rope or tow-bar
It is easier and safer to tow a vehicle with a tow-bar. You should only use a
tow-rope if you do not have a tow-bar.
A tow-rope should be slightly elastic to reduce the loading on both vehicles.
It is advisable to use a tow-rope made of synthetic fibre or similarly elastic
material.
Attach the tow-rope or the tow-bar only to the towing eyes provided or a
towing bracket.
Driving style
Towing requires some experience, especially when using a tow-rope. Both
drivers should be familiar with the te chnique required for towing. Inexperi-
enced drivers should not attempt to tow-start or tow away another vehicle.
Do not pull too hard with the towing vehicle and take care to avoid jerking the
tow-rope. When towing on an unpaved ro ad, there is always a risk of over-
loading and damaging the anchorage points.
The ignition of the vehicle being towed must be switched on to prevent the
steering wheel from locking and also to allow the use of the turn signals,
horn, windscreen wipers and washers. As the brake servo does not work if the
engine is not running, you must apply
considerably more pressure to the brake pedal than you normally would.
As the power assisted steering does not work if the engine is not running, you
will need more strength to steer than you normally would.
Towing vehicles with an automatic gearbox
•
Put the selector lever into position “N”.
•
Do not drive faster than 50 km/h when towing a vehicle.
•
Do not tow further than 50 km.
•
If a breakdown vehicle is used, the vehicle must be towed with the front
wheels raised.Note
•
Observe legal requirements when towing or tow-starting.
•
Switch on the hazard warning lights of both vehicles. However, observe
any regulations to the contrary.
•
For technical reasons, vehicles with an automatic gearbox must not be
tow-started.
•
If damage to your vehicle means that there is no lubricant in the gearbox,
you must raise the drive wheels while the vehicle is being towed.
•
If the vehicle has to be towed more than 50 km, the front wheels must be
raised during towing, and towing should be carried out by a qualified person.
•
The steering wheel is locked when the vehicle has no electrical power. The
vehicle must then be towed with the front wheels raised. Towing should be
carried out by a qualified person.
Rear towline anchorageAt the rear, on the right below th e rear bumper is a towline point.
AA
ibiza_ingles Seite 218 Mittwoch, 5. Oktober 2005 5:17 17
Page 221 of 252

General notes on the technical data 219
Safety First
Operating instructions
Tips and Maintenance
Te c h n i c a l D a t a
Te c h n i c a l D a t aGeneral notes on the technical dataWhat you should be aware ofGeneral notes
All data in the official vehicle documents take precedence over this data.All data in these documents are valid for the basic model as offered in Spain.
The vehicle data card included in the inspection and maintenance schedule
in the vehicles registration documents show which engine is installed in the
vehicle. The figures may be different if addition
al equipment is fitted, for different
models, for special vehicles and for other countries.
Abbreviations used in this paragraph of the Technical Data Abbreviation MeaningkW Kilowatt, engine power measurement.
bhp Brake horse power, formerly used to denote engine power
at rpm Revolutions per minute - engine speed. Nm Newton metres, unit of engine torque.
l/100 km Fuel consumption in litres per 100 kilometres g/km Carbon dioxide emission s in grams per kilometre.
CO
2
Carbon dioxide
CN Cetane number, indication of the ignition quality of the diesel.
RON Research octane number, indication of the knock resistance of petrol.
ibiza_ingles Seite 219 Mittwoch, 5. Oktober 2005 5:17 17