2005 Seat Ibiza 5D weight
[x] Cancel search: weightPage 49 of 252
Child safety47
Safety First
Operating instructions
Tips and Maintenance
Te c h n i c a l D a t a
WARNING
•
The shoulder part of the seat belt mu st lie approximately on the centre
of the shoulder, never across the neck or the arm. The seat belt must lie
close to the torso. The lap belt part must lie across the pelvis, not across the stomach, and always fit closely. Pull the belt tight if necessary to take
up any slack ⇒
page 22, “Seat belts”.
•
Read and always observe information and warnings concerning the use
of child seats ⇒ in “Safety notes on using child seats” on page 44.
Securing child seatsWays to secure a child seat
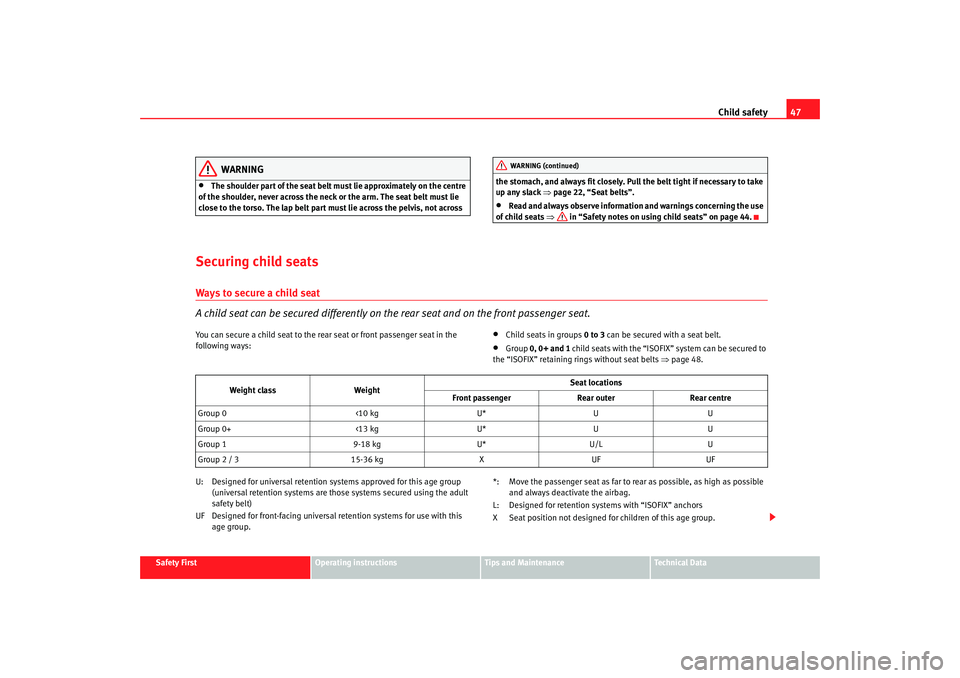
A child seat can be secured differently on th e rear seat and on the front passenger seat.You can secure a child seat to the rear seat or front passenger seat in the
following ways:
•
Child seats in groups 0 to 3 can be secured with a seat belt.
•
Group 0, 0+ and 1 child seats with the “ISOFIX” system can be secured to
the “ISOFIX” retaining rings without seat belts ⇒ page 48.
U: Designed for universal retention systems approved for this age group (universal retention systems are those systems secured using the adult
safety belt)
UF Designed for front-facing universal retention systems for use with this age group. *: Move the passenger seat as far to rear as possible, as high as possible
and always deactivate the airbag.
L: Designed for retention systems with “ISOFIX” anchors
X Seat position not designed for children of this age group.WARNING (continued)
Weight class Weight Seat locations
Front passenger Rear outerRear centre
Group 0 <10 kgU*UU
Group 0+ <13 kgU*UU
Group 1 9-18 kgU*U/L U
Group 2 / 3 15-36 kgXUF UF
ibiza_ingles Seite 47 Mittwoch, 5. Oktober 2005 5:17 17
Page 50 of 252
Child safety
48
WARNING
•
When travelling, children must be secured in the vehicle with a
restraint system suitable for age, weight and size.
•
Never install a rear-facing child seat on the front passenger seat unless
the front passenger airbag has been disabled. Risk of potentially fatal inju-
ries to the child! If it is necessary in exceptional cases to transport a child
on the front passenger seat, you must always disable the front passenger
airbag ⇒ page 41, “Deactivating airbags*”.
•
Read and always observe information and warnings concerning the use
of child seats ⇒ in “Safety notes on using child seats” on page 44.
Securing child seat with the “ISOFIX” system
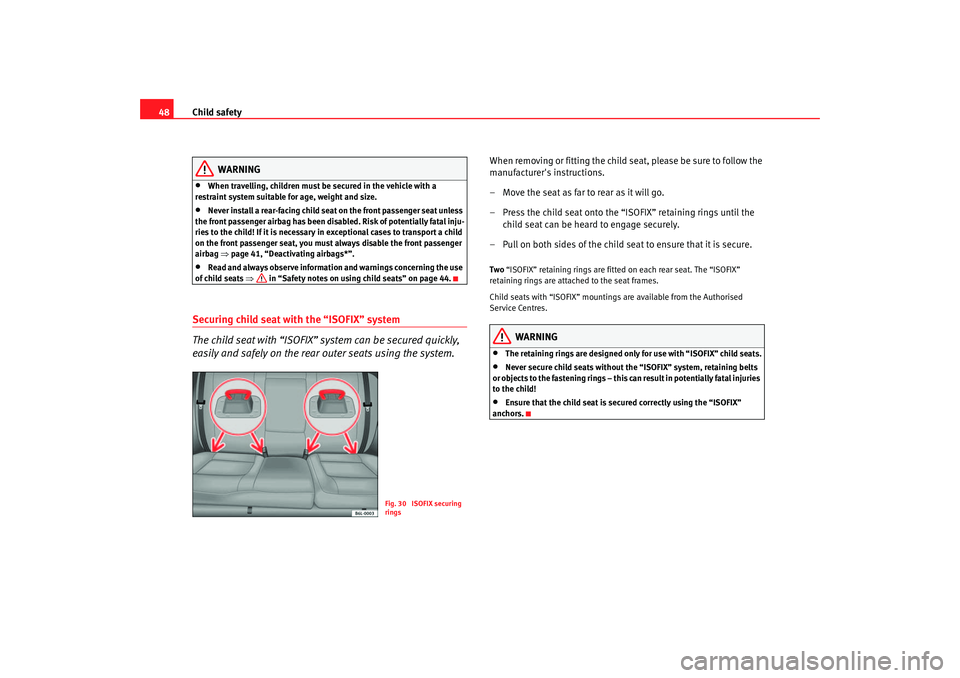
The child seat with “ISOFIX” system can be secured quickly,
easily and safely on the rear outer seats using the system.
When removing or fitting the child seat, please be sure to follow the
manufacturer's instructions.
– Move the seat as far to rear as it will go.
– Press the child seat onto the “ISOFIX” retaining rings until the
child seat can be heard to engage securely.
– Pull on both sides of the child seat to ensure that it is secure.Two “ISOFIX” retaining rings are fitted on each rear seat. The “ISOFIX”
retaining rings are attached to the seat frames.
Child seats with “ISOFIX” mountings are available from the Authorised
Service Centres.
WARNING
•
The retaining rings are designed only for use with “ISOFIX” child seats.
•
Never secure child seats without the “ISOFIX” system, retaining belts
or objects to the fastening rings – this c an result in potentially fatal injuries
to the child!
•
Ensure that the child seat is se cured correctly using the “ISOFIX”
anchors.
Fig. 30 ISOFIX securing
rings
ibiza_ingles Seite 48 Mittwoch, 5. Oktober 2005 5:17 17
Page 106 of 252
Seats and stowage
104
To lower and lift the seat back* (for 2-door vehicles with the Easy
- Entry* function)
4)
–To lower the seat back, pull on the lever upwards, in the direc-
tion of the arrow and press the seatback forwards. You can push
the seat forwards at the same time to make entry to the rear seats
easier.
–To lift the seatback, first move the seat fully back.
Adjusting the seat forwards and backwards
– Pull up the grip and move th e seat forwards or backwards.
– Then release the grip and move the seat further until the catch engages.
Adjusting the seat height*
– Pull the lever up or push down (s everal times if necessary) from
its home position. This adjusts the seat height in stages.
Adjusting the backrest angle
– Take your weight off the backrest and turn the hand wheel.The Easy-Entry function facilitates access to the vehicle rear seats. Before
lifting the seatback, put the seat base in its correct position. The seat will
engage when the seatback is lifted.
WARNING
•
Never adjust the driver or front passenger seat while the vehicle is in
motion. While adjusting your seat, you will assume an incorrect sitting
position. Risk of fatal accidents. Adju st the driver or front passenger seat
only when the vehicle is stationary.
•
To reduce the risk of injury to the driver and front passenger during
sudden braking manoeuvres or an acci dent, never drive with the backrest
tilted far to the rear. The maximum protection of the seat belt can be
achieved only when the backrests are in an upright position and the driver
and front passenger have properly adjusted their seat belts. The further
the backrests are tilted to the rear, the greater the risk of injury due to
improper positioning of the belt web!
•
Exercise caution when adjusting the seat height or forwards/back-
wards position. Injuries can be caused if the backrest is tilted without due
care and attention.
Heated seats*
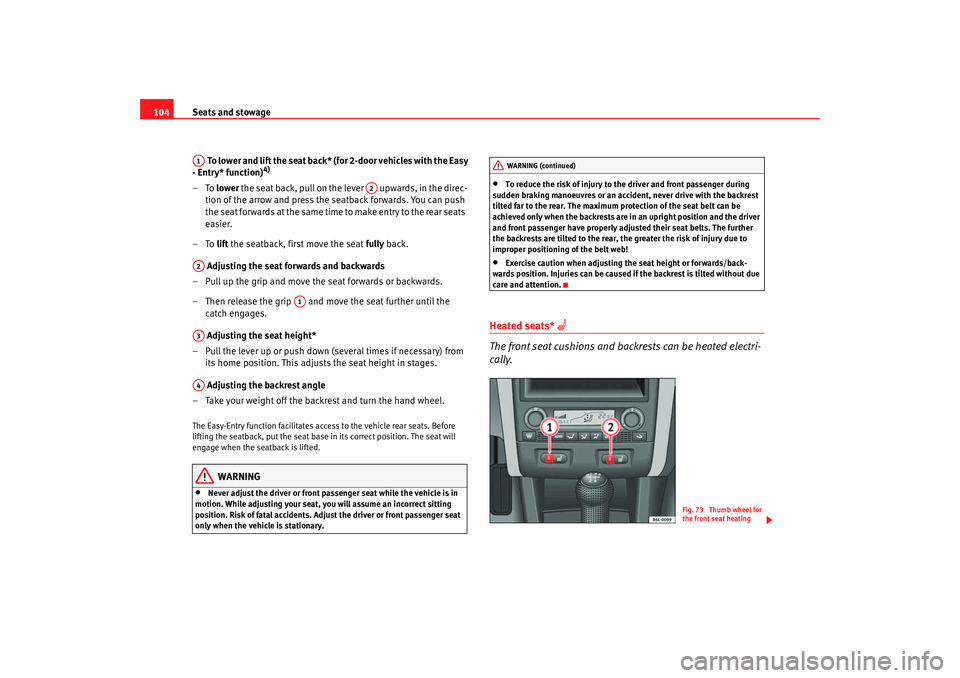
The front seat cushions and backrests can be heated electri-
cally.
A1
A2
A2
A1
A3A4
WARNING (continued)
Fig. 73 Thumb wheel for
the front seat heating
ibiza_ingles Seite 104 Mittwoch, 5. Oktober 2005 5:17 17
Page 114 of 252

Seats and stowage
112Luggage compartment coverRemoving the cover
– Disengage the loops ⇒ fig. 84 from the allotments .
– Extract the cover from its allotment, in its rest position and pull outwards.
WARNING
Do not place heavy or hard objects on the luggage compartment cover, this
will endanger the vehicle occupants in case of sudden braking.
Note
•
Ensure that, when placing items of clothing on the luggage compartment
cover, that rear visibility is not reduced.
Roof carrier*Please observe the following points if you intend to carry loads on the roof:•
For safety reasons, only luggage racks and accessories supplied by offi-
cial SEAT Service should be used.
•
It is imperative to precisely follow the fitting instructions included for the
rack, taking special care when fitting th e front bar in the allotments designed
for this and the rear bar between the marks on the upper part of the rear door
frame while respecting the correct direction of travel indicated in the installa-
tion manual. Not following these instr uctions may lead to paintwork damage
or marks on the bodywork.
•
Pay special attention to the tightening torque of the attachment bolts and
check them following a short journey. If necessary, retighten the bolts and
check them at regular intervals.
•
Distribute the load evenly. A maximum load of 40 kg only is permitted for
each roof carrier system support bar, the load must be distributed evenly over
the entire length. However, the maxi mum load permitted for the entire roof
(including the support system) of 75 kg must not be exceeded nor should the
total weight of the vehicle be exceeded. See the chapter on “Technical Data”.
•
When transporting heavy or large objects on the roof, any change in the
normal vehicle behaviour due to a change in the centre of gravity or an
increased wind resistance must be taken into account. For this reason, a suit-
able speed and driving style must be used.
•
For those vehicles fitted with a sunroof*, ensure that it does not contact
the load on the roof carrier system when opened.
Fig. 84 Luggage
compartment cover
AB
AA
ibiza_ingles Seite 112 Mittwoch, 5. Oktober 2005 5:17 17
Page 137 of 252

Driving135
Safety First
Operating instructions
Tips and Maintenance
Te c h n i c a l D a t a
– Switch off the engine and remove the key from the ignition lock.
Turn the steering wheel slightly to engage the steering lock.
– Always take you car keys with you when you leave the vehicle ⇒ .Additional notes on parking the vehicle on gradients:
Turn the steering wheel so that the vehicle would roll against the kerb if it did
start to roll.•
If the vehicle is facing downhill, turn the front wheels so that they point
towards the kerb.
•
If the vehicle is facing uphill , turn the front wheels so that they point away
from the kerb .
•
Secure the vehicle as normal by applying the handbrake firmly and
selecting first gear.
WARNING
•
Take measures to reduce the risk of injury when you leave your vehicle
unattended.
•
Never park where the hot exhaust system could ignite inflammable
materials, such as dry grass, low bushes, spilt fuel etc.
•
Never allow vehicle occupants to re main in the vehicle when it is
locked. They would be unable to open the vehicle from the inside, and
could become trapped in the vehicle in an emergency. In the event of an
emergency, locked doors will delay assistance to occupants.
•
Never leave children unsupervised in the vehicle. They could set the
vehicle in motion, for example, by releasing the handbrake or the gear
lever / selector lever.
•
Depending on weather conditions, it may become extremely hot or cold
inside the vehicle. This can be fatal.
Cruise control system (CCS)*Description
The cruise control system is able to maintain the set speed in
the range from approx. 30 km/h to 180 km/h.Once the speed setting has been saved, you may take your foot off the accel-
erator.
WARNING
It could be dangerous to use the cruise control system if it is not possible
to drive at constant speed.•
For safety reasons the cruise control system should not be used in
dense traffic, in sections with bends or where roads conditions are poor
(e.g. aquaplaning, loose chippings, slippery surfaces, snow). Risk of acci-
dent.
•
Always switch off the CCS when you have finished using it. This will
prevent you using it by mistake.
•
It is dangerous to use a set speed which is too high for the current road,
traffic or weather conditions. Risk of accident.Note
The cruise control cannot maintain a constant speed when descending gradi-
ents. The vehicle will accelerate under its own weight. Use the foot brake to
slow the vehicle.
ibiza_ingles Seite 135 Mittwoch, 5. Oktober 2005 5:17 17
Page 152 of 252

Driving and the environment
150Connectors
Your vehicle is fitted with a 12-pin connector for the electrical connection
between the trailer and the vehicle.
If the trailer has a 7-pin plug you will need to use an adapter cable. This is
available from any Technical Service.
Trailer weight / draw bar loading
Never exceed the authorised towing limit. If you do not load the trailer up to
the maximum permitted tr ailer weight, you can then climb correspondingly
steeper gradients.
The maximum trailer weights listed are only applicable for altitudes up to
1,000 m above sea level. With increasing altitude the engine power and
therefore the vehicle's climbing ability are impaired because of the reduced
air density. The maximum trailer weight has to be reduced accordingly. The
weight of the vehicle and trailer combination must be reduced by 10% for
every further 1,000m (or part thereof). The gross combination weight is the
actual weight of the laden vehicle plus the actual weight of the laden trailer.
Where possible, operate the trailer with the maximum permitted draw bar
weight on the ball joint of the towing bracket, but do not exceed the specified
limit.
The figures for trailer weights and draw bar weights that are given on the
data plate of the towing bracket are for certification purposes only. The
correct figures for your specific model, which may be lower than these figures
for the towing bracket, are given in the registration documents and
⇒ Section “Technical data”.
Distributing the load
Distribute loads in the trailer so that heavy objects are as near to the axle as
possible. Loads carried in the trailer must be secured to prevent them
moving. Tyre pressure
Set tyre pressure to the maximum permissible pressure shown on the sticker
on the inside of the fuel tank flap. Set the tyre pressure of the trailer tyres in
accordance with the trailer manufacturer's recommendations.
Exterior mirrors
Check whether you can see enough of the road behind the trailer with the
standard mirrors. If this is not the case you should have additional mirrors
fitted. Both exterior mirrors shoul
d be mounted on hinged extension
brackets. Adjust the mirrors to give sufficient vision to the rear.
WARNING
Never transport people in a trailer. This could result in fatal accidents.
Note
•
Towing a trailer places additional demands on the vehicle. We recom-
mend additional services between the normal inspection intervals if the
vehicle is used frequently for towing a trailer.
•
Find out whether special regulations apply to towing a trailer in your
country.
Ball coupling of towing bracket*
The ball coupling of the towing bracket is located in the tool
boxThe ball coupling is provided with inst ructions on fitting and removing the
ball coupling of the towing bracket.
ibiza_ingles Seite 150 Mittwoch, 5. Oktober 2005 5:17 17
Page 153 of 252

Driving and the environment151
Safety First
Operating instructions
Tips and Maintenance
Te c h n i c a l D a t a
WARNING
The towing bracket ball coupling must be stored securely in the luggage
compartment to prevent them being flung through the vehicle and causing
injury.
Note
•
By law, the ball coupling must be re moved if a trailer is not being towed
and it obscures the number plate.
Driving tips
Driving with a trailer always requires extra care.Weight distribution
The weight distribution of a loaded trailer with an unladen vehicle is very
unfavourable. However, if this cannot be avoided, drive extra slowly to allow
for the unbalanced weight distribution.
Speed
The stability of the vehicle and trailer is reduced with increasing speed. For
this reason it is advisable not to drive at the maximum permissible speed in
unfavourable road, weather or wind conditions. This applies especially when
driving downhill.
You should always reduce speed immediat ely if the trailer shows the slightest
sign of snaking . Never try to stop the “snaking” by increasing speed.
Always brake in good time. If the trailer has an overrun brake, apply the
brakes gently at first and then firmly. This will prevent the jerking that can be
caused by the trailer wheels locking. Se lect a low gear in good time before
going down a steep descent. This enables you to use the engine braking to
slow down the vehicle. Heating
When climbing long hills in hot weather
with the engine running fast in a low
gear, you should keep an eye on the coolant temperature gauge ⇒page 51.
Electronic Stabilisation Program*
Do not switch off the ESP* when towing a trailer. The ESP* makes it easier to
stabilise if the trailer starts to snake.
Driving economically and with respect for the
environmentGeneral notes
Fuel consumption depends largely on your personal driving
style.Fuel economy, environmental impact and wear on the engine, brakes and
tyres depend largely on three factors:•
Personal driving style
•
Conditions of use (weather, road surface)
•
Technical requirements
By adopting an economical driving style and anticipating the traffic situation
ahead, you can easily reduce fuel consumption by 10-15%. This section
suggests methods of lessening the impact on the environment and reducing
your operating costs at the same time.
ibiza_ingles Seite 151 Mittwoch, 5. Oktober 2005 5:17 17
Page 167 of 252

Accessories, parts replacement and modifications165
Safety First
Operating instructions
Tips and Maintenance
Te c h n i c a l D a t a
If a towing bracket is to be fitted after the vehicle is purchased, this must be
completed according to the instructions of the towing bracket manufacturer.
The attachment points for the towing bracket are underneath the vehicle.
The distance between the centre of th
e ball coupling and the ground should
never be lower than the measurement indicated when the vehicle is fully
loaded including the maximum resting weight.
Measurement for securin g the towing bracket:
68 mm
420 mm (empty vehicle) to 350 mm (fully laden vehicle)
960 mm
345 mm
188 mm
Fitting a towing bracket
•
Driving with a trailer implies additional work for the vehicle. Therefore,
before fitting a towing bracket, please contact an Authorised Service Centre
to check whether your cooling system needs modification.
•
Observe the legal requirements in yo ur country (e.g. the fitting of a sepa-
rate warning lamp).
•
Certain vehicle componen ts, e.g. the rear bumper must be removed and
reinstalled. The towing bracket securi ng bolts must be tightened using a
torque wrench, and an electrical sock et must be used to connect to the
vehicle's electrical system. This requires specialist knowledge and tools.
•
The figures in the illustration show the dimensions and attachment points
which must be observed if you are retrofitting a towing bracket.
WARNING
Towing brackets should be fitted by specialists.•
If the towing bracket is incorrectly installed, there is serious danger of
an accident.
•
For your own safety, please observe the instructions provided by the
manufacturer of the towing bracket.Caution
•
If the electrical socket is incorrectly installed, this could cause damage to
the vehicle's electrical system.
AA
ABACADAEAF
WARNING (continued)
ibiza_ingles Seite 165 Mittwoch, 5. Oktober 2005 5:17 17