Page 368 of 444

11 -4 3
Maintenance and service
– CONTINUED –
11
18 February 2004
3. Drive the vehicle for about 220 yards (200 meters)
in this condition.
4. Wait 5 to 10 minutes for the parking brake to cool
down. Repeat this procedure.
5. Check the parking brake stroke. If the parking
brake stroke is out of the specified range, adjust it by
turning the adjusting nut located on the parking brake
lever.Parking brake stroke:
7 – 8 notches / 44 lbs (196 N, 20 kg)
A safe location and situation should be select-ed for break-in driving.Pulling the parking brake lever too forcefully
may cause the rear wheels to lock. To avoid
this, be certain to pull the lever up slowly andgently.
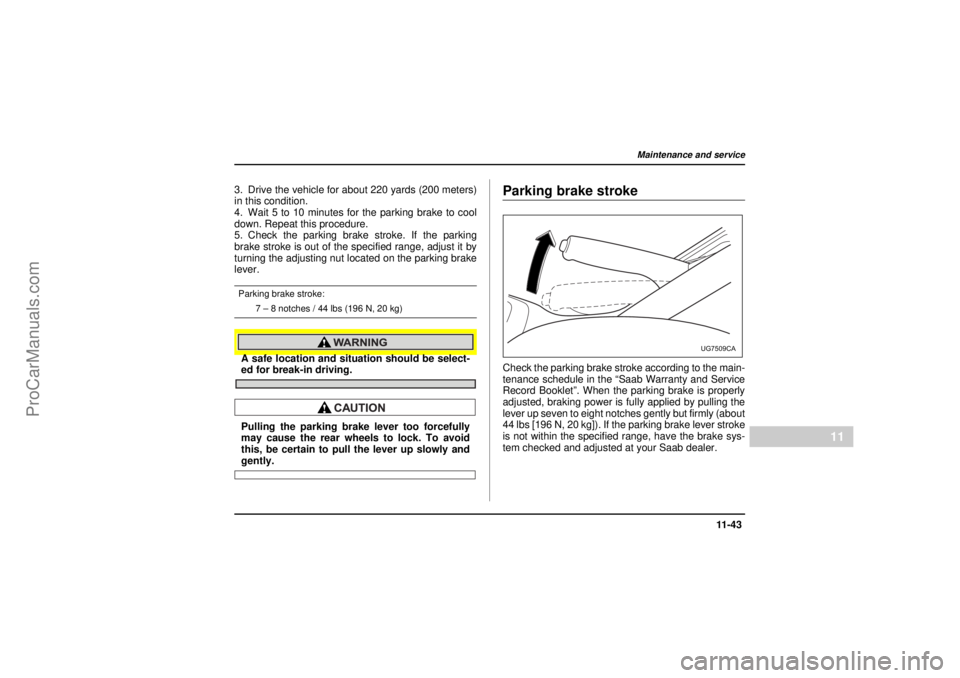
Parking brake strokeCheck the parking brake stroke according to the main-
tenance schedule in the “Saab Warranty and Service
Record Booklet”. When the parking brake is properly
adjusted, braking power is fully applied by pulling the
lever up seven to eight notches gently but firmly (about
44 lbs [196 N, 20 kg]). If the parking brake lever stroke
is not within the specified range, have the brake sys-
tem checked and adjusted at your Saab dealer.
UG7509CA
ProCarManuals.com
Page 376 of 444

11 -5 1
Maintenance and service
– CONTINUED –
11
18 February 2004
"Wheel replacementWhen replacing wheels due, for example, to damage,
make sure the replacement wheels match the specifi-
cations of the wheels that are fitted as standard equip-
ment. Replacement wheels are available from Saab
dealers.Use only those wheels that are specified for
your vehicle. Wheels not meeting specifica-
tions could interfere with brake caliper opera-
tion and may cause the tires to rub against the
wheel well housing during turns. The resulting
loss of vehicle control could lead to an acci-dent.NOTEWhen any of the wheels is removed and replaced
for tire rotation or to change a flat tire, always
check the tightness of the wheel nuts after driving
approximately 600 miles (1,000 km). If any nut is
loose, tighten it to the specified torque.
Aluminum wheelsAluminum wheels can be scratched and damaged
easily. Handle them carefully to maintain their appear-
ance, performance, and safety.
!When any of the wheels is removed and replaced
for tire rotation or to change a flat, always check the
tightness of the wheel nuts after driving approximately
600 miles (1,000 km). If any nut is loose, tighten it to
the specified torque.
!Never apply oil to the threaded parts, wheel nuts, or
tapered surface of the wheel.
!Never let the wheel rub against sharp protrusions or
curbs.
!Be sure to fit tire chains on uniformly and completely
around the tire, otherwise the chains may scratch the
wheel.
!When wheel nuts, balance weights, or the center
cap is replaced, be sure to replace them with genuine
Saab parts designed for aluminum wheels.
ProCarManuals.com
Page 392 of 444

11 -6 7
Maintenance and service
– CONTINUED –
11
18 February 2004
"HID headlight bulbs (optional on cer-
tain U.S. models)High-intensity-discharge (HID) bulbs are used
for the low beams of the headlights. These HID
bulbs use an extremely high voltage. To avoid
the risk of an electric shock and resulting seri-
ous injury, you should not attempt to replace
them. Neither should you attempt to replace the
high-beam bulbs, remove/refit the headlight as-
semblies, or remove any headlight-assembly
components. For replacement of the headlight
bulbs (low-beam and high-beam), removal and
installation of the headlight assemblies, and re-
moval of headlight-assembly components,
contact your Saab dealer.
Ask your Saab dealer to check whether your ve-hicle is equipped with HID headlights. Wattage Bulb No.
1) Low beam head light
U.S.-spec. halogen 12V-35W D2R
Others 12V-55W H1
2) High beam head light 12V-60W 9005
(HB3)
3) Front side marker light 12V-5W W5W
4) Spot light 12V-8W –
5) Room light 12V-8W –
6) Front turn signal 12V-21W WY21W
7) Parking light 12V-5W W5W
8) Front fog light 12V-57W 9006
(HB4)
9) High mount stop light 12V-1.3W LED
10) Rear turn signal light 12V-21W
(Amber)7440A
11) Cargo area light 12V-5W W5W
12) Brake/tail light 12V-5W W5W
13) Backup light 12V-16W 921
14) License plate light 12V-5W W5W
ProCarManuals.com
Page 403 of 444
11 - 7 8Maintenance and service
18 February 2004
1) Rear turn signal light
Brake/tail light
2) Backup light3. Remove the bulb holder from the rear combination
light assembly by turning it counterclockwise.
4. Remove the bulb from the socket by pushing it and
turning counterclockwise. Install a new bulb.
5. Set the bulb holder into the rear combination light
assembly and turn it clockwise until it locks.
6. Close the cover and latch the lock.
7. Reinstall the rear combination light assembly and
its side cover.
"License plate light1. Remove the mounting screws using a Phillips
screwdriver.
2. Remove the cover and lens.
3. Pull the bulb out of the socket. Install a new bulb.
4. Reinstall the lens and cover.
5. Tighten the mounting screws.
1
2
3
UGB102BB
UGB103BA
ProCarManuals.com