2005 PONTIAC BONNEVILLE clock
[x] Cancel search: clockPage 204 of 438
wSEEKx:The tape must have at least
three seconds of silence between each selection for
seek to work. Press the up or the down arrow to search
for the next or the previous selection on the tape.
You can skip as many as nine selections up or down on
the tape. Choose how many selections you want to
skip, then press the SEEK arrow that many times.
The number of selections to be skipped will appear on
the display.
wSCANx:Press and hold one of the arrows for
more than two seconds until SCAN appears on
the display and you hear a beep. The tape will go to the
next selection, play for a few seconds, then go on to
the next selection. The tape will scan forward only.
Press either arrow again to stop scanning.
BAND:Press this button to listen to the radio when a
cassette tape or CD is playing. The inactive tape or CD
will remain safely inside the radio for future listening.
CD TAPE:Press this button to play a cassette tape or
CD when listening to the radio. The inactive tape or
CD will remain safely inside the radio for future listening.
Z(Eject):Press this button, located next to the
cassette tape slot, to eject a tape. Eject may be
activated with either the ignition or radio off. Cassette
tapes may be loaded with the ignition and radio off if this
button is pressed �rst.
Cassette Tape Messages
If an error occurs while trying to play a cassette tape, it
could be for one of the following reasons:
TIGHT TAPE:This message is displayed when the
tape is tight and the player cannot turn the tape hubs.
Remove the tape. Hold the tape with the open end down
and try to turn the right hub counterclockwise with a
pencil. Turn the tape over and repeat. If the hubs do not
turn easily, the tape may be damaged and should not
be used in the player. Try a new tape to make sure the
player is working properly.
BROKEN TAPE:This message is displayed when the
tape is broken. Try a new tape.
WRAPPED TAPE:This message is displayed when the
tape is wrapped around the tape head. Attempt to get
the cassette out. Try a new tape.
CLEAN PLAYER:If this message appears on the
display, the cassette tape player needs to be cleaned. It
will still play tapes, but it should be cleaned as soon
as possible to prevent damage to the tapes and player.
SeeCare of Your Cassette Tape Player on page 3-101.
If the cassette tape is not playing correctly, for any
other reason, try a known good cassette.
If any error occurs repeatedly or if an error cannot be
corrected, contact your GM dealer. If the radio displays
an error message, write it down and provide it to
your GM dealer when reporting the problem.
3-92
Page 227 of 438
If you need to reduce your speed as you approach a
curve, do it before you enter the curve, while your front
wheels are straight ahead.
Try to adjust your speed so you can “drive” through the
curve. Maintain a reasonable, steady speed. Wait to
accelerate until you are out of the curve, and then
accelerate gently into the straightaway.
Steering in Emergencies
There are times when steering can be more effective than
braking. For example, you come over a hill and �nd a
truck stopped in your lane, or a car suddenly pulls out
from nowhere, or a child darts out from between parked
cars and stops right in front of you. You can avoid these
problems by braking — if you can stop in time. But
sometimes you cannot; there is not room. That is the time
for evasive action — steering around the problem.
Your vehicle can perform very well in emergencies like
these. First apply your brakes.
SeeBraking on page 4-5. It is better to remove as much
speed as you can from a possible collision. Then
steer around the problem, to the left or right depending
on the space available.An emergency like this requires close attention and a
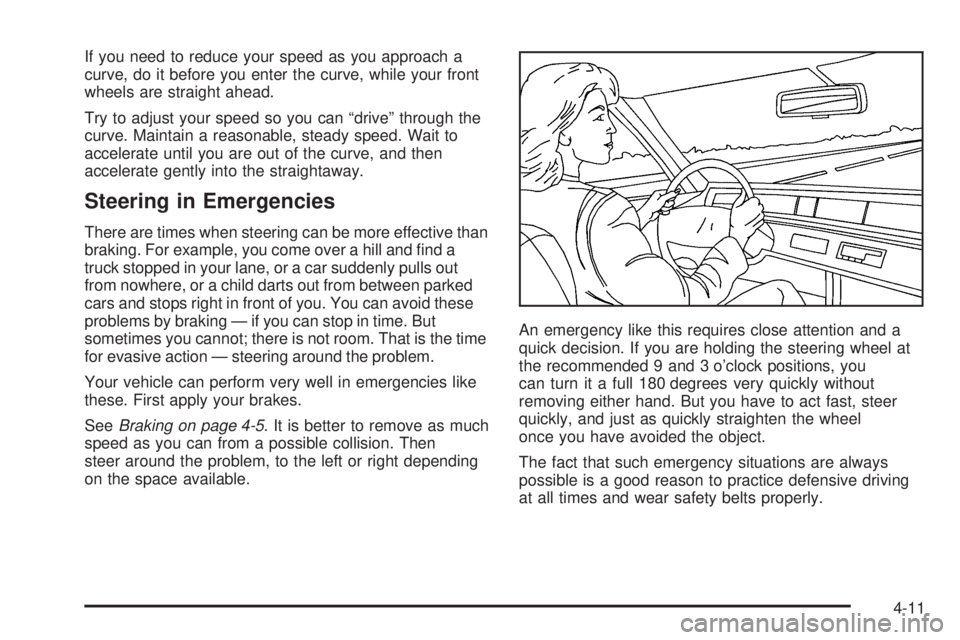
quick decision. If you are holding the steering wheel at
the recommended 9 and 3 o’clock positions, you
can turn it a full 180 degrees very quickly without
removing either hand. But you have to act fast, steer
quickly, and just as quickly straighten the wheel
once you have avoided the object.
The fact that such emergency situations are always
possible is a good reason to practice defensive driving
at all times and wear safety belts properly.
4-11
Page 268 of 438
Filling Your Tank
{CAUTION:
Fuel vapor burns violently and a fuel �re can
cause bad injuries. To help avoid injuries to you
and others, read and follow all the instructions
on the pump island. Turn off your engine when
you are refueling. Do not smoke if you are near
fuel or refueling your vehicle. Keep sparks,
�ames and smoking materials away from fuel.
Do not leave the fuel pump unattended when
refueling your vehicle — this is against the law
in some places. Keep children away from the
fuel pump; never let children pump fuel.
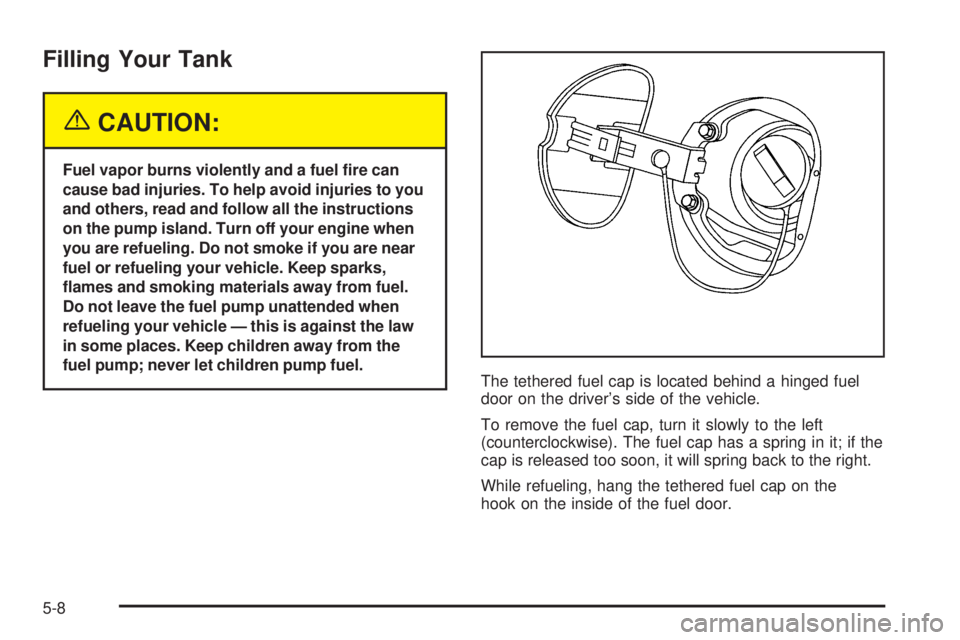
The tethered fuel cap is located behind a hinged fuel
door on the driver’s side of the vehicle.
To remove the fuel cap, turn it slowly to the left
(counterclockwise). The fuel cap has a spring in it; if the
cap is released too soon, it will spring back to the right.
While refueling, hang the tethered fuel cap on the
hook on the inside of the fuel door.
5-8
Page 269 of 438
{CAUTION:
If you spill fuel and then something ignites it,
you could be badly burned. Fuel can spray out
on you if you open the fuel cap too quickly.
This spray can happen if your tank is nearly
full, and is more likely in hot weather. Open
the fuel cap slowly and wait for any hiss noise
to stop. Then unscrew the cap all the way.
Be careful not to spill fuel. Do not top off or over�ll the
tank and wait a few seconds after you have �nished
pumping before removing the nozzle. Clean fuel
from painted surfaces as soon as possible.
SeeWashing Your Vehicle on page 5-105.
When replacing the fuel cap, turn it to the right
(clockwise) until it clicks. Make sure the cap is fully
installed. The diagnostic system can determine if the
fuel cap has been left off or improperly installed.
This would allow fuel to evaporate into the atmosphere.
SeeMalfunction Indicator Lamp on page 3-48.If your vehicle has the optional Driver Information
Center (DIC), the CHECK GAS CAP message will be
displayed if the fuel cap is not properly reinstalled.{CAUTION:
If a �re starts while you are refueling, do not
remove the nozzle. Shut off the �ow of fuel by
shutting off the pump or by notifying the
station attendant. Leave the area immediately.
Notice:If you need a new fuel cap, be sure to get
the right type. Your dealer can get one for you.
If you get the wrong type, it may not �t properly.
This may cause your malfunction indicator lamp to
light and may damage your fuel tank and emissions
system. SeeMalfunction Indicator Lamp on
page 3-48.
5-9
Page 290 of 438
Then, without shutting off the engine, follow these steps:
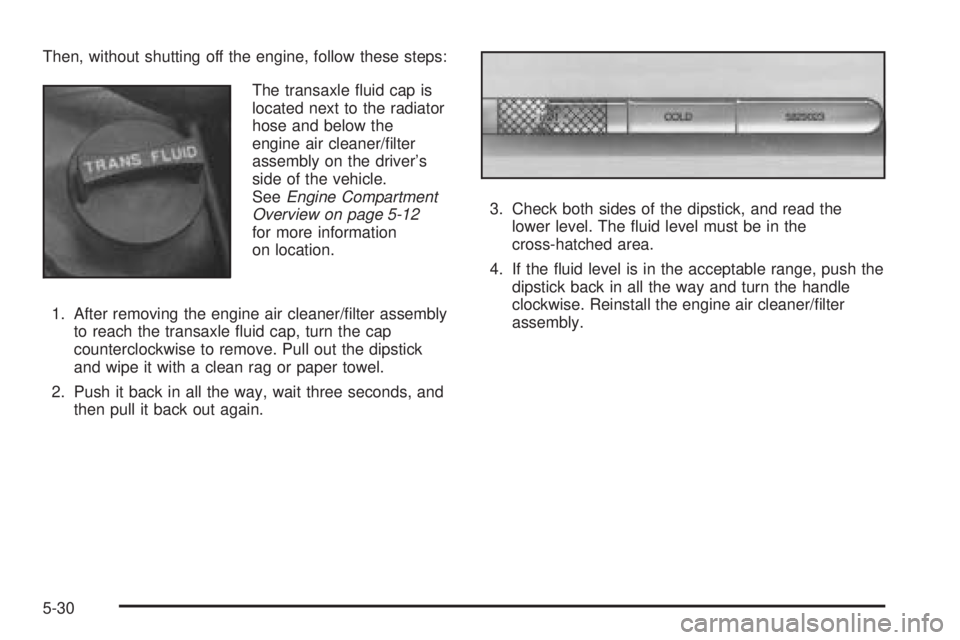
The transaxle �uid cap is
located next to the radiator
hose and below the
engine air cleaner/�lter
assembly on the driver’s
side of the vehicle.
SeeEngine Compartment
Overview on page 5-12
for more information
on location.
1. After removing the engine air cleaner/�lter assembly
to reach the transaxle �uid cap, turn the cap
counterclockwise to remove. Pull out the dipstick
and wipe it with a clean rag or paper towel.
2. Push it back in all the way, wait three seconds, and
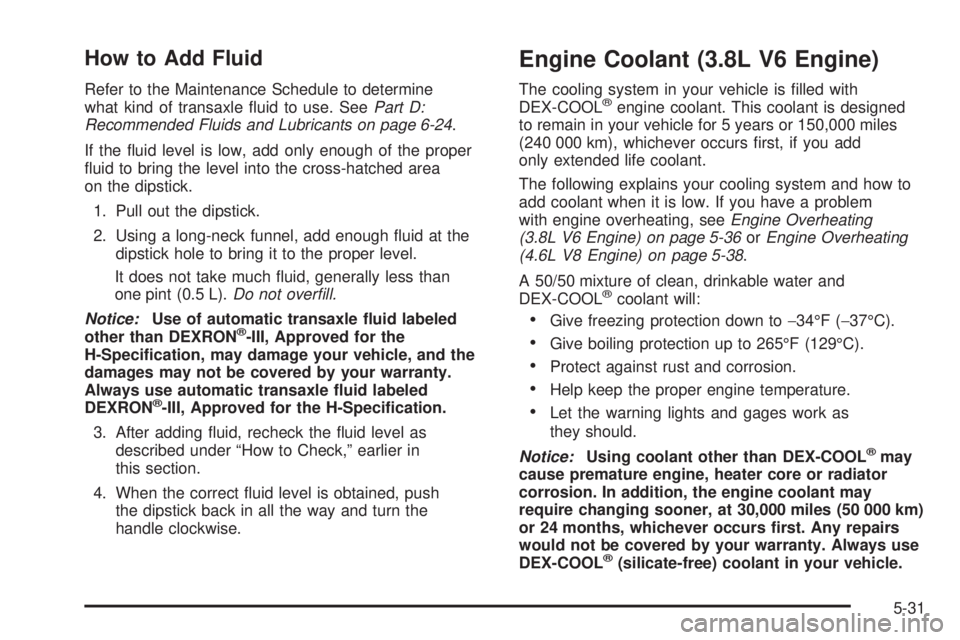
then pull it back out again.3. Check both sides of the dipstick, and read the
lower level. The �uid level must be in the
cross-hatched area.
4. If the �uid level is in the acceptable range, push the
dipstick back in all the way and turn the handle
clockwise. Reinstall the engine air cleaner/�lter
assembly.
5-30
Page 291 of 438
How to Add Fluid
Refer to the Maintenance Schedule to determine
what kind of transaxle �uid to use. SeePart D:
Recommended Fluids and Lubricants on page 6-24.
If the �uid level is low, add only enough of the proper
�uid to bring the level into the cross-hatched area
on the dipstick.
1. Pull out the dipstick.
2. Using a long-neck funnel, add enough �uid at the
dipstick hole to bring it to the proper level.
It does not take much �uid, generally less than
one pint (0.5 L).Do not over�ll.
Notice:Use of automatic transaxle �uid labeled
other than DEXRON
®-III, Approved for the
H-Speci�cation, may damage your vehicle, and the
damages may not be covered by your warranty.
Always use automatic transaxle �uid labeled
DEXRON
®-III, Approved for the H-Speci�cation.
3. After adding �uid, recheck the �uid level as
described under “How to Check,” earlier in
this section.
4. When the correct �uid level is obtained, push
the dipstick back in all the way and turn the
handle clockwise.
Engine Coolant (3.8L V6 Engine)
The cooling system in your vehicle is �lled with
DEX-COOL®engine coolant. This coolant is designed
to remain in your vehicle for 5 years or 150,000 miles
(240 000 km), whichever occurs �rst, if you add
only extended life coolant.
The following explains your cooling system and how to
add coolant when it is low. If you have a problem
with engine overheating, seeEngine Overheating
(3.8L V6 Engine) on page 5-36orEngine Overheating
(4.6L V8 Engine) on page 5-38.
A 50/50 mixture of clean, drinkable water and
DEX-COOL
®coolant will:
Give freezing protection down to−34°F (−37°C).
Give boiling protection up to 265°F (129°C).
Protect against rust and corrosion.
Help keep the proper engine temperature.
Let the warning lights and gages work as
they should.
Notice:Using coolant other than DEX-COOL
®may
cause premature engine, heater core or radiator
corrosion. In addition, the engine coolant may
require changing sooner, at 30,000 miles (50 000 km)
or 24 months, whichever occurs �rst. Any repairs
would not be covered by your warranty. Always use
DEX-COOL
®(silicate-free) coolant in your vehicle.
5-31
Page 303 of 438
If the overheat warning continues, there is one more
thing you can try. You can add the proper coolant
mixture directly to the radiator, but be sure the cooling
system is cool before you do it.
{CAUTION:
Steam and scalding liquids from a hot cooling
system can blow out and burn you badly.
They are under pressure, and if you turn the
radiator pressure cap — even a little — they
can come out at high speed. Never turn the
cap when the cooling system, including the
radiator pressure cap, is hot. Wait for the
cooling system and radiator pressure cap to
cool if you ever have to turn the pressure cap.
How to Add Coolant to the Radiator
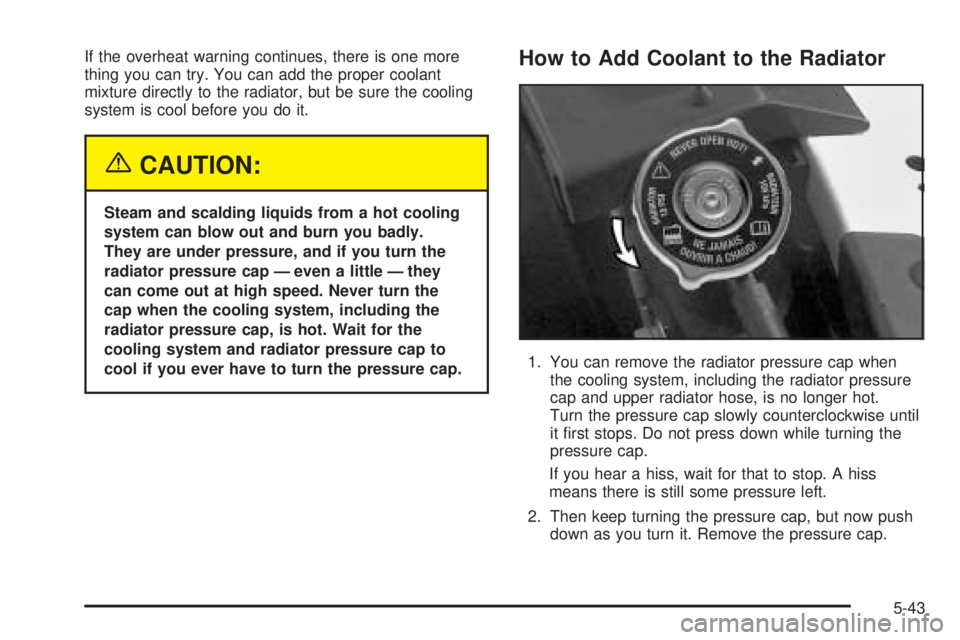
1. You can remove the radiator pressure cap when
the cooling system, including the radiator pressure
cap and upper radiator hose, is no longer hot.
Turn the pressure cap slowly counterclockwise until
it �rst stops. Do not press down while turning the
pressure cap.
If you hear a hiss, wait for that to stop. A hiss
means there is still some pressure left.
2. Then keep turning the pressure cap, but now push
down as you turn it. Remove the pressure cap.
5-43
Page 304 of 438
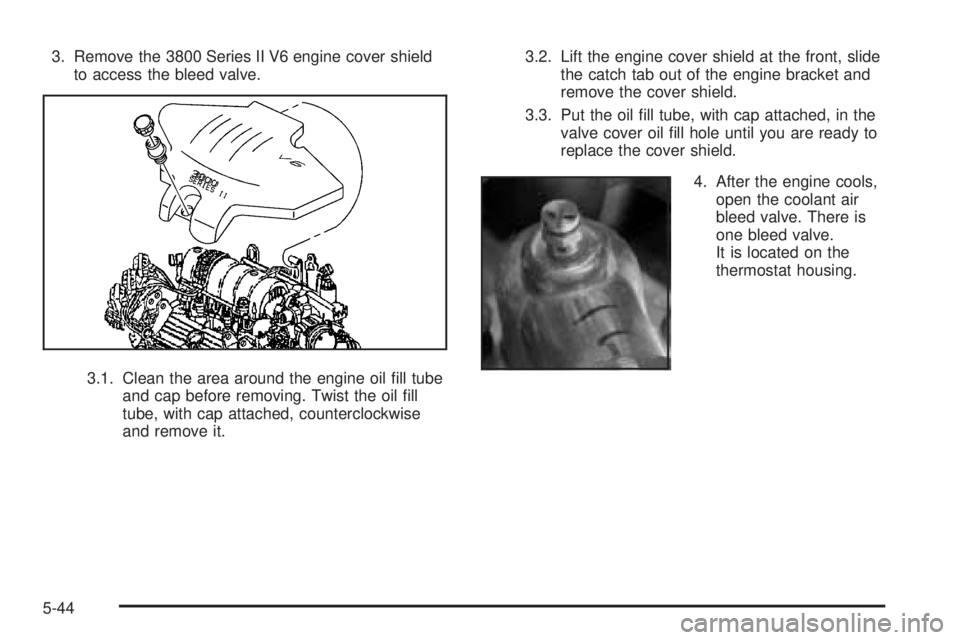
3. Remove the 3800 Series II V6 engine cover shield
to access the bleed valve.
3.1. Clean the area around the engine oil �ll tube
and cap before removing. Twist the oil �ll
tube, with cap attached, counterclockwise
and remove it.3.2. Lift the engine cover shield at the front, slide
the catch tab out of the engine bracket and
remove the cover shield.
3.3. Put the oil �ll tube, with cap attached, in the
valve cover oil �ll hole until you are ready to
replace the cover shield.
4. After the engine cools,
open the coolant air
bleed valve. There is
one bleed valve.
It is located on the
thermostat housing.
5-44