Page 115 of 279
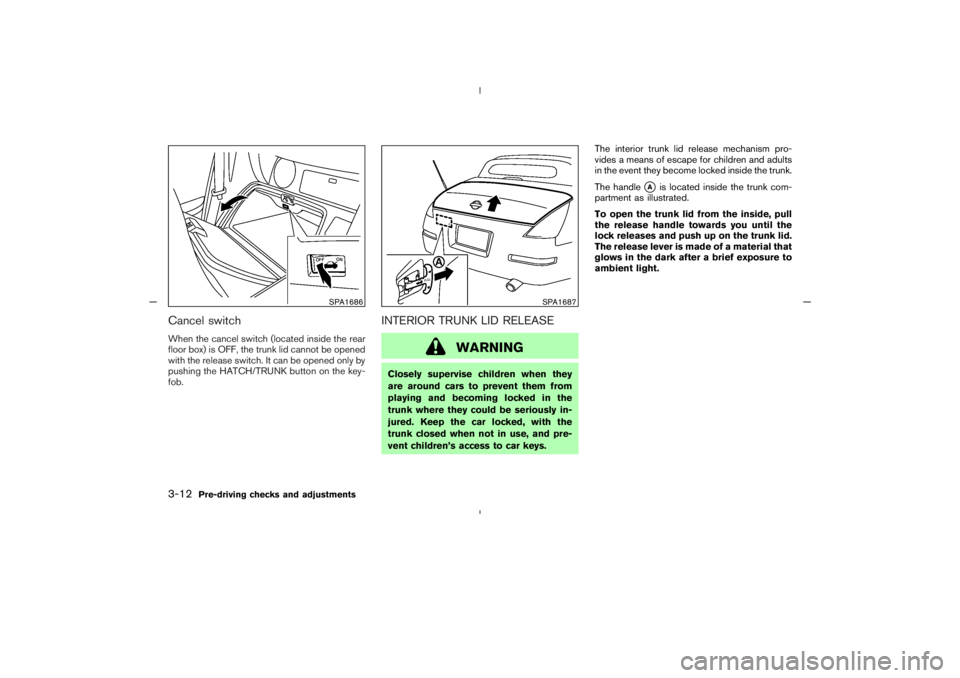
Cancel switchWhen the cancel switch (located inside the rear
floor box) is OFF, the trunk lid cannot be opened
with the release switch. It can be opened only by
pushing the HATCH/TRUNK button on the key-
fob.
INTERIOR TRUNK LID RELEASE
WARNING
Closely supervise children when they
are around cars to prevent them from
playing and becoming locked in the
trunk where they could be seriously in-
jured. Keep the car locked, with the
trunk closed when not in use, and pre-
vent children’s access to car keys.The interior trunk lid release mechanism pro-
vides a means of escape for children and adults
in the event they become locked inside the trunk.
The handle
�A
is located inside the trunk com-
partment as illustrated.
To open the trunk lid from the inside, pull
the release handle towards you until the
lock releases and push up on the trunk lid.
The release lever is made of a material that
glows in the dark after a brief exposure to
ambient light.
SPA1686
SPA1687
3-12
Pre-driving checks and adjustments
�
04.8.23/Z33-D/V5.0
�
Page 116 of 279
SECONDARY TRUNK LID RELEASEThe secondary trunk lid release mechanism al-
lows opening the trunk lid in the event of dis-
charged battery or emergency.
Remove the cover
�1
(located inside of the rear
floor box) using a suitable tool
�2
as shown.
Access the release (string) handle�3.
To open the trunk lid from the inside, firmly
pull the release handle to the direction
shown above until the lock releases.
OPENER OPERATIONTo open the fuel filler lid, push the opener switch
located below the instrument panel. To lock,
close the fuel filler lid securely.
SPA1688
SPA1508
FUEL FILLER LIDPre-driving checks and adjustments
3-13
�
04.8.23/Z33-D/V5.0
�
Page 120 of 279
The night position
�1
will reduce glare from the
headlights of vehicles behind you at night.
Use the day position�2when driving in daylight
hours.
WARNING
Use the night position only when neces-
sary, because it reduces rear view clar-
ity.
AUTOMATIC ANTI-GLARE INSIDE
MIRROR (if so equipped)The inside mirror is designed so that it automati-
cally changes reflection according to the inten-
sity of the headlight of the following vehicle.
When the inside mirror is in the AUTO position�1, excessive glare from the headlights of the
vehicle behind you will be reduced. The AUTO
indicator light
�A
(green) will be on. When the
switch of the inside mirror is in the OFF position
�2, the inside mirror will operate normally.
For HomeLink
Universal Transceiver, see thedescription in the “2. Instruments and controls”
section.
PD1006MB
SPA1709A
Pre-driving checks and adjustments
3-17
�
04.8.23/Z33-D/V5.0
�
Page 121 of 279
OUTSIDE MIRRORS
WARNING
Objects viewed in the outside mirror on
the passenger side are closer than they
appear. Be careful when moving to the
right. Using only this mirror could cause
an accident. Use the inside mirror or
glance over your shoulder to properly
judge distances to other objects.The outside mirror will operate only when the
ignition switch is in the ACC or ON position.
Turn the control knob(located on the driver side
door armrest) to right or left to select the right or
left outside mirror, then adjust using the knob.
Foldable outside mirrorsFold the outside mirror by pushing it toward the
rear of the vehicle.
SPA1390
IC0565
3-18
Pre-driving checks and adjustments
�
04.8.23/Z33-D/V5.0
�
Page 122 of 279
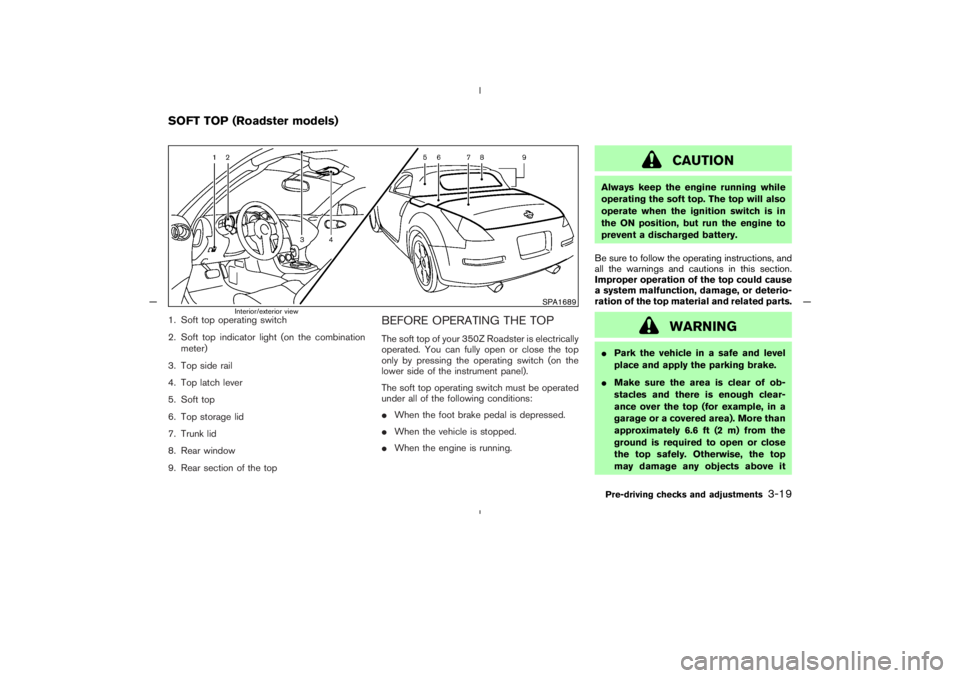
1. Soft top operating switch
2. Soft top indicator light (on the combination
meter)
3. Top side rail
4. Top latch lever
5. Soft top
6. Top storage lid
7. Trunk lid
8. Rear window
9. Rear section of the top
BEFORE OPERATING THE TOPThe soft top of your 350Z Roadster is electrically
operated. You can fully open or close the top
only by pressing the operating switch (on the
lower side of the instrument panel).
The soft top operating switch must be operated
under all of the following conditions:
�When the foot brake pedal is depressed.
�When the vehicle is stopped.
�When the engine is running.
CAUTION
Always keep the engine running while
operating the soft top. The top will also
operate when the ignition switch is in
the ONposition, but run the engine to
prevent a discharged battery.
Be sure to follow the operating instructions, and
all the warnings and cautions in this section.
Improper operation of the top could cause
a system malfunction, damage, or deterio-
ration of the top material and related parts.
WARNING
�Park the vehicle in a safe and level
place and apply the parking brake.
�Make sure the area is clear of ob-
stacles and there is enough clear-
ance over the top (for example, in a
garage or a covered area). More than
approximately 6.6 ft (2 m) from the
ground is required to open or close
the top safely. Otherwise, the top
may damage any objects above it
SPA1689
Interior/exterior view
SOFT TOP (Roadster models)
Pre-driving checks and adjustments
3-19
�
04.8.23/Z33-D/V5.0
�
Page 123 of 279
while moving. The top operating sys-
tem could also be damaged.
�Do not operate the top in a strong
wind. It could be blown by the wind,
striking someone or damage the top.
�Do not allow anyone to stand up or
extend any portion of their body out
of the opening while the vehicle is in
motion or while the top is being op-
erated.
�In an accident you could be thrown
from the vehicle with an open top.
Always use seat belts and proper
child restraints.
CAUTION
�Do not operate the top when the
temperature is below 32°F (0°C). This
may result in damage to the top ma-
terial or operating system.
�Remove water drops, snow, ice or
sand from the top, and dry the sur-face of the top completely before
opening it.
�Do not open the top when it is wet or
damp. This may cause interior water
damage, stains or mildew on the top
material.
�Be sure to turn off the rear window
defroster switch. Never turn it on
while the top is being operated or
fully opened. The heat may damage
the top material.
CAUTION
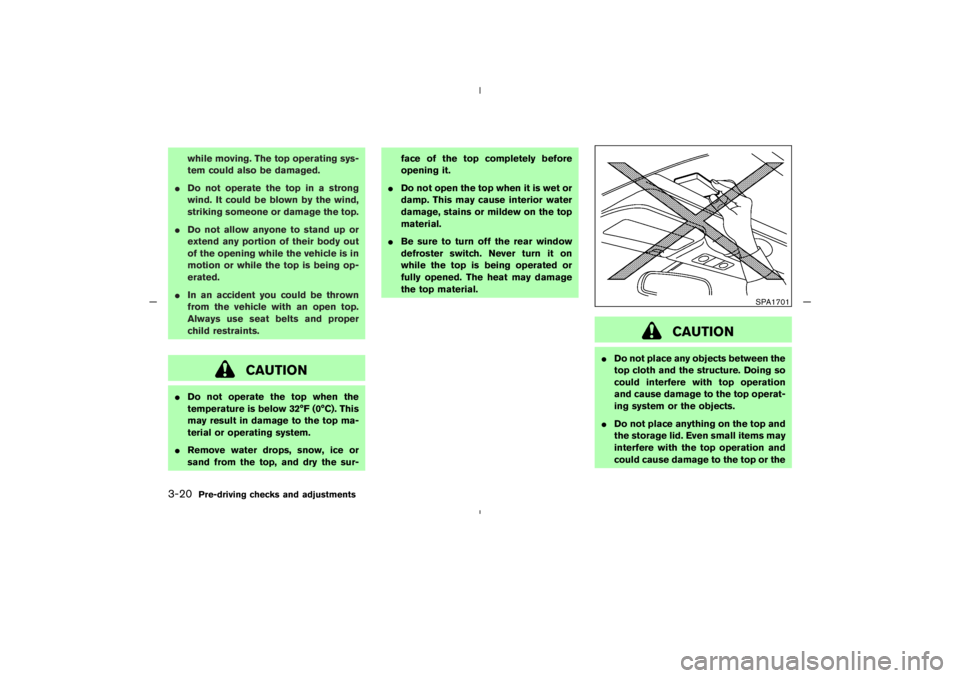
�Do not place any objects between the
top cloth and the structure. Doing so
could interfere with top operation
and cause damage to the top operat-
ing system or the objects.
�Do not place anything on the top and
the storage lid. Even small items may
interfere with the top operation and
could cause damage to the top or the
SPA1701
3-20
Pre-driving checks and adjustments
�
04.8.23/Z33-D/V5.0
�
Page 124 of 279
vehicle body.
�Do not place anything in the top stor-
age area. The top will not fit there
properly, and this could damage the
top and/or the vehicle body.
�Do not sit or place excessive weight
on the top and the storage lid, espe-
cially when the top is being operated.
The top may be damaged.
�Do not drive the vehicle with the top
partially opened. Always make sure
the top is either fully opened or
closed before driving.
�Secure items so that they cannot be
blown from the vehicle while driving
with the top open.
�When a child restraint is installed in
the passenger seat, be sure to turn
the seatback tilt cancel switch (lo-
cated on the passenger seatback) to
the CANCEL position, or the child
restraint may be damaged.
Make sure the trunk lid is securely closed before
operating the top.
WHEN OPERATING THE TOP
WARNING
Keep hands and other parts of the body
away from moving parts such as the top,
storage lid and power windows.
CAUTION
Keep all parts of the top linkage clear of
obstructions, or the top latch may not be
securely locked.NOTE:
�In case of low battery or low tempera-
ture, the top may temporarily stop mov-
ing during the operation. This functions
to protect the top control mechanism,
and it is not a malfunction.
�If the top is opened and closed repeat-
edly in a short period of time, it may
stop moving to protect the top motor.
Wait for a few minutes before operating
the top again.
Pre-driving checks and adjustments
3-21
�
04.8.23/Z33-D/V5.0
�
Page 125 of 279
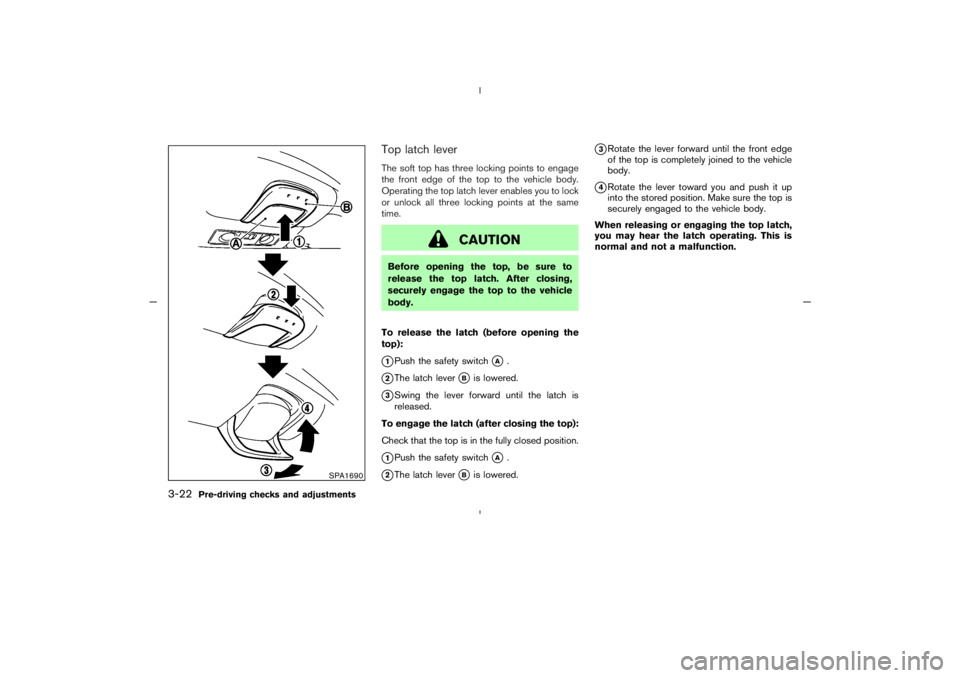
Top latch leverThe soft top has three locking points to engage
the front edge of the top to the vehicle body.
Operating the top latch lever enables you to lock
or unlock all three locking points at the same
time.
CAUTION
Before opening the top, be sure to
release the top latch. After closing,
securely engage the top to the vehicle
body.
To release the latch (before opening the
top):�1Push the safety switch
�A
.
�2The latch lever
�B
is lowered.
�3Swing the lever forward until the latch is
released.
To engage the latch (after closing the top):
Check that the top is in the fully closed position.
�1Push the safety switch
�A
.
�2The latch lever
�B
is lowered.
�3Rotate the lever forward until the front edge
of the top is completely joined to the vehicle
body.
�4Rotate the lever toward you and push it up
into the stored position. Make sure the top is
securely engaged to the vehicle body.
When releasing or engaging the top latch,
you may hear the latch operating. This is
normal and not a malfunction.
SPA1690
3-22
Pre-driving checks and adjustments
�
04.8.23/Z33-D/V5.0
�