Page 917 of 1500

GENERAL DESCRIPTION
ENGINE COOLING14-2
GENERAL DESCRIPTIONM1141000100401
The cooling system is designed to keep every
part of the engine at appropriate temperature in
whatever condition the engine may be operated.
The cooling method is of the water-cooled, pres-
sure forced circulation type in which the water
pump pressurizes coolant and circulates it
throughout the engine. If the coolant temperature exceeds the prescribed temperature, the thermo-
stat opens to circulate the coolant through the
radiator as well so that the heat absorbed by the
coolant may be radiated into the air. The water
pump is of the centrifugal type and is driven by
the drive belt from the crankshaft. The radiator is
the corrugated fin, down flow type.
SPECIAL TOOLM1141000600279
ENGINE COOLING DIAGNOSIS
INTRODUCTIONM1141005300347
The system cools the engine so that it does not over-
heat and maintains the engine at an optimum tem-
perature. The system components are the radiator,
water pump, thermostat, condenser and fan assem-
blies. Possible faults include low coolant, contamina-
tion, belt loosening and component damage.
TROUBLESHOOTING STRATEGYM1141005200340
Use these steps to plan your diagnostic strategy. If
you follow them carefully, you will be sure to find
most of the engine cooling faults.
1. Gather information from the customer.2. Verify that the condition described by the
customer exists.
3. Find and repair the malfunction by following the
SYMPTOM CHART.
4. Verify that the malfunction is eliminated. TOOL TOOL NUMBER AND
NAMESUPERSESSION APPLICATION
MB991871
LLC changerGeneral service tool Coolant refilling
Page 918 of 1500

ENGINE COOLING DIAGNOSIS
ENGINE COOLING14-3
SYMPTOM CHARTM1141005600393
SYMPTOM PROCEDURES
INSPECTION PROCEDURE 1: Coolant Leak
DIAGNOSIS
STEP 1. Check for coolant leaks.
When pressure testing the cooling system, slowly
release cooling system pressure to avoid being
burned by hot coolant.
Be sure to completely clean away any moisture from
the places checked.
When the tester is removed, be careful not to spill any
coolant.
When installing and removing the tester and when test-
ing, be careful not to deform the filler neck of the radia-
tor.
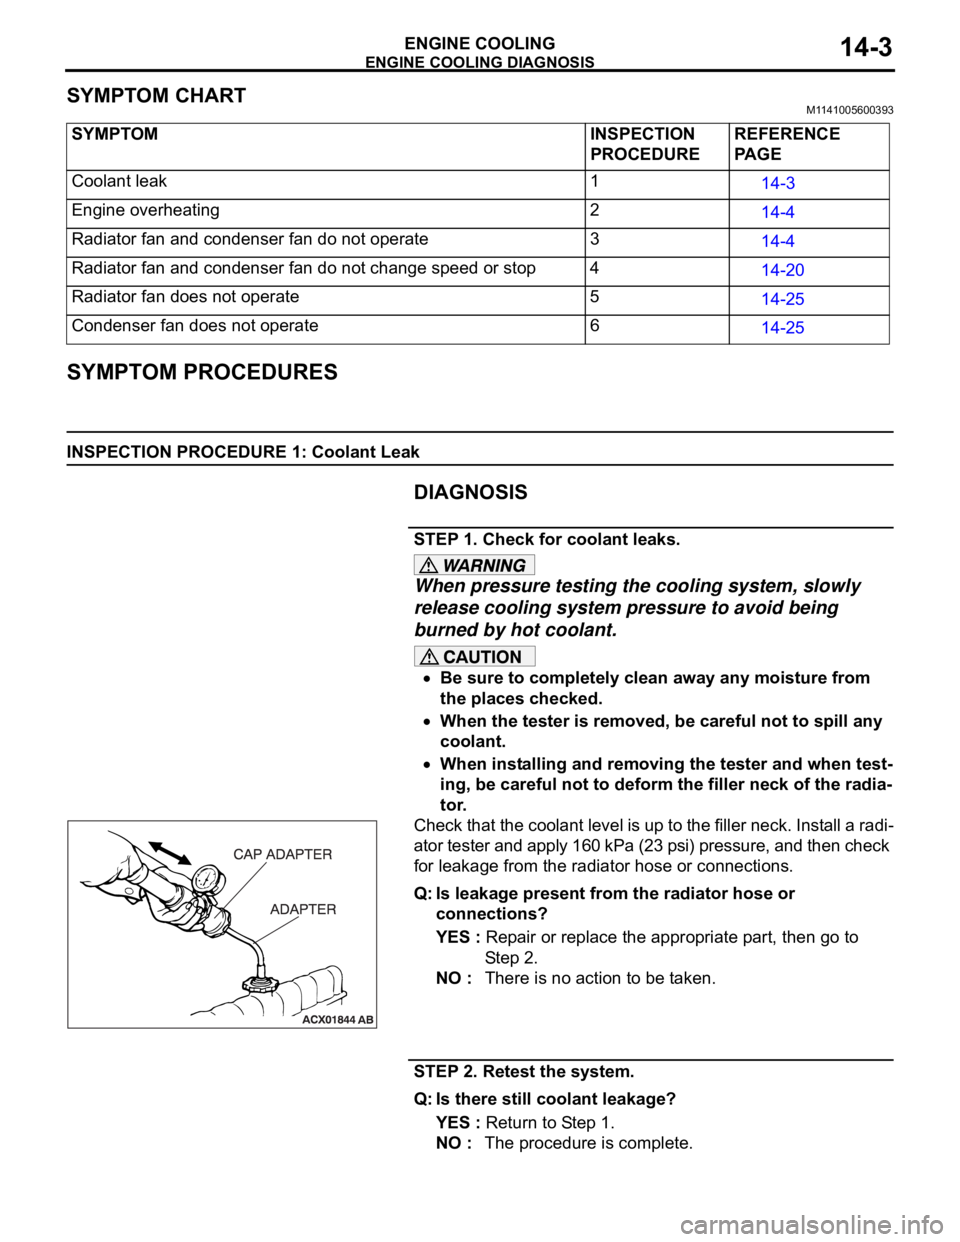
Check that the coolant level is up to the filler neck. Install a radi-
ator tester and apply 160 kPa (23 psi) pressure, and then check
for leakage from the radiator hose or connections.
Q: Is leakage present from the radiator hose or
connections?
YES : Repair or replace the appropriate part, then go to
St e p 2 .
NO : There is no action to be taken.
STEP 2. Retest the system.
Q: Is there still coolant leakage?
YES : Return to Step 1.
NO : The procedure is complete. SYMPTOM INSPECTION
PROCEDUREREFERENCE
PA G E
Coolant leak 1
14-3
Engine overheating 2
14-4
Radiator fan and condenser fan do not operate 3
14-4
Radiator fan and condenser fan do not change speed or stop 4
14-20
Radiator fan does not operate 5
14-25
Condenser fan does not operate 6
14-25
Page 919 of 1500

ENGINE COOLING DIAGNOSIS
ENGINE COOLING14-4
INSPECTION PROCEDURE 2: Engine Overheating
DIAGNOSIS
STEP 1. Remove the radiator cap and check for coolant
contamination.
Q: Is the coolant contaminated with rust and oil?
YES : Replace it. Refer to P.14-27.
NO : There is no action to be taken. Go to Step 2.
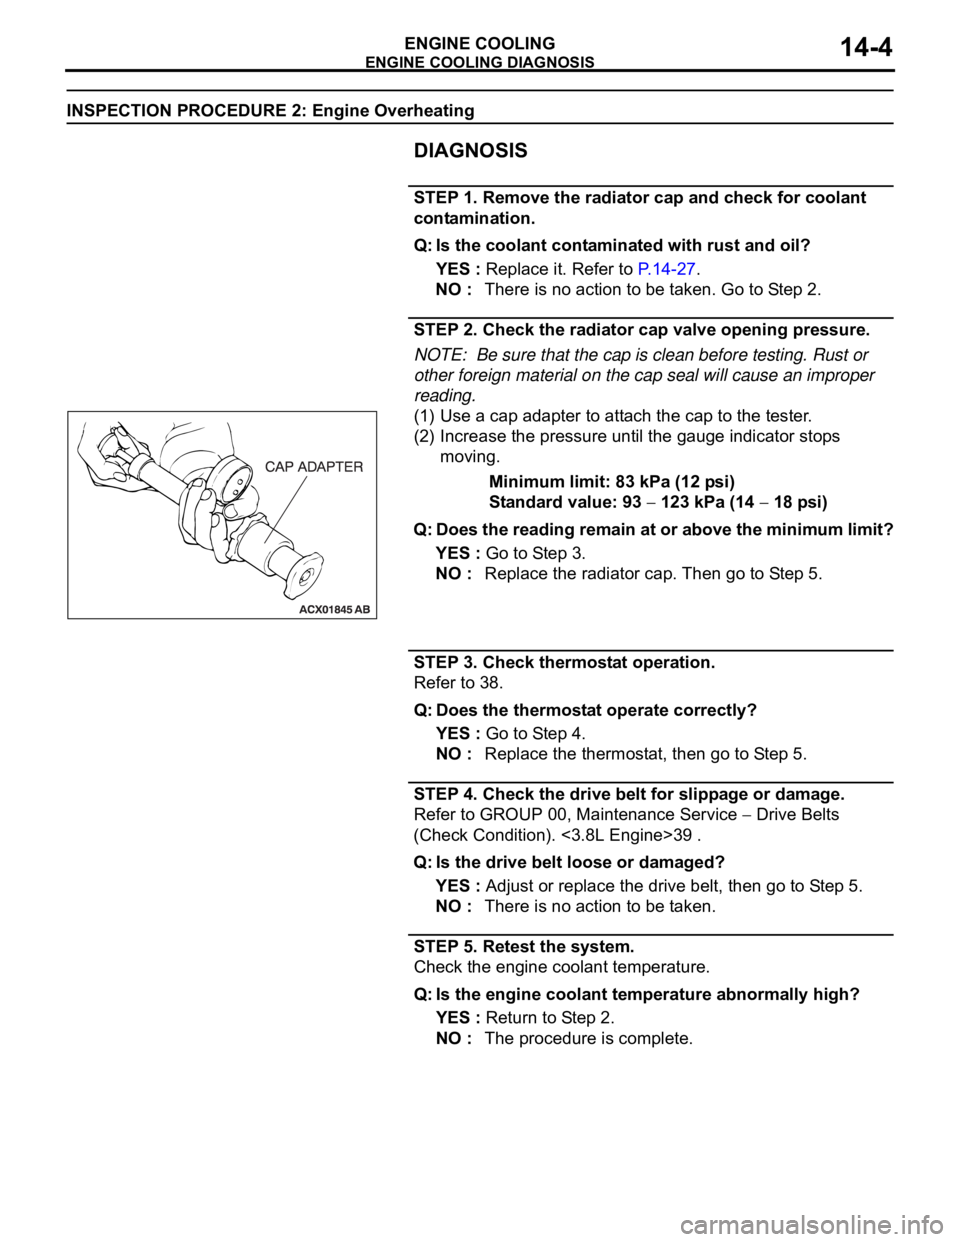
STEP 2. Check the radiator cap valve opening pressure.
NOTE: Be sure that the cap is clean before testing. Rust or
other foreign material on the cap seal will cause an improper
reading.
(1) Use a cap adapter to attach the cap to the tester.
(2) Increase the pressure until the gauge indicator stops
moving.
Minimum limit: 83 kPa (12 psi)
Standard value: 93
123 kPa (14 18 psi)
Q: Does the reading remain at or above the minimum limit?
YES : Go to Step 3.
NO : Replace the radiator cap. Then go to Step 5.
STEP 3. Check thermostat operation.
Refer to 38.
Q: Does the thermostat operate correctly?
YES : Go to Step 4.
NO : Replace the thermostat, then go to Step 5.
STEP 4. Check the drive belt for slippage or damage.
Refer to GROUP 00, Maintenance Service
Drive Belts
(Check Condition). <3.8L Engine>39 .
Q: Is the drive belt loose or damaged?
YES : Adjust or replace the drive belt, then go to Step 5.
NO : There is no action to be taken.
STEP 5. Retest the system.
Check the engine coolant temperature.
Q: Is the engine coolant temperature abnormally high?
YES : Return to Step 2.
NO : The procedure is complete.
Page 920 of 1500
Page 921 of 1500
ENGINE COOLING DIAGNOSIS
ENGINE COOLING14-6
DIAGNOSIS
STEP 1. Measure the power supply voltage at fan
controller connector A-24.
(1) Disconnect fan controller connector A-24 and measure
wiring harness side connector.
(2) Turn the ignition switch to the "ON" position.
(3) Measure the voltage between fan controller connector A-24
terminal 3 and body earth.
The voltage should measure system voltage.
(4) Turn the ignition switch to the "LOCK" (OFF) position.
(5) Connect fan controller connector A-24.
Q: Is the measured voltage system voltage?
YES : Go to Step 17.
NO : Go to Step 2.
STEP 2. Check the fan controller connector A-24.
Q: Is the connector in good condition?
YES : Go to Step 3.
NO : Repair or replace the connector. Then go to Step 24.
Page 922 of 1500
ENGINE COOLING DIAGNOSIS
ENGINE COOLING14-7
STEP 3. Check the fusible link No.2.
Q: Is the fusible link No.2 in good condition?
YES : Go to Step 4.
NO : Replace the fusible link No.2. Then go to Step 24.
STEP 4. Measure the power supply voltage at fan control
relay connector A-10X.
(1) Disconnect fan control relay connector A-10X (remove the
fan control relay) and measure relay box side connector.
(2) Turn the ignition switch to the "ON" position.
(3) Measure the voltage between fan control relay connector
A-10X terminal 4 and body earth.
The voltage should measure system voltage.
(4) Turn the ignition switch to the "LOCK" (OFF) position.
(5) Connect fan control relay connector A-10X (install the fan
control relay).
Q: Is the measured voltage system voltage?
YES : Go to Step 7.
NO : Go to Step 5.
Page 923 of 1500
ENGINE COOLING DIAGNOSIS
ENGINE COOLING14-8
STEP 5. Check the fan control relay connector A-10X.
Q: Is the connector in good condition?
YES : Go to Step 6.
NO : Repair the connector or replace the relay box. Then
go to Step 24.
STEP 6. Check the harness wire between fusible link No.2
and fan control relay connector A-10X terminal 4.
Q: Is the harness wire in good condition?
YES : An intermittent malfunction is suspected (Refer to
GROUP 00 - How to use troubleshooting 00-7).
NO : Repair the damaged harness wire. Then go to Step
24.
STEP 7. Check the fan control relay.
Refer to 14-31.
Q: Is the fan control relay in good condition?
YES : Go to Step 8.
NO : Replace the fan control relay. Then go to Step 24.
Page 924 of 1500
ENGINE COOLING DIAGNOSIS
ENGINE COOLING14-9
STEP 8. Check the fan control relay connector A-10X.
Q: Is the connector in good condition?
YES : Go to Step 9.
NO : Repair the connector or replace the relay box. Then
go to Step 24.
STEP 9. Check the harness wire between fan control relay
connector A-10X terminal 2 and fan controller connector
A-24 terminal 3.
Q: Is the harness wire in good condition?
YES : Go to Step 10.
NO : Repair the damaged harness wire. Then go to Step
24.