Page 186 of 417

185 Controls in detail
Automatic climate control
The automatic climate control is operation-
al whenever the engine is running. You can
operate the climate control system in ei-
ther the automatic or manual mode. The
system cools or heats the interior depend-
ing on the selected interior temperature
and the current outside temperature.Nearly all dust particles, pollutants and
odors are filtered out before outside air en-
ters the passenger compartment through
the air distribution system.
Adjusting the temperature
Use temperature controls6 andb to
separately adjust the air temperature on
each side of the passenger compartment.
You should raise or lower the temperature
setting in small increments, preferably
starting at 72°F (22°C).
Increasing�
Turn the outer adjustment ring slightly
to the right.
The automatic climate control system
will correspondingly adjust the interior
air temperature.
Warning!
G
When operating the automatic climate con-
trol, the air that enters the passenger com-
partment through the air vents in the
footwell can be very hot or very cold (de-
pending on the set temperature). This may
cause burns or frostbite on unprotected skin
in the immediate area of the air vents. Al-
ways keep sufficient distance between un-
protected parts of the body and the footwell
air vents. If necessary change the air flow
using the air distribution controls to direct
the air away from the footwell air vents
(�page 187).
Warning!
G
Follow the recommended settings for heat-
ing and cooling given on the following pag-
es. Otherwise the windows could fog up,
impairing visibility and endangering you and
others.iIf the vehicle interior is hot, ventilate
the interior before driving off.
Keep the air intake grille in front of the
windshield free of snow and debris.
iWhen operating the climate control
system in automatic mode, you will
only rarely need to adjust the tempera-
ture, air volume and air distribution.
Page 187 of 417

186 Controls in detailAutomatic climate controlDecreasing�
Turn the outer adjustment ring slightly
to the left.
The automatic climate control system
will correspondingly adjust the interior
air temperature.
Adjusting the temperature for the
center and side air vents
When outside temperatures are low, you
can manually raise the air temperature for
the center and side air vents. The
controls2 are located between the cen-
ter air vents (
�page 182).
Turning on warm air
�
Press the left button (red).
The indicator lamp on the button
comes on. Warm air will enter from the
center and side air vents.Turning off warm air
�
Press the left button (red).
The indicator lamp on the button goes
out. The air from the outlets will return
to the temperature set in the system.
Turning on cooler air
�
Press the right button (blue).
The indicator lamp on the button
comes on. Cooler air will enter from the
center and side air vents.
Turning off cooler air
�
Press the right button (blue).
The indicator lamp on the button goes
out. The air from the outlets will return
to the temperature set in the system.
Adjusting air volume
Use air volume control knob9
(�page 184) for both automatic and man-
ual air volume adjustment.
Adjusting manually
�
Press the control knob.
The U light on the control knob
goes out. You can now select one of
nine air volume settings.
Adjusting automatically
�
Press the control knob.
The U light on the control knob
comes on. The airflow is adjusted auto-
matically.
Page 188 of 417
 to separately adjust
the air distribution on each side of the pas-
s")
187 Controls in detail
Automatic climate control
Adjusting air distribution
Use air distribution control knobs1
and5 (
�page 184) to separately adjust
the air distribution on each side of the pas-
senger compartment. The following sym-
bols are found on the controls:Adjusting manually
�
Press the control knob.
The U light on the control knob
goes out. The air distribution can be ad-
justed manually.
Adjusting automatically
�
Press the control knob.
The U light on the control knob
comes on. The air distribution is adjust-
ed automatically.
Windshield fogged on the outside
�
Switch the windshield wipers on.
�
Turn the air distribution control to h
or k.
Maximum cooling MAXCOOL
If the left and right air distribution controls
as well as the airflow volume control are
set to U and there is a high need for
cooling, MAXCOOL is activated.
This provides the fastest possible cooling
of the vehicle interior.
Symbol
Function
h
Directs air through the cen-
ter air vents
j
Directs air to the windows
V
Directs air into the entire
vehicle interior
k
Directs air to the footwells
Page 194 of 417

193 Controls in detail
Power windows
�Power windows
Opening and closing the windows
The windows are opened and closed elec-
trically. The switches for the windows are
located on the door sill on the driver’s side
(�page 34). The switch for the passenger
side is located on the door sill on the pas-
senger side.
1Left window
2Right window
�
Switch on the ignition (
�page 40).
Warning!
G
When closing the windows, make sure there
is no danger of anyone being harmed by the
closing procedure.
The closing of the windows can be immedi-
ately halted by releasing the switch or, if
switch was pulled past the resistance point
and released, by either pressing or pulling
the respective switch.
If the window encounters an obstruction
that blocks its path in a circumstance where
you pulled the switch past the resistance
point and released it to close the window,
the automatic reversal function will stop the
window and open it slightly.
If the window encounters an obstruction
that blocks its path in a circumstance where
you are closing the window by pulling and
holding the switch, or by pressing and hold-
ing button‹ on the SmartKey, the auto-
matic reversal function will not operate.
When leaving the vehicle, always remove the
SmartKey from starter switch, take it with
you, and lock the vehicle. Do not leave
children unattended in the vehicle, or with
access to an unlocked vehicle. Unsuper-
vised use of vehicle equipment can cause an
accident and/or serious personal injury.
Page 195 of 417

194 Controls in detailPower windowsOpening the windows�
Press switch1 or2 to the resistance
point.
The corresponding window will move
downwards until you release the
switch.
Closing the windows
�
Pull switch1 or2 to the resistance
point.
The corresponding window will move
upwards until you release the switch.Fully opening the windows
(Express-open)
�
Press switch1 or2 past the resis-
tance point and release.
The corresponding window opens com-
pletely.
Fully closing the windows
(Express-close)
�
Pull switch1 to4 past the
resistance point and release.
The corresponding window closes
completely.
Warning!
G
If you pull and hold the switch up when
closing the window, and upward movement
of the window is blocked by some obstruc-
tion including but not limited to arms, hands,
fingers, etc., the automatic reversal will not
operate.
!If the upward movement of the window
is blocked during the closing
procedure, the window will stop and
open slightly.
Remove the obstruction, pull the
switch again past the resistance point
and release.
If the window still does not close when
there is no obstruction, then pull and
hold the switch again. The window will
then close without the obstruction sen-
sor function.Warning!
G
Driver’s door only:
If within five seconds you again pull the
switch past the resistance point and
release, the automatic reversal will not
function.
Page 196 of 417
195 Controls in detail
Power windows
Stopping the windows�
Press or pull respective switch again.
Opening and closing the windows with
the SmartKey
You can also open and close the windows
from the outside using the SmartKey.
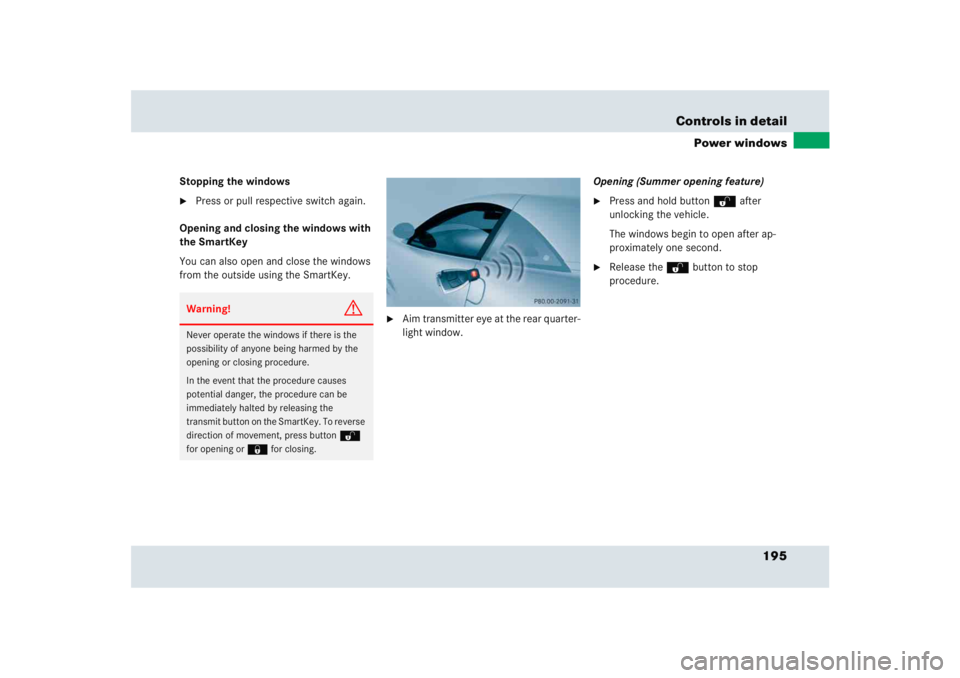
�
Aim transmitter eye at the rear quarter-
light window.Opening (Summer opening feature)
�
Press and hold buttonΠafter
unlocking the vehicle.
The windows begin to open after ap-
proximately one second.
�
Release the Œbutton to stop
procedure.
Warning!
G
Never operate the windows if there is the
possibility of anyone being harmed by the
opening or closing procedure.
In the event that the procedure causes
potential danger, the procedure can be
immediately halted by releasing the
transmit button on the SmartKey. To reverse
direction of movement, press buttonŒ
for opening or‹ for closing.
Page 203 of 417

202 Controls in detailUseful featuresAshtray and cigarette lighter
The ashtray and the cigarette lighter are lo-
cated in the storage compartment under
the armrest.
1Cigarette lighter
2Ashtray insertAshtray
Removing ashtray insert
�
Pull insert 2 upwards.
Replacing ashtray insert
�
Press the insert into the holder until
you hear it click into place.Cigarette lighter
Lighter socket1 may be used for acces-
sories with a maximum power consump-
tion of 180 W.
�
Switch on the ignition (
�page 40).
�
Push in cigarette lighter 1.
The cigarette lighter pops out automat-
ically when hot.
Warning!
G
Remove front ashtray only with vehicle
standing still.
Warning!
G
Never touch the heating element or sides of
the lighter; they are extremely hot. Hold the
knob only.
When leaving the vehicle, always remove the
SmartKey from the starter switch, take it
with you, and lock the vehicle. Do not leave
children unattended in the vehicle, or with
access to an unlocked vehicle. Unsuper-
vised use of vehicle equipment may cause
an accident and/or serious personal injury.
Page 204 of 417
.
�
Flip up cover and insert electrical pl")
203 Controls in detail
Useful features
12-V socket
The 12-V socket is located on the left side
in the trunk.
112-V socket�
Switch on the ignition (
�page 40).
�
Flip up cover and insert electrical plug
(cigar lighter type).
Telephone
The telephone is located in the center stor-
age compartment (
�page 201).Radio transmitters, such as a portable tele-
phone or a citizens band unit, should only
be used inside the vehicle if they are con-
nected to an antenna that is installed on
the outside of the vehicle.
The external antenna must be approved by
Mercedes-Benz. Please contact an autho-
rized Mercedes-Benz Center for informa-
tion on the installation of an approved
external antenna. Refer to the radio trans-
mitter operation instructions regarding use
of an external antenna.
iThe 12-V socket can be used to
accommodate electrical consumers
(e.g. air pump, auxiliary lamps) up to a
maximum of 180 W or as a battery
charging point (
�page 355).
Warning!
G
Never operate radio transmitters equipped
with a built-in or attached antenna (i.e. with-
out being connected to an external antenna)
from inside the vehicle while the engine is
running. Doing so could lead to a malfunc-
tion of the vehicle’s electronic system, pos-
sibly resulting in an accident and personal
injury.