Page 165 of 464
165 Controls in detail
Automatic transmission*
Downshifting�
Briefly press the gear selector lever to
the left in theD-direction
(�page 154).
or
�
Press button1 on the left side of the
steering wheel (
�page 162).
The transmission shifts to the next
lower gear.Upshifting
�
Briefly press the gear selector lever to
the right in theD+direction
(�page 154).
or
�
Press button2 on the right side of the
steering wheel (
�page 162).
The transmission shifts to the next
higher gear.
If, instead of the manual program mode
symbol
M, thep symbol appears in the
multifunction display (
�page 153), shift to
the next higher gear. The fuel supply will
otherwise be interrupted to prevent the
engine from overrevving.
Warning!
G
On slippery road surfaces, never downshift
in order to obtain braking action. This could
result in drive wheel slip and reduced
vehicle control. Your vehicle’s ABS will not
prevent this type of loss of control.iWhen you brake or stop, the transmis-
sion shifts down to a gear from which
you can easily accelerate or take off.
!In the manual program modeM, the
transmission will not upshift, even if
the engine has reached its overrevving
range. Shift up to the next gear before
the engine has reached its overrevving
range. Make absolutely certain that the
engine speed does not reach the red
marking on the tachometer
(�page 24). Otherwise the engine
could be damaged which is not covered
by the Mercedes-Benz Limited
Warranty.
Page 166 of 464
166 Controls in detailAutomatic transmission*Kickdown
Using the kickdown when driving in the
manual program modeM is not possible.
Deactivating manual shift program�
Press the program mode selector
switch (
�page 164) repeatedly
until
Cor
S appears in the multifunction
display.
or
�
Restart the engine.
The transmission will go to the
automatic program mode (C orS).
The manual program modeM is not
stored.Emergency operation (Limp Home
Mode)
If vehicle acceleration worsens or the
transmission no longer shifts, the trans-
mission is most likely operating in limp
home (emergency operation) mode. In this
mode only second gear and reverse gear
can be activated.
�
Stop the vehicle.
�
Move gear selector lever toP.
�
Turn off the engine.
�
Wait at least ten seconds before
restarting.
�
Restart the engine.
�
Move gear selector lever to positionD
(for second gear) orR.
�
Have the transmission checked at an
authorized Mercedes-Benz Center as
soon as possible.
Page 246 of 464
246 Controls in detailDriving systems
Canceling cruise control
There are several ways to cancel the cruise
control:�
Step on the brake pedal.
The cruise control is canceled. The last
speed set is stored for later use.
or
�
Briefly push the cruise control lever in
direction of arrow3 (
�page 245).
The cruise control is canceled. The last
speed set is stored for later use.
iOn uphill or downhill grades, the cruise
control may not be able to maintain the
set speed. Once the grade eases, the
set speed will be resumed.
On downhill grades, the cruise control
will hold the set speed with active brak-
ing action.
In addition, on longer downhill grades
the automatic transmission* will auto-
matically downshift.
iVehicles with manual transmission:
If you depress the clutch pedal when
shifting into another gear, the engine
speed may increase.�
Drive with sufficient engine speed.
�
Shift gears in a timely manner.
�
If possible, do not shift down more
than one gear.
iThe last stored speed is canceled when
you turn off the engine.
Page 247 of 464
247 Controls in detail
Driving systems
Setting a higher speed�
Lift the cruise control lever in direction
of arrow1 (
�page 245) and hold it
up until the desired speed is reached.
�
Release the cruise control lever.
The new speed is set.
Setting a lower speed
�
Depress the cruise control lever in
direction of arrow2 (
�page 245) and
hold it down until the desired speed is
reached.
�
Release the cruise control lever.
The new speed is set.
iThe cruise control switches off auto-
matically, if�
you step on the brake pedal.
�
you pull up the parking brake lever
firmly.
�
the vehicle speed is below 25 mph
(40 km/h).
�
ESP is in operation or switched off
with the ESP switch (
�page 82).
�
Vehicles with manual transmission:
you depress the clutch pedal for
longer than six seconds during
shifting into another gear.
�
Vehicles with automatic transmis-
sion*: you move the gear selector
lever to positionN while driving.
!Vehicles with automatic transmission*:
Moving gear selector lever to
positionN while driving also cancels
cruise control. However, the gear se-
lector lever should not be moved to
positionN while driving except to coast
when the vehicle is in danger of skid-
ding (e.g. on icy roads).iDepressing the accelerator pedal does
not deactivate the cruise control. After
brief acceleration (e.g. for passing), the
cruise control will resume the last
speed set.
iWhen you use the cruise control lever
to decelerate, the brake system will
automatically brake the vehicle if the
engine’s braking power does not brake
the vehicle sufficiently.
Page 253 of 464
253 Controls in detail
Useful features
Ashtray
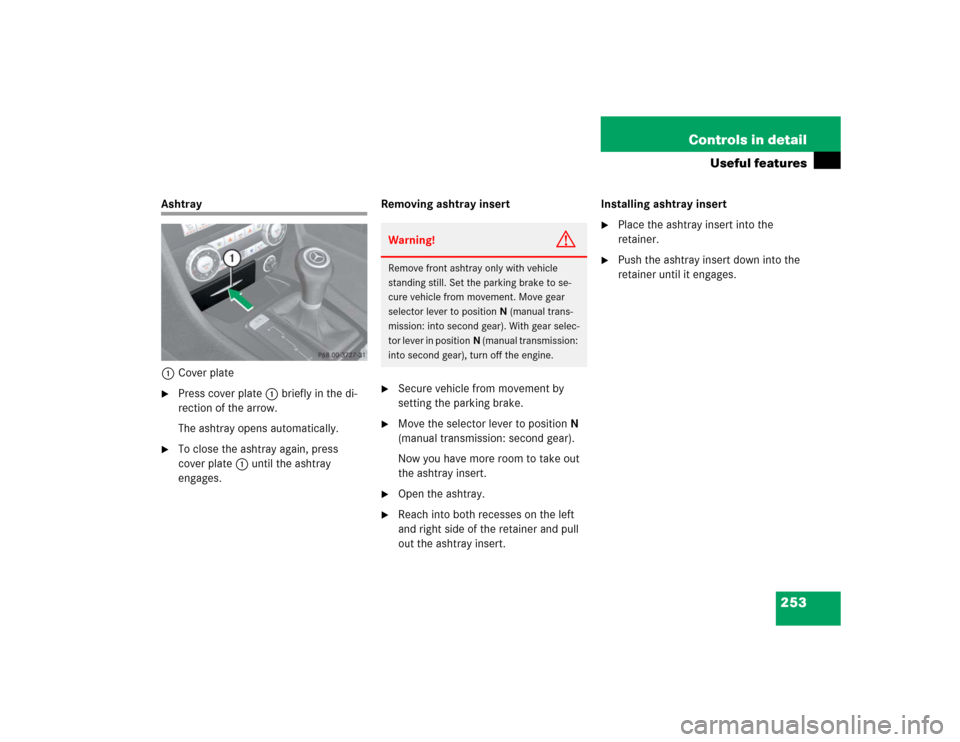
1Cover plate�
Press cover plate1 briefly in the di-
rection of the arrow.
The ashtray opens automatically.
�
To close the ashtray again, press
cover plate1 until the ashtray
engages.Removing ashtray insert
�
Secure vehicle from movement by
setting the parking brake.
�
Move the selector lever to positionN
(manual transmission: second gear).
Now you have more room to take out
the ashtray insert.
�
Open the ashtray.
�
Reach into both recesses on the left
and right side of the retainer and pull
out the ashtray insert.Installing ashtray insert
�
Place the ashtray insert into the
retainer.
�
Push the ashtray insert down into the
retainer until it engages.
Warning!
G
Remove front ashtray only with vehicle
standing still. Set the parking brake to se-
cure vehicle from movement. Move gear
selector lever to positionN (manual trans-
mission: into second gear). With gear selec-
tor lever in positionN (manual transmission:
into second gear), turn off the engine.
Page 268 of 464

268 Controls in detailUseful featuresStep 8:�
Locate “training” button on the garage
door opener motor head unit.
Exact location and color of the button
may vary by garage door opener brand.
Depending on manufacturer, the “train-
ing” button may also be referred to as
“learn”or “smart” button. If there is dif-
ficulty locating the transmitting button,
refer to the garage door opener opera-
tor’s manual.
Step 9:
�
Press “training” button on the garage
door opener motor head unit.
The “training light” is activated.
You have 30 seconds to initiate the follow-
ing step.
Step 10:
�
Firmly press, hold for two seconds and
release programmed integrated signal
transmitter button (1,2 or3).Step 11:
�
Press, hold for two seconds and re-
lease same button a second time to
complete the training process.
Some garage door openers (or other rolling
code equipped devices) may require you to
perform this procedure a third time to
complete the training.
Step 12:
�
Confirm the garage door operation by
pressing programmed integrated signal
transmitter button (1,2 or3).
Step 13:
�
To program the remaining two buttons,
repeat the steps above starting with
step 3.Gate operator/Canadian programming
Canadian radio-frequency laws require
transmitter signals to “time-out” (or quit)
after several seconds of transmission
which may not be long enough for the inte-
grated signal transmitter to pick up the sig-
nal during programming. Similar to this
Canadian law, some U.S. gate operators
are designed to “time-out” in the same
manner.
If you live in Canada or if you are having dif-
ficulties programming a gate operator (re-
gardless of where you live) by using the
programming procedures, replace step 4
with the following:
Page 276 of 464

276 OperationDriving instructionsDriving off
Apply the brakes to test them briefly after
driving off. Perform this procedure only
when the road is clear of other traffic.
Warm up the engine smoothly. Do not
place full load on the engine until the oper-
ating temperature has been reached.
When starting off on a slippery surface, do
not allow a drive wheel to spin for an ex-
tended period with the ESP switched off.
Doing so may cause serious damage to the
drivetrain which is not covered by the
Mercedes-Benz Limited Warranty.
Parking
!Simultaneously depressing the acceler-
ator pedal and applying the brake re-
duces engine performance and causes
premature brake and drivetrain wear.
Warning!
G
Do not park this vehicle in areas where com-
bustible materials such as grass, hay or
leaves can come into contact with the hot
exhaust system, as these materials could be
ignited and cause a vehicle fire.
To reduce the risk of personal injury as a re-
sult of vehicle movement, before
turning off
the engine and leaving the vehicle always:
�
Keep right foot on brake pedal.
�
Pull the parking brake lever up as many
notches as possible.
�
Move the selector lever to positionP
(manual transmission: first or reverse
gear).
�
Slowly release brake pedal.
�
When parked on an incline, turn front
wheels towards the road curb.
�
Turn the SmartKey in the starter switch
to position0 and remove the SmartKey
from the starter switch.
�
Take the SmartKey and lock vehicle
when leaving.!Set the parking brake whenever park-
ing or leaving the vehicle. In addition,
place gear selector lever* in positionP
(manual transmission: move gearshift
lever to first or reverse gear).
In addition, when parking on hills, turn
front wheel towards the road curb.
Page 279 of 464
279 Operation
Driving instructions
SLK 350
SLK 350 with Sport Package*
Your vehicle is factory equipped with
“W”-rated tires, which have a tire speed
rating of 168 mph (270 km / h).
An electronic speed limiter prevents your
vehicle from exceeding a speed of
155 mph (250 km/h).SLK 55 AMG
Your vehicle is factory equipped with
“Y”-rated tires, which have a tire speed
rating of 186 mph (300 km / h).
An electronic speed limiter prevents your
vehicle from exceeding a speed of
155 mph (250 km/h).
Winter driving instructions
The most important rule for slippery or icy
roads is to drive sensibly and to avoid
abrupt acceleration, braking and steering
maneuvers. Do not use the cruise control
system under such conditions.
When the vehicle is in danger of skidding,
move gear selector lever* to positionN or
declutch in case of manual transmission.
Try to keep the vehicle under control by
corrective steering action.
iFor information on speed rating for
winter tires, see “Winter tires”
(�page 327).
For additional general information on
tire speed markings on tire sidewall,
see “Tire speed rating” (
�page 313).
iFor information on driving with snow
chains, see “Snow chains”
(�page 328).
Warning!
G
On slippery road surfaces, never downshift
in order to obtain braking action. This could
result in drive wheel slip and reduced vehi-
cle control. Your vehicle’s ABS will not pre-
vent this type of control loss.