Page 98 of 474
96 Controls in detailLocking and unlocking
Factory setting
Global unlocking�
Press button Œ.
All turn signals flash once. The locking
knobs in the doors move up. The
anti-theft alarm system is disarmed.
The vehicle will lock again automatically
within approximately 40 seconds of un-
locking if:
�
neither door nor trunk is opened
�
the SmartKey is not inserted in the
starter switch
�
the central locking switch is not acti-
vated
Global locking
�
Press button ‹.
All turn signals flash three times. The
locking knobs in the doors move down.
The anti-theft alarm system is armed.Selective setting
If you frequently travel alone, you may wish
to reprogram the SmartKey so that
pressingŒ only unlocks the driver’s
door, interior lockable storage compart-
ments and the fuel filler flap.
�
Press and hold buttons Œ and ‹
simultaneously for about six seconds
until battery check lamp5 flashes
twice.
The SmartKey will then function as fol-
lows:
Unlocking driver’s door and fuel filler
flap
�
Press button Πonce.
All turn signals flash once. The locking
knob in the driver’s door moves up.
The anti-theft alarm system is disarmed.
iCanada only:
This device complies with RSS-210 of
Industry Canada. Operation is subject
to the following two conditions:
(1) This device may not cause interfer-
ence, and
(2) this device must accept any inter-
ference received, including interfer-
ence that may cause undesired
operation undesired operation of
the device.
Any unauthorized modification to this
device could void the user’s authority
to operate the equipment.iYou can also open and close the power
windows (
�page 193) and the retract-
able hardtop using the SmartKey
(
�page 200).
Page 102 of 474
100 Controls in detailLocking and unlocking
iUSA only:
This device complies with Part 15 of
the FCC Rules. Operation is subject to
the following two conditions:
(1) This device may not cause harmful
interference, and
(2) this device must accept any inter-
ference received, including interfer-
ence that may cause undesired
operation.
Any unauthorized modification to this
device could void the user’s authority
to operate the equipment.
iCanada only:
This device complies with RSS-210 of
Industry Canada. Operation is subject
to the following two conditions:
(1) This device may not cause interfer-
ence, and
(2) this device must accept any inter-
ference received, including interfer-
ence that may cause undesired
operation undesired operation of
the device.
Any unauthorized modification to this
device could void the user’s authority
to operate the equipment.
iYou can also close the power windows
(�page 193) and the retractable hard-
top using the SmartKey with
KEYLESS-GO (
�page 200).
iWhen you unlock the vehicle, the SBC
brake system is activated.
Page 121 of 474
119 Controls in detailSeats
Seat ventilation* (standard on SL 600 and SL 65 AMG)
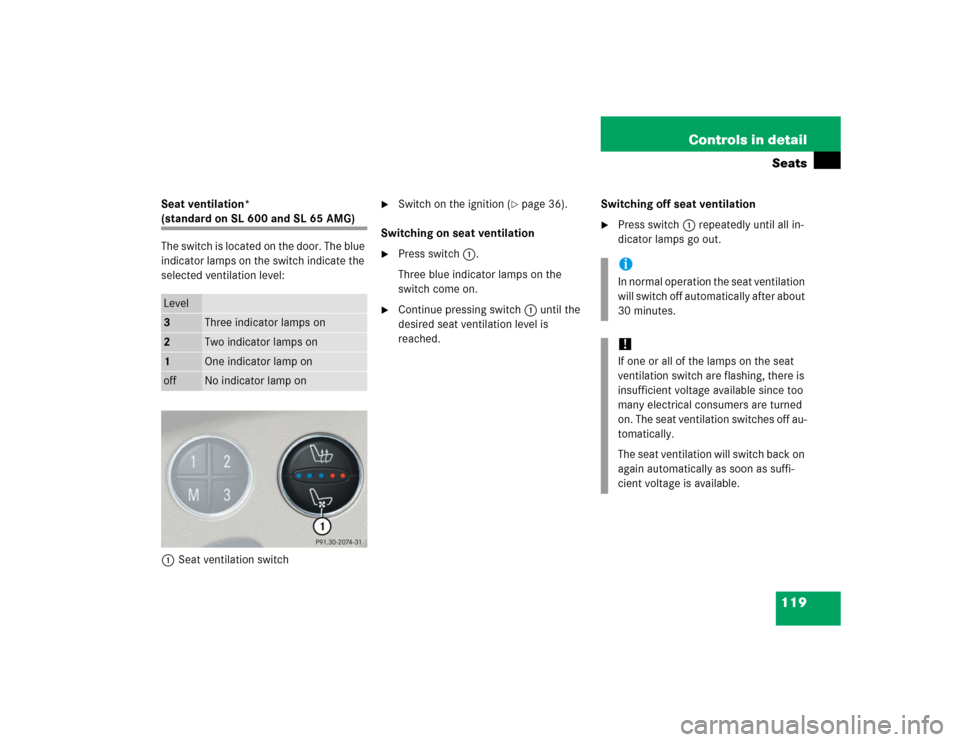
The switch is located on the door. The blue
indicator lamps on the switch indicate the
selected ventilation level:
1Seat ventilation switch
�
Switch on the ignition (
�page 36).
Switching on seat ventilation
�
Press switch1.
Three blue indicator lamps on the
switch come on.
�
Continue pressing switch 1 until the
desired seat ventilation level is
reached.Switching off seat ventilation
�
Press switch1 repeatedly until all in-
dicator lamps go out.
Level3
Three indicator lamps on
2
Two indicator lamps on
1
One indicator lamp on
off
No indicator lamp on
iIn normal operation the seat ventilation
will switch off automatically after about
30 minutes. !If one or all of the lamps on the seat
ventilation switch are flashing, there is
insufficient voltage available since too
many electrical consumers are turned
on. The seat ventilation switches off au-
tomatically.
The seat ventilation will switch back on
again automatically as soon as suffi-
cient voltage is available.
Page 126 of 474
124 Controls in detailLightingManual headlamp mode
The low beam headlamps and parking
lamps can be switched on or off with the
exterior lamp switch.Automatic headlamp mode
The following lamps switch on and off au-
tomatically depending on the brightness of
the ambient light:
�
Low beam headlamps
�
Tail lamps
�
Parking lamps
�
License plate lamps
�
Side marker lamps
iWith the SmartKey removed from the
starter switch or the engine turned off
with KEYLESS-GO* and the driver’s
door open, a warning sounds if the
parking lamps or the low beam head-
lamps are switched on.
The message $
Turn off lamps
appears in the multifunction display.
iWith the daytime running lamp mode
activated (mandatory in Canada) and
the engine running, the low beam head-
lamps cannot be switched off manual-
ly.
To activate the daytime running lamp
mode, see “Setting daytime running
lamp mode (USA only)” (
�page 152).
Warning!
G
If the exterior lamp switch is set toU,�
the headlamps may switch off unexpect-
edly when the system senses bright am-
bient light, for example light from
oncoming traffic.
�
the headlamps will not be automatically
switched on under foggy conditions.
To minimize risk to you and to others, acti-
vate headlamps by turning exterior lamp
switch to B when driving or when traffic
and / or ambient lighting conditions require
you to do so.
In low ambient lighting conditions, only
switch from position U to B with the
vehicle at a standstill. Switching from U
to B will briefly switch off the head-
lamps. Doing so while driving in low ambient
lighting conditions may result in an acci-
dent.
The automatic headlamp feature is only an
aid to the driver. The driver is responsible for
the operation of the vehicle’s lights at all
times.
Page 129 of 474
127 Controls in detail
Lighting
Fog lamps
Front fog lamps
�
Switch on the low beam headlamps
(�page 51).
�
Pull out the exterior lamp switch to first
stop.
The front fog lamps are switched on.
The green indicator lamp ‡ in the
exterior lamp switch comes on
(�page 123).
�
Push in the exterior lamp switch.
The front fog lamps are switched off.
The green indicator lamp ‡ in the
exterior lamp switch goes out.Rear fog lamp (driver’s side only)
�
Switch on the front fog lamps
(�page 127).
�
Pull out the exterior lamp switch to sec-
ond stop.
The rear fog lamp is switched on.
The yellow indicator lamp † in the
lamp switch comes on (
�page 123).
�
Push in the exterior lamp switch to first
stop.
The rear fog lamp is switched off.
The yellow indicator lamp † in the
exterior lamp switch goes out.
The front fog lamps remain lit.
Warning!
G
In low ambient lighting or foggy conditions,
only switch from position U to B with
the vehicle at a standstill. Switching from
U to B will briefly switch off the head-
lamps. Doing so while driving in low ambient
lighting conditions may result in an acci-
dent.iFog lamps will operate with the parking
lamps and/or the low beam headlamps
on. Fog lamps should only be used in
conjunction with low beam headlamps.
Consult your State or Province Motor
Vehicle Regulations regarding permis-
sible lamp operation.
iThe fog lamps cannot be switched on
with the exterior lamp switch in posi-
tion U. To switch on the fog lamps,
turn the exterior lamp switch to posi-
tion B first.
Page 143 of 474
141 Controls in detail
Control system
Operate the CD player
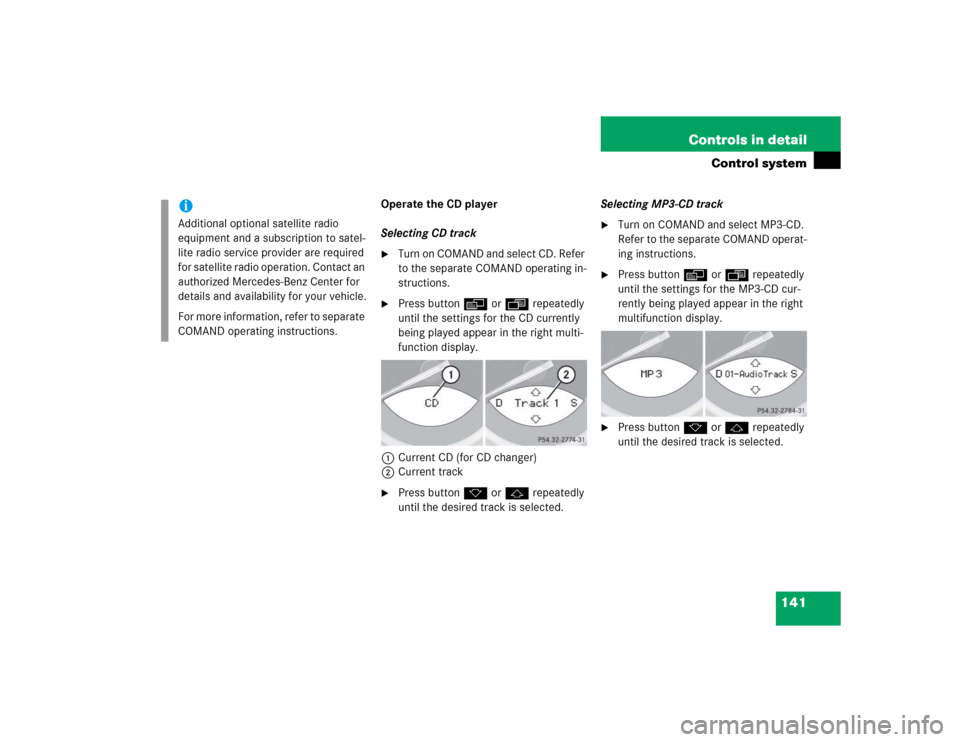
Selecting CD track�
Turn on COMAND and select CD. Refer
to the separate COMAND operating in-
structions.
�
Press button è or ÿ repeatedly
until the settings for the CD currently
being played appear in the right multi-
function display.
1Current CD (for CD changer)
2Current track
�
Press button k or j repeatedly
until the desired track is selected.Selecting MP3-CD track
�
Turn on COMAND and select MP3-CD.
Refer to the separate COMAND operat-
ing instructions.
�
Press button è or ÿ repeatedly
until the settings for the MP3-CD cur-
rently being played appear in the right
multifunction display.
�
Press button k or j repeatedly
until the desired track is selected.
iAdditional optional satellite radio
equipment and a subscription to satel-
lite radio service provider are required
for satellite radio operation. Contact an
authorized Mercedes-Benz Center for
details and availability for your vehicle.
For more information, refer to separate
COMAND operating instructions.
Page 145 of 474
143 Controls in detail
Control system
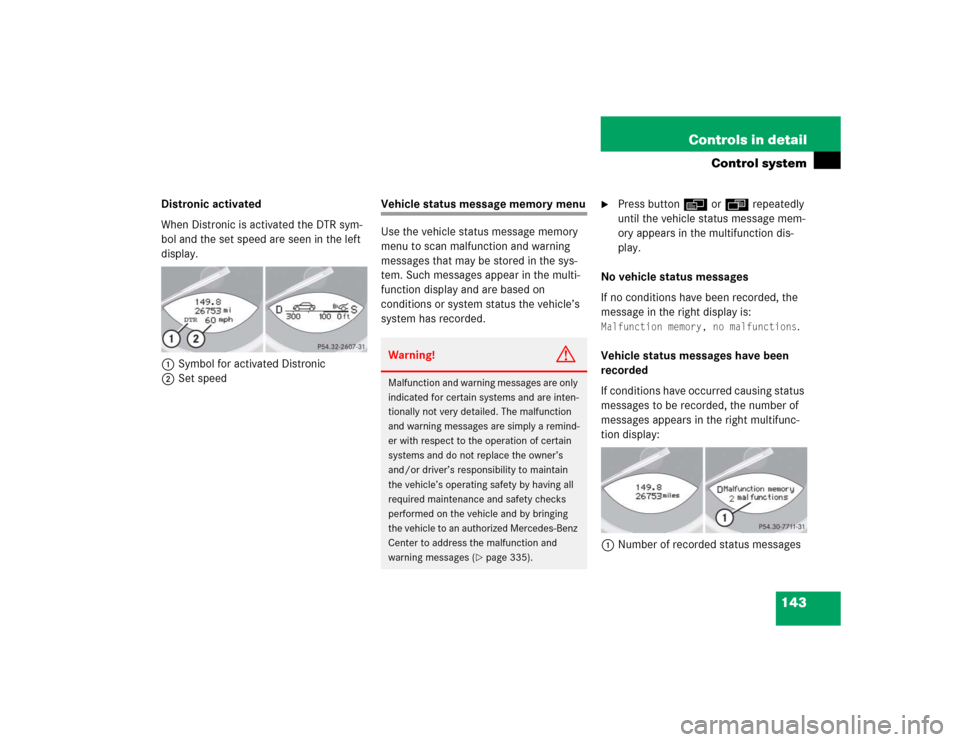
Distronic activated
When Distronic is activated the DTR sym-
bol and the set speed are seen in the left
display.
1Symbol for activated Distronic
2Set speed
Vehicle status message memory menu
Use the vehicle status message memory
menu to scan malfunction and warning
messages that may be stored in the sys-
tem. Such messages appear in the multi-
function display and are based on
conditions or system status the vehicle’s
system has recorded.
�
Press button è or ÿ repeatedly
until the vehicle status message mem-
ory appears in the multifunction dis-
play.
No vehicle status messages
If no conditions have been recorded, the
message in the right display is:
Malfunction memory, no malfunctions
.
Vehicle status messages have been
recorded
If conditions have occurred causing status
messages to be recorded, the number of
messages appears in the right multifunc-
tion display:
1Number of recorded status messages
Warning!
G
Malfunction and warning messages are only
indicated for certain systems and are inten-
tionally not very detailed. The malfunction
and warning messages are simply a remind-
er with respect to the operation of certain
systems and do not replace the owner’s
and/or driver’s responsibility to maintain
the vehicle’s operating safety by having all
required maintenance and safety checks
performed on the vehicle and by bringing
the vehicle to an authorized Mercedes-Benz
Center to address the malfunction and
warning messages (
�page 335).
Page 154 of 474
152 Controls in detailControl systemLighting submenu
Access the
Lighting
submenu via the
Settings
menu. Use the
Lighting
sub-
menu to change the lamp and lighting set-
tings on your vehicle. The following
functions are available:Setting daytime running lamp mode
(USA only)
�
Move the selection marker with button
æ or ç to the
Lighting
sub-
menu.
�
Press button j or k repeatedly
until you see
Light circuit Headlamp
mode
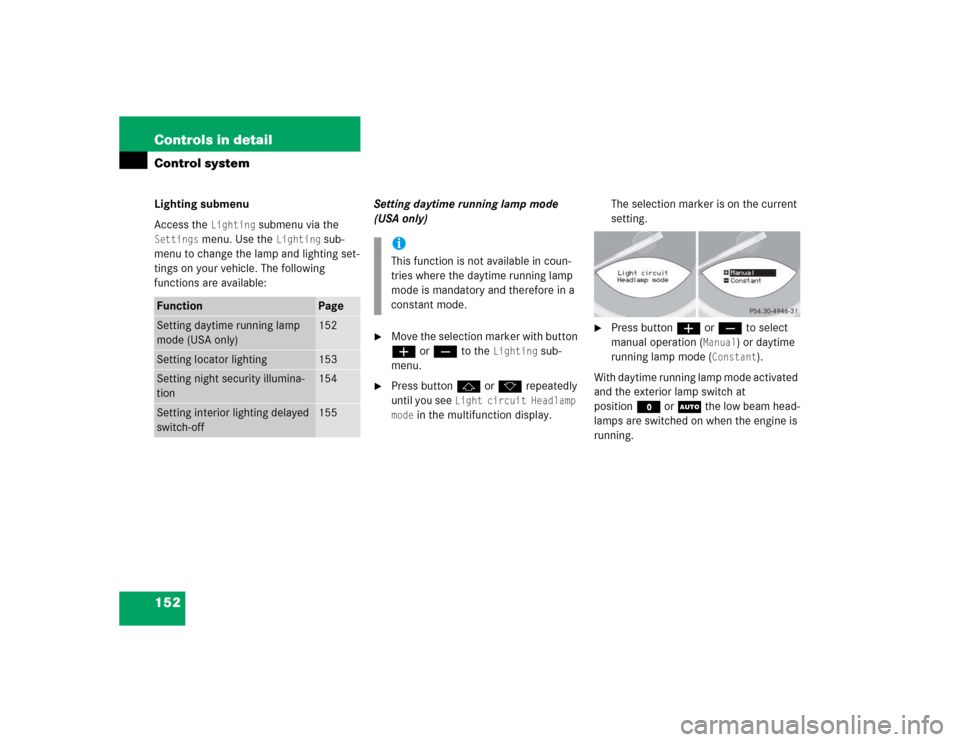
in the multifunction display.The selection marker is on the current
setting.
�
Press button æ or ç to select
manual operation (
Manual
) or daytime
running lamp mode (
Constant
).
With daytime running lamp mode activated
and the exterior lamp switch at
positionM or U the low beam head-
lamps are switched on when the engine is
running.
Function
Page
Setting daytime running lamp
mode (USA only)
152
Setting locator lighting
153
Setting night security illumina-
tion
154
Setting interior lighting delayed
switch-off
155
iThis function is not available in coun-
tries where the daytime running lamp
mode is mandatory and therefore in a
constant mode.