Page 187 of 474
185 Controls in detail
Automatic climate control
Setting the temperature
Use temperature controls1 and7 to
separately adjust the air temperature on
each side of the passenger compartment.
You should raise or lower the temperature
setting in small increments, preferably
starting at 72°F (22°C).
Increasing�
Turn the outer adjustment ring slightly
to the right.
The automatic climate control system
will correspondingly adjust the interior
air temperature.Decreasing
�
Turn the outer adjustment ring slightly
to the left.
The automatic climate control system
will correspondingly adjust the interior
air temperature.
Adjusting air volume
Use air volume controla (
�page 183) for
both automatic and manual air volume ad-
justment.
Adjusting manually
�
Press the control knob.
The U light on the control knob
goes out. You can now select one of
nine air volume settings.
Adjusting automatically
�
Press the control knob.
The U light on the control knob
comes on. The airflow is adjusted auto-
matically.
iWhen operating the climate control
system in automatic mode, you will
only rarely need to adjust the tempera-
ture, air volume and air distribution.
Page 188 of 474
186 Controls in detailAutomatic climate controlAdjusting air distribution
Use air distribution controls2 and6
(�page 183) to separately adjust the air
distribution on each side of the passenger
compartment. The following symbols are
found on the controls:
Adjusting manually
�
Press the control knob.
The U light on the control knob
goes out. The air distribution can be ad-
justed manually.Adjusting automatically
�
Press the control knob.
The U light on the control knob
comes on. The air distribution is adjust-
ed automatically.
Windshield fogged on the outside
�
Switch the windshield wipers on.
�
Turn the air distribution control to h
or j.
Maximum cooling MAXCOOL
If the left and right air distribution controls
as well as the airflow volume control are
set to U and there is a high need for
cooling, MAXCOOL is activated.
This provides the fastest possible cooling
of the vehicle interior (when retractable
hardtop is closed).
Symbol
Function
h
Directs air through the cen-
ter air vents
j
Directs air to the windows
V
Directs air into the entire
vehicle interior
k
Directs air to the footwells
Page 195 of 474
193 Controls in detail
Power windows
�Power windows
Opening and closing the windows
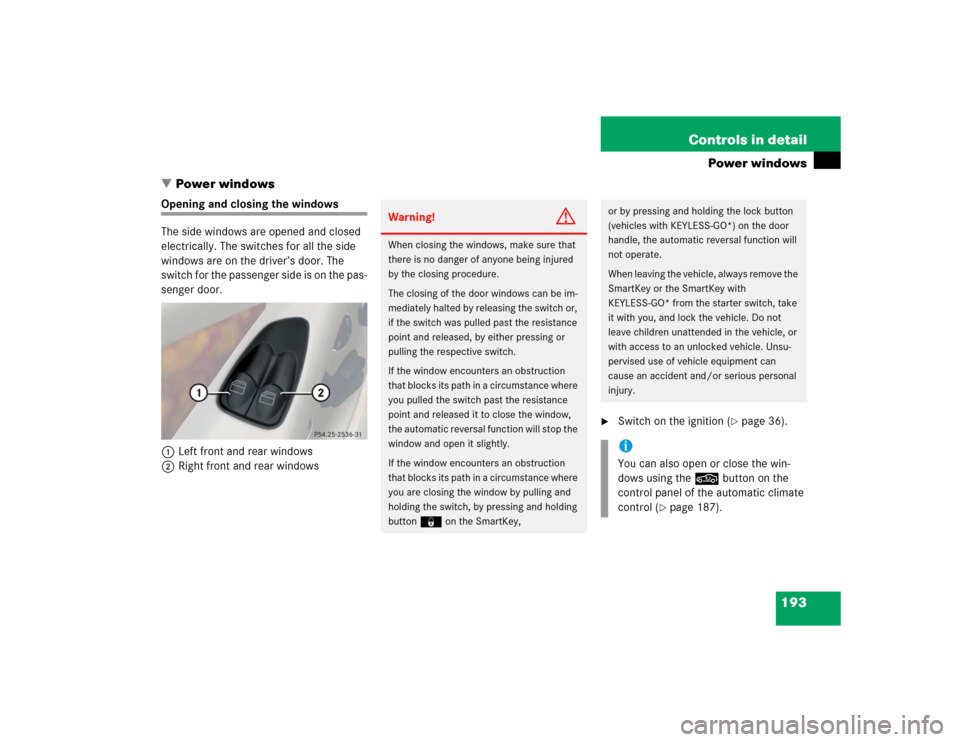
The side windows are opened and closed
electrically. The switches for all the side
windows are on the driver’s door. The
switch for the passenger side is on the pas-
senger door.
1Left front and rear windows
2Right front and rear windows
�
Switch on the ignition (
�page 36).
Warning!
G
When closing the windows, make sure that
there is no danger of anyone being injured
by the closing procedure.
The closing of the door windows can be im-
mediately halted by releasing the switch or,
if the switch was pulled past the resistance
point and released, by either pressing or
pulling the respective switch.
If the window encounters an obstruction
that blocks its path in a circumstance where
you pulled the switch past the resistance
point and released it to close the window,
the automatic reversal function will stop the
window and open it slightly.
If the window encounters an obstruction
that blocks its path in a circumstance where
you are closing the window by pulling and
holding the switch, by pressing and holding
button ‹on the SmartKey,
or by pressing and holding the lock button
(vehicles with KEYLESS-GO*) on the door
handle, the automatic reversal function will
not operate.
When leaving the vehicle, always remove the
SmartKey or the SmartKey with
KEYLESS-GO* from the starter switch, take
it with you, and lock the vehicle. Do not
leave children unattended in the vehicle, or
with access to an unlocked vehicle. Unsu-
pervised use of vehicle equipment can
cause an accident and/or serious personal
injury.iYou can also open or close the win-
dows using the , button on the
control panel of the automatic climate
control (
�page 187).
Page 197 of 474
195 Controls in detail
Power windows
Fully closing the windows
(Express-close)�
Pull switch1 or2 past the resis-
tance point and release.
The corresponding window closes com-
pletely.
If the upward movement of the window is
blocked during the closing procedure, the
window will stop and open slightly.
Stopping windows
�
Press or pull the respective switch
again.Closing the windows with the
SmartKey with KEYLESS-GO*
�
Press and hold lock button at door
(�page 60) until the side windows are
closed.
Synchronizing power windows
The power window must be resynchro-
nized each time�
after the battery has been disconnect-
ed
�
if the power windows cannot be fully
opened (Express-open) or closed
(Express-close)
Synchronizing the power windows
�
Switch on ignition.
�
Pull the power window switches until
the side windows are closed.
Hold the switches for approximately
one second.
The power windows are synchronized.
Warning
G
Driver’s door only:
If within five seconds the switch is again
pulled past the resistance point and re-
leased, the automatic reversal will not
operate.
Warning!
G
When closing the windows make sure that
there is no danger of anyone being harmed
by the closing procedure.
The windows will not automatically re-open
if blocked during convenience closing.
If potential danger exists, proceed as fol-
lows:�
Release the lock button.
�
Pull on the door handle and hold firmly.
The side windows open for as long as
the door handle is held but the door not
opened.
Page 201 of 474
199 Controls in detail
Retractable hardtop
Locking the retractable hardtop after
raising/lowering
If the retractable hardtop is not properly
locked, lock it as described below.Unlocked status noticed when stopped
�
Switch on ignition.
�
To lock the hardtop in its fully closed
position, press hardtop switch forward.
The message
+
Retractable roof Closed
ap-
pears in the multifunction display.
or:
�
To lock the hardtop in its fully opened
position, pull up on the hardtop switch.
The message K
Retractable roof
Open
appears in the multifunction dis-
play.Unlocked status noticed while driving
�
Stop the vehicle.
�
Leave the ignition switched on.
�
To lock the hardtop in its fully closed
position, press hardtop switch forward.
The message
+
Retractable roof Closed
ap-
pears in the multifunction display.
or:
�
To lock the hardtop in its fully opened
position, pull up on the hardtop switch.
The message K
Retractable roof
Open
appears in the multifunction dis-
play.
Warning!
G
The hardtop is not fully closed and locked or
not fully opened and locked if:�
the indicator light in the hardtop switch
remains lit
�
the message K
in operation
is
shown in the multifunction display and
the indicator lamp in the hardtop switch
does not go out
�
the indicator lamp flashes and a warning
sounds for 10 seconds and the message
K
Lock retractable roof
is
shown in the multifunction display when
starting to drive
Warning!
G
Stop the vehicle and lock the hardtop before
continuing to drive. You could otherwise en-
danger yourself and others.
Page 204 of 474
202 Controls in detailRetractable hardtopIndicator lamp in the retractable hard-
top switch lights when vehicle is
stopped
If the indicator lamp in the retractable
hardtop switch lights while the vehicle is
standing still and the switch was not acti-
vated, then the retractable hardtop is not
locked.�
Properly lock the retractable hardtop
(�page 199) before continuing to
drive.
The retractable hardtop will not lock
There is a malfunction in the retractable
hardtop system.
�
Notify an authorized Mercedes-Benz
Center.Wind screen
The wind screen deflects drafts away from
the driver and passenger when the hardtop
is lowered. It is stored in a separate stor-
age bag.
Installing
�
Leave the wind screen folded and place
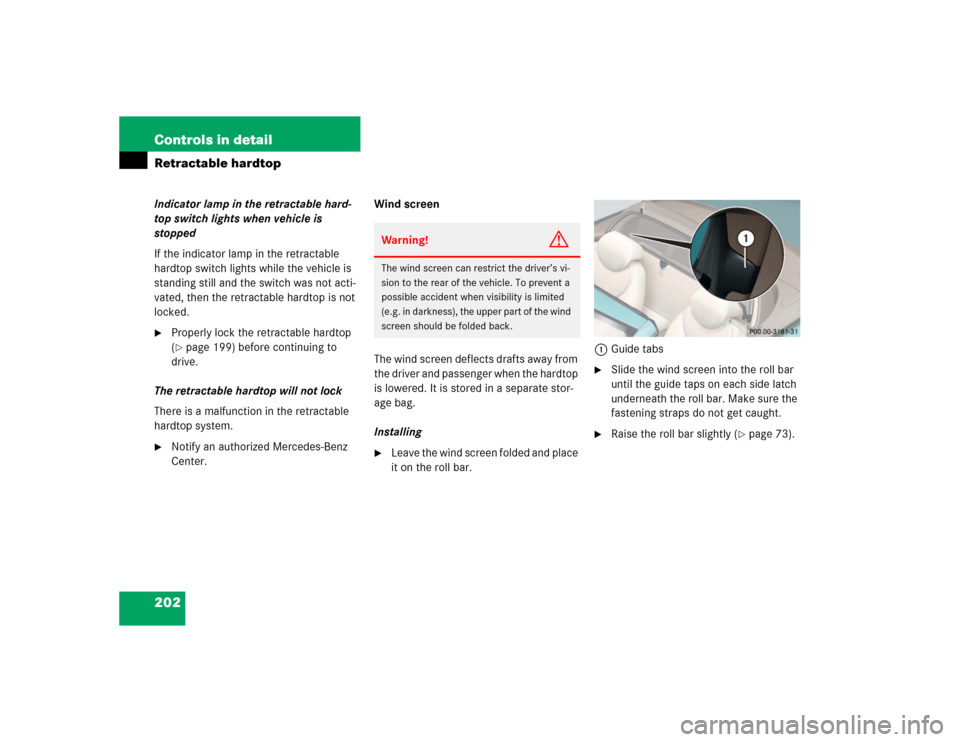
it on the roll bar.1Guide tabs
�
Slide the wind screen into the roll bar
until the guide taps on each side latch
underneath the roll bar. Make sure the
fastening straps do not get caught.
�
Raise the roll bar slightly (
�page 73).
Warning!
G
The wind screen can restrict the driver’s vi-
sion to the rear of the vehicle. To prevent a
possible accident when visibility is limited
(e.g. in darkness), the upper part of the wind
screen should be folded back.
Page 205 of 474
203 Controls in detail
Retractable hardtop
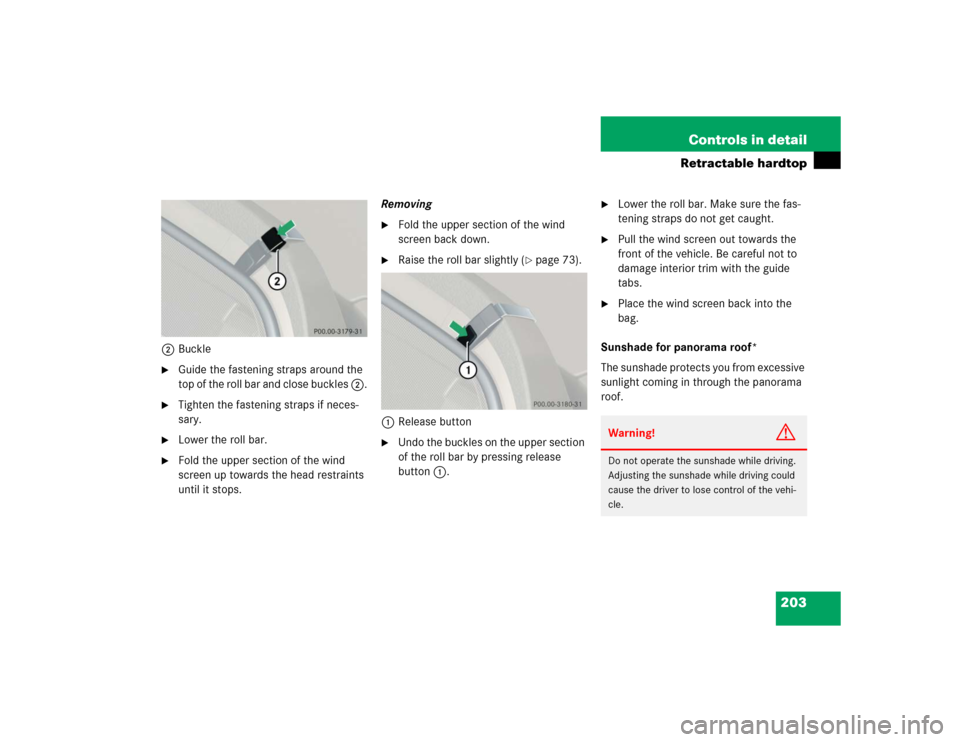
2Buckle�
Guide the fastening straps around the
top of the roll bar and close buckles 2.
�
Tighten the fastening straps if neces-
sary.
�
Lower the roll bar.
�
Fold the upper section of the wind
screen up towards the head restraints
until it stops.Removing
�
Fold the upper section of the wind
screen back down.
�
Raise the roll bar slightly (
�page 73).
1Release button
�
Undo the buckles on the upper section
of the roll bar by pressing release
button1.
�
Lower the roll bar. Make sure the fas-
tening straps do not get caught.
�
Pull the wind screen out towards the
front of the vehicle. Be careful not to
damage interior trim with the guide
tabs.
�
Place the wind screen back into the
bag.
Sunshade for panorama roof*
The sunshade protects you from excessive
sunlight coming in through the panorama
roof.Warning!
G
Do not operate the sunshade while driving.
Adjusting the sunshade while driving could
cause the driver to lose control of the vehi-
cle.
Page 234 of 474
232 Controls in detailUseful featuresLuggage compartment in the rear
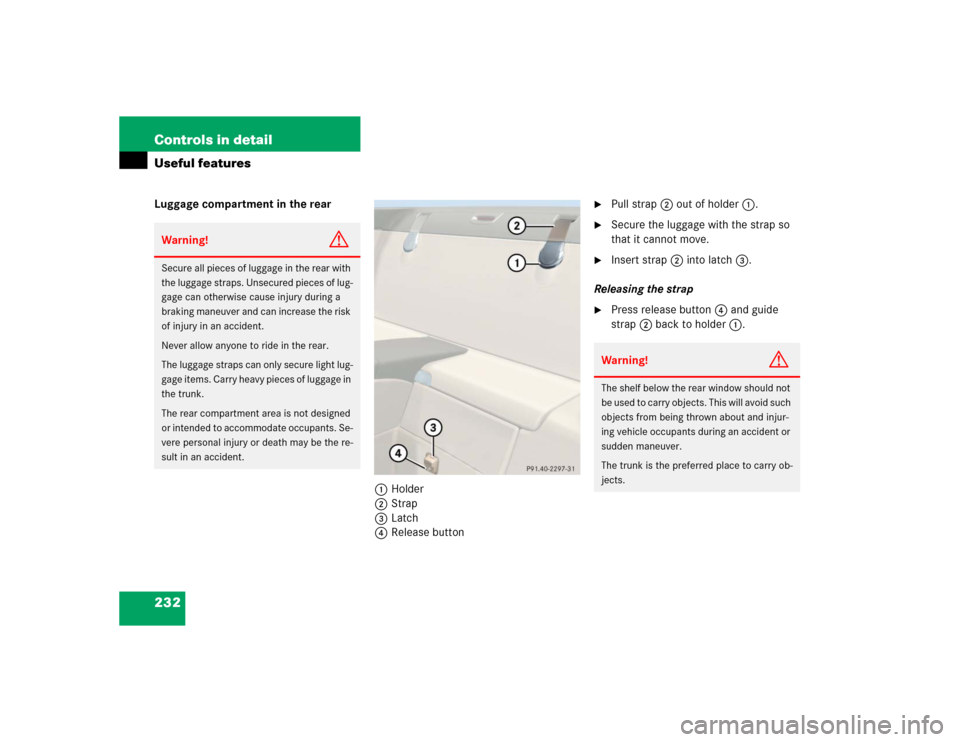
1Holder
2Strap
3Latch
4Release button
�
Pull strap2 out of holder1.
�
Secure the luggage with the strap so
that it cannot move.
�
Insert strap2 into latch3.
Releasing the strap
�
Press release button4 and guide
strap2 back to holder1.
Warning!
G
Secure all pieces of luggage in the rear with
the luggage straps. Unsecured pieces of lug-
gage can otherwise cause injury during a
braking maneuver and can increase the risk
of injury in an accident.
Never allow anyone to ride in the rear.
The luggage straps can only secure light lug-
gage items. Carry heavy pieces of luggage in
the trunk.
The rear compartment area is not designed
or intended to accommodate occupants. Se-
vere personal injury or death may be the re-
sult in an accident.
Warning!
G
The shelf below the rear window should not
be used to carry objects. This will avoid such
objects from being thrown about and injur-
ing vehicle occupants during an accident or
sudden maneuver.
The trunk is the preferred place to carry ob-
jects.