Page 373 of 474
371 Practical hints
What to do if …?
Display
Possible cause
Possible solution
A
TANK OPEN!
CHECK FILLER CAP!
A loss of pressure has been detected in
the fuel system. The fuel cap may not be
closed properly or the fuel system may be
leaky.
�
Check the fuel cap (
�page 283).
If it is not closed properly:
�
Close the fuel cap.
If it is closed properly:
�
Have the fuel system checked by an au-
thorized Mercedes-Benz Center.
Ê
TRUNK OPEN
This message will appear whenever the
trunk lid is open.
�
Close the trunk lid.
W
WASHER FLUID
CHECK LEVEL!
The fluid level has dropped to about
1/3
of total reservoir capacity.�
Add washer fluid (
�page 295).
Page 381 of 474
379 Practical hints
Where will I find ...?
�Where will I find ...?
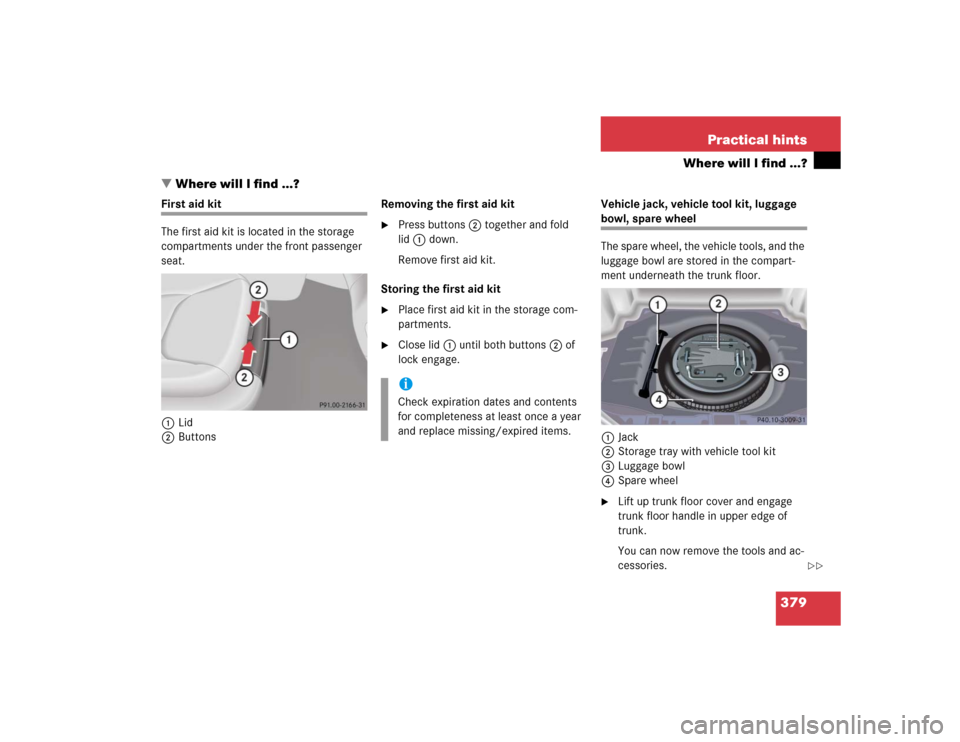
First aid kit
The first aid kit is located in the storage
compartments under the front passenger
seat.
1Lid
2ButtonsRemoving the first aid kit
�
Press buttons2 together and fold
lid1 down.
Remove first aid kit.
Storing the first aid kit
�
Place first aid kit in the storage com-
partments.
�
Close lid1 until both buttons2 of
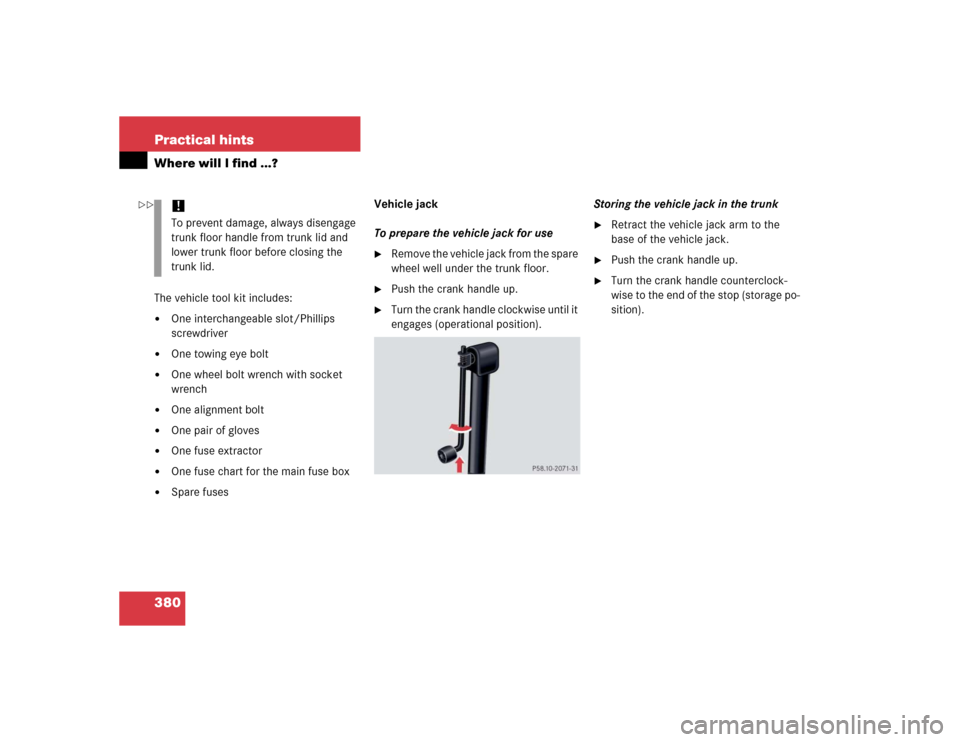
lock engage.Vehicle jack, vehicle tool kit, luggage
bowl, spare wheel
The spare wheel, the vehicle tools, and the
luggage bowl are stored in the compart-
ment underneath the trunk floor.
1Jack
2Storage tray with vehicle tool kit
3Luggage bowl
4Spare wheel�
Lift up trunk floor cover and engage
trunk floor handle in upper edge of
trunk.
You can now remove the tools and ac-
cessories.
iCheck expiration dates and contents
for completeness at least once a year
and replace missing/expired items.
��
Page 382 of 474
380 Practical hintsWhere will I find ...?The vehicle tool kit includes:�
One interchangeable slot/Phillips
screwdriver
�
One towing eye bolt
�
One wheel bolt wrench with socket
wrench
�
One alignment bolt
�
One pair of gloves
�
One fuse extractor
�
One fuse chart for the main fuse box
�
Spare fusesVehicle jack
To prepare the vehicle jack for use
�
Remove the vehicle jack from the spare
wheel well under the trunk floor.
�
Push the crank handle up.
�
Turn the crank handle clockwise until it
engages (operational position).Storing the vehicle jack in the trunk
�
Retract the vehicle jack arm to the
base of the vehicle jack.
�
Push the crank handle up.
�
Turn the crank handle counterclock-
wise to the end of the stop (storage po-
sition).
!To prevent damage, always disengage
trunk floor handle from trunk lid and
lower trunk floor before closing the
trunk lid.
��
Page 385 of 474
383 Practical hints
Unlocking/locking in an emergency
�Unlocking/locking in an emergency
Unlocking the vehicle
If you are unable to unlock the vehicle with
the SmartKey or KEYLESS-GO*, open the
driver’s door and the trunk using the me-
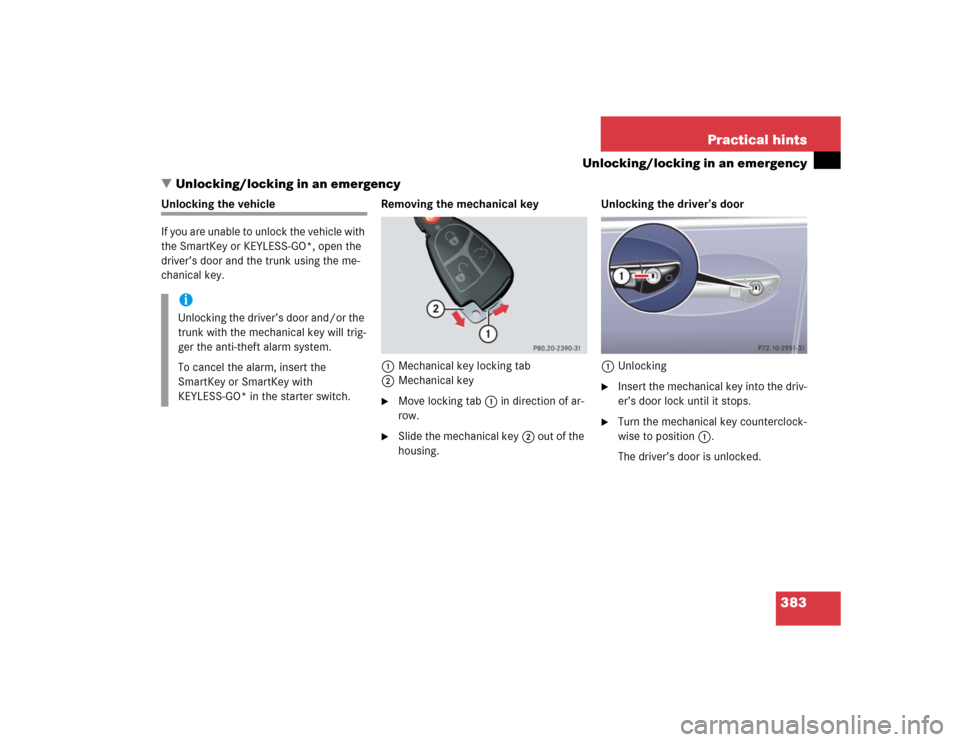
chanical key. Removing the mechanical key
1Mechanical key locking tab
2Mechanical key
�
Move locking tab1 in direction of ar-
row.
�
Slide the mechanical key2 out of the
housing.Unlocking the driver’s door
1Unlocking
�
Insert the mechanical key into the driv-
er’s door lock until it stops.
�
Turn the mechanical key counterclock-
wise to position1.
The driver’s door is unlocked.
iUnlocking the driver’s door and/or the
trunk with the mechanical key will trig-
ger the anti-theft alarm system.
To cancel the alarm, insert the
SmartKey or SmartKey with
KEYLESS-GO* in the starter switch.
Page 386 of 474
 is required to open the trunk lid.
The trunk lid lock is located next to the
hand")
384 Practical hintsUnlocking/locking in an emergencyUnlocking the trunk
A minimum height clearance of 6 ft.
(1.85 m) is required to open the trunk lid.
The trunk lid lock is located next to the
handle above the rear license plate recess.
1Unlocking and opening�
Insert the mechanical key into the
trunk lid lock until it stops.
�
Turn the mechanical key counterclock-
wise to position1.
The trunk unlocks and opens.
Locking the vehicle
If you are unable to lock the vehicle with
the SmartKey or the SmartKey with
KEYLESS-GO*, do the following:�
Close the passenger doors and the
trunk lid.
�
Press the central locking switch in the
center console (
�page 113).
�
Check to see whether the locking
knobs on the passenger doors have
moved down.
�
If necessary push them down manually.
Except for the driver's door, the vehicle
should now be locked.1Unlocking
�
Remove the mechanical key out of the
SmartKey (
�page 383).
�
Insert the mechanical key into the driv-
er’s door lock until it stops.
�
Turn the mechanical key clockwise to
position1.
The driver’s door is locked.
!The trunk lid swings open upwards au-
tomatically. Always make sure that
there is sufficient overhead clearance.
Page 387 of 474
385 Practical hints
Unlocking/locking in an emergency
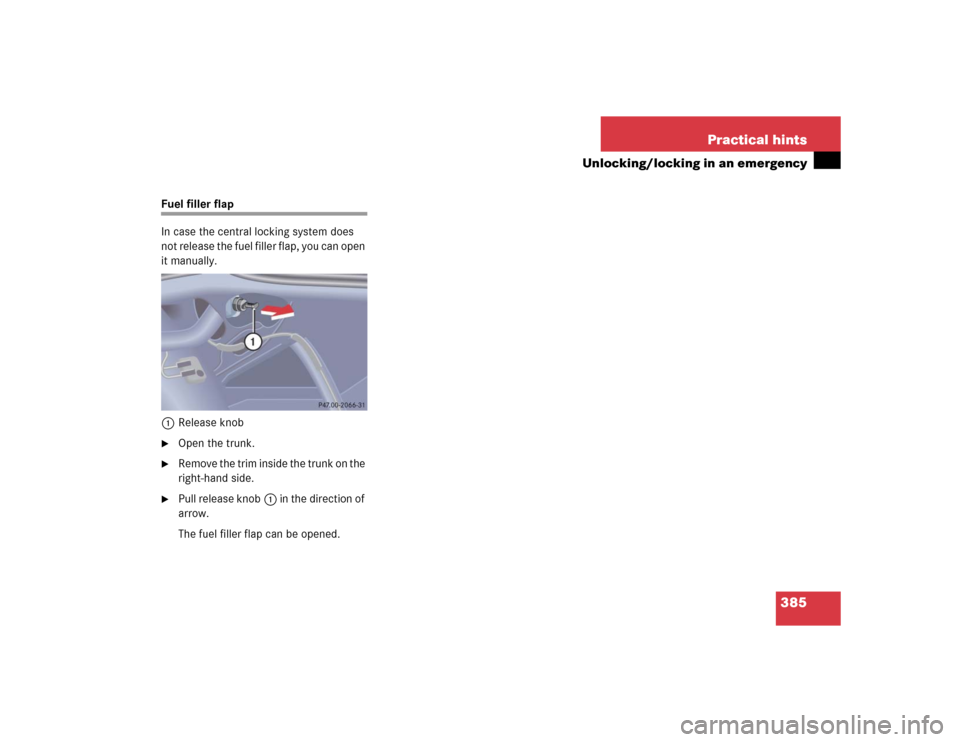
Fuel filler flap
In case the central locking system does
not release the fuel filler flap, you can open
it manually.
1Release knob�
Open the trunk.
�
Remove the trim inside the trunk on the
right-hand side.
�
Pull release knob1 in the direction of
arrow.
The fuel filler flap can be opened.
Page 396 of 474
394 Practical hintsReplacing bulbsParking and standing lamp bulb�
Press the tab on cover2 and remove
cover.
�
Pull out the bulb socket5 with the
bulb.
�
Pull the bulb out of the bulb socket5.
�
Insert a new bulb in the bulb socket5.
�
Reinstall the bulb socket5.
�
Press cover2 onto the housing until
the tab engages.Side marker lamp bulb
�
Carefully slide lamp towards rear.
�
Remove front end first.
�
Twist bulb socket counterclockwise
and pull out.
�
Pull bulb out of the bulb socket.
�
Insert new bulb in socket.
�
Reinstall bulb socket, push in and twist
clockwise.
�
To reinstall lamp, set rear end in
bumper and let front end snap into
place.
Replacing bulbs for rear lamps
Before you start to replace a bulb for a rear
lamp, do the following first:�
Turn the exterior lamp switch to M
(�page 50).
�
Open the trunk (
�page 103).
Page 401 of 474
.
Lifting the vehicle
�
Prevent the")
399 Practical hints
Flat tire
Preparing the vehicle�
Take vehicle tool kit tray and vehicle
jack out of trunk.
�
Take the spare wheel out of wheel well
(�page 379).
Lifting the vehicle
�
Prevent the vehicle from rolling away
by blocking wheels with wheel chocks
(not included) or other sizable objects.
When changing wheel on a level surface:
�
Place one chock in front of and one be-
hind the wheel that is diagonally oppo-
site to the wheel being changed.
When changing wheel on a hill:
�
Place chocks behind the downhill sides
of both wheels of the axle not being
worked on.
�
Take the two-piece wheel wrench out
of the vehicle tool kit tray. Assemble
wheel wrench.
�
On wheel to be changed, loosen but do
not yet remove the wheel bolts (ap-
proximately one full turn with wrench).
The tube openings are located directly be-
hind the front wheel housings and in front
of the rear wheel housings.
The dimensions of the spare wheel are dif-
ferent from those of the road wheels. As a
result, the vehicle handling characteristics
change when driving with a mounted spare
wheel. Adapt your driving style accordingly.
Warning!
G
The jack is designed exclusively for jacking
up the vehicle at the jack tubes built both
sides of the vehicle. To help avoid personal
injury, use the jack only to lift the vehicle
during a wheel change. Never get beneath
the vehicle while it is supported by the jack.
Keep hands and feet away from the area un-
der the lifted vehicle. Always firmly set park-
ing brake and block wheels before raising
vehicle with jack.
Do not disengage parking brake while the
vehicle is raised. Be certain that the jack is
always vertical (plumb line) when in use, es-
pecially on hills. Always try to use the jack
on level surface. Make sure the jack arm is
fully inserted in the jack tube. Always lower
the vehicle onto sufficient capacity jack-
stands before working under the vehicle.