Page 156 of 356
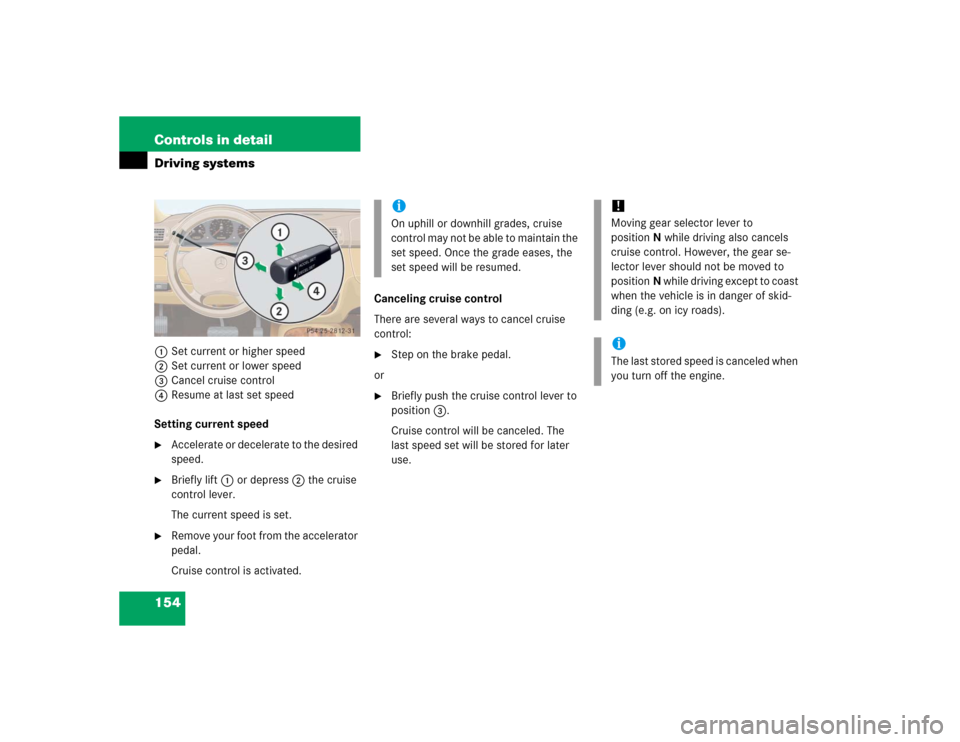
154 Controls in detailDriving systems1Set current or higher speed
2Set current or lower speed
3Cancel cruise control
4Resume at last set speed
Setting current speed�
Accelerate or decelerate to the desired
speed.
�
Briefly lift1 or depress2 the cruise
control lever.
The current speed is set.
�
Remove your foot from the accelerator
pedal.
Cruise control is activated.Canceling cruise control
There are several ways to cancel cruise
control:
�
Step on the brake pedal.
or
�
Briefly push the cruise control lever to
position3.
Cruise control will be canceled. The
last speed set will be stored for later
use.iOn uphill or downhill grades, cruise
control may not be able to maintain the
set speed. Once the grade eases, the
set speed will be resumed.
!Moving gear selector lever to
positionN while driving also cancels
cruise control. However, the gear se-
lector lever should not be moved to
positionN while driving except to coast
when the vehicle is in danger of skid-
ding (e.g. on icy roads).iThe last stored speed is canceled when
you turn off the engine.
Page 157 of 356
155 Controls in detail
Driving systems
Setting a higher speed�
Lift the cruise control lever to
position1 and hold it up until the de-
sired speed is reached.
�
Release the cruise control lever.
The new speed is set.
Setting a lower speed
�
Depress the cruise control lever to
position2 and hold it down until the
desired speed is reached.
�
Release the cruise control lever.
The new speed is set.Fine adjustment in 1 mph
(Canada: 1 km / h) increments
Faster
�
Briefly tip the cruise control lever in the
direction of arrow1.
Slower
�
Briefly tip the cruise control lever in the
direction of arrow2.Setting to last stored speed (“Resume”
function)
�
Briefly push the cruise control lever to
position4.
The cruise control will resume the last
set speed.
�
Remove your foot from the accelerator
pedal.
Transmission in LOW RANGE mode
iDepressing the accelerator pedal does
not deactivate the cruise control. After
brief acceleration (e.g. for passing),
cruise control will resume the last
speed set.
iWhen you use the cruise control lever
to decelerate, the transmission will au-
tomatically downshift if the engine’s
braking power does not brake the vehi-
cle sufficiently.
Warning!
G
The speed stored in memory should only be
set again if prevailing road conditions per-
mit. Possible acceleration or deceleration
differences arising from returning to preset
speed could cause an accident and / or seri-
ous injury to you and others.iThe cruise control should not be used
during off-road driving.
Page 173 of 356
171 Controls in detail
Useful features
Ashtrays and cigarette lighter Ashtray and cigarette lighter in the
front center console
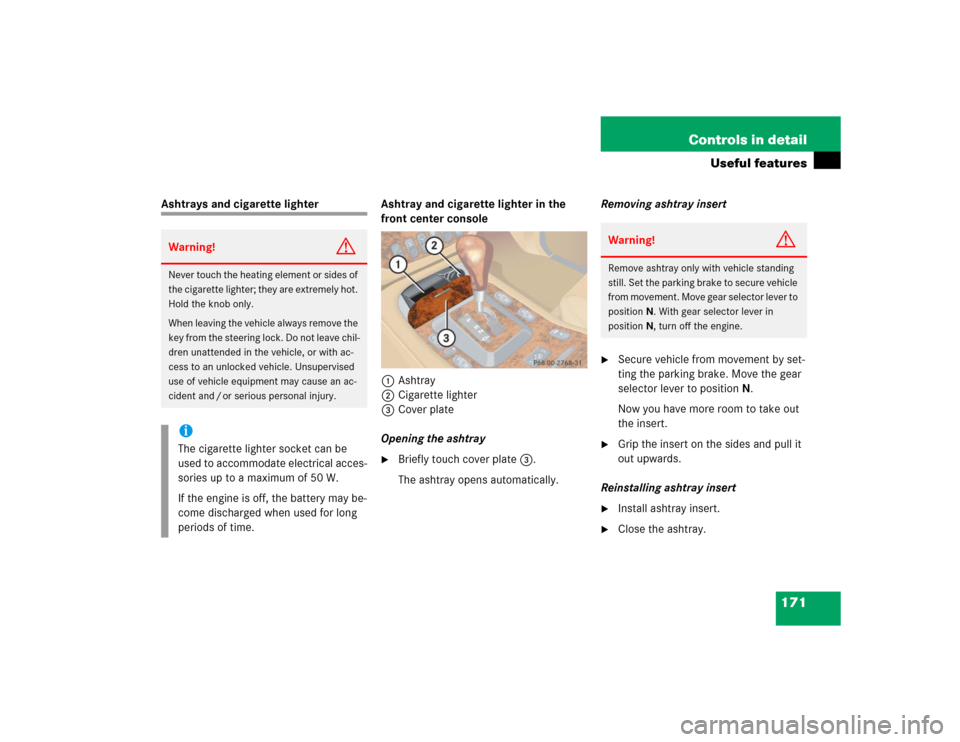
1Ashtray
2Cigarette lighter
3Cover plate
Opening the ashtray
�
Briefly touch cover plate3.
The ashtray opens automatically.Removing ashtray insert
�
Secure vehicle from movement by set-
ting the parking brake. Move the gear
selector lever to positionN.
Now you have more room to take out
the insert.
�
Grip the insert on the sides and pull it
out upwards.
Reinstalling ashtray insert
�
Install ashtray insert.
�
Close the ashtray.
Warning!
G
Never touch the heating element or sides of
the cigarette lighter; they are extremely hot.
Hold the knob only.
When leaving the vehicle always remove the
key from the steering lock. Do not leave chil-
dren unattended in the vehicle, or with ac-
cess to an unlocked vehicle. Unsupervised
use of vehicle equipment may cause an ac-
cident and / or serious personal injury.iThe cigarette lighter socket can be
used to accommodate electrical acces-
sories up to a maximum of 50 W.
If the engine is off, the battery may be-
come discharged when used for long
periods of time.
Warning!
G
Remove ashtray only with vehicle standing
still. Set the parking brake to secure vehicle
from movement. Move gear selector lever to
positionN. With gear selector lever in
positionN, turn off the engine.
Page 175 of 356
173 Controls in detail
Useful features
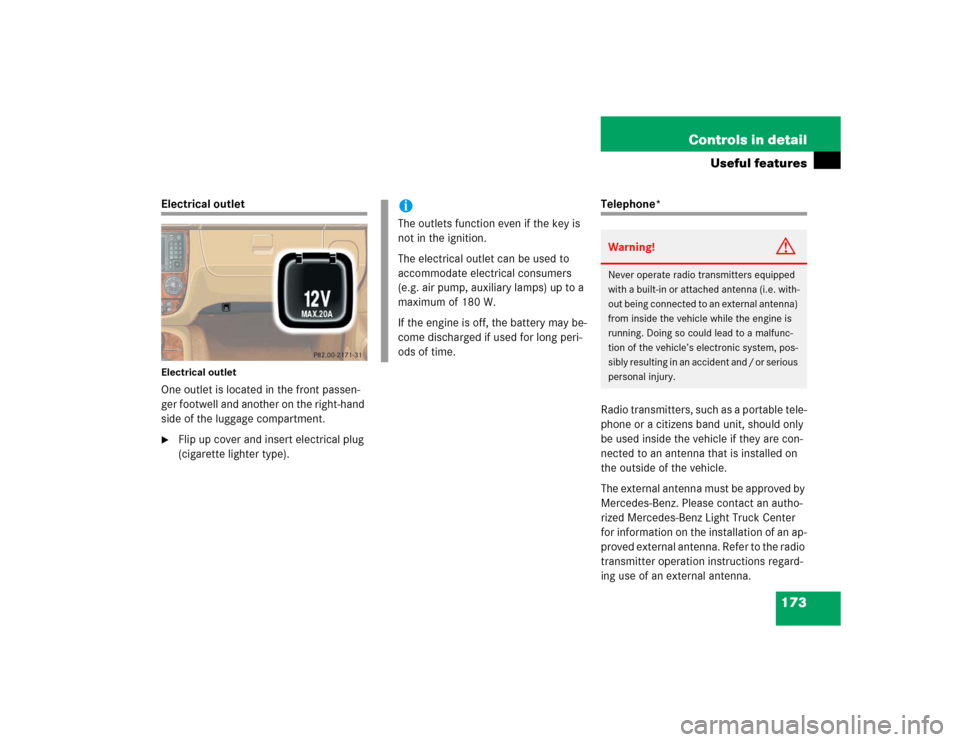
Electrical outletElectrical outletOne outlet is located in the front passen-
ger footwell and another on the right-hand
side of the luggage compartment.�
Flip up cover and insert electrical plug
(cigarette lighter type).
Telephone*
Radio transmitters, such as a portable tele-
phone or a citizens band unit, should only
be used inside the vehicle if they are con-
nected to an antenna that is installed on
the outside of the vehicle.
The external antenna must be approved by
Mercedes-Benz. Please contact an autho-
rized Mercedes-Benz Light Truck Center
for information on the installation of an ap-
proved external antenna. Refer to the radio
transmitter operation instructions regard-
ing use of an external antenna.
iThe outlets function even if the key is
not in the ignition.
The electrical outlet can be used to
accommodate electrical consumers
(e.g. air pump, auxiliary lamps) up to a
maximum of 180 W.
If the engine is off, the battery may be-
come discharged if used for long peri-
ods of time.
Warning!
G
Never operate radio transmitters equipped
with a built-in or attached antenna (i.e. with-
out being connected to an external antenna)
from inside the vehicle while the engine is
running. Doing so could lead to a malfunc-
tion of the vehicle’s electronic system, pos-
sibly resulting in an accident and / or serious
personal injury.
Page 191 of 356
189 Controls in detail
Useful features
Trip computer*
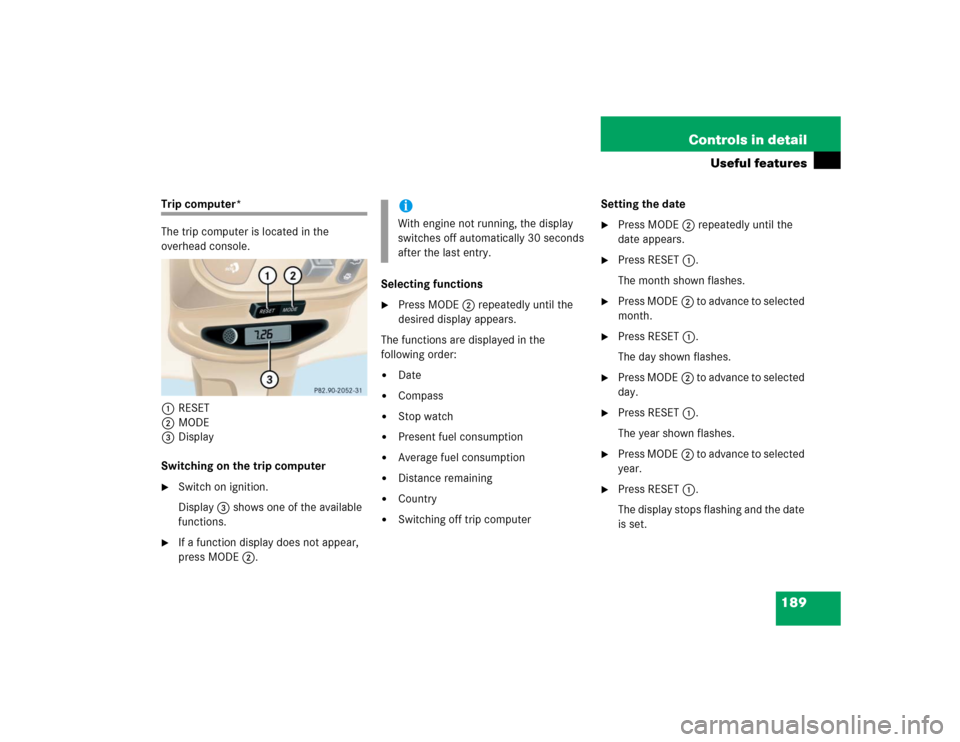
The trip computer is located in the
overhead console.
1RESET
2MODE
3Display
Switching on the trip computer�
Switch on ignition.
Display3 shows one of the available
functions.
�
If a function display does not appear,
press MODE2.Selecting functions
�
Press MODE2 repeatedly until the
desired display appears.
The functions are displayed in the
following order:
�
Date
�
Compass
�
Stop watch
�
Present fuel consumption
�
Average fuel consumption
�
Distance remaining
�
Country
�
Switching off trip computerSetting the date
�
Press MODE2 repeatedly until the
date appears.
�
Press RESET1.
The month shown flashes.
�
Press MODE2 to advance to selected
month.
�
Press RESET1.
The day shown flashes.
�
Press MODE2 to advance to selected
day.
�
Press RESET1.
The year shown flashes.
�
Press MODE2 to advance to selected
year.
�
Press RESET1.
The display stops flashing and the date
is set.
iWith engine not running, the display
switches off automatically 30 seconds
after the last entry.
Page 193 of 356
191 Controls in detail
Useful features
Setting the compass zone�
Determine the geographical point of
the vehicle with the aid of the zone
maps.
�
Switch on the ignition.
�
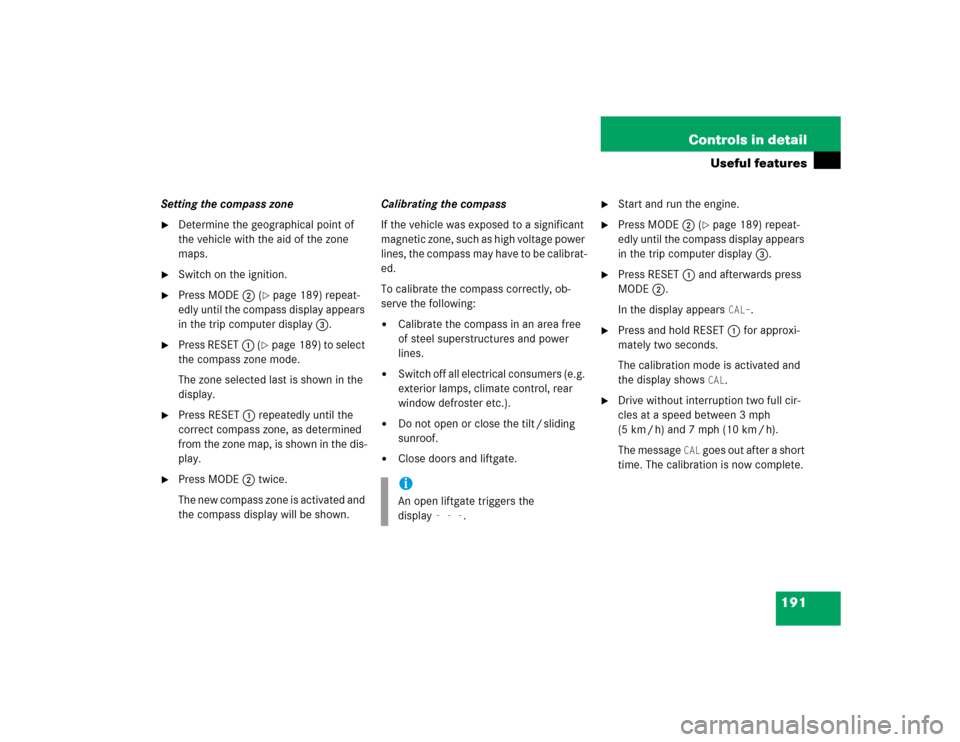
Press MODE2 (
�page 189) repeat-
edly until the compass display appears
in the trip computer display3.
�
Press RESET1 (
�page 189) to select
the compass zone mode.
The zone selected last is shown in the
display.
�
Press RESET1 repeatedly until the
correct compass zone, as determined
from the zone map, is shown in the dis-
play.
�
Press MODE2 twice.
The new compass zone is activated and
the compass display will be shown.Calibrating the compass
If the vehicle was exposed to a significant
magnetic zone, such as high voltage power
lines, the compass may have to be calibrat-
ed.
To calibrate the compass correctly, ob-
serve the following:
�
Calibrate the compass in an area free
of steel superstructures and power
lines.
�
Switch off all electrical consumers (e.g.
exterior lamps, climate control, rear
window defroster etc.).
�
Do not open or close the tilt / sliding
sunroof.
�
Close doors and liftgate.
�
Start and run the engine.
�
Press MODE2 (
�page 189) repeat-
edly until the compass display appears
in the trip computer display3.
�
Press RESET1 and afterwards press
MODE2.
In the display appears
CAL–
.
�
Press and hold RESET1 for approxi-
mately two seconds.
The calibration mode is activated and
the display shows
CAL
.
�
Drive without interruption two full cir-
cles at a speed between 3 mph
(5 km / h) and 7 mph (10 km / h).
The message
CAL
goes out after a short
time. The calibration is now complete.
iAn open liftgate triggers the
display
---
.
Page 197 of 356
195 Operation
The first 1000 miles (1500 km)
Driving instructions
At the gas station
Engine compartment
Tires and wheels
Winter driving
Maintenance
Vehicle care
Page 198 of 356

196 OperationIn the “Operation” section you will find
detailed information on operating, main-
taining and caring for your vehicle.The first 1000 miles (1500 km)
The more cautiously you treat your vehicle
during the break-in period, the more satis-
fied you will be with its performance later
on.�
Drive your vehicle during the first
1000 miles (1500 km) at varying but
moderate vehicle and engine speeds.
�
During this period, avoid heavy loads
(full throttle driving) and excessive en-
gine speeds (no more than
2/3 of max-
imum rpm in each gear).
�
Avoid accelerating by kick-down.
�
Do not attempt to slow the vehicle
down by shifting to a lower gear using
the gear selector lever.
�
Select positions3, 2 or1 only when
driving at moderate speeds (for hill
driving).After 1000 miles (1500 km) you may grad-
ually increase vehicle and engine speeds
to the permissible maximum.
All of the above instructions, as may apply
to your vehicle type, also apply when the
first 1000 miles (1500 km) after the en-
gine, the transfer case, the front differen-
tial or the rear differential has been
replaced.
iAlways obey applicable speed limits.