Page 215 of 356
213 Operation
Driving instructions
Checking weights of vehicle and trailer�
To assure that the tow vehicle and trail-
er are in compliance with the maximum
permissible weight limits have the load-
ed rig (tow vehicle including driver, pas-
sengers and cargo, trailer fully loaded)
weighed on a commercial scale.
�
Check the vehicle’s front and rear
Gross Axle Weight (GAW), the GTW and
TW.
The values as measured must not be
exceeded, according to the weight list-
ed under “Vehicle and trailer weight
and ratings”.Attaching a trailer
Observe maximum permitted trailer
dimensions (width and length).
Most states and all Canadian provinces
require
�
safety chains between your tow vehicle
and the trailer.
The chains should be crisscrossed un-
der the trailer tongue. They must be at-
tached to the hitch receiver, and not to
the vehicle’s bumper or axle.
Make sure to leave enough slack in the
chains to permit turning corners.
�
a separate brake system at various
trailer weights.
�
a break-away switch on trailers with a
separate brake system.
The switch activates the trailer brakes
in the possible event that the trailer
might separate from the tow vehicle.
!Do not connect a trailer brake system
(if trailer is so equipped) directly to the
vehicle’s hydraulic brake system, as
your vehicle is equipped with antilock
brakes. If you do, neither the vehicle’s
brakes nor the trailer’s brakes will func-
tion properly.iThe provided vehicle electrical wiring
harness for trailer towing has a brake
signal wire (color orange) for hook-up
to a brake controller.
You should consider using a trailer
sway control system. For further infor-
mation see an authorized
Mercedes-Benz Light Truck Center.
Page 240 of 356
238 OperationMaintenanceMaintenance service term exceeded
If you have exceeded the suggested
maintenance service term:�
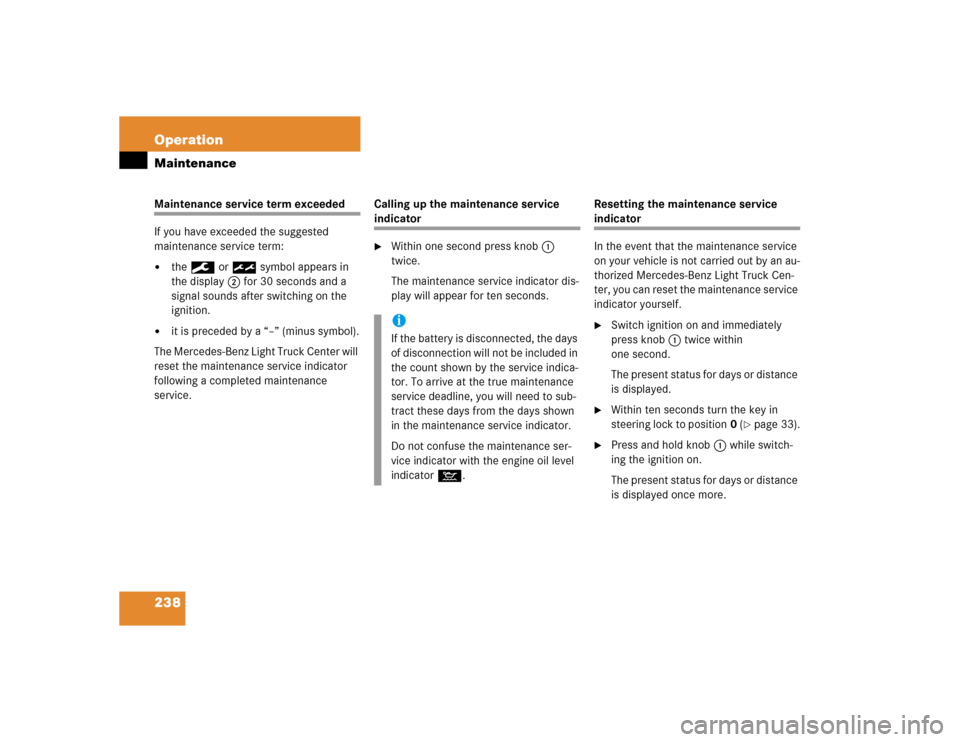
the9 or ½symbol appears in
the display2 for 30 seconds and a
signal sounds after switching on the
ignition.
�
it is preceded by a “–” (minus symbol).
The Mercedes-Benz Light Truck Center will
reset the maintenance service indicator
following a completed maintenance
service.Calling up the maintenance service
indicator�
Within one second press knob1
twice.
The maintenance service indicator dis-
play will appear for ten seconds.Resetting the maintenance service
indicator
In the event that the maintenance service
on your vehicle is not carried out by an au-
thorized Mercedes-Benz Light Truck Cen-
ter, you can reset the maintenance service
indicator yourself.�
Switch ignition on and immediately
press knob1 twice within
one second.
The present status for days or distance
is displayed.
�
Within ten seconds turn the key in
steering lock to position0 (
�page 33).
�
Press and hold knob1 while switch-
ing the ignition on.
The present status for days or distance
is displayed once more.
iIf the battery is disconnected, the days
of disconnection will not be included in
the count shown by the service indica-
tor. To arrive at the true maintenance
service deadline, you will need to sub-
tract these days from the days shown
in the maintenance service indicator.
Do not confuse the maintenance ser-
vice indicator with the engine oil level
indicator:.
Page 244 of 356

242 OperationVehicle careEngine cleaning
Prior to cleaning the engine compartment
make sure to protect electrical compo-
nents and connectors from the intrusion of
water and cleaning agents.
Corrosion protection, such as MB Anticor-
rosion Wax, should be applied to the en-
gine compartment after every engine
cleaning. Before applying, all control link-
age bushings and joints should be lubricat-
ed. The poly-V-belt and all pulleys should
be protected from any wax.
Vehicle washing
Do not use hot water or wash your vehicle
in direct sunlight. Use only a mild car wash
detergent, such as Mercedes-Benz
approved Car Shampoo.Thoroughly spray the vehicle with a dif-
fused jet of water. Direct only a very weak
spray towards the ventilation intake. Use
plenty of water and rinse the sponge and
chamois frequently.
Rinse with clear water and thoroughly dry
with a chamois. Do not allow cleaning
agents to dry on the finish.
Due to the width of the vehicle, fold in ex-
terior rear view mirrors prior to running the
vehicle through an automatic car wash to
prevent damage to the mirrors.
In the winter, thoroughly remove all traces
of road salt as soon as possible.
When washing the underbody, do not for-
get to clean the inner sides of the wheels.Ornamental moldings
For regular cleaning and care of very dirty
chrome-plated parts, use a chrome clean-
er.
Headlamps, tail lamps, side markers,
turn signal lenses
Use a mild car wash detergent, such as
Mercedes-Benz approved Car Shampoo,
with plenty of water.
To prevent scratches, never apply strong
force and only use a soft, non-scratchy
cloth when cleaning the lenses. Do not
attempt to wipe dirty lenses with a dry
cloth or sponge.
Page 276 of 356
274 Practical hintsReplacing bulbsBulbs
Safe vehicle operation depends on proper
exterior lighting and signaling. It is there-
fore essential that all bulbs and lamp as-
semblies are in good working order at all
times.
Correct headlamp adjustment is extremely
important. Have headlamps checked and
readjusted at regular intervals and when a
bulb has been replaced. See an authorized
Mercedes-Benz Light Truck Center for
headlamp adjustment.Front lamps
iBackup bulbs will be brought into use
when the following lamps malfunction:�
Turn signal lamps
�
Parking lamps
�
Tail lamps
iIf the headlamps or front fog lamps are
fogged up on the inside as a result of
high humidity, driving the vehicle a dis-
tance with the lights on should clear up
the fogging.
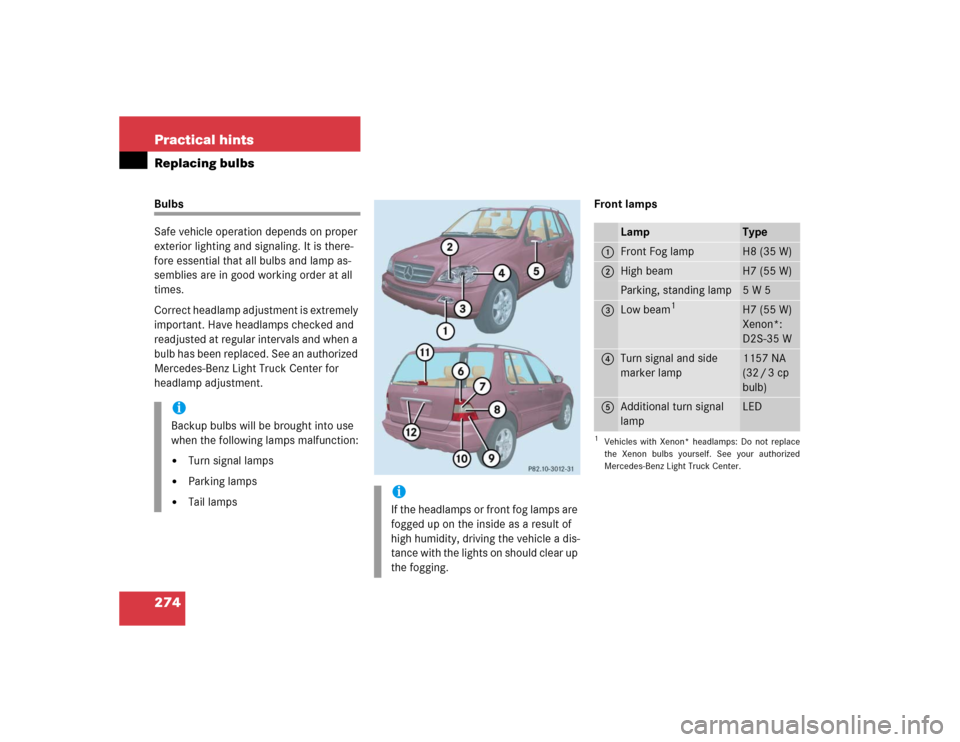
Lamp
Type
1
Front Fog lamp
H8 (35 W)
2
High beam
H7 (55 W)
Parking, standing lamp
5W5
3
Low beam
1
1Vehicles with Xenon* headlamps: Do not replace
the Xenon bulbs yourself. See your authorized
Mercedes-Benz Light Truck Center.
H7 (55 W)
Xenon*:
D2S-35 W
4
Turn signal and side
marker lamp
1157 NA
(32 / 3 cp
bulb)
5
Additional turn signal
lamp
LED
Page 277 of 356
275 Practical hints
Replacing bulbs
Rear lamps Notes on bulb replacement
�
Only use 12 volt bulbs of the same type
and with the specified watt rating.
�
Switch lights off before changing a bulb
to prevent short circuits.
�
Always use a clean lint-free cloth when
handling bulbs.
�
Your hands should be dry and free of oil
and grease.
�
If the newly installed bulb does not
come on, visit an authorized
Mercedes-Benz Light Truck Center.
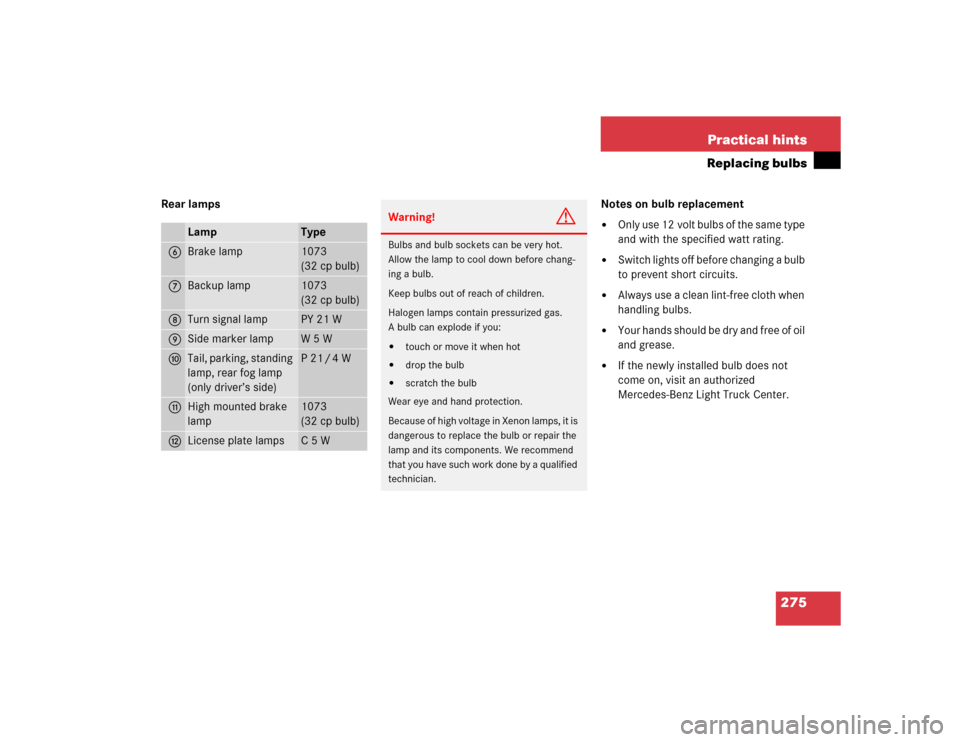
Lamp
Type
6
Brake lamp
1073
(32 cp bulb)
7
Backup lamp
1073
(32 cp bulb)
8
Turn signal lamp
PY 21 W
9
Side marker lamp
W 5 W
a
Tail, parking, standing
lamp, rear fog lamp
(only driver’s side)
P 21 / 4 W
b
High mounted brake
lamp
1073
(32 cp bulb)
c
License plate lamps
C 5 W
Warning!
G
Bulbs and bulb sockets can be very hot.
Allow the lamp to cool down before chang-
ing a bulb.
Keep bulbs out of reach of children.
Halogen lamps contain pressurized gas.
A bulb can explode if you:�
touch or move it when hot
�
drop the bulb
�
scratch the bulb
Wear eye and hand protection.
Because of high voltage in Xenon lamps, it is
dangerous to replace the bulb or repair the
lamp and its components. We recommend
that you have such work done by a qualified
technician.
Page 278 of 356
276 Practical hintsReplacing bulbsHave the LEDs and bulbs for the following
lamps replaced by an authorized
Mercedes-Benz Light Truck Center:�
Additional turn signals in the exterior
rear view mirrors
�
Xenon*-lamps
�
Front fog lamps (vehicles with sport
package*)
�
High mounted brake lamp (only vehi-
cles with an exterior spare-wheel
rack*)
Replacing bulbs for front lamps
Before you start to replace a bulb for a
front lamp, do the following first:�
Turn the combination switch to
positionD (
�page 107).
�
Open the hood (
�page 222).
Replacing low beam bulbs
1Low beam halogen or Bi-Xenon* hous-
ing cover with locking tab2Electrical connector
Bi-Xenon* headlamp
Warning!
G
Do not remove the cover
1
for the
Bi-Xenon* headlamp. Because of high volt-
age in Xenon* lamps, it is dangerous to re-
place the bulb or repair the lamp and its
components. We recommend that you have
such work done by a qualified technician.
Page 280 of 356
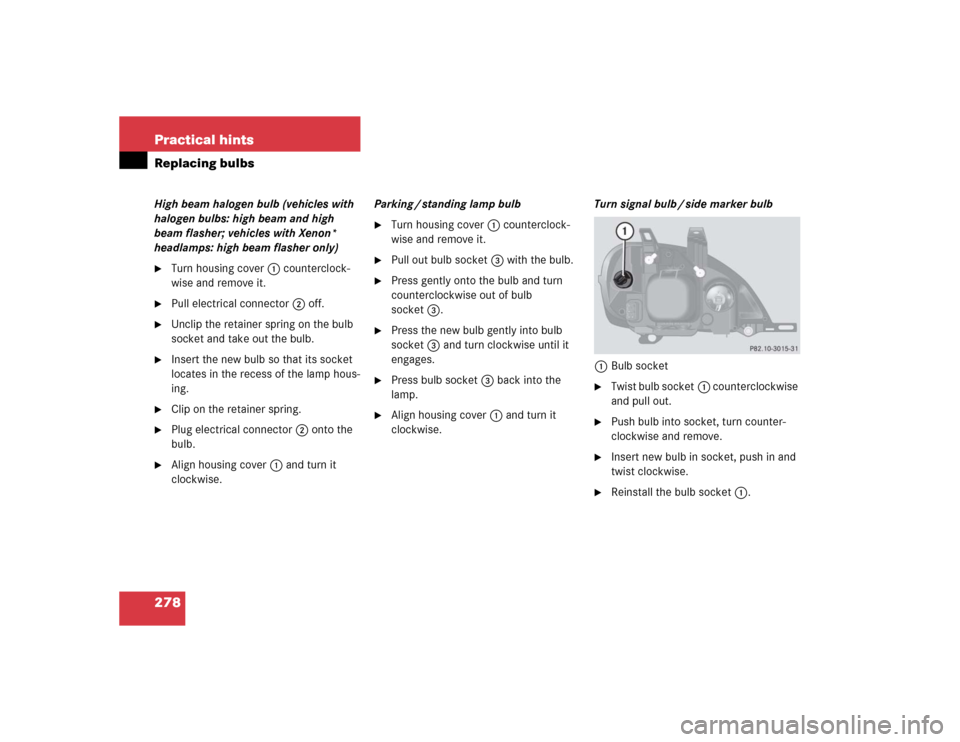
278 Practical hintsReplacing bulbsHigh beam halogen bulb (vehicles with
halogen bulbs: high beam and high
beam flasher; vehicles with Xenon*
headlamps: high beam flasher only)�
Turn housing cover1 counterclock-
wise and remove it.
�
Pull electrical connector2 off.
�
Unclip the retainer spring on the bulb
socket and take out the bulb.
�
Insert the new bulb so that its socket
locates in the recess of the lamp hous-
ing.
�
Clip on the retainer spring.
�
Plug electrical connector2 onto the
bulb.
�
Align housing cover1 and turn it
clockwise.Parking / standing lamp bulb
�
Turn housing cover1 counterclock-
wise and remove it.
�
Pull out bulb socket3 with the bulb.
�
Press gently onto the bulb and turn
counterclockwise out of bulb
socket3.
�
Press the new bulb gently into bulb
socket3 and turn clockwise until it
engages.
�
Press bulb socket3 back into the
lamp.
�
Align housing cover1 and turn it
clockwise.Turn signal bulb / side marker bulb
1Bulb socket
�
Twist bulb socket1 counterclockwise
and pull out.
�
Push bulb into socket, turn counter-
clockwise and remove.
�
Insert new bulb in socket, push in and
twist clockwise.
�
Reinstall the bulb socket1.
Page 281 of 356
279 Practical hints
Replacing bulbs
Front fog lamp
1Front fog lamp�
Use a suitable object (e.g. screwdriver)
to press on the release lever behind the
front panel.
Front fog lamp1 releases.
�
Pull front fog lamp1 out of the
bumper.2Bulb socket of front fog lamp bulb
3Tabs
�
Turn bulb socket2 with the bulb
counterclockwise and remove it.
�
Insert new bulb socket2 with the bulb
into the lamp and turn it clockwise.
�
Reinstall front fog lamp1 into the
bumper.
Let tabs3 engage in the bumper.
Replacing bulbs for rear lamps
Before you start to replace a bulb for a rear
lamp, do the following first:�
Turn the combination switch to
positionD (
�page 107).
Tail lamp unit
1Hexagon cap nut (with washer)
2Rear fog lamp (only driver’s side), tail
lamp, parking and standing lamp
3Side marker lamp
4Turn signal lamp
5Backup lamp
6Brake lamp
��