Page 41 of 356

39 Getting started
Adjusting
Seat cushion tilt�
Press the switch up or down in the di-
rection of arrow3 until your upper
legs are lightly supported.
Seat backrest tilt
�
Press the switch forward or backward
in the direction of arrow1 until your
arms are slightly angled when holding
the steering wheel.
Seat height
�
Press the switch up or down in the di-
rection of arrow4.Head restraint height
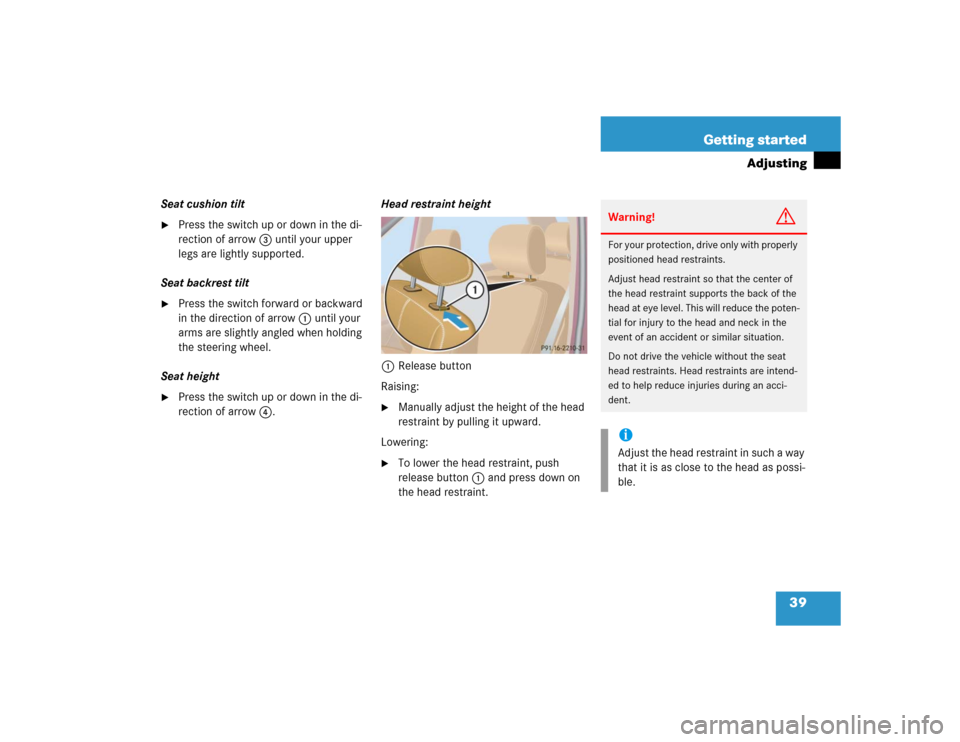
1Release button
Raising:
�
Manually adjust the height of the head
restraint by pulling it upward.
Lowering:
�
To lower the head restraint, push
release button1 and press down on
the head restraint.
Warning!
G
For your protection, drive only with properly
positioned head restraints.
Adjust head restraint so that the center of
the head restraint supports the back of the
head at eye level. This will reduce the poten-
tial for injury to the head and neck in the
event of an accident or similar situation.
Do not drive the vehicle without the seat
head restraints. Head restraints are intend-
ed to help reduce injuries during an acci-
dent.iAdjust the head restraint in such a way
that it is as close to the head as possi-
ble.
Page 42 of 356
40 Getting startedAdjustingHead restraint tilt
Manually adjust the angle of the head
restraint.�
Push or pull on the upper edge of the
head restraint cushion.
For more information, see “Seats”
(
�page 95).
Steering wheel Steering wheel adjustment
1Lever
�
To unlock the steering column, move
lever1 to its stop down.
�
Move steering wheel to the desired po-
sition.
�
To lock the steering column, move
lever1 to its stop up.
The steering wheel is once again
locked into position.
Warning!
G
Do not adjust the steering wheel while driv-
ing. Adjusting the steering wheel while driv-
ing, or driving without the adjustment
locked could cause the driver to lose control
of the vehicle.
When leaving the vehicle, always remove the
key from the steering lock and lock your ve-
hicle.
Do not leave children unattended in the ve-
hicle, or with access to an unlocked vehicle.
Unsupervised use of vehicle equipment may
cause an accident and / or serious personal
injury.
Page 43 of 356

41 Getting started
Adjusting
Mirrors
Adjust the interior and exterior rear view
mirrors before driving so that you have a
good view of the road and traffic condi-
tions.Interior rear view mirror
�
Manually adjust the interior rear view
mirror.
For more information, see “Rear view mir-
rors” (
�page 128).
Exterior rear view mirrors
!Do not drive the vehicle until you have
properly locked the steering column.
If the indicator lamp_ (
�page 26)
comes on while the engine is running,
the steering column is not locked prop-
erly.
Warning!
G
In the case of an accident, liquid electrolyte
may escape the mirror housing if the mirror
glass breaks.
Electrolyte has an irritating effect. Do not al-
low the liquid to come into contact with
eyes, skin, clothing, or respiratory system.
In case it does, immediately flush affected
area with water, and seek medical help if
necessary.
Warning!
G
Exercise care when using the passenger-
side exterior rear view mirror. The mirror
surface is convex (outwardly curved surface
for a wider field of view). Objects in mirror
are closer than they appear. Check your in-
terior rear view mirror or glance over your
shoulder before changing lanes.!Electrolyte drops coming into contact
with the vehicle paint finish can only be
completely removed while in their
liquid state and by applying plenty of
water.
Page 44 of 356

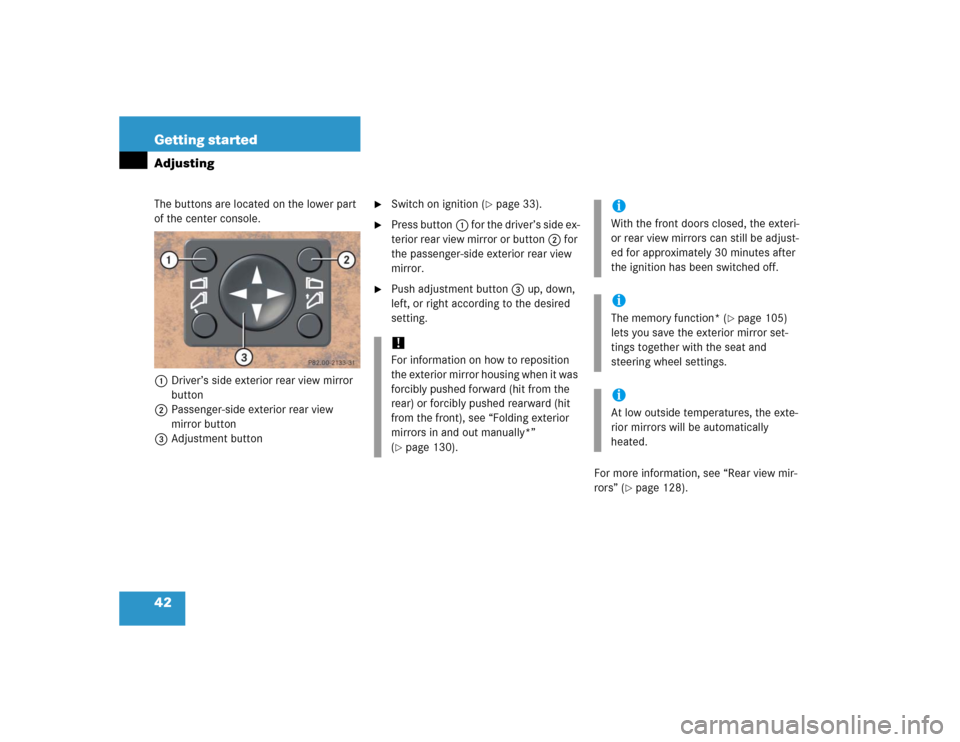
42 Getting startedAdjustingThe buttons are located on the lower part
of the center console.
1Driver’s side exterior rear view mirror
button
2Passenger-side exterior rear view
mirror button
3Adjustment button
�
Switch on ignition (
�page 33).
�
Press button1 for the driver’s side ex-
terior rear view mirror or button2 for
the passenger-side exterior rear view
mirror.
�
Push adjustment button3 up, down,
left, or right according to the desired
setting.
For more information, see “Rear view mir-
rors” (
�page 128).
!For information on how to reposition
the exterior mirror housing when it was
forcibly pushed forward (hit from the
rear) or forcibly pushed rearward (hit
from the front), see “Folding exterior
mirrors in and out manually*”
(�page 130).
iWith the front doors closed, the exteri-
or rear view mirrors can still be adjust-
ed for approximately 30 minutes after
the ignition has been switched off.iThe memory function* (
�page 105)
lets you save the exterior mirror set-
tings together with the seat and
steering wheel settings.
iAt low outside temperatures, the exte-
rior mirrors will be automatically
heated.
Page 49 of 356

47 Getting started
Driving
Starting the engine Automatic transmission
Gearshift pattern for automatic
transmissionPPark position with gear selector lever
lock
RReverse gear
NNeutral
DDrive position
For more information, see “Automatic
transmission” (
�page 120).Starting
�
Make sure the gear selector lever is set
toP.
�
Do not depress accelerator.
�
Turn the key in the steering lock to
position3 and hold until the engine
starts (
�page 33).
�
Depress the brake pedal.
The gear selector lever lock is released.
For information on turning off the engine,
see “Turning off engine” (
�page 55).
Warning!
G
Inhalation of exhaust gas is hazardous to
your health. All exhaust gas contains carbon
monoxide, and inhaling it can cause uncon-
sciousness and lead to death.
Do not run the engine in confined areas
(such as a garage) which are not properly
ventilated. If you think that exhaust gas
fumes are entering the vehicle while driving,
have the cause determined and corrected
immediately. If you must drive under these
conditions, drive only with at least one win-
dow fully open.
Page 50 of 356

48 Getting startedDrivingStarting difficulties
If the engine does not start as described,
carry out the following steps:�
Turn key in steering lock to position0
and repeat starting procedure.
Remember that extended starting at-
tempts can drain the battery.
�
Get a jump start (
�page 291).
If the engine does not start after several
starting attempts, there could be a mal-
function in the engine electronics or in the
fuel supply system.
�
Notify an authorized Mercedes-Benz
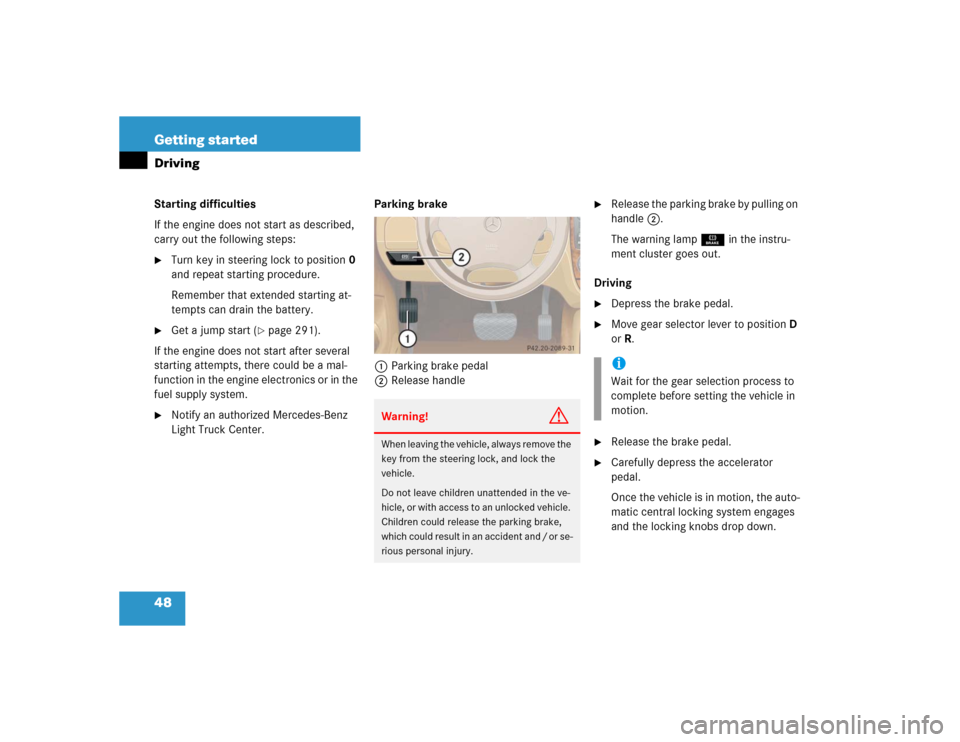
Light Truck Center.Parking brake
1Parking brake pedal
2Release handle
�
Release the parking brake by pulling on
handle2.
The warning lampÉ in the instru-
ment cluster goes out.
Driving
�
Depress the brake pedal.
�
Move gear selector lever to positionD
orR.
�
Release the brake pedal.
�
Carefully depress the accelerator
pedal.
Once the vehicle is in motion, the auto-
matic central locking system engages
and the locking knobs drop down.
Warning!
G
When leaving the vehicle, always remove the
key from the steering lock, and lock the
vehicle.
Do not leave children unattended in the ve-
hicle, or with access to an unlocked vehicle.
Children could release the parking brake,
which could result in an accident and / or se-
rious personal injury.
iWait for the gear selection process to
complete before setting the vehicle in
motion.
Page 52 of 356

50 Getting startedDrivingSwitching on headlamps
The combination switch is located on the
left of the steering column.Combination switch1 Off
2Low beam headlamps on�
Turn combination switch to
positionõ.
The low beam headlamps are switched
on.
For more information, see “Lighting”
(
�page 107).
Turn signals and high beam
The combination switch is on the left of the
steering column.Combination switch1Turn signals, right
2Turn signals, left
3High beamTurn signals
�
Press combination switch in direction
of arrow1 or2.
The corresponding turn signal indicator
lampK orL in the instrument
cluster flashes.
The combination switch resets auto-
matically after major steering wheel
movements.
High beam
�
Push combination switch forward in di-
rection of arrow3.
The high beam indicator lampA in
the instrument cluster comes on.
For more information, see “Lighting”
(
�page 107).iTo signal minor directional changes,
move combination switch only to point
of resistance and release. The corre-
sponding turn signals will flash three
times.
Page 53 of 356

51 Getting started
Driving
Windshield wipers
The wiper switch is located on the right of
the steering column.Wiper switch0Windshield wipers off
1Intermittent wiping
2Normal wiper speed
3Fast wiper speed
4Wiping with windshield wiper fluid�
Switch on ignition (
�page 33).Switching on windshield wipers
�
Press the wiper switch to the desired
position1,2 or3, depending on
the intensity of the rain.
Single wipe
�
Press wiper switch briefly in the direc-
tion of arrow2.
The windshield wipers wipe one time
without washer fluid.
Wiping with windshield washer fluid
�
Pull and hold wiper switch in direction
of arrow4.
The windshield wiper operates with
washer fluid.
For information on filling up the washer
reservoir, see “Windshield washer system
and headlamp cleaning system*”
(
�page 230).
!Vehicles with rain sensor*:
Do not leave windshield wipers in inter-
mittent setting when the vehicle is tak-
en to an automatic car wash or during
windshield cleaning. Wipers will oper-
ate in the presence of water sprayed on
the windshield, and wipers may be
damaged as a result.
The switch should not be left in inter-
mittent setting as the wipers will wipe
the windshield once every time the en-
gine is started. Dust that accumulates
on the windshield might scratch the
glass and / or damage the wiper blades
when wiping occurs on a dry wind-
shield.