Page 95 of 356
93 Controls in detail
Locking and unlocking
Automatic central locking
The doors and the liftgate automatically
lock when the ignition is switched on and
the left front wheel turns at vehicle speeds
of approximately 9 mph (15 km / h) or
more.
You can open a locked door from the in-
side. Open door only when conditions are
safe to do so.
If one of the front doors is then opened
from the inside, the vehicle is unlocked
centrally unless only the driver's door was
previously unlocked.You can deactivate the automatic locking
using the central locking switch.The switch is located on the lower center
console.
Central locking switch1Locking
2Unlocking�
Switch on ignition (
�page 33).
iThe doors unlock automatically after an
accident if the force of the impact ex-
ceeds a preset threshold.
To prevent the vehicle door locks from
locking, deactivate the automatic cen-
tral locking when the vehicle�
is pushed or towed
�
is on a test stand
�
during a wheel change
Page 96 of 356
94 Controls in detailLocking and unlockingActivating�
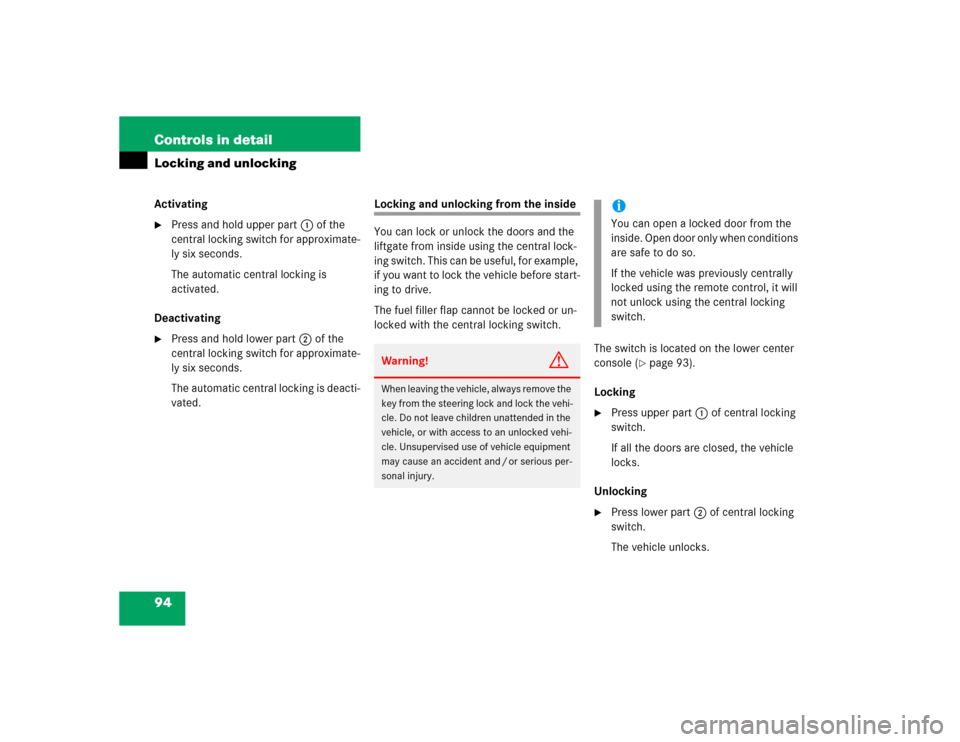
Press and hold upper part1 of the
central locking switch for approximate-
ly six seconds.
The automatic central locking is
activated.
Deactivating
�
Press and hold lower part2 of the
central locking switch for approximate-
ly six seconds.
The automatic central locking is deacti-
vated.
Locking and unlocking from the inside
You can lock or unlock the doors and the
liftgate from inside using the central lock-
ing switch. This can be useful, for example,
if you want to lock the vehicle before start-
ing to drive.
The fuel filler flap cannot be locked or un-
locked with the central locking switch.
The switch is located on the lower center
console (
�page 93).
Locking
�
Press upper part1 of central locking
switch.
If all the doors are closed, the vehicle
locks.
Unlocking
�
Press lower part2 of central locking
switch.
The vehicle unlocks.
Warning!
G
When leaving the vehicle, always remove the
key from the steering lock and lock the vehi-
cle. Do not leave children unattended in the
vehicle, or with access to an unlocked vehi-
cle. Unsupervised use of vehicle equipment
may cause an accident and / or serious per-
sonal injury.
iYou can open a locked door from the
inside. Open door only when conditions
are safe to do so.
If the vehicle was previously centrally
locked using the remote control, it will
not unlock using the central locking
switch.
Page 100 of 356

98 Controls in detailSeatsInstalling rear seat head restraints�
Insert head restraint and push it down
to the stop.
�
Push release button1 and adjust
head restraint to the desired position
(�page 37).
Stowing rear center head restraint
1Rear center head restraint
2Bar
3Clip
�
Remove rear center head restraint
(�page 97).
�
If necessary, remove cargo floor plates,
see “Removing cargo floor plates”
(�page 165).
�
Slide rear seats forward, see “Adjusting
rear seat fore and aft” (
�page 100).
�
Fold rear seat backrests down, see
“Folding down the backrest”
(�page 100).
�
From cargo compartment, attach rear
center head restraint1 to underside
of rear center seat.
Make sure front side of head
restraint1 is facing upward.
�
Press bar2 on both sides into
clips3.
Heated seats*
Both switches for the front seats are loca-
ted in the center console.
1Normal heating
2Rapid heating�
Start the engine.
Switching on seat heating
�
Press upper switch position1.
A red indicator lamp on the switch
lights up.
Page 102 of 356
100 Controls in detailSeatsThe rear seats are divided asymmetrically.
To enlarge the cargo compartment you can
adjust the left and right part separately.
The following changes are possible:�
moving the seat fore and aft
�
folding down the backrest
�
lowering the seat
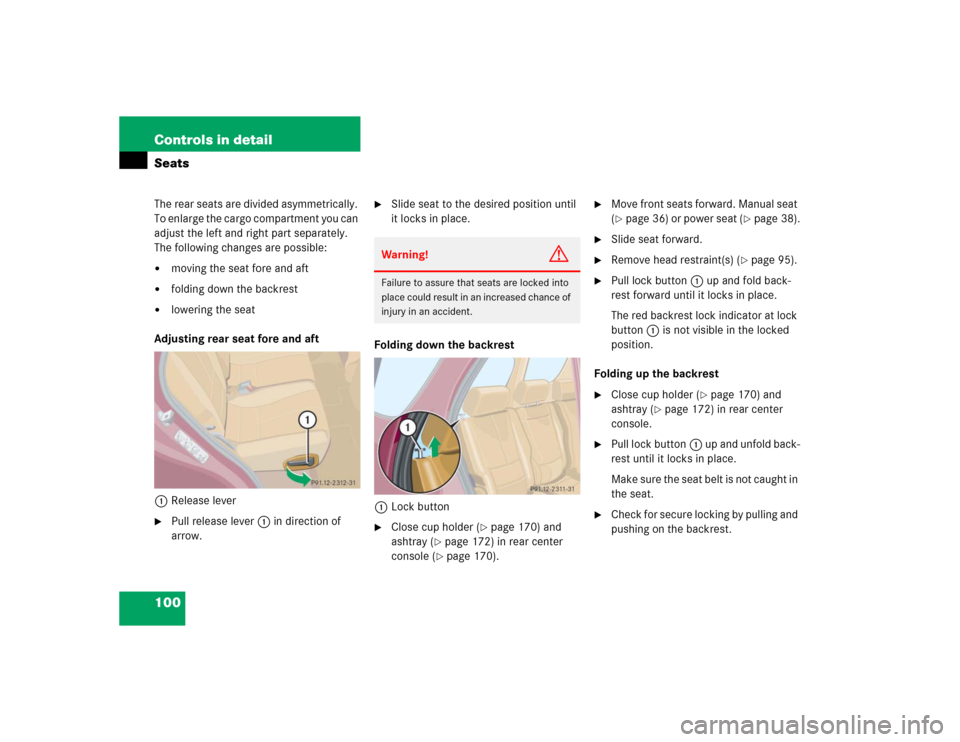
Adjusting rear seat fore and aft
1Release lever
�
Pull release lever1 in direction of
arrow.
�
Slide seat to the desired position until
it locks in place.
Folding down the backrest
1Lock button
�
Close cup holder (
�page 170) and
ashtray (
�page 172) in rear center
console (�page 170).
�
Move front seats forward. Manual seat
(�page 36) or power seat (
�page 38).
�
Slide seat forward.
�
Remove head restraint(s) (
�page 95).
�
Pull lock button1 up and fold back-
rest forward until it locks in place.
The red backrest lock indicator at lock
button1 is not visible in the locked
position.
Folding up the backrest
�
Close cup holder (
�page 170) and
ashtray (
�page 172) in rear center
console.
�
Pull lock button1 up and unfold back-
rest until it locks in place.
Make sure the seat belt is not caught in
the seat.
�
Check for secure locking by pulling and
pushing on the backrest.
Warning!
G
Failure to assure that seats are locked into
place could result in an increased chance of
injury in an accident.
Page 103 of 356
101 Controls in detailSeats
The red backrest lock indicator at lock
button1 is not visible in the locked
position.
�
Install head restraint (
�page 96).
�
Slide seat rearward to desired position
(�page 100).
�
Adjust front seats to desired position.
Manual seats (
�page 36) or power
seats (
�page 38).
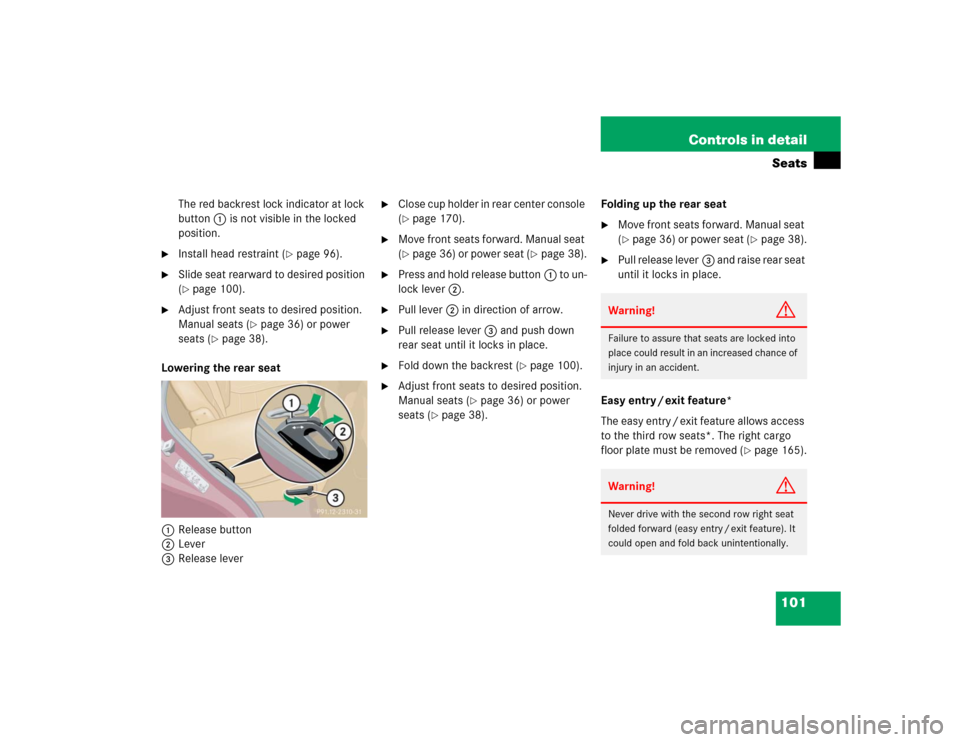
Lowering the rear seat
1Release button
2Lever
3Release lever
�
Close cup holder in rear center console
(�page 170).
�
Move front seats forward. Manual seat
(�page 36) or power seat (
�page 38).
�
Press and hold release button1 to un-
lock lever2.
�
Pull lever2 in direction of arrow.
�
Pull release lever3 and push down
rear seat until it locks in place.
�
Fold down the backrest (
�page 100).
�
Adjust front seats to desired position.
Manual seats (
�page 36) or power
seats (
�page 38).Folding up the rear seat
�
Move front seats forward. Manual seat
(�page 36) or power seat (
�page 38).
�
Pull release lever3 and raise rear seat
until it locks in place.
Easy entry / exit feature*
The easy entry / exit feature allows access
to the third row seats*. The right cargo
floor plate must be removed (
�page 165).
Warning!
G
Failure to assure that seats are locked into
place could result in an increased chance of
injury in an accident.Warning!
G
Never drive with the second row right seat
folded forward (easy entry / exit feature). It
could open and fold back unintentionally.
Page 131 of 356
129 Controls in detail
Good visibility
Activating
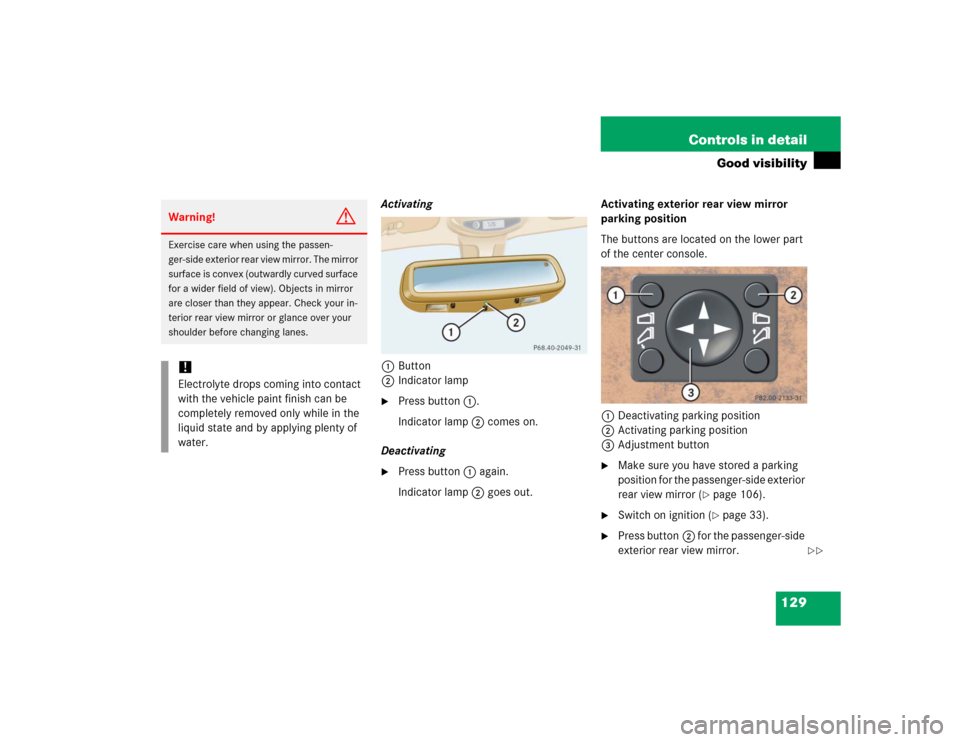
1Button
2Indicator lamp�
Press button1.
Indicator lamp2 comes on.
Deactivating
�
Press button1 again.
Indicator lamp2 goes out.Activating exterior rear view mirror
parking position
The buttons are located on the lower part
of the center console.
1Deactivating parking position
2Activating parking position
3Adjustment button
�
Make sure you have stored a parking
position for the passenger-side exterior
rear view mirror (
�page 106).
�
Switch on ignition (
�page 33).
�
Press button2 for the passenger-side
exterior rear view mirror.
Warning!
G
Exercise care when using the passen-
ger-side exterior rear view mirror. The mirror
surface is convex (outwardly curved surface
for a wider field of view). Objects in mirror
are closer than they appear. Check your in-
terior rear view mirror or glance over your
shoulder before changing lanes.!Electrolyte drops coming into contact
with the vehicle paint finish can be
completely removed only while in the
liquid state and by applying plenty of
water.
��
Page 132 of 356
130 Controls in detailGood visibility�
Place the gear selector lever in reverse
gearR.
The passenger-side exterior rear view
mirror will be turned downward to the
stored position.
The exterior rear view mirror returns to its
previously stored driving position:
�
ten seconds after you put the gear
selector lever in positionD
�
immediately once you exceed a vehicle
speed of approx. 6 mph (10 km / h)
�
immediately when you press the
button1 for driver’s side mirrorElectrically folding exterior rear view
mirrors
Folding exterior mirrors in and out
manually*
The exterior rear view mirrors can vibrate if
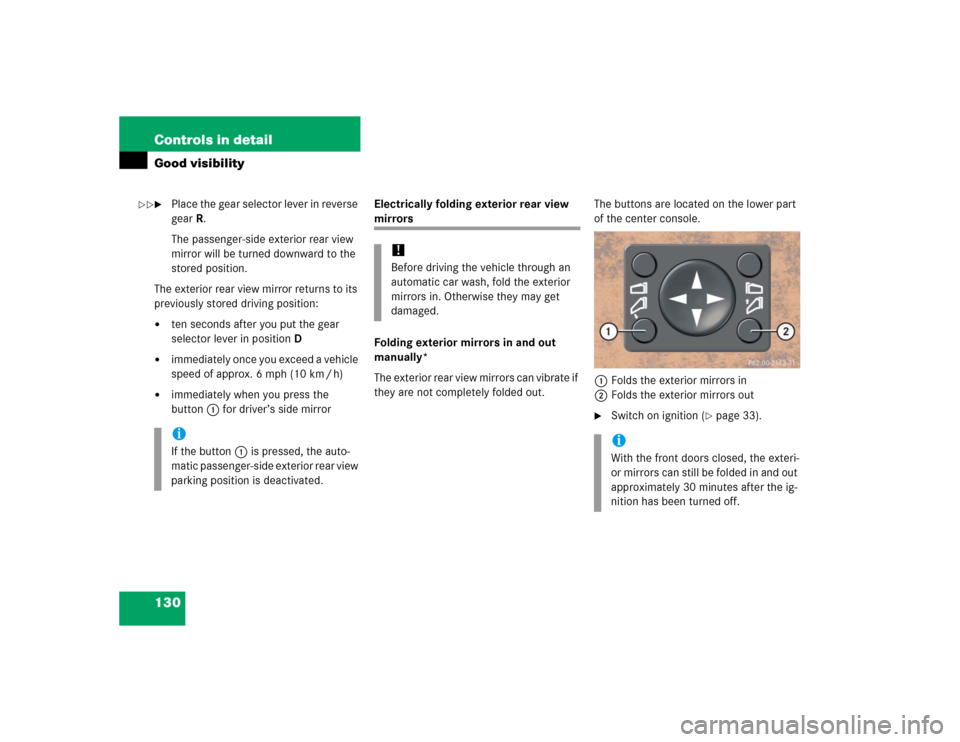
they are not completely folded out.The buttons are located on the lower part
of the center console.
1Folds the exterior mirrors in
2Folds the exterior mirrors out
�
Switch on ignition (
�page 33).
iIf the button1 is pressed, the auto-
matic passenger-side exterior rear view
parking position is deactivated.
!Before driving the vehicle through an
automatic car wash, fold the exterior
mirrors in. Otherwise they may get
damaged.
iWith the front doors closed, the exteri-
or mirrors can still be folded in and out
approximately 30 minutes after the ig-
nition has been turned off.
��
Page 145 of 356
143 Controls in detail
Automatic climate control
Rear passenger compartment ventila-tion and rear automatic climate control
Deactivating
For an improved cooling or heating output
in the front passenger compartment, you
can switch off the rear passenger compart-
ment ventilation.�
Press button§ (
�page 137).
The indicator lamp on the button§
comes on.
The operation of the rear automatic
climate control and the fresh air supply
to the rear compartment is shut off.
Activating
�
Press button§ again.
The indicator lamp on the button§
goes out.
The rear automatic climate control
switches to automatic mode and fresh
air enters the rear compartment.Automatic mode
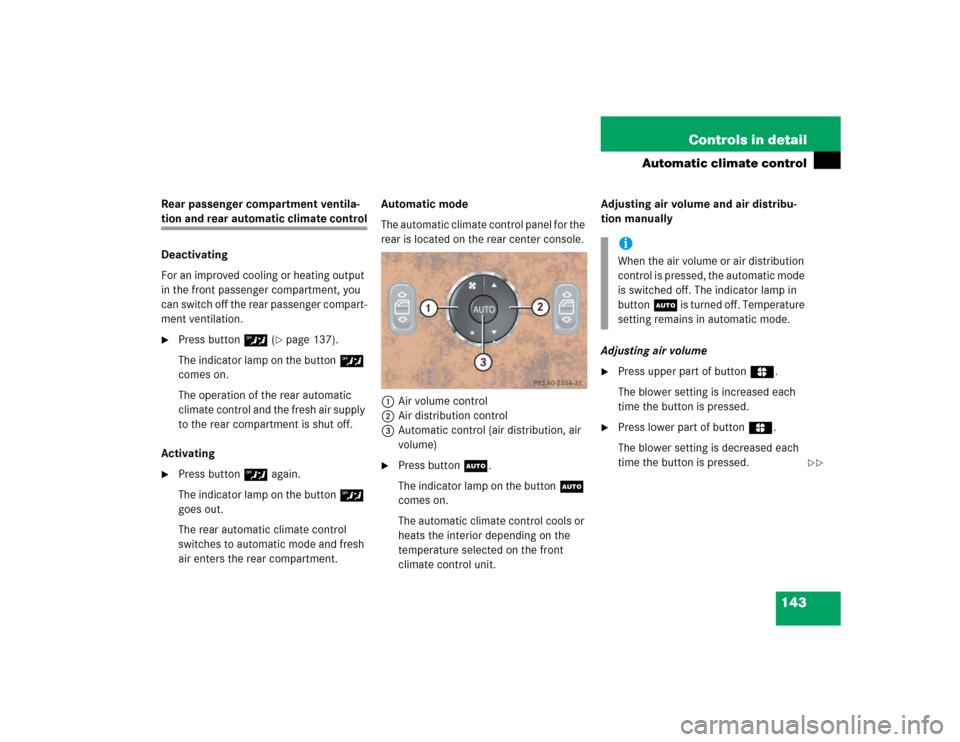
The automatic climate control panel for the
rear is located on the rear center console.
1Air volume control
2Air distribution control
3Automatic control (air distribution, air
volume)
�
Press buttonU.
The indicator lamp on the buttonU
comes on.
The automatic climate control cools or
heats the interior depending on the
temperature selected on the front
climate control unit.Adjusting air volume and air distribu-
tion manually
Adjusting air volume
�
Press upper part of buttonR.
The blower setting is increased each
time the button is pressed.
�
Press lower part of buttonR.
The blower setting is decreased each
time the button is pressed.iWhen the air volume or air distribution
control is pressed, the automatic mode
is switched off. The indicator lamp in
buttonU is turned off. Temperature
setting remains in automatic mode.
��