Page 122 of 416

122 Controls in detailInstrument clusterOutside temperature indicator
The outside temperature is displayed in
the multifunction display (
�page 123).
For information on how to select the unit of
the displayed temperature, i.e. degrees
Celsius (°C) or degrees Fahrenheit (°F),
see “Selecting temperature display mode”
(
�page 135).The temperature sensor is located in the
front bumper area. Due to its location, the
sensor can be affected by road or engine
heat during idling or slow driving. This
means that the accuracy of the displayed
temperature can only be verified by com-
parison to a thermometer placed next to
the sensor, not by comparison to external
displays (e.g. bank signs, etc.).When moving the vehicle into colder ambi-
ent temperatures (e.g. when leaving your
garage), you will notice a delay before the
lower temperature is displayed.
A delay also occurs when ambient temper-
atures rise. This prevents inaccurate tem-
perature indications caused by heat
radiated from the engine during idling or
slow driving.Warning!
G
The outside temperature indicator is not de-
signed to serve as an ice-warning device and
is therefore unsuitable for that purpose.
Indicated temperatures just above the freez-
ing point do not guarantee that the road sur-
face is free of ice. The road may still be icy,
especially in wooded areas or on bridges.
Page 127 of 416
127 Controls in detail
Control system
Menus, submenus and functions
Menu1
Menu2
Menu3
Menu4
Menu5
Menu6
Menu7
Standard
display
AUDIO
NAVI
Vehicle status
message
memory
Settings
Trip computer
Telephone
(�page 128)
(�page 128)
(�page 130)
(�page 131)
(�page 132)
(�page 144)
(�page 145)
Commands/submenuCoolant
temperature
display
Select radio
station
Activate route
guidance
Call up vehicle
malfunction,
warning and
system status
messages stored
in memory
Reset to factory
settings
Fuel
consumption
statistics after
start
Load phone book
Digital
speedometer
Select satellite
radio station*
(USA only)
Instrument
cluster submenu
Fuel
consumption
statistics since
the last reset
Search for name
in phone book
Call up mainte-
nance service
indicator
Operate CD
player
Lighting
submenu
Call up range
Check engine oil
level
Vehicle submenuConvenience
submenu
Page 128 of 416
128 Controls in detailControl system
Standard display menu
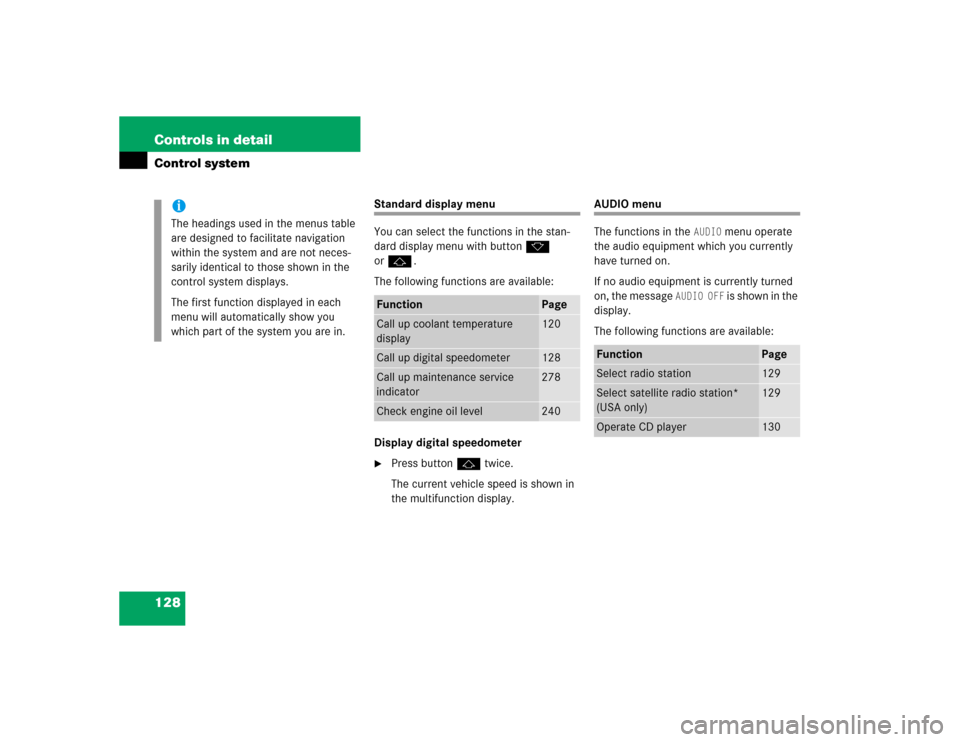
You can select the functions in the stan-
dard display menu with buttonk
orj.
The following functions are available:
Display digital speedometer�
Press buttonj twice.
The current vehicle speed is shown in
the multifunction display.
AUDIO menu
The functions in the
AUDIO
menu operate
the audio equipment which you currently
have turned on.
If no audio equipment is currently turned
on, the message
AUDIO OFF
is shown in the
display.
The following functions are available:
iThe headings used in the menus table
are designed to facilitate navigation
within the system and are not neces-
sarily identical to those shown in the
control system displays.
The first function displayed in each
menu will automatically show you
which part of the system you are in.
Function
Page
Call up coolant temperature
display
120
Call up digital speedometer
128
Call up maintenance service
indicator
278
Check engine oil level
240
Function
Page
Select radio station
129
Select satellite radio station*
(USA only)
129
Operate CD player
130
Page 139 of 416
139 Controls in detail
Control system
�
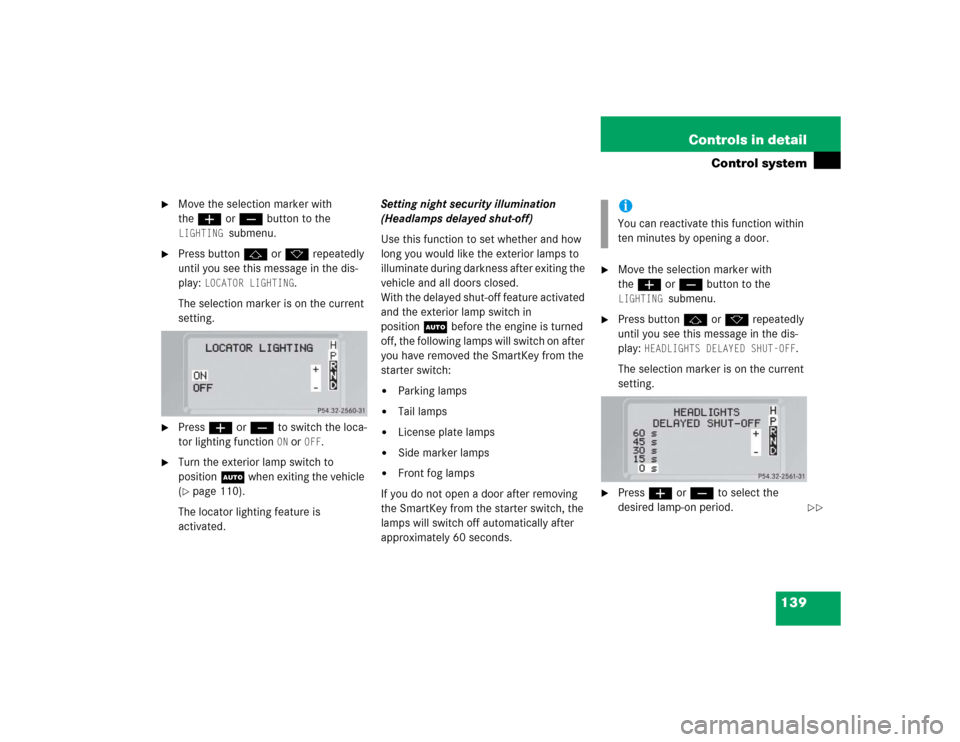
Move the selection marker with
theæ orç button to the LIGHTING
submenu.
�
Press buttonj ork repeatedly
until you see this message in the dis-
play:
LOCATOR LIGHTING
.
The selection marker is on the current
setting.
�
Pressæ orç to switch the loca-
tor lighting function
ON or
OFF
.
�
Turn the exterior lamp switch to
positionU when exiting the vehicle
(�page 110).
The locator lighting feature is
activated.Setting night security illumination
(Headlamps delayed shut-off)
Use this function to set whether and how
long you would like the exterior lamps to
illuminate during darkness after exiting the
vehicle and all doors closed.
With the delayed shut-off feature activated
and the exterior lamp switch in
positionU before the engine is turned
off, the following lamps will switch on after
you have removed the SmartKey from the
starter switch:
�
Parking lamps
�
Tail lamps
�
License plate lamps
�
Side marker lamps
�
Front fog lamps
If you do not open a door after removing
the SmartKey from the starter switch, the
lamps will switch off automatically after
approximately 60 seconds.
�
Move the selection marker with
theæ orç button to the LIGHTING
submenu.
�
Press buttonj ork repeatedly
until you see this message in the dis-
play:
HEADLIGHTS DELAYED SHUT-OFF
.
The selection marker is on the current
setting.
�
Pressæ orç to select the
desired lamp-on period.iYou can reactivate this function within
ten minutes by opening a door.
��
Page 140 of 416
140 Controls in detailControl system
You can select:�
0 s
, the delayed shut-off feature is
deactivated.
�
15 s
, 30 s
, 45 s
or
60 s
, select the
desired lamp-on period.
�
Turn the exterior lamp switch to
positionU before turning off the
engine.
The headlamps delayed shut-off
feature is activated.
You can temporarily deactivate the
delayed shut-off feature:
�
Before exiting the vehicle, turn the
SmartKey in the starter switch to
position0.
�
Then turn it to position2 and back to
position0.
The delayed shut-off feature is deacti-
vated. It will reactivate as soon as you
reinsert the SmartKey in the starter
switch.Setting interior lighting delayed shut-off
Use this function to set whether and how
long you would like the interior lighting to
remain lit during darkness after you have
removed the SmartKey from the starter
switch.
�
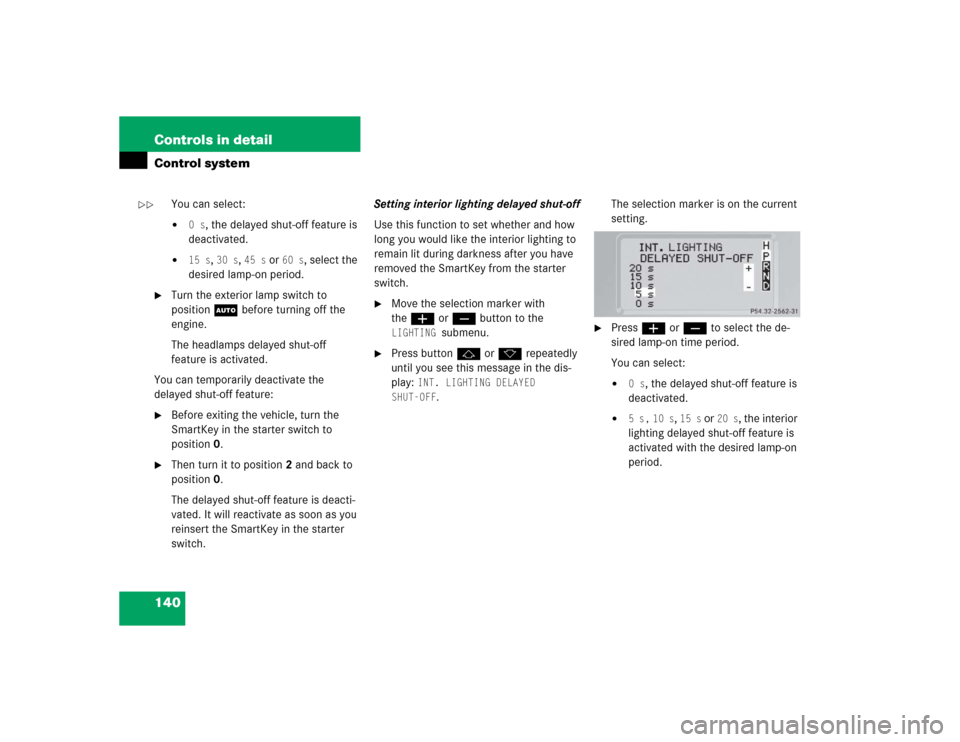
Move the selection marker with
theæ orç button to the LIGHTING
submenu.
�
Press buttonj ork repeatedly
until you see this message in the dis-
play:
INT. LIGHTING DELAYED
SHUT-OFF
.The selection marker is on the current
setting.
�
Pressæ orç to select the de-
sired lamp-on time period.
You can select:�
0 s
, the delayed shut-off feature is
deactivated.
�
5 s,
10 s
, 15 s
or
20 s
, the interior
lighting delayed shut-off feature is
activated with the desired lamp-on
period.
��
Page 146 of 416
146 Controls in detailControl systemYou can use the functions in the
TEL
menu
to operate your telephone, provided it is
connected to a hands-free system and
switched on.
�
Switch on the telephone and COMAND.
�
Press buttonÿ orè on the
steering wheel repeatedly until you see
the
TEL
menu in the display.
Which messages will appear in the display
field depends on whether your telephone is
switched on or off:
�
If the telephone is off, the message in
the multifunction display is:
TEL OFF
.
�
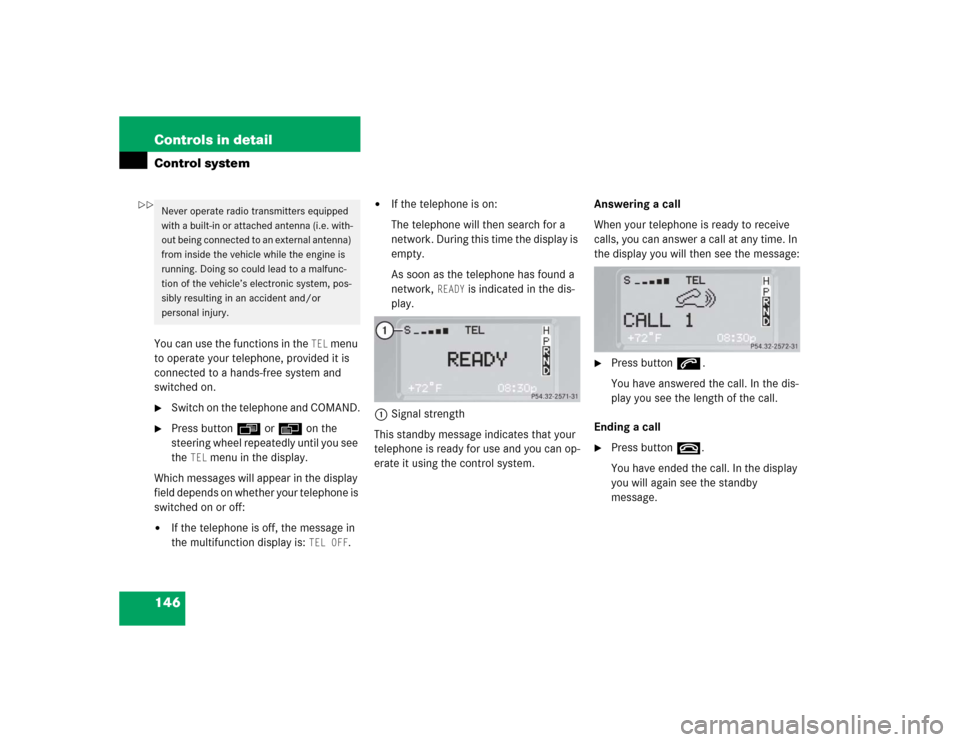
If the telephone is on:
The telephone will then search for a
network. During this time the display is
empty.
As soon as the telephone has found a
network,
READY
is indicated in the dis-
play.
1Signal strength
This standby message indicates that your
telephone is ready for use and you can op-
erate it using the control system.Answering a call
When your telephone is ready to receive
calls, you can answer a call at any time. In
the display you will then see the message:
�
Press buttons.
You have answered the call. In the dis-
play you see the length of the call.
Ending a call
�
Press buttont.
You have ended the call. In the display
you will again see the standby
message.
Never operate radio transmitters equipped
with a built-in or attached antenna (i.e. with-
out being connected to an external antenna)
from inside the vehicle while the engine is
running. Doing so could lead to a malfunc-
tion of the vehicle’s electronic system, pos-
sibly resulting in an accident and/or
personal injury.
��
Page 148 of 416
148 Controls in detailAutomatic transmissionFor more information on driving with an au-
tomatic transmission, see the “Getting
started” section (
�page 49).
Your vehicle’s transmission adapts its gear
shifting process to your individual driving
style by continually adjusting the shift
points up or down. These shift point adjust-
ments are performed based on current op-
erating and driving conditions.
If the operating conditions change, the au-
tomatic transmission reacts by adjusting
its gear shift program.The automatic transmission selects indi-
vidual gears automatically, dependent
upon
�
the gear selector lever positionD with
gear ranges4, 3, 2, 1 (
�page 150)
�
transfer case position (HIGH or LOW)
�
the position of the accelerator pedal
(�page 153)
�
the vehicle speed
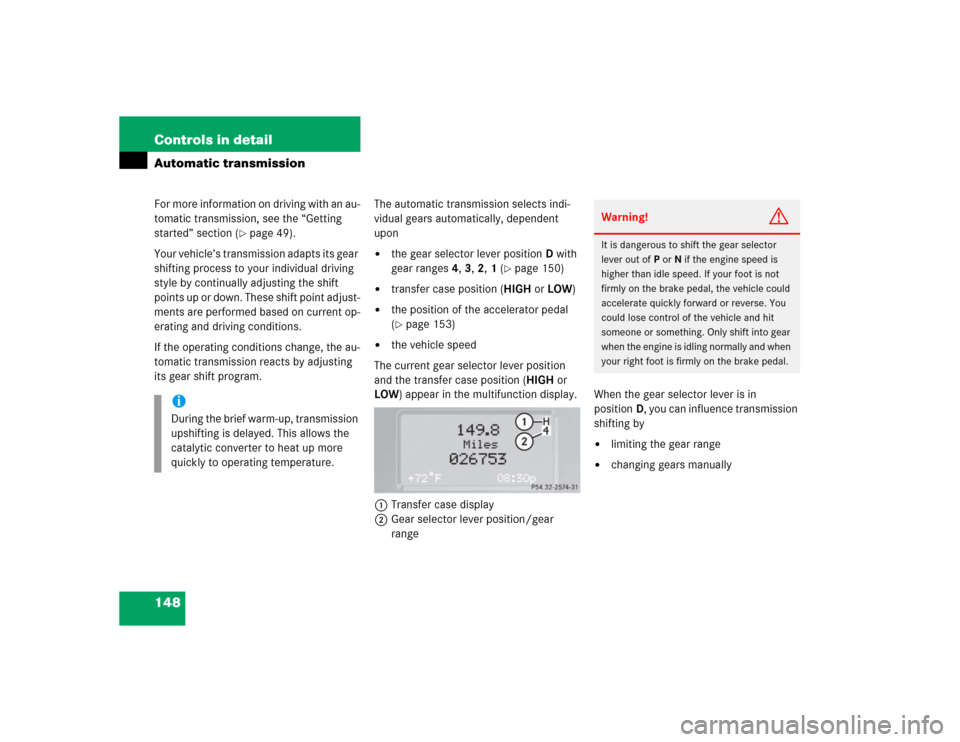
The current gear selector lever position
and the transfer case position (HIGH or
LOW) appear in the multifunction display.
1Transfer case display
2Gear selector lever position/gear
range When the gear selector lever is in
positionD, you can influence transmission
shifting by
�
limiting the gear range
�
changing gears manually
iDuring the brief warm-up, transmission
upshifting is delayed. This allows the
catalytic converter to heat up more
quickly to operating temperature.
Warning!
G
It is dangerous to shift the gear selector
lever out ofP orN if the engine speed is
higher than idle speed. If your foot is not
firmly on the brake pedal, the vehicle could
accelerate quickly forward or reverse. You
could lose control of the vehicle and hit
someone or something. Only shift into gear
when the engine is idling normally and when
your right foot is firmly on the brake pedal.
Page 149 of 416
149 Controls in detail
Automatic transmission
One-touch gearshifting
Even with an automatic transmission, you
can change the gears manually when the
gear selector lever is in positionD.
Downshifting�
Briefly press the gear selector lever to
the left in the D–direction.
The transmission will shift from the current
gear to the next lower gear. This action si-
multaneously limits the gear range of the
transmission (
�page 150).Upshifting
�
Briefly press the gear selector lever to
the right in the D+direction.
The transmission will shift from the current
gear to the next higher gear as permitted
by the shift program. This action simulta-
neously extends the gear range of the
transmission.
Warning!
G
On slippery road surfaces, never downshift
in order to obtain braking action. This could
result in drive wheel slip and reduced vehi-
cle control. Your vehicle’s ABS will not pre-
vent this type of loss of control.iTo avoid overrevving the engine when
the gear selector lever is moved to the
D- direction, the transmission will not
shift to a lower gear if the engine’s
max. speed would be exceeded.