Page 91 of 416
91 Controls in detail
Locking and unlocking
Seats
Memory function
Lighting
Instrument cluster
Control system
Automatic transmission
Transfer case
Differential locks
Good visibility
Climate control
Power windows
Power tilt/sliding sunroof
Driving systems
Loading
Useful features
Page 100 of 416
.
Easy-entry/exit feature
This feature allows for easier entry into and
exit from")
100 Controls in detailSeatsFor more information on seat adjustment,
see the “Getting started” section
(�page 37).
Easy-entry/exit feature
This feature allows for easier entry into and
exit from the vehicle.
The easy-entry/exit feature can be
switched on or off, see “Setting
easy-entry/exit feature” (
�page 142).
When the SmartKey is inserted in the start-
er switch and the driver’s door is closed,
the steering wheel returns to the last set
position.When exiting the vehicle with the
easy-entry/exit feature activated, the
steering wheel tilts upwards when you
�
remove the SmartKey from the starter
switch,
or
�
open the driver’s door with the
SmartKey in starter switch
position0or1.
Warning!
G
You must make sure no one can become
trapped or injured by the moving steering
wheel when the easy-entry/exit feature is
activated.
To cancel steering wheel movement, do one
of the following�
Move steering column lever
(�page 40).
�
Press memory position switch
(�page 107).
Do not leave children unattended in the ve-
hicle, or with access to an unlocked vehicle.
Children could open the driver’s door an un-
intentionally activate the easy-entry/exit
feature, which could result in an accident
and/or serious personal injury.
iIf the current position for the steering
wheel is in the uppermost tilt position,
the steering wheel will no longer be
able to move upward when the
easy-entry/exit feature is activated.
Page 101 of 416

101 Controls in detailSeats
When entering the vehicle, with the
easy-entry/exit feature activated, the
steering wheel will return to its last set po-
sition when you�
close the driver’s door with the ignition
switched on,
or
�
insert the SmartKey into the starter
switch with the driver’s door closed.Removing and installing front seat
head restraints
For more information on head restraint ad-
justment, see the “Getting started” section
(�page 39).
Front seat head restraints
1Switch
Removing front seat head restraint
�
Press switch1 upwards and hold until
the head restraint is fully extended.
�
Pull head restraint out.
Warning!
G
For your protection, drive only with properly
positioned head restraints.
Adjust head restraint so that the head re-
straint supports the back of the head at eye
level. This will reduce the potential for injury
to the head and neck in the event of an ac-
cident or similar situation.
Do not drive the vehicle without the seat
head restraints. Head restraints are intend-
ed to help reduce injuries during an acci-
dent.
Do not interchange head restraints from
front and rear seat.
iTilt the seat backrest rearward for eas-
ier removal and installation of the head
restraints.
Page 102 of 416

102 Controls in detailSeatsInstalling front seat head restraint�
Press switch1 upwards and hold for
about five seconds.
�
Press the head restraint down until it
engages.
�
Adjust head restraint to the desired
position.Synchronizing head restraints and seat
adjustment fore and aft for front seats
If the power supply was interrupted (bat-
tery disconnected or discharged), the head
restraints and the seat adjustment fore
and aft are no longer adjusted
automatically.
The head restraints and the seat adjust-
ment fore and aft must be resynchronized:�
Switch on the ignition (
�page 35).
�
Move the seat completely forward
(�page 38) and the head restraint fully
down (
�page 39) and hold the switch-
es for approximately one second.
Rear seat head restraintsWarning!
G
For your protection, drive only with properly
positioned head restraints.
Adjust head restraint so that the center of
the head restraint supports the back of the
head at eye level. This will reduce the poten-
tial for injury to the head and neck in the
event of an accident or similar situation.
Do not drive the vehicle without the seat
head restraints. Head restraints are intend-
ed to help reduce injuries during an acci-
dent.
Page 103 of 416
103 Controls in detailSeats
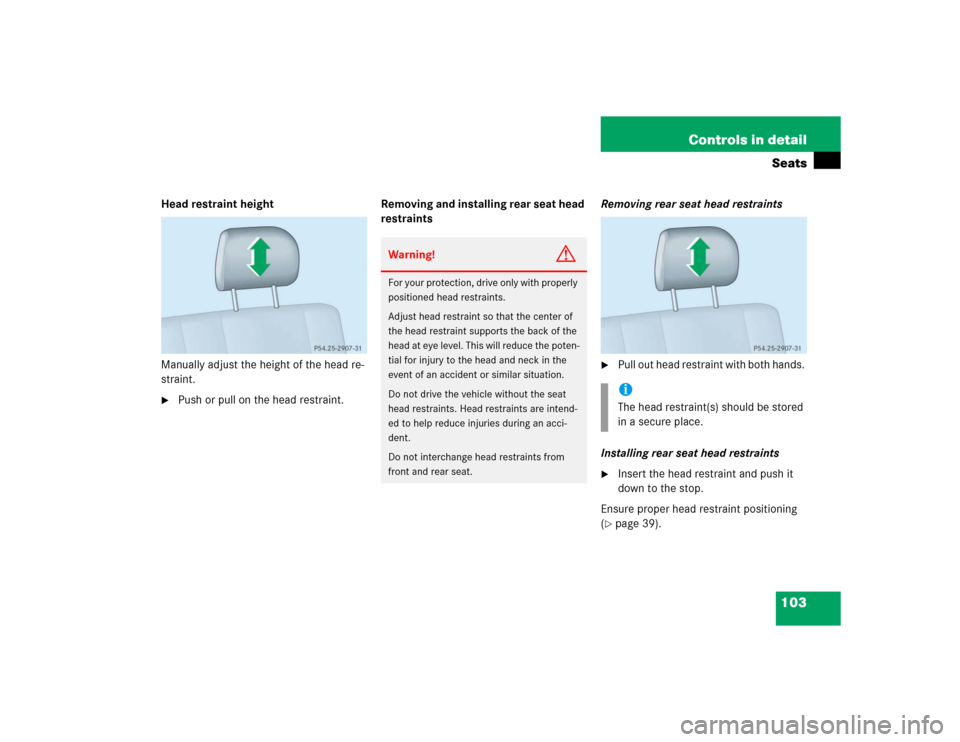
Head restraint height
Manually adjust the height of the head re-
straint.�
Push or pull on the head restraint.Removing and installing rear seat head
restraintsRemoving rear seat head restraints
�
Pull out head restraint with both hands.
Installing rear seat head restraints
�
Insert the head restraint and push it
down to the stop.
Ensure proper head restraint positioning
(
�page 39).
Warning!
G
For your protection, drive only with properly
positioned head restraints.
Adjust head restraint so that the center of
the head restraint supports the back of the
head at eye level. This will reduce the poten-
tial for injury to the head and neck in the
event of an accident or similar situation.
Do not drive the vehicle without the seat
head restraints. Head restraints are intend-
ed to help reduce injuries during an acci-
dent.
Do not interchange head restraints from
front and rear seat.
iThe head restraint(s) should be stored
in a secure place.
Page 104 of 416

104 Controls in detailSeatsMulticontour seat*
The multicontour seat has a movable seat
cushion and inflatable air cushions built
into the seat backrest to provide additional
lumbar and side support.
The seat cushion movement and amount of
seat backrest cushion height and curva-
ture can be continuously varied with regu-
lators on the right side of the seat after
switching on ignition (
�page 35).
1Seat cushion length
2Backrest bottom
3Backrest center
4Backrest side bolsters
�
Switch on the ignition (
�page 35).
Seat cushion length
�
Adjust the seat cushion to the length of
your upper leg using switch1.
Backrest contour
�
Adjust the contour of the backrest to
the desired position using switches2
and 3.
Backrest side bolsters
�
Adjust the backrest side bolsters so
that they provide good lateral support
using switch4.
Heated seats
Driver’s and front passenger seats
The switch is located in the center console.
1Normal heating
2Rapid heating�
Switch on the ignition (
�page 35).
Page 105 of 416
105 Controls in detailSeats
Switching on seat heating�
Press upper switch position1.
A red indicator lamp on the switch
comes on.
Switching off seat heating
�
Press upper switch position1 again.Switching on rapid seat heating
�
Press lower switch position2.
Both red indicator lamps on the switch
come on.Switching off rapid seat heating
�
Press lower switch position2 again.
iThe seat heater will automatically
switch off after approximately
30 minutes.
iThe system switches over to normal
heating mode after approximately
five minutes. Only one indicator lamp
remains lit.
iIf one or both of the lamps on the seat
heater switch are blinking, there is in-
sufficient voltage available as too many
electrical consumers are turned on.
The seat heater switches off automati-
cally.
The seat heater will switch back on
again automatically as soon as suffi-
cient voltage is available.
Page 106 of 416
 pil-
lar.
1Normal heating
2Rapid heating�
Switch on the ignition (
�page 35).Switching on seat heating
�
Press upper switc")
106 Controls in detailSeatsRear seats
The switch is located on the B (center) pil-
lar.
1Normal heating
2Rapid heating�
Switch on the ignition (
�page 35).Switching on seat heating
�
Press upper switch position1.
A red indicator lamp on the switch
comes on.
Switching off seat heating
�
Press upper switch position1 again.Switching on rapid seat heating
�
Press lower switch position2.
Both red indicator lamps on the switch
come on.
Switching off rapid seat heating
�
Press lower switch position2 again.
iThe seat heater will automatically
switch off after approximately
30 minutes.
iThe system switches over to normal
heating mode after approximately five
minutes. Only one indicator lamp re-
mains lit. iIf one or both of the lamps on the seat
heater switch are blinking, there is in-
sufficient voltage available as too many
electrical consumers are turned on.
The seat heater switches off automati-
cally.
The seat heater will switch back on
again automatically as soon as suffi-
cient voltage is available.