Page 27 of 498

25 At a glance
Instrument cluster
Item
Page
1
LLeft turn signal indi-
cator lamp
51
2
vESP warning lamp
358
3
Speedometer
4
Multifunction display
137
5
lDistance warning
lamp
Warning lamp without func-
tion. It illuminates with the
ignition on. It should go out
when the engine is running.
6
KRight turn signal indi-
cator lamp
51
7
Coolant temperature indi-
cator with:
135
•
Coolant temperature
warning lamp
357,
376
Item
Page
8
Tachometer with:
136
1Supplemental
restraint system
indicator lamp
359,
386
-Antilock Brake Sys-
tem (ABS) warning
lamp
354
359,
386
AHigh beam headlamp
indicator lamp
129
BLow beam headlamp
indicator lamp
129
9
Main odometer with:�
Gear selector lever posi-
tion
166
�
Program mode
170
Item
Page
a
Clock with:
151
;Brake warning lamp,
USA only
355
3Brake warning lamp,
Canada only?Engine malfunction
indicator lamp,
USA only
356
±Engine malfunction
indicator lamp,
Canada only
356
b
Fuel display with:AFuel reserve warning
lamp
359
c
Reset button for:�
Resetting trip odometer
135
�
Adjusting instrument
cluster illumination
134
�
Confirming new time set-
tings
151
Page 51 of 498

or3 (Canada only) in th")
49 Getting started
Driving
Parking brake
1Parking brake release handle
2Parking brake pedal�
Release the parking brake by pulling on
handle1.
The indicator lamp ; (USA only)
or3 (Canada only) in the clock
goes out.Driving
�
Depress the brake pedal.
�
Move gear selector lever in
positionDorR.
�
Release the brake pedal.
�
Carefully depress the accelerator
pedal.
Once the vehicle is in motion, the auto-
matic central locking system engages and
the locking knobs drop down.After a cold start, the automatic transmis-
sion shifts at a higher engine revolution.
This allows the catalytic converter to reach
its operating temperature earlier.Warning!
G
When leaving the vehicle, always remove the
SmartKey or SmartKey with KEYLESS-GO*
from the starter switch, take it with you, and
lock the vehicle. Do not leave children unat-
tended in the vehicle, or with access to an
unlocked vehicle. Children could release the
parking brake, which could result in an acci-
dent and/or serious personal injury.
iYou can open a locked door from the
inside. Open door only when conditions
are safe to do so.
You can deactivate the automatic
locking using the control system
(�page 158).
!If you hear a warning signal and the
message
Parking brake Release
brake!
appears in the multifunction
display when driving off, you have for-
gotten to release the parking brake.
Release the parking brake.
Page 136 of 498
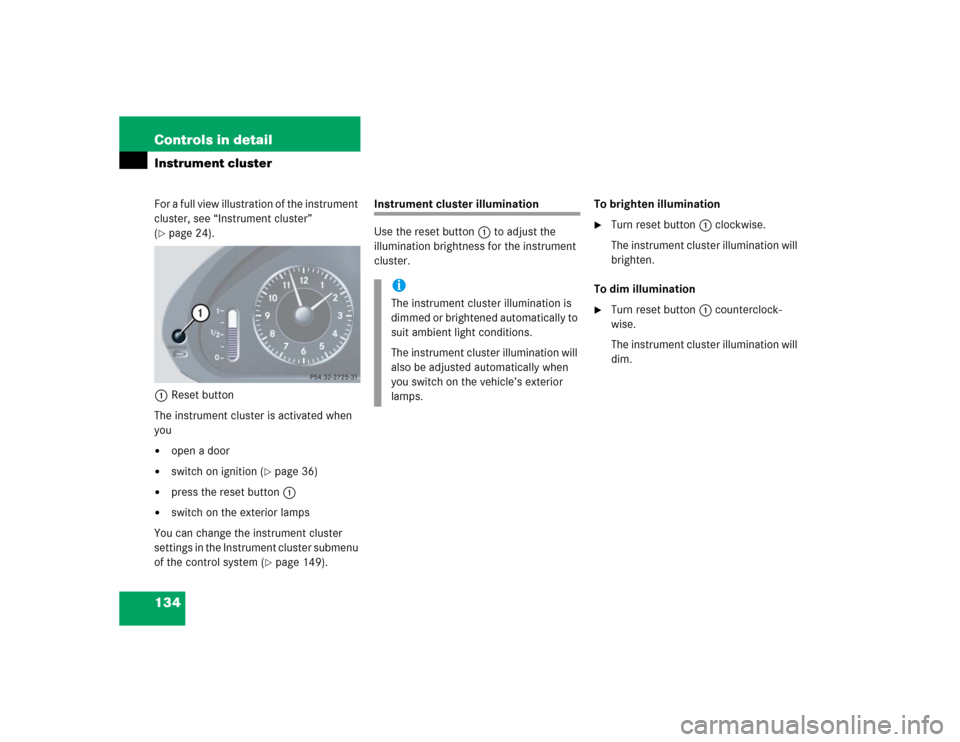
134 Controls in detailInstrument clusterFor a full view illustration of the instrument
cluster, see “Instrument cluster”
(�page 24).
1Reset button
The instrument cluster is activated when
you
�
open a door
�
switch on ignition (
�page 36)
�
press the reset button1
�
switch on the exterior lamps
You can change the instrument cluster
settings in the Instrument cluster submenu
of the control system (
�page 149).
Instrument cluster illumination
Use the reset button1 to adjust the
illumination brightness for the instrument
cluster.To brighten illumination
�
Turn reset button1 clockwise.
The instrument cluster illumination will
brighten.
To dim illumination
�
Turn reset button1 counterclock-
wise.
The instrument cluster illumination will
dim.
iThe instrument cluster illumination is
dimmed or brightened automatically to
suit ambient light conditions.
The instrument cluster illumination will
also be adjusted automatically when
you switch on the vehicle’s exterior
lamps.
Page 154 of 498

This function can only be seen with audio
system.�
Move the selection marker with
buttonæ orç to the
Time/Date
submenu.
�
Press buttonj")
152 Controls in detailControl systemSetting time (hours)
This function can only be seen with audio
system.�
Move the selection marker with
buttonæ orç to the
Time/Date
submenu.
�
Press buttonj ork repeatedly
until the message
Clock, hours
Confirm by press. R
appears in the
multifunction display.
The selection marker is on the hour
setting.
�
Press buttonæ orç to set the
hour.
�
Press the reset button in the instru-
ment cluster (
�page 134) to confirm.
The hour is set and stored.
Setting time (minutes)
This function can only be seen with audio
system.
�
Move the selection marker with
buttonæ orç to the
Time/Date
submenu.
�
Press buttonj ork repeatedly
until the message
Clock, minutes
Confirm by press. R
appears in the
multifunction display.
The selection marker is on the minutes
setting.
�
Press buttonæ orç to set the
minutes.
�
Press the reset button in the instru-
ment cluster (
�page 134) to confirm.
The minutes are set and stored.
iVehicles with COMAND*:
For information on setting the time,
refer to the separate COMAND
operating instructions.
iVehicles with COMAND*:
For information on setting the time,
refer to the separate COMAND
operating instructions.
Page 307 of 498

305 Operation
At the gas station
�At the gas station
Refueling
The fuel filler flap is located on the
right-hand side of the vehicle towards the
rear. Locking/unlocking the vehicle with
the SmartKey or the SmartKey with
KEYLESS-GO* automatically locks/un-
locks the fuel filler flap.1To open the fuel filler flap
2To insert the fuel filler cap
�
Turn the engine off�
by turning the SmartKey to
position0. Remove the SmartKey
from the starter switch.
�
by pressing the KEYLESS-GO*
start/stop button. Open the driv-
er’s door (with driver’s door open,
starter switch is now in position0,
same as with SmartKey removed
from starter switch).
�
Open the fuel filler flap by pushing at
the point indicated by the arrow 1.
The fuel filler flap springs open.
�
Turn fuel cap counterclockwise and
hold on to it until possible pressure is
released.
�
Take off cap and set it in direction of
arrow 2 in the recess on the fuel filler
flap.
To prevent fuel vapors from escaping
into open air, fully insert filler nozzle
unit.
�
Only fill your tank until the filler nozzle
unit cuts out – do not top up or
overfill.
Warning!
G
Gasoline is highly flammable and poisonous.
It burns violently and can cause serious inju-
ry. Whenever you are around gasoline, avoid
inhaling fumes and skin contact, extinguish
all smoking materials. Never allow sparks,
flame or smoking materials near gasoline!
Failure to remove the fuel cap slowly could
result in personal injury.
��
Page 308 of 498
306 OperationAt the gas station�
Replace fuel cap by turning it
clockwise.
You will hear when the fuel cap is
tightened.
�
Close fuel filler flap.Warning!
G
Overfilling of the fuel tank may create
pressure in the system which could cause a
gas discharge. This could cause the gas to
spray back out when removing the fuel
pump nozzle, which could cause personal
injury.
iOnly use premium unleaded gasoline
with a minimum Posted Octane Rating
of 91 (average of 96 RON / 86 MON).
Information on gasoline quality can
normally be found on the fuel pump.
For more information on gasoline, see
“Premium unleaded gasoline”
(�page 450) or the Factory Approved
Service Products pamphlet.
iLeaving the engine running and the fuel
cap open can cause theú malfunc-
tion indicator lamp (USA only) or
the± malfunction indicator lamp
(Canada only) to illuminate.
More information can be found in the
“Practical hints” section (
�page 356).
��
Page 391 of 498

389 Practical hints
Where will I find...?
�Where will I find...?
First aid kit
The first aid kit is located in the trunk on
the left side secured by a hook and loop
fastener.�
Loosen hook and loop fastener.
�
Remove first aid kit.
Vehicle tool kit
The vehicle tool kit is located in the storage
compartment underneath the trunk floor.
The following is included:�
Towing eye bolt
�
Wheel wrench
�
Alignment bolt
�
Vehicle jack
�
Spare wheel bolts
�
Spare fuses
�
Valve extractor (CLK 55 AMG only)
�
Protective wrap (CLK 55 AMG only)
�
Collapsible wheel chock
�
A pair of gloves Removing the vehicle tool kit (except
CLK 55 AMG)
�
Lift up trunk floor cover and engage
trunk floor handle in upper edge of
trunk.
1Retaining screw
2Storage well casing
�
Loosen retaining screw1 in the mid-
dle of storage well casing by turning it
counterclockwise.
�
Remove storage well casing2.
iCheck expiration dates and contents
for completeness at least once a year
and replace missing/expired items.
��
Page 392 of 498

390 Practical hintsWhere will I find...?3Arrow
4Minispare wheel
5Vehicle tool kit storage well casing
6Vehicle tool kit�
Remove vehicle tool kit6.
Storing the vehicle tool kit
�
Place vehicle tool kit6 in vehicle tool
kit storage well casing5.
�
Place storage well casing2 over the
vehicle tool kit storage well casing5
and turn retaining screw1 clockwise
as far it will go to secure the Minispare
wheel.
�
Disengage trunk floor handle in upper
edge of trunk and lower trunk floor
cover.Removing the vehicle tool kit
(CLK 55 AMG only)
�
Lift up trunk floor cover and engage
trunk floor handle in upper edge of
trunk.
1Collapsible tire
2Vehicle tool kit (under collapsible tire)
3Retaining screw
�
Loosen retaining screw3 by turning it
counterclockwise.
�
Remove collapsible tire1.
�
Remove vehicle tool kit2.
iArrow3 on vehicle tool kit storage
well casing5 must point in the direc-
tion of travel. Otherwise you cannot
place the storage well casing2 on top
and secure the Minispare wheel with
retaining screw1.!To prevent damage, always disengage
trunk floor handle from upper edge of
trunk and lower trunk floor before
closing the trunk lid.
��