Page 359 of 498

357 Practical hints
What to do if …?
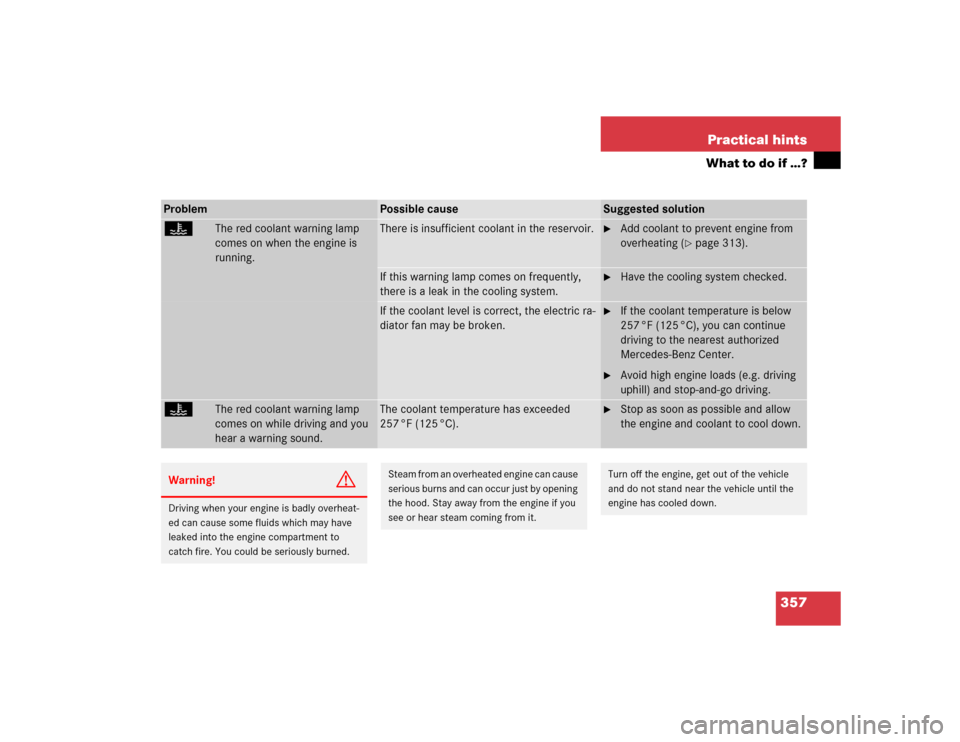
Problem
Possible cause
Suggested solution
•
The red coolant warning lamp
comes on when the engine is
running.
There is insufficient coolant in the reservoir.
�
Add coolant to prevent engine from
overheating (
�page 313).
If this warning lamp comes on frequently,
there is a leak in the cooling system.
�
Have the cooling system checked.
If the coolant level is correct, the electric ra-
diator fan may be broken.
�
If the coolant temperature is below
257 °F (125 °C), you can continue
driving to the nearest authorized
Mercedes-Benz Center.
�
Avoid high engine loads (e.g. driving
uphill) and stop-and-go driving.
•
The red coolant warning lamp
comes on while driving and you
hear a warning sound.
The coolant temperature has exceeded
257 °F (125 °C).
�
Stop as soon as possible and allow
the engine and coolant to cool down.
Warning!
G
Driving when your engine is badly overheat-
ed can cause some fluids which may have
leaked into the engine compartment to
catch fire. You could be seriously burned.
Steam from an overheated engine can cause
serious burns and can occur just by opening
the hood. Stay away from the engine if you
see or hear steam coming from it.
Turn off the engine, get out of the vehicle
and do not stand near the vehicle until the
engine has cooled down.
Page 378 of 498

376 Practical hintsWhat to do if …?
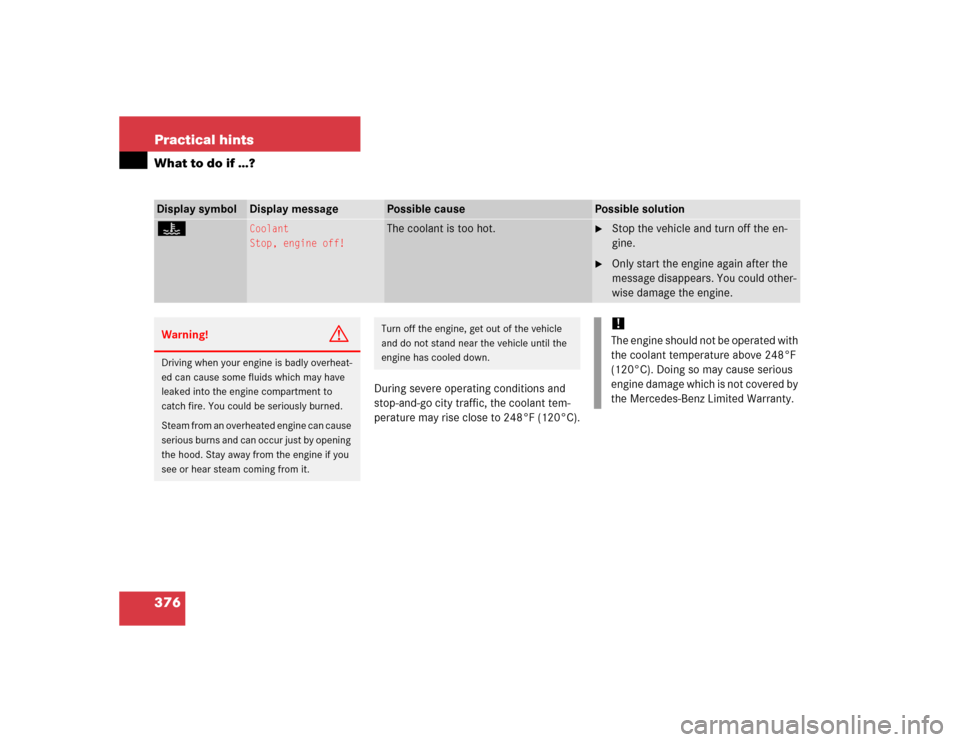
During severe operating conditions and
stop-and-go city traffic, the coolant tem-
perature may rise close to 248°F (120°C).
Display symbol
Display message
Possible cause
Possible solution
•
Coolant
Stop, engine off!
The coolant is too hot.
�
Stop the vehicle and turn off the en-
gine.
�
Only start the engine again after the
message disappears. You could other-
wise damage the engine.
Warning!
G
Driving when your engine is badly overheat-
ed can cause some fluids which may have
leaked into the engine compartment to
catch fire. You could be seriously burned.
Steam from an overheated engine can cause
serious burns and can occur just by opening
the hood. Stay away from the engine if you
see or hear steam coming from it.
Turn off the engine, get out of the vehicle
and do not stand near the vehicle until the
engine has cooled down.
!The engine should not be operated with
the coolant temperature above 248°F
(120°C). Doing so may cause serious
engine damage which is not covered by
the Mercedes-Benz Limited Warranty.
Page 383 of 498

381 Practical hints
What to do if …?
Display symbol
Display message
Possible cause
Possible solution
A
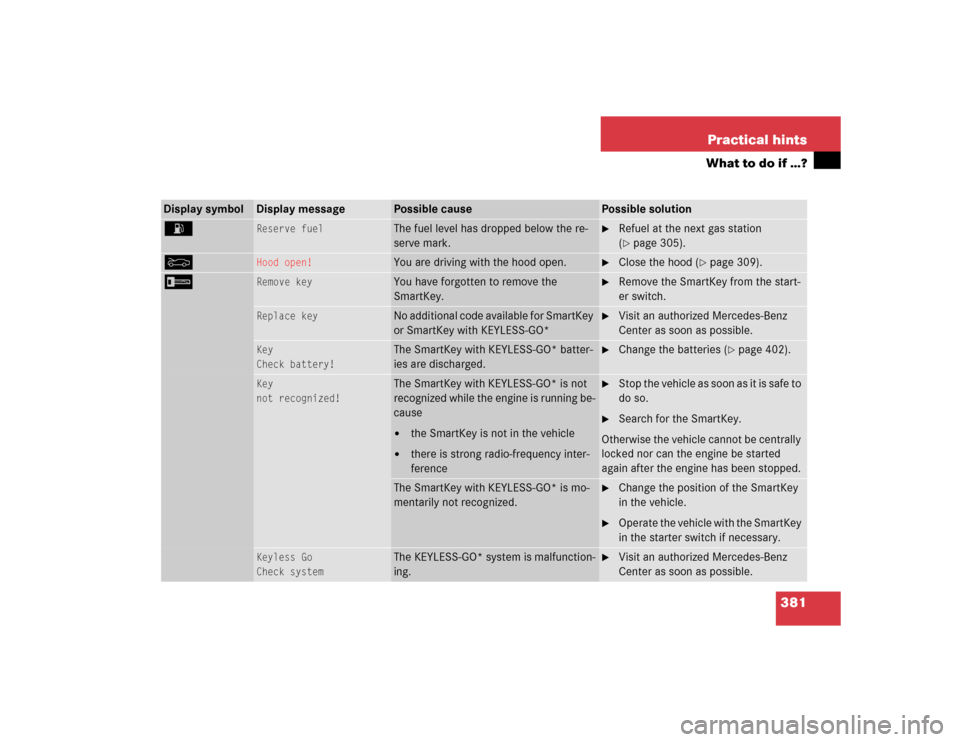
Reserve fuel
The fuel level has dropped below the re-
serve mark.
�
Refuel at the next gas station
(�page 305).
Y
Hood open!
You are driving with the hood open.
�
Close the hood (
�page 309).
I
Remove key
You have forgotten to remove the
SmartKey.
�
Remove the SmartKey from the start-
er switch.
Replace key
No additional code available for SmartKey
or SmartKey with KEYLESS-GO*
�
Visit an authorized Mercedes-Benz
Center as soon as possible.
Key
Check battery!
The SmartKey with KEYLESS-GO* batter-
ies are discharged.
�
Change the batteries (
�page 402).
Key
not recognized!
The SmartKey with KEYLESS-GO* is not
recognized while the engine is running be-
cause�
the SmartKey is not in the vehicle
�
there is strong radio-frequency inter-
ference
�
Stop the vehicle as soon as it is safe to
do so.
�
Search for the SmartKey.
Otherwise the vehicle cannot be centrally
locked nor can the engine be started
again after the engine has been stopped.
The SmartKey with KEYLESS-GO* is mo-
mentarily not recognized.
�
Change the position of the SmartKey
in the vehicle.
�
Operate the vehicle with the SmartKey
in the starter switch if necessary.
Keyless Go
Check system
The KEYLESS-GO* system is malfunction-
ing.
�
Visit an authorized Mercedes-Benz
Center as soon as possible.
Page 408 of 498
406 Practical hintsReplacing bulbsReplacing bulbs for front lamps
Before you start to replace a bulb for a
front lamp, do the following first:�
Turn the exterior lamp switch to
positionM (
�page 124).
�
Open the hood (
�page 308) (except
for side marker lamps).
Front lamps halogen-type
1Housing cover for low beam headlamp
2Housing cover for high beam head-
lamp, parking and standing lamp3Bulb socket for turn signal lamp bulb
4Bulb holder of low beam bulb
5Bulb holder of high beam bulb
6Bulb socket for parking and standing
lamp bulbLow beam bulb
�
Turn housing cover1 counterclock-
wise and remove it.
�
Turn bulb holder4 with the bulb coun-
terclockwise and remove it.
�
Pull the bulb at its socket out of bulb
holder4.
�
Insert the new bulb so that its socket
locates in the recess of bulb holder4
and is level to it.
�
Reinsert bulb holder4 with the bulb in
the lamp and turn clockwise.
�
Align housing cover1 and turn it
clockwise.
Page 413 of 498

411 Practical hints
Replacing wiper blades
�Replacing wiper blades
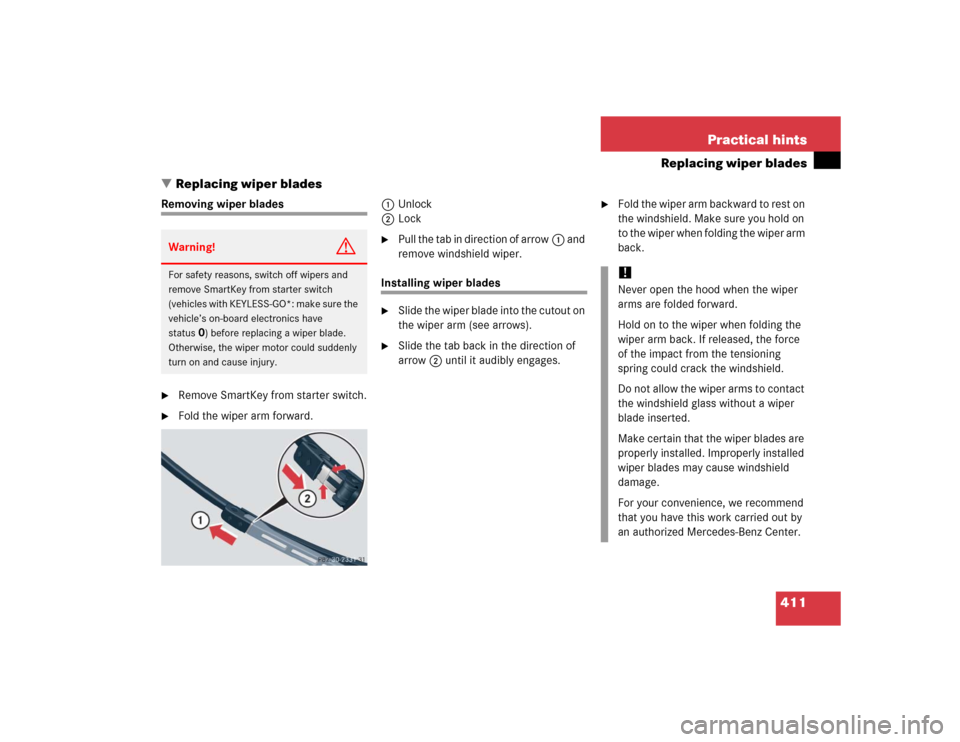
Removing wiper blades�
Remove SmartKey from starter switch.
�
Fold the wiper arm forward.1Unlock
2Lock
�
Pull the tab in direction of arrow1 and
remove windshield wiper.
Installing wiper blades�
Slide the wiper blade into the cutout on
the wiper arm (see arrows).
�
Slide the tab back in the direction of
arrow2 until it audibly engages.
�
Fold the wiper arm backward to rest on
the windshield. Make sure you hold on
to the wiper when folding the wiper arm
back.
Warning!
G
For safety reasons, switch off wipers and
remove SmartKey from starter switch
(vehicles with KEYLESS-GO*: make sure the
vehicle’s on-board electronics have
status
0) before replacing a wiper blade.
Otherwise, the wiper motor could suddenly
turn on and cause injury.
!Never open the hood when the wiper
arms are folded forward.
Hold on to the wiper when folding the
wiper arm back. If released, the force
of the impact from the tensioning
spring could crack the windshield.
Do not allow the wiper arms to contact
the windshield glass without a wiper
blade inserted.
Make certain that the wiper blades are
properly installed. Improperly installed
wiper blades may cause windshield
damage.
For your convenience, we recommend
that you have this work carried out by
an authorized Mercedes-Benz Center.
Page 423 of 498
421 Practical hints
Battery
1Negative terminal
2Positive terminal cover
Disconnecting the battery�
Turn off the engine (
�page 46).
�
Turn off all electrical consumers.
�
Remove SmartKey from starter switch.
Vehicles with KEYLESS-GO*:�
Press the start / stop button until
the engine shuts off.
�
Open the driver’s door.
�
Open the hood (
�page 308).
�
Remove the filter box (
�page 420).
�
Disconnect the battery negative lead
from negative terminal1.
�
Remove cover2 from the positive ter-
minal.
�
Disconnect the battery positive lead.
Removing the battery�
Remove the screw securing the
battery.
�
Remove the battery support and
bracket.
�
Take out the battery.
Warning!
G
With a disconnected battery�
you will no longer be able to turn the
SmartKey in the starter switch and
pressing the KEYLESS-GO* start/stop
button on the gear selector lever will
have no effect
�
the gear selector lever will remain
locked in positionP
Page 426 of 498

424 Practical hintsJump startingThe battery is located on the right side of
the engine compartment. For jump start-
ing use the terminals in front of the bat-
tery.�
Make sure the two vehicles do not
touch.
�
Turn off all electrical consumers.
�
Apply parking brake.
�
Shift gear selector lever to positionP.
�
Open the hood.1Positive terminal of charged battery
2Positive under hood terminal in front of
discharged battery
3Negative under hood terminal in front
of discharged battery
4Negative terminal of charged battery
�
Connect the positive terminal1 of the
charged battery with the positive under
hood terminal 2 in front of the dis-
charged battery with the jumper cable.
Clamp cable to charged battery1
first.
�
Start engine of the vehicle with the
charged battery and run at idle speed.
�
Connect the negative terminal4 of
the charged battery with the negative
under hood terminal 3 in front of the
discharged battery with the jumper ca-
ble. Clamp cable to charged battery4
first.
�
Start the engine of the disabled vehi-
cle.
You can now turn on the electrical con-
sumers. Do not turn on the lights under
any circumstances.
�
Remove the jumper cables first from
the negative terminals3 and4 and
then from the positive terminals1
and2.
You can now turn on the lights.
�
Have the battery checked at the near-
est authorized Mercedes-Benz Center.
Warning!
G
Keep flames or sparks away from battery.
Do not smoke.
Observe all safety instructions and precau-
tions when handling automotive batteries
(�page 314).
!Never invert the terminal connections.
!Do not tow-start the vehicle.
Page 471 of 498

469 Index
E
Easy-entry/exit feature 112
Activating 159
Electrical fuses 429
Electrical outlet in
rear passenger compartment 278
Electrical system
Technical data 444
Electronic Stability Program see ESP
Emergency call
911 245
Emergency call system* 280
Emergency calls
Initiating an emergency call 282
With Tele Aid 281
Emergency operation
(Limp Home Mode) 177
Emergency operations
Closing
power tilt/sliding sunroof* 401
Locking the vehicle 398
Opening
power tilt/sliding sunroof* 401
Remote door unlock 286
Unlocking the vehicle 397Emergency tensioning device see ETD
Emission control 304
Emission control information label 436
Ending
A call (telephone) 163
Engine
Compartment 308
Message in display 356
Starting 47
Starting with KEYLESS-GO* 47
Starting with the SmartKey 47
Technical data 438
Turning off 56
Engine cleaning 349
Engine compartment 308
Fuse box in 431
Hood 308
Engine malfunction
indicator lamp 25, 356
Engine number 436, 456Engine oil 309, 449
Adding 312
Additives 449
Checking level 310
Consumption 309
Filler cap 312
Filler neck 312
Message in display 379
Messages in display 311
Viscosity 456
Engine oil level see Oil level
ESP 25, 86, 456
Messages in display 367
Switching off 87
Switching on 88
Warning lamp 358
ETD 69, 456
Safety guidelines 64
Exterior lamp switch 124
Exterior rear view mirrors
Adjusting 41
Parking position for 160