Page 107 of 227

105 Telephone*
Telephone operation
You can select the following functions:�
Changing the phone book display at
the COMAND
�
Selecting a phone book entry and
dialing the number (
�page 105)
�
Entering and saving a new phone book
entry* (
�page 106)
�
Deleting a phone book entry
(�page 108)
Changing the phone book display
�
Open the phone book (
�page 104).
�
Press the
123
soft key.
The display changes to numbers. The
status bar displays the name of the
marked entry.
or
�
Press the
ABC
soft key.
The display changes to names. The
status bar displays the number of the
marked entry.Selecting a phone book entry and
dialing the number
�
Open the phone book (
�page 104).
The list of phone book entries with
names starting with a certain letter is
displayed.
Changing the initial letters
With Handh
�
Press H or h one or several times.
With every push of the button the
display changes to the next possible
letter. At the end of the letter list
follows the category
Other
.
Category
Other
:
Here, all entries without names or with
names starting with a special character
(e.g. * or #) are put together.With the number keys
The number keys are labelled with the let-
ters which can be selected.
�
Press, e.g. 4.
The system displays a window above
the status bar which shows the letters G, H and
I. After that, the address book
list with the letter
G is displayed.
�
To select, e.g. the letter
H, press 4
twice in quick succession.
Selecting an entry
�
Change the initial letter if required.
�
Use G or g to select a list entry.
iIf you hold one of the buttons, scrolling
is accelerated.
iIf you hold one of the buttons, scrolling
is accelerated.
Page 117 of 227

115 Navigation
Important notes
COMAND calculates the route with the
help of data that is stored on the navigati-
on DVD.
Only use Mercedes-Benz navigation DVDs.
Using other navigation DVDs or CDs will
cause malfunctions and/or damage.
Because of changes in local traffic patterns
(e.g. road works) and/or incomplete data,
errors in calculation may occur.
As a result, the recommended route may
deviate from the ideal route. The data
stored on the DVD only reflects local con-
ditions at the time of DVD production. DVD
maps do not cover all areas nor all routes
within an area.Loading/ejecting a DVD
DVDs are loaded and ejected at the
navigation computer. The navigation
computer is located on the left side in the
trunk.
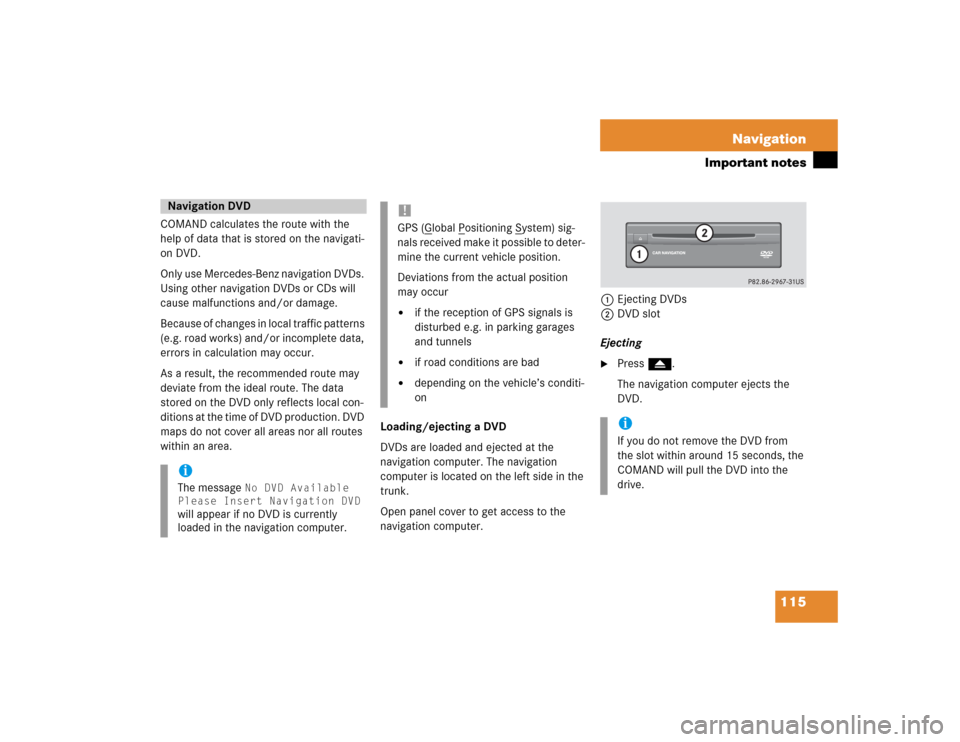
Open panel cover to get access to the
navigation computer. 1Ejecting DVDs
2DVD slot
Ejecting
�
Press l.
The navigation computer ejects the
DVD.
Navigation DVDiThe message
No DVD Available
Please Insert Navigation DVD
will appear if no DVD is currently
loaded in the navigation computer.
!GPS (G
lobal P
ositioning S
ystem) sig-
nals received make it possible to deter-
mine the current vehicle position.
Deviations from the actual position
may occur
�
if the reception of GPS signals is
disturbed e.g. in parking garages
and tunnels
�
if road conditions are bad
�
depending on the vehicle’s conditi-
on
iIf you do not remove the DVD from
the slot within around 15 seconds, the
COMAND will pull the DVD into the
drive.
Page 118 of 227
116 NavigationImportant notesLoading�
Insert the DVD into the DVD slot 2
with the label side up.
The navigation computer pulls the DVD
in.
If your vehicle has been transported (e.g.
by a car, train or ferry) the system may
make navigation announcements which do
not correspond to the vehicle’s position.
The system needs to redetermine its
position.Determining the location after the
vehicle has been transported
The system will need some time to
determine its location after the car has
been transported. The time required for
the system to do so varies from case to
case.
�
Switch the COMAND on.
�
Activate the Navigation main menu
(�page 118).
The navigation DVD needs to be in the
navigation computer (
�page 115).
�
Drive and press c.
The display will change to the map
display.Drive until the position or the road
indicated correspond to the real
circumstances. The system is now
correctly adjusted.
Route guidance after the vehicle has
been transported
Page 148 of 227

146 NavigationDuring route guidanceWith the via function you can influence
how the route is calculated.
Example:
You wish to travel from Chicago to New
York. You can use the via function to define
whether the route will lead via Cleveland or
Pittsburgh.�
In the Info menu (
�page 144), press
the
Route
soft key.
The route is shown on the map.
�
Press the
Via
soft key.If the via function is not yet active, you may
now select a via route.
If the via function is already active, the
message
Via Already Active
will
appear. You can delete (
�page 147) or
change (
�page 147) the via route.
Selecting a via route
You can select one via route at a time.
�
Press G or g to select a list entry.
�
Press E.
The system calculates the new route.
Via function (soft key via)iThe
Via
soft key has no function if the
route cannot offer any via routes.
iThe selection list always refers to the
currently active route.
Example:
You have entered a main and a
stopover destination. First, the system
will calculate your route to the stopover
destination, so that route is the active
route.
The selection list only shows possible
via routes to the stopover destination.
Page 179 of 227
177 Service
Address book
Selecting an initial letter
With Handh�
Press H or h one or several times.
With every push of the button the
display changes to the next possible
letter. At the end of the letter list
follows the category
Additional
.
Here, all entries without names or with
names starting with a special character
(e.g. +, !, * etc.) are put together.
�
After that use g or G to select the
desired entry.
AWith the number keys
The number keys are labelled with the let-
ters which can be selected.�
Press, e.g. 4.
The system displays a window above
the status bar which shows the letters G, H and
I. After that, the address book
list with the letter
G is displayed.
�
To select, e.g. the letter
H, press 4
twice in quick succession.
�
After that use g or G to select the
desired entry.
Selecting an entryiIf you hold H or h, scrolling is
accelerated.
iIf you hold g or G, scrolling is
accelerated.
iIf you hold g or G, scrolling is
accelerated.
Page 195 of 227
193 Service
Entering data
� Entering data
Sometimes you need to enter data such as
names or phone numbers.
E.g.:�
New phone book entry
�
New address book entry
The following input types are possible:
�
Via selection menu
�
Via 12-button keypad (
�page 195)The selection menu is displayed
automatically when you press the
corresponding button in a menu in which
this kind of data input is possible. The
following display may appear if you create
a new entry in the phone book.You can enter upper-case and lower-case
letters including special characters and
numbers.
The following shift fields can be used to
change the type of the characters:
= Upper case
= Lower case
= Special characters
Shifting Keys
�
Press h, H, g, G or F to
select the shift field .
�
Press E.
Input via selection menu
ABCabc. . .
abc
Page 201 of 227

199 System settings
System settings
�
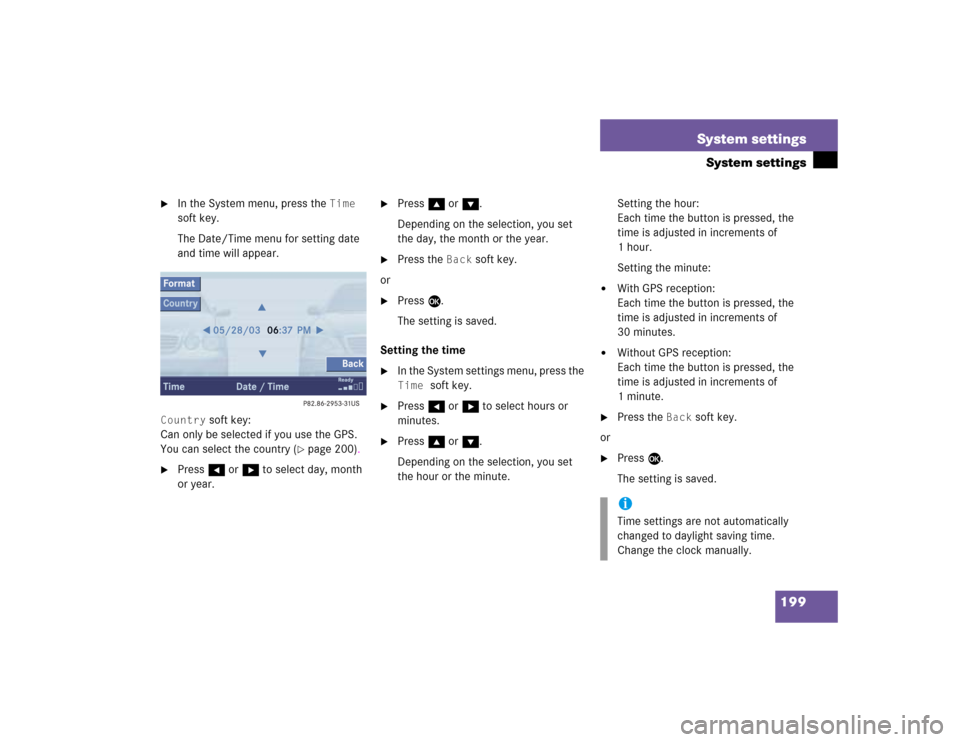
In the System menu, press the
Time
soft key.
The Date/Time menu for setting date
and time will appear.
Country
soft key:
Can only be selected if you use the GPS.
You can select the country (
�page 200).
�
Press H or h to select day, month
or year.
�
Press g or G.
Depending on the selection, you set
the day, the month or the year.
�
Press the
Back
soft key.
or
�
Press E.
The setting is saved.
Setting the time
�
In the System settings menu, press the Time
soft key.
�
Press H or h to select hours or
minutes.
�
Press g or G.
Depending on the selection, you set
the hour or the minute.Setting the hour:
Each time the button is pressed, the
time is adjusted in increments of
1hour.
Setting the minute:
�
With GPS reception:
Each time the button is pressed, the
time is adjusted in increments of
30 minutes.
�
Without GPS reception:
Each time the button is pressed, the
time is adjusted in increments of
1minute.
�
Press the
Back
soft key.
or
�
Press E.
The setting is saved.iTime settings are not automatically
changed to daylight saving time.
Change the clock manually.
Page 204 of 227
202 System settingsSystem settingsAdjusting the display brightness �
In the Display menu, press the Bright.
soft key.
�
Press h or H to adjust the
brightness.
or
�
Press the
Bright
. soft key longer than
2 seconds.
The display brightness changes
gradually.
�
Release the
Bright.
soft key.
�
Press the
Back
soft key.
or
�
Press E.
The brightness setting is applied.
Setting the display dimming
characteristics
�
In the Display menu, press the
Mode
soft key.
�
Press G or g to select an entry.Day ModeThe display is continuously set to
daylight design.Night ModeThe display is continuously set to night-
time design.AutomaticThe display changes depending on the
ambient light sensor in the vehicle.
�
Press E.
The setting is applied. The System
settings menu will appear.