Page 132 of 474
.
Vehicles with COMAND*:
Refer to separate operating
instructions.
�
Press button�")
131 Controls in detail
Control system
Operate the CD player�
Turn on the radio and select the
CD player (
�page 213).
Vehicles with COMAND*:
Refer to separate operating
instructions.
�
Press buttonè orÿ repeatedly
until the settings for the CD currently
being played appear in the
multifunction display.1Current CD (for CD changer*)
2Current track
�
Press buttonk orj repeatedly
until the desired track is selected.
NAV* menu
The
NAV
menu contains the functions
needed to operate your navigation system.
�
Press buttonè orÿ repeatedly
until the message
NAV
appears in the
multifunction display.
�
If the navigation system is switched off,
the message
NAV OFF
appears in the
multifunction display.
�
If the navigation system is on, different
messages, depending on the current
state of the navigation system, appear
in the multifunction display.
Please refer to the COMAND* manual for
instructions on how to activate the route
guidance system*.
iFor more information on satellite radio
operation, see “Introduction to satellite
radio* (USA only)” (
�page 208).
Vehicles with COMAND*:
Refer to separate operating
instructions.
iTo select a CD from the magazine,
press a number on the audio system or
the COMAND* system key pad located
in the center dashboard.
Page 140 of 474

139 Controls in detail
Control system
Time/Date submenu
Access the
Time/Date
submenu via the
Settings
menu. Use the
Time/Date
submenu to change the instrument cluster
display settings. The following functions
are available:Time synchronization with head unit*
This function can only be seen on vehicles
with COMAND* and navigation module*.
�
Move the selection marker with
buttonæ orç to the
Time/Date
submenu.
�
Press buttonj ork repeatedly
until the message
Time synchro.
w/Head Unit
appears in the multifunc-
tion display.
The selection marker is on the current
setting.
�
Press buttonæ orç to select
the desired setting.Setting the time (hours)
This function can be seen in vehicles with
audio system, or in vehicles with
COMAND* if the time synchronization with
head unit* feature was set to
Off
.
�
Move the selection marker with
buttonæ orç to the
Time/Date
submenu.
�
Press buttonj ork repeatedly
until the message
Time Hours
appears
in the multifunction display.
Function
Page
Time synchronization with
head unit*
139
Setting time (hours)
139
Setting time (minutes)
140
Selecting time display mode
141
Selecting automatic time change
(Daylight Saving Time (DST)
summer/Standard Time winter)
141
Setting date (month)
141
Setting date (day)
142
Setting date (year)
143
iVehicles with COMAND*:
For information on setting the time in
COMAND, refer to the separate
COMAND operating instructions.
��
Page 141 of 474
140 Controls in detailControl system
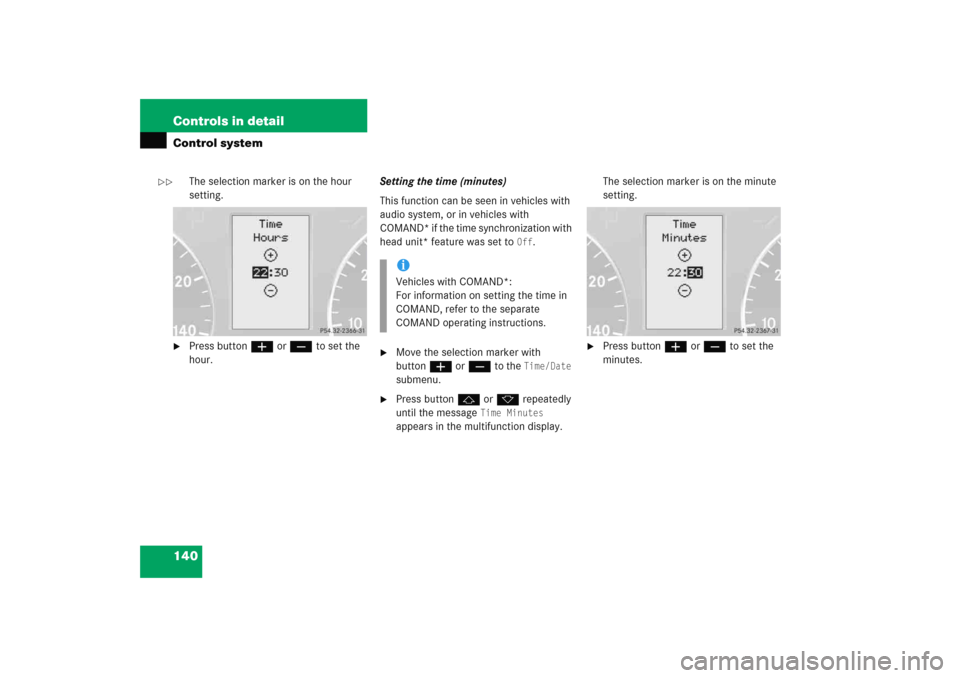
The selection marker is on the hour
setting.
�
Press buttonæ orç to set the
hour.Setting the time (minutes)
This function can be seen in vehicles with
audio system, or in vehicles with
COMAND* if the time synchronization with
head unit* feature was set to
Off
.
�
Move the selection marker with
buttonæ orç to the
Time/Date
submenu.
�
Press buttonj ork repeatedly
until the message
Time Minutes
appears in the multifunction display.The selection marker is on the minute
setting.
�
Press buttonæ orç to set the
minutes.
iVehicles with COMAND*:
For information on setting the time in
COMAND, refer to the separate
COMAND operating instructions.
��
Page 142 of 474

141 Controls in detail
Control system
Selecting time display mode�
Move the selection marker with
buttonæ orç to the
Time/Date
submenu.
�
Press buttonj ork repeatedly
until the message
Clock display
appears in the multifunction display.
The selection marker is on the current
setting.
�
Press buttonæ orç to set
the
12h
or
24h
time display mode.Selecting automatic time change
(Daylight Saving Time (DST) summer /
Standard Time winter)
This function can be seen in vehicles with
audio system, or in vehicles with
COMAND* if the time synchronization with
head unit* feature was set to
Off
.
�
Move the selection marker with
buttonæ orç to the
Time/Date
submenu.
�
Press buttonj ork repeatedly
until the message
Change-over
Summer / Winter time
appears in the
multifunction display.
The selection marker is on the current
setting.
�
Press buttonæ orç to select if
the changeover between summer and
winter time should be automatic or
manual.
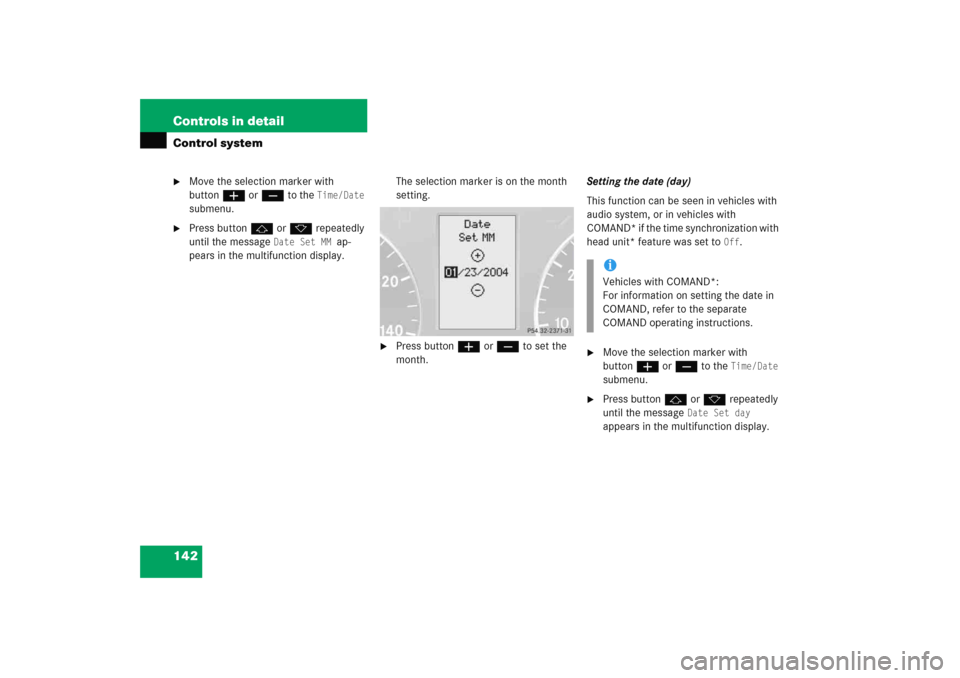
Setting the date (month)
This function can be seen in vehicles with
audio system, or in vehicles with
COMAND* if the time synchronization with
head unit* feature was set to
Off
.
iVehicles with COMAND*:
For information on setting the date in
COMAND, refer to the separate
COMAND operating instructions.
Page 143 of 474
142 Controls in detailControl system�
Move the selection marker with
buttonæ orç to the
Time/Date
submenu.
�
Press buttonj ork repeatedly
until the message
Date Set MM
ap-
pears in the multifunction display.The selection marker is on the month
setting.
�
Press buttonæ orç to set the
month.Setting the date (day)
This function can be seen in vehicles with
audio system, or in vehicles with
COMAND* if the time synchronization with
head unit* feature was set to
Off
.
�
Move the selection marker with
buttonæ orç to the
Time/Date
submenu.
�
Press buttonj ork repeatedly
until the message
Date Set day
appears in the multifunction display.
iVehicles with COMAND*:
For information on setting the date in
COMAND, refer to the separate
COMAND operating instructions.
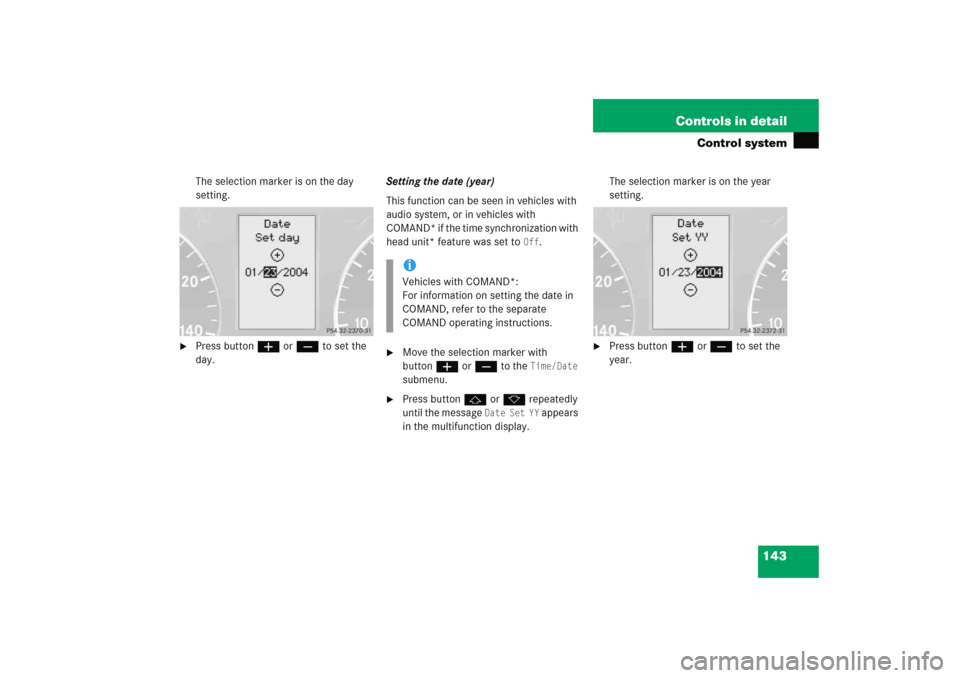
Page 144 of 474
143 Controls in detail
Control system
The selection marker is on the day
setting.
�
Press buttonæ orç to set the
day.Setting the date (year)
This function can be seen in vehicles with
audio system, or in vehicles with
COMAND* if the time synchronization with
head unit* feature was set to
Off
.
�
Move the selection marker with
buttonæ orç to the
Time/Date
submenu.
�
Press buttonj ork repeatedly
until the message
Date Set YY
appears
in the multifunction display.The selection marker is on the year
setting.
�
Press buttonæ orç to set the
year.
iVehicles with COMAND*:
For information on setting the date in
COMAND, refer to the separate
COMAND operating instructions.
Page 196 of 474

195 Controls in detail
Audio system
�Audio system
Audio and telephone, operation
These instructions are intended to help
you become familiar with your
Mercedes-Benz audio system. They con-
tain useful tips and a detailed description
of the user functions.
Operating safety
Warning!
G
In order to avoid distraction which could
lead to an accident, the driver should enter
system settings with the vehicle at a stand-
still and operate the system only when road
and traffic conditions permit. Always pay full
attention to traffic conditions first before
operating system controls while driving.
Bear in mind that at a speed of just 30 mph
(approximately 50 km/h), your car is cover-
ing a distance of 44 feet (approximately
14 m) every second.
Warning!
G
Any alterations made to electronic compo-
nents can cause malfunctions.
The radio, amplifier, CD changer*, satellite
radio* and telephone* are interconnected.
When one of the components is not opera-
tional or has not been removed/replaced
properly, the function of other components
may be impaired.
This condition might seriously impair the
operating safety of your vehicle.
We recommend that you have any service
work on electronic components carried out
by an authorized Mercedes-Benz Center.
Page 197 of 474
196 Controls in detailAudio systemOperating and display elements