Page 114 of 474

113
Controls in detail
Lighting
Fog lamps
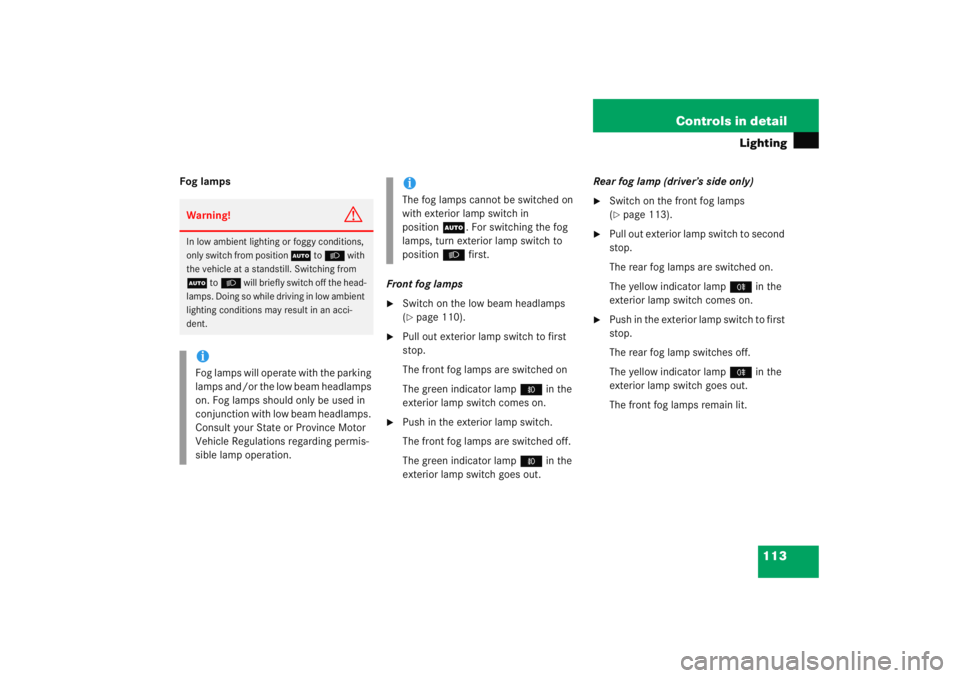
Front fog lamps
�
Switch on the low beam headlamps
(�page 110).
�
Pull out exterior lamp switch to first
stop.
The front fog lamps are switched on
The green indicator lamp‡ in the
exterior lamp switch comes on.
�
Push in the exterior lamp switch.
The front fog lamps are switched off.
The green indicator lamp ‡ in the
exterior lamp switch goes out. Rear fog lamp (driver’s side only)
�
Switch on the front fog lamps
(�page 113).
�
Pull out exterior lamp switch to second
stop.
The rear fog lamps are switched on.
The yellow indicator lamp
† in the
exterior lamp switch comes on.
�
Push in the exterior lamp switch to first
stop.
The rear fog lamp switches off.
The yellow indicator lamp † in the
exterior lamp switch goes out.
The front fog lamps remain lit.
Warning!
G
In low ambient lighting or foggy conditions,
only switch from position U to B with
the vehicle at a standstill. Switching from
U to B will briefly switch off the head-
lamps. Doing so while driving in low ambient
lighting conditions may result in an acci-
dent.iFog lamps will operate with the parking
lamps and/or the low beam headlamps
on. Fog lamps should only be used in
conjunction with low beam headlamps.
Consult your State or Province Motor
Vehicle Regulations regarding permis-
sible lamp operation.
iThe fog lamps cannot be switched on
with exterior lamp switch in
position U. For switching the fog
lamps, turn exterior lamp switch to
position B first.
Page 115 of 474

114 Controls in detailLightingCombination switch
The combination switch is located on the
left of the steering column.Combination switch1High beam
2 High beam flasher High beam
�
Turn exterior lamp switch to
position
B orU (
�page 110).
�
Push the combination switch in direc-
tion of arrow 1 to switch on the high
beam.
The high beam headlamp indicator
lamp A in the instrument cluster
comes on (
�page 24).
�
Pull the combination switch in direction
of arrow 2 to its original position to
switch off the high beam.
The high beam headlamp indicator
lamp A in the instrument cluster
goes out.
High beam flasher
�
Pull the combination switch briefly in
direction of arrow 2.
Cornering fog lamps*
The cornering fog lamps improve illumina-
tion of the road into which you are turning.
Cornering fog lamps will operate with the
engine running and with�
the exterior lamp switch in
position B (
�page 110)
or
�
the exterior lamp switch in
position U (
�page 110)
or
�
the daytime running lamp mode
activated (
�page 112)
iCornering fog lamps will only come on
in low ambient lighting conditions.
The cornering fog lamps function is not
available at a vehicle speed above
25 mph (40 km/h).
Page 145 of 474

144 Controls in detailControl systemLighting submenu
Access the
Lighting
submenu via the
Settings
menu. Use the
Lighting
submenu to change the lamp and lighting
settings on your vehicle.
The following functions are available:Setting daytime running lamp mode
(USA only)
�
Move the selection marker with
button
æ orç to the
Lighting
submenu.
�
Press button j ork repeatedly
until the message
Hdlamp mode
appears
in the multifunction display. The selection marker is on the current
setting.
�
Press button
æ orç to select
manual operation (
Manual
) or daytime
running lamp mode (
Constant
) activat-
ed.
With daytime running lamp mode activated
and the exterior lamp switch in
position MorU , the low beam
headlamps are switched on when the
engine is running.
Function
Page
Setting daytime running lamp
mode (USA only)
144
Setting locator lighting
145
Setting night security
illumination
146
Setting Interior lighting delayed
shut-off
147
iThis function is not available in coun-
tries where the daytime running lamp
mode is mandatory and therefore in a
constant mode.
Page 349 of 474
348 Practical hintsWhat to do if …On the pages that follow, you will find a
compilation of the most important warning
and malfunction messages that may
appear in the display. High priority
messages appear in red color.For your convenience the messages are
divided into two sections:
�
Text messages (
�page 349)
�
Symbol messages (
�page 357)
iSwitching on the ignition causes all
instrument cluster lamps (except low
beam headlamp indicator lamp, high
beam headlamp indicator lamp, and
turn signal indicator lamps unless
activated) as well as the multifunction
display to come on. Make sure the
lamps and multifunction display are in
working order before starting your
journey.
Page 369 of 474
368 Practical hintsWhat to do if …Display symbol
Display message
Possible cause
Possible solution
.
Low beam left
The left low beam lamp is malfunctioning.
Halogen headlamp:�
Replace the bulb as soon as possible.
Bi-Xenon* headlamp:
�
Visit an authorized Mercedes-Benz
Center as soon as possible.
Low beam right
The right low beam lamp is
malfunctioning.
Halogen headlamp:�
Replace the bulb as soon as possible.
Bi-Xenon* headlamp:
�
Visit an authorized Mercedes-Benz
Center as soon as possible.
Parking lamp
left front
The left parking lamps are
malfunctioning. A substitute bulb is being
used.
�
Replace the bulb as soon as possible.
Parking lamp
right front
The right parking lamps are
malfunctioning. A substitute bulb is being
used.
�
Replace the bulb as soon as possible.
Rear fog lamp
Substitute bulb on
The rear fog lamp is malfunctioning.
�
Replace the bulb as soon as possible.
Page 386 of 474
385
Practical hints
Replacing bulbs
Front lamps
Rear lamps
Lamp
Type
1
Additional turn signal
lamps
LED
2
Halogen headlamp: Turn
signal lamp
Bi-Xenon* headlamp:
Turn signal lamp
1156 A
2357 A
3
Halogen headlamps:
Low beam
1
Bi-Xenon* headlamp:
Low and high beam
1Vehicles with Bi-Xenon* headlamps: Low beam
and high beam use the same D2S-35W lamp. Do
not replace the Xenon bulbs yourself. See an
authorized Mercedes-Benz Center.
H7 (55 W)
D2S-35 W
Lamp
Type
4
Halogen headlamps:
High beam/high beam
flasher
Bi-Xenon* headlamps:
High beam flasher
H7 (55 W)
H7 (55 W)
Parking and standing
lamps
W5W
5
Fog lamp
Front fog lamp with
cornering fog lamp
HB4 (51 W)
H7 (55 W)
6
Side marker lamp
W5W
Lamp
Type
7
High mounted brake
lamp
LED
8
License plate lamps
C 5 W
9
Brake lamp
P 21 W
Turn signal lamp
PY21W
Tail, parking, standing
and side marker lamp
P21/5W
Rear fog lamp (only
driver’s side)
P21/4W
Page 387 of 474

386 Practical hintsReplacing bulbs
Notes on bulb replacement�
Use only 12-volt bulbs of the same type
and with the specified watt rating.
�
Switch lights off before replacing a bulb
to prevent short circuits.
�
Always use a clean lint-free cloth when
handling bulbs.
�
Your hands should be dry and free of oil
and grease.
�
If the newly installed bulb does not
come on, visit an authorized
Mercedes-Benz Center.
Have the LEDs and bulbs for the following
lamps replaced by an authorized
Mercedes-Benz Center.
�
Additional turn signals in the exterior
rear view mirrors
�
High mounted brake lamp
�
Xenon* lamps
�
Front fog lamps
Replacing bulbs for front lamps
Before you start to replace a bulb for a
front lamp, do the following first:�
Turn the exterior lamp switch to
position M (
�page 110).
�
Open the hood (
�page 291) (except
for side marker lamps).
Halogen headlamps
Left headlamp, mirror-image of right
headlamp1 Housing cover for low beam headlamp
2 Housing cover for high beam head-
lamp, parking and standing lamp
Warning!
G
Bulbs and bulb sockets can be very hot. Al-
low the lamp to cool down before changing
a bulb.
Keep bulbs out of reach of children.
Halogen lamps contain pressurized gas.
A bulb can explode if you�
touch or move it when hot
�
drop the bulb
�
scratch the bulb
Wear eye and hand protection.
Because of high voltage in Xenon lamps, it is
dangerous to replace the bulb or repair the
lamp and its components. We recommend
that you have such work done by a qualified
technician.
Page 388 of 474

387
Practical hints
Replacing bulbs
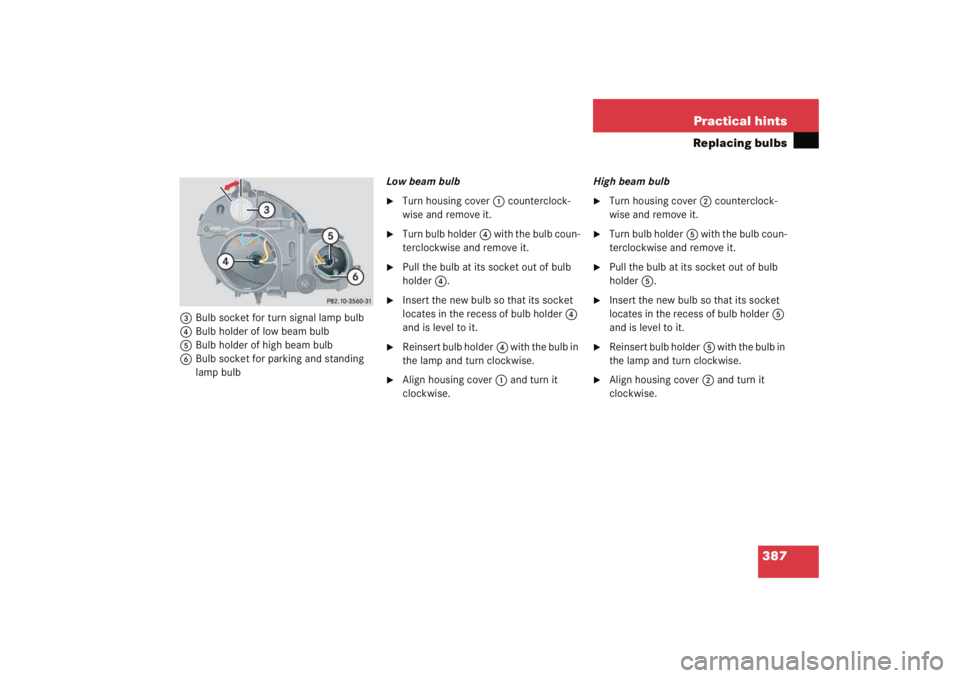
3
Bulb socket for turn signal lamp bulb
4 Bulb holder of low beam bulb
5 Bulb holder of high beam bulb
6 Bulb socket for parking and standing
lamp bulb Low beam bulb
�
Turn housing cover
1 counterclock-
wise and remove it.
�
Turn bulb holder 4 with the bulb coun-
terclockwise and remove it.
�
Pull the bulb at its socket out of bulb
holder 4.
�
Insert the new bulb so that its socket
locates in the recess of bulb holder 4
and is level to it.
�
Reinsert bulb holder 4 with the bulb in
the lamp and turn clockwise.
�
Align housing cover 1 and turn it
clockwise. High beam bulb
�
Turn housing cover
2 counterclock-
wise and remove it.
�
Turn bulb holder 5 with the bulb coun-
terclockwise and remove it.
�
Pull the bulb at its socket out of bulb
holder 5.
�
Insert the new bulb so that its socket
locates in the recess of bulb holder 5
and is level to it.
�
Reinsert bulb holder 5 w i t h t h e b u l b i n
the lamp and turn clockwise.
�
Align housing cover 2 and turn it
clockwise.