Page 221 of 425
AUDIO
204
AUDIO SYSTEM
Quick reference for your audio system (with six CD changer)
SV22066
�You can adjust the brightness of the display. See ªInstrument panel light controlº on page 58 for details.
04 06.30
Page 227 of 425

AUDIO
210(c) Your radio antenna
To remove an antenna, carefully turn it counterclockwise.
NOTICE
To prevent damage to the antenna, make sure it is
removed before driving your vehicle through anautomatic car wash.
(d) Your cassette player
When you insert a cassette, the exposed tape should be to the
right.
NOTICE
Do not oil any part of the cassette player, and do not insert anything except a cassette tape into the slot.
(e) Your automatic changer (with six CD changer only)
SV22071
Your automatic changer can be store up to 6 CDs and play
selected CDs or continuously play all the CDs set in the player.
When you set CDs into the player, make sure their labels face
up. If not, the player will display ªERR 1º and the CD number.
NOTICE
�Do not stack up two CDs for insertion, or it will cause
damage to the CD changer. Insert only one CD intoslot at a time.
�Never try to disassemble or oil any part of the CDplayer. Do not insert anything other than CDs into theslot.
�Do not insert a CD upon another one.
The player is intended for use with 12 cm (4.7 in.) CDs only.
04 06.30
Page 236 of 425

AUDIO
219
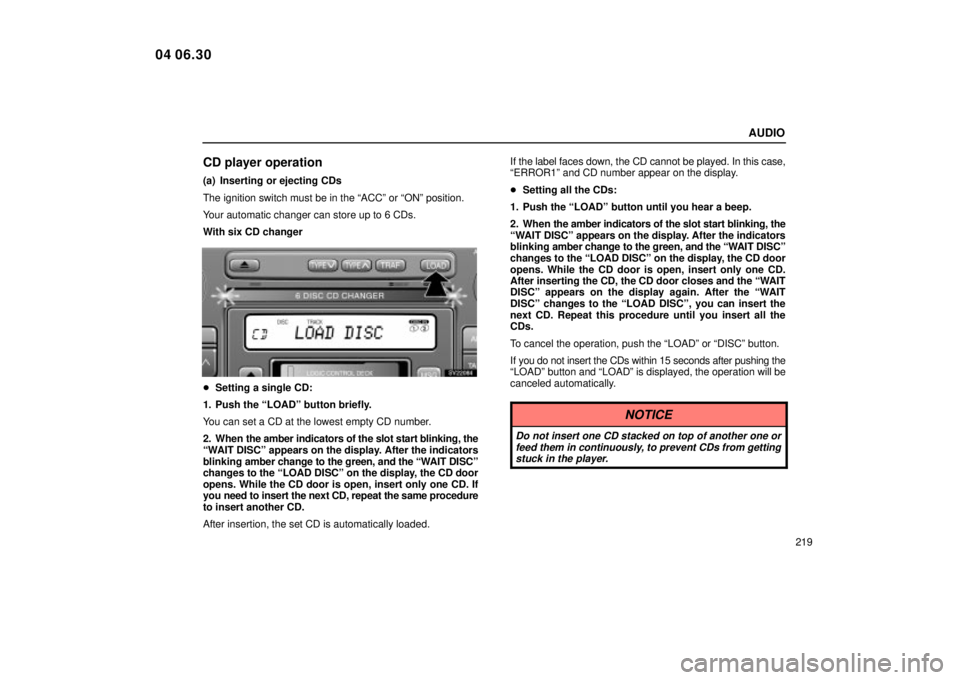
CD player operation
(a) Inserting or ejecting CDs
The ignition switch must be in the ªACCº or ªONº position.
Your automatic changer can store up to 6 CDs.
With six CD changer
SV22084
�Setting a single CD:
1. Push the ªLOADº button briefly.
You can set a CD at the lowest empty CD number.
2. When the amber indicators of the slot start blinking, the
ªWAIT DISCº appears on the display. After the indicators
blinking amber change to the green, and the ªWAIT DISCº
changes to the ªLOAD DISCº on the display, the CD door
opens. While the CD door is open, insert only one CD. If
you need to insert the next CD, repeat the same procedure
to insert another CD.
After insertion, the set CD is automatically loaded. If the label faces down, the CD cannot be played. In this case,
ªERROR1º and CD number appear on the display.
�
Setting all the CDs:
1. Push the ªLOADº button until you hear a beep.
2. When the amber indicators of the slot start blinking, the
ªWAIT DISCº appears on the display. After the indicators
blinking amber change to the green, and the ªWAIT DISCº
changes to the ªLOAD DISCº on the display, the CD door
opens. While the CD door is open, insert only one CD.
After inserting the CD, the CD door closes and the ªWAIT
DISCº appears on the display again. After the ªWAIT
DISCº changes to the ªLOAD DISCº, you can insert the
next CD. Repeat this procedure until you insert all the
CDs.
To cancel the operation, push the ªLOADº or ªDISCº button.
If you do not insert the CDs within 15 seconds after pushing the
ªLOADº button and ªLOADº is displayed, the operation will be
canceled automatically.
NOTICE
Do not insert one CD stacked on top of another one or feed them in continuously, to prevent CDs from gettingstuck in the player.
04 06.30
Page 239 of 425
AUDIO
222(c) Selecting a desired CD (with six CD changer only)
SV22087
Push the ªDISC �
º or ªDISC �º button to select the CD
number.
Push the button several times until the desired CD number
appears on the display. When you release the button, the
player will start playing the selected CD from the first track. (d) Searching for a desired track
SV22088
Push the ªSCANº button briefly.
ªSCANº will appear on the display. The CD player will play the
next track for 10 seconds, then scan again. To select a track,
push the ªSCANº button a second time. If the player reaches
the end of the CD, it will continue scanning at track 1.
After all the tracks are scanned in one pass, normal play
resumes.
04 06.30
Page 240 of 425

AUDIO
223
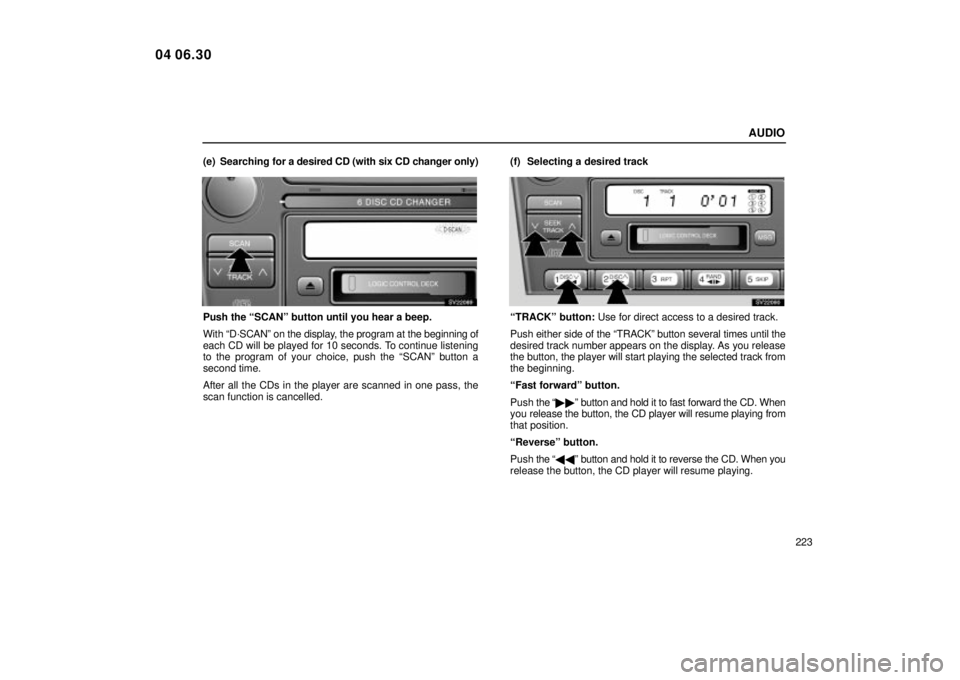
(e) Searching
for a desired CD (with six CD changer only)
SV22089
Push the ªSCANº button until you hear a beep.
With ªD´SCANº on the display, the program at the beginning of
each CD will be played for 10 seconds. To continue listening
to the program of your choice, push the ªSCANº button a
second time.
After all the CDs in the player are scanned in one pass, the
scan function is cancelled. (f) Selecting a desired track
SV22090
ªTRACKº button: Use for direct access to a desired track.
Push either side of the ªTRACKº button several times until the
desired track number appears on the display. As you release
the button, the player will start playing the selected track from
the beginning.
ªFast forwardº button.
Push
the ª�� º button and hold it to fast forward the CD. When
you release the button, the CD player will resume playing from
that position.
ªReverseº button.
Push the ª�� º button and hold it to reverse the CD. When you
release the button, the CD player will resume playing.
04 06.30
Page 246 of 425
AUDIO
229
20E425
�Low quality CDs
20E423
�Labeled CDs
NOTICE
Do not use special shaped, transparent/translucent, lowquality or labeled CDs such as those shown in the il-lustrations. The use of such CDs may damage the player
or changer, or it may be impossible to eject the CD.
04 06.30