Page 213 of 425

AIR CONDITIONING
196However, once selecting ªRECIRCULATED AIRº of the air
intake manually will make this function inoperable. In order to
make this function operable again, first select ªOUTSIDE AIRº
of the air intake, turn off the ignition switch, and start the engine
again. Then this function return to be operable.
If manual on±off of the air conditioning is desired ±
Push the ªA/Cº button to turn the air conditioning on and push
it again to turn the air conditioning off.
The air conditioning does not work if the outside temperature
is lowered down to around 0�C (32�F).
If the system is used for ventilation, heating in dry weather or
removing frost or exterior fog on the windshield, turn the air
conditioning off once it is no longer required. This will improve
fuel economy. The air conditioning can be used for year±round
automatic temperature control including cooling and
dehumidifying operation.
If the air conditioning compressor does not operate, the
indicator of the ªA/Cº button will blink. If the indicator of the
ªA/Cº button blinks even when the ªA/Cº button is pushed
again, have the compressor checked by your nearest Lexus
dealer.
(b) Windshield defogging and defrosting
SV21016
To remove interior fog on the windshield ±
1. Turn the air flow control dial to ªWINDSHIELDº.
2. Set the ªOUTSIDE AIRº mode.
To remove frost or exterior fog on the windshield ±
1. Turn the temperature control dial to the maximum
temperature.
2. Turn the air flow control dial to ªWINDSHIELDº.
3. Turn the fan speed control dial to ªHIº.
4. Leave the air conditioning on±off button off.
04 06.30
Page 231 of 425
AUDIO
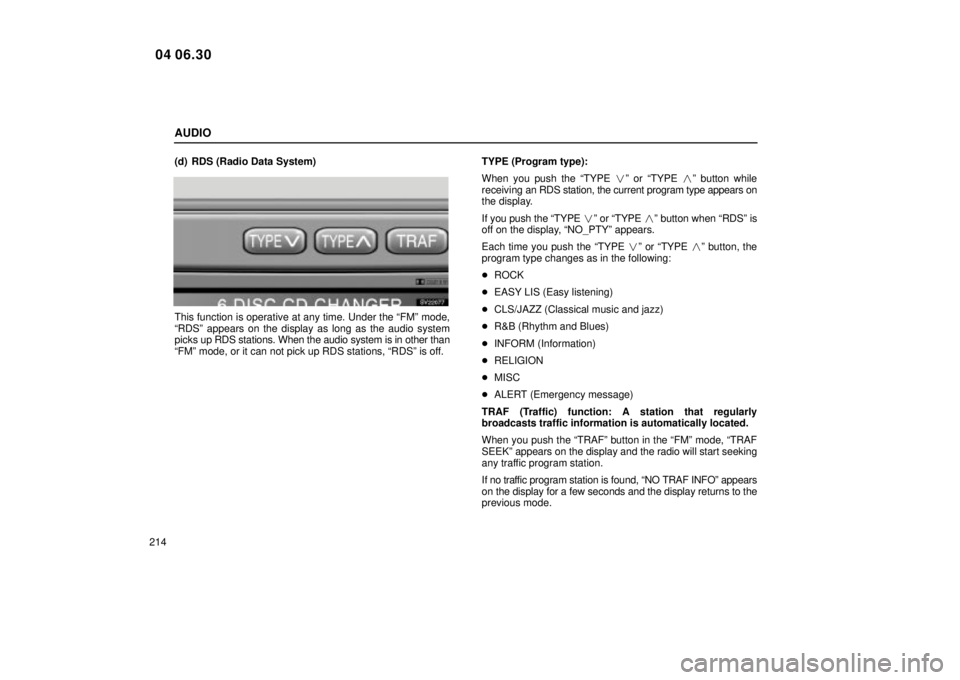
214(d) RDS (Radio Data System)
SV22077
This function is operative at any time. Under the ªFMº mode,
ªRDSº appears on the display as long as the audio system
picks up RDS stations. When the audio system is in other than
ªFMº mode, or it can not pick up RDS stations, ªRDSº is off.
TYPE (Program type):
When you push the ªTYPE
�º or ªTYPE � º button while
receiving an RDS station, the current program type appears on
the display.
If you push the ªTYPE �º or ªTYPE � º button when ªRDSº is
off on the display, ªNO_PTYº appears.
Each time you push the ªTYPE �º or ªTYPE �º button, the
program type changes as in the following:
� ROCK
� EASY LIS (Easy listening)
� CLS/JAZZ (Classical music and jazz)
� R&B (Rhythm and Blues)
� INFORM (Information)
� RELIGION
� MISC
� ALERT (Emergency message)
TRAF (Traffic) function: A station that regularly
broadcasts traffic information is automatically located.
When you push the ªTRAFº button in the ªFMº mode, ªTRAF
SEEKº appears on the display and the radio will start seeking
any traffic program station.
If no traf fic program station is found, ªNO TRAF INFOº appears
on the display for a few seconds and the display returns to the
previous mode.
04 06.30
Page 233 of 425
AUDIO
216
Cassette tape player operation
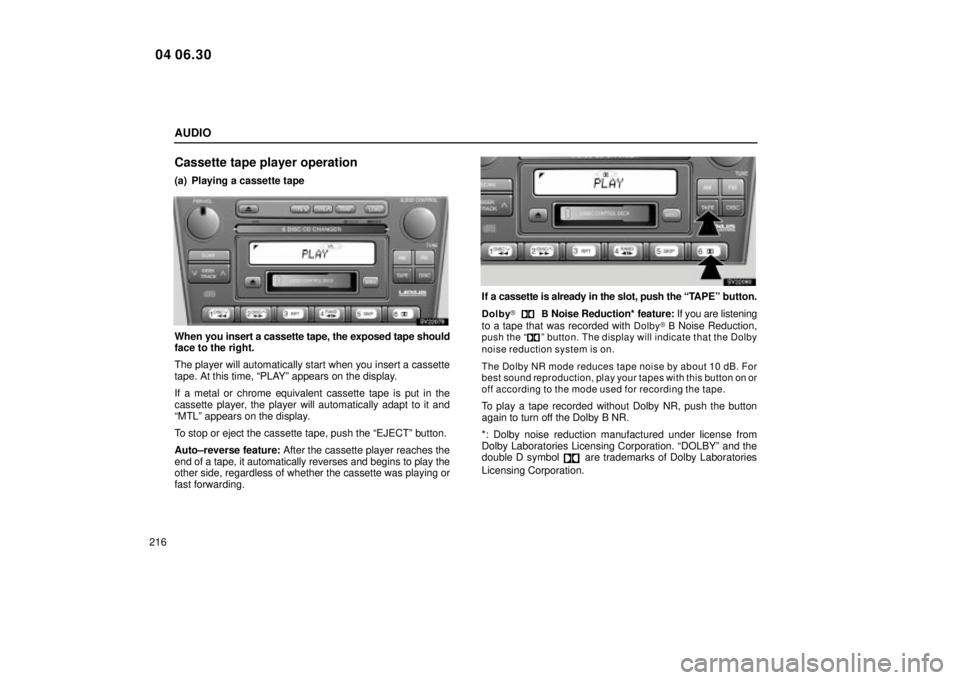
(a) Playing a cassette tape
SV22079
When you insert a cassette tape, the exposed tape should
face to the right.
The player will automatically start when you insert a cassette
tape. At this time, ªPLAYº appears on the display.
If a metal or chrome equivalent cassette tape is put in the
cassette player, the player will automatically adapt to it and
ªMTLº appears on the display.
To stop or eject the cassette tape, push the ªEJECTº button.
Auto±reverse feature: After the cassette player reaches the
end of a tape, it automatically reverses and begins to play the
other side, regardless of whether the cassette was playing or
fast forwarding.
SV22080
If a cassette is already in the slot, push the ªTA PEº button.
Dolby�B Noise Reduction* feature: If you are listening
to a tape that was recorded with
Dolby � B Noise Reduction,push the ªº button. The display will indicate that the Dolby
noise reduction system is on.
The Dolby NR mode reduces tape noise by about 10 dB. For
best sound reproduction, play your tapes with this button on or
off according to the mode used for recording the tape.
To play a tape recorded without Dolby NR, push the button
again to turn off the Dolby B NR.
*: Dolby noise reduction manufactured under license from
Dolby Laboratories Licensing Corporation. ªDOLBYº and the
double D symbol
are trademarks of Dolby Laboratories
Licensing Corporation.
04 06.30
Page 236 of 425
AUDIO
219
CD player operation
(a) Inserting or ejecting CDs
The ignition switch must be in the ªACCº or ªONº position.
Your automatic changer can store up to 6 CDs.
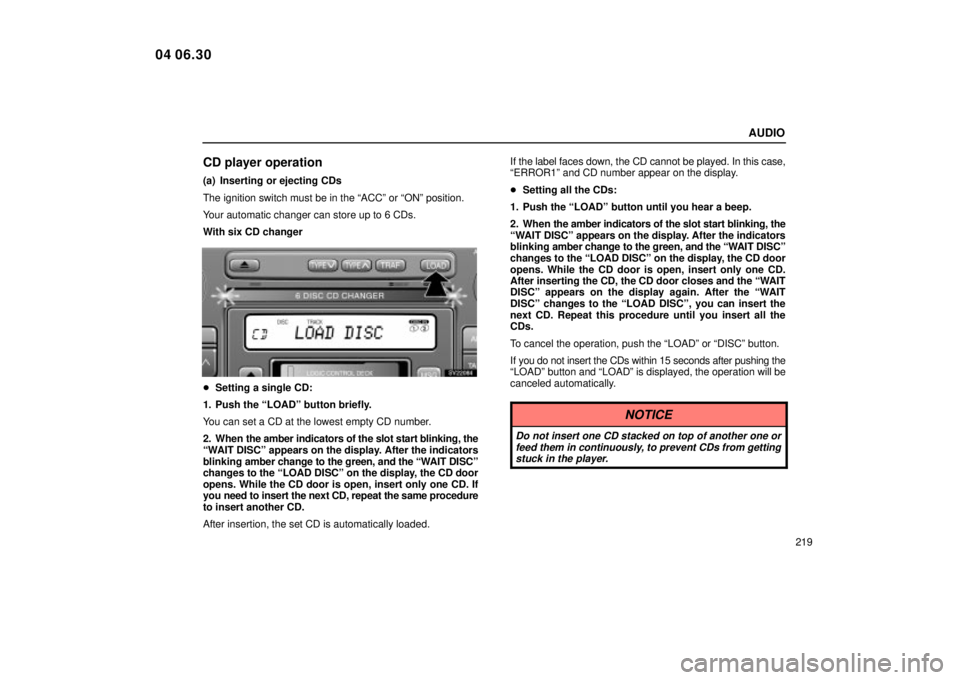
With six CD changer
SV22084
�Setting a single CD:
1. Push the ªLOADº button briefly.
You can set a CD at the lowest empty CD number.
2. When the amber indicators of the slot start blinking, the
ªWAIT DISCº appears on the display. After the indicators
blinking amber change to the green, and the ªWAIT DISCº
changes to the ªLOAD DISCº on the display, the CD door
opens. While the CD door is open, insert only one CD. If
you need to insert the next CD, repeat the same procedure
to insert another CD.
After insertion, the set CD is automatically loaded. If the label faces down, the CD cannot be played. In this case,
ªERROR1º and CD number appear on the display.
�
Setting all the CDs:
1. Push the ªLOADº button until you hear a beep.
2. When the amber indicators of the slot start blinking, the
ªWAIT DISCº appears on the display. After the indicators
blinking amber change to the green, and the ªWAIT DISCº
changes to the ªLOAD DISCº on the display, the CD door
opens. While the CD door is open, insert only one CD.
After inserting the CD, the CD door closes and the ªWAIT
DISCº appears on the display again. After the ªWAIT
DISCº changes to the ªLOAD DISCº, you can insert the
next CD. Repeat this procedure until you insert all the
CDs.
To cancel the operation, push the ªLOADº or ªDISCº button.
If you do not insert the CDs within 15 seconds after pushing the
ªLOADº button and ªLOADº is displayed, the operation will be
canceled automatically.
NOTICE
Do not insert one CD stacked on top of another one or feed them in continuously, to prevent CDs from gettingstuck in the player.
04 06.30
Page 238 of 425
AUDIO
221
SV22047
To eject the CD, push the ªEJECTº button.(b) Playing a CD
SV22086
Push the ªDISCº button if the CDs are already loaded in
the player.
The CDs set in the player are played continuously, starting with
CD number 1. The CD number of the CD currently being
played,
the track number and the time from the beginning of the
program appear on the display.
When play of one CD ends, the first track of the following CD
starts. W hen play of the final CD ends, play of the first CD starts
again.
The player will skip any empty CD trays.
04 06.30
Page 239 of 425
AUDIO
222(c) Selecting a desired CD (with six CD changer only)
SV22087
Push the ªDISC �
º or ªDISC �º button to select the CD
number.
Push the button several times until the desired CD number
appears on the display. When you release the button, the
player will start playing the selected CD from the first track. (d) Searching for a desired track
SV22088
Push the ªSCANº button briefly.
ªSCANº will appear on the display. The CD player will play the
next track for 10 seconds, then scan again. To select a track,
push the ªSCANº button a second time. If the player reaches
the end of the CD, it will continue scanning at track 1.
After all the tracks are scanned in one pass, normal play
resumes.
04 06.30
Page 240 of 425
AUDIO
223
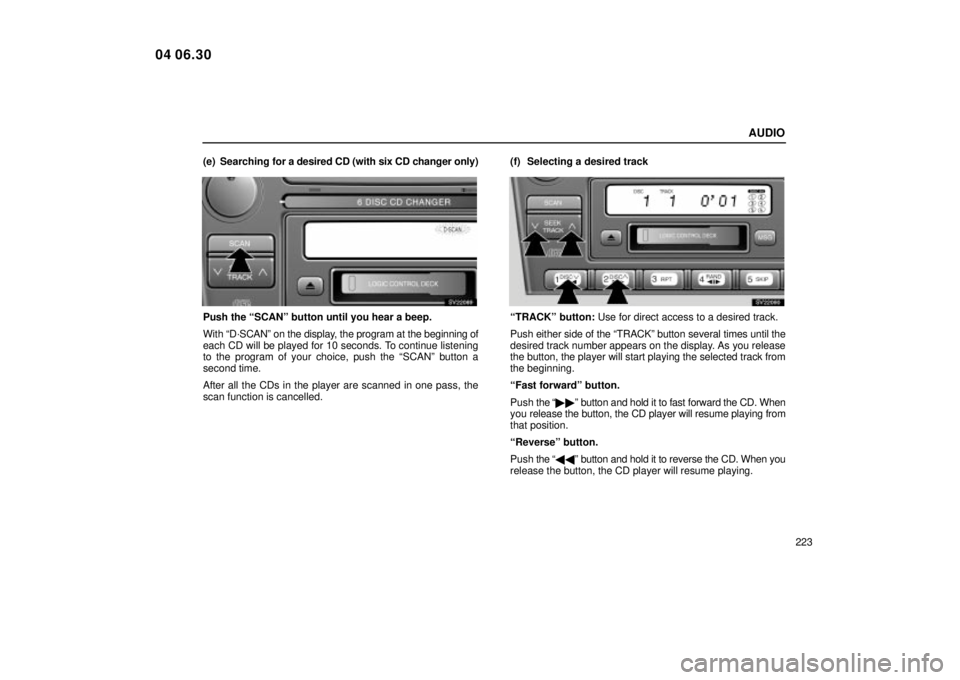
(e) Searching
for a desired CD (with six CD changer only)
SV22089
Push the ªSCANº button until you hear a beep.
With ªD´SCANº on the display, the program at the beginning of
each CD will be played for 10 seconds. To continue listening
to the program of your choice, push the ªSCANº button a
second time.
After all the CDs in the player are scanned in one pass, the
scan function is cancelled. (f) Selecting a desired track
SV22090
ªTRACKº button: Use for direct access to a desired track.
Push either side of the ªTRACKº button several times until the
desired track number appears on the display. As you release
the button, the player will start playing the selected track from
the beginning.
ªFast forwardº button.
Push
the ª�� º button and hold it to fast forward the CD. When
you release the button, the CD player will resume playing from
that position.
ªReverseº button.
Push the ª�� º button and hold it to reverse the CD. When you
release the button, the CD player will resume playing.
04 06.30
Page 248 of 425
 SECTION 3 ± 1
231
STARTING AND DRIVING
Starting and driving
Three±way catalytic converter232
. . . . . . . . . . . . . . . . . . . . . . . . . . . . . . . . . . . . .\
. . . . . . . . . . . . .")
SECTION 3 ± 1
231
STARTING AND DRIVING
Starting and driving
Three±way catalytic converter232
. . . . . . . . . . . . . . . . . . . . . . . . . . . . . . . . . . . . .\
. . . . . . . . . . . . . . . . . .
Engine exhaust caution 233
. . . . . . . . . . . . . . . . . . . . . . . . . . . . . . . . . . . . .\
. . . . . . . . . . . . . . . . . . . . . . . .
Before starting the engine 234
. . . . . . . . . . . . . . . . . . . . . . . . . . . . . . . . . . . . .\
. . . . . . . . . . . . . . . . . . . . . .
Ignition switch with steering lock 235
. . . . . . . . . . . . . . . . . . . . . . . . . . . . . . . . . . . . .\
. . . . . . . . . . . . . . . . .
Parking brake 236
. . . . . . . . . . . . . . . . . . . . . . . . . . . . . . . . . . . . .\
. . . . . . . . . . . . . . . . . . . . . . . . . . . . . . . .
How to start the engine 237
. . . . . . . . . . . . . . . . . . . . . . . . . . . . . . . . . . . . .\
. . . . . . . . . . . . . . . . . . . . . . . .
Automatic transmission 238
. . . . . . . . . . . . . . . . . . . . . . . . . . . . . . . . . . . . .\
. . . . . . . . . . . . . . . . . . . . . . . .
Manual transmission 247
. . . . . . . . . . . . . . . . . . . . . . . . . . . . . . . . . . . . .\
. . . . . . . . . . . . . . . . . . . . . . . . . . .
Electronic controlled transmission 248
. . . . . . . . . . . . . . . . . . . . . . . . . . . . . . . . . . . . .\
. . . . . . . . . . . . . . .
Cruise control 249
. . . . . . . . . . . . . . . . . . . . . . . . . . . . . . . . . . . . .\
. . . . . . . . . . . . . . . . . . . . . . . . . . . . . . . .
Traction control system 252
. . . . . . . . . . . . . . . . . . . . . . . . . . . . . . . . . . . . .\
. . . . . . . . . . . . . . . . . . . . . . . .
Vehicle stability control system 258
. . . . . . . . . . . . . . . . . . . . . . . . . . . . . . . . . . . . .\
. . . . . . . . . . . . . . . . . .
Electronic throttle control system 260
. . . . . . . . . . . . . . . . . . . . . . . . . . . . . . . . . . . . .\
. . . . . . . . . . . . . . . .
Brake system 261
. . . . . . . . . . . . . . . . . . . . . . . . . . . . . . . . . . . . .\
. . . . . . . . . . . . . . . . . . . . . . . . . . . . . . . . .
Brake pad wear indicators 265
. . . . . . . . . . . . . . . . . . . . . . . . . . . . . . . . . . . . .\
. . . . . . . . . . . . . . . . . . . . . . Limited ±slip differential
. . . . . . . . . . . . . . . . . . . . . . . . . . . . . . . . . . . . . \
. . . . . . . . . . . . . . . . . . . . . . . . 265
04 06.30

