2005 KIA Sportage check engine light
[x] Cancel search: check engine lightPage 171 of 354
Driving your vehicle48 4
1
2
3
4
5
6
7
8
9
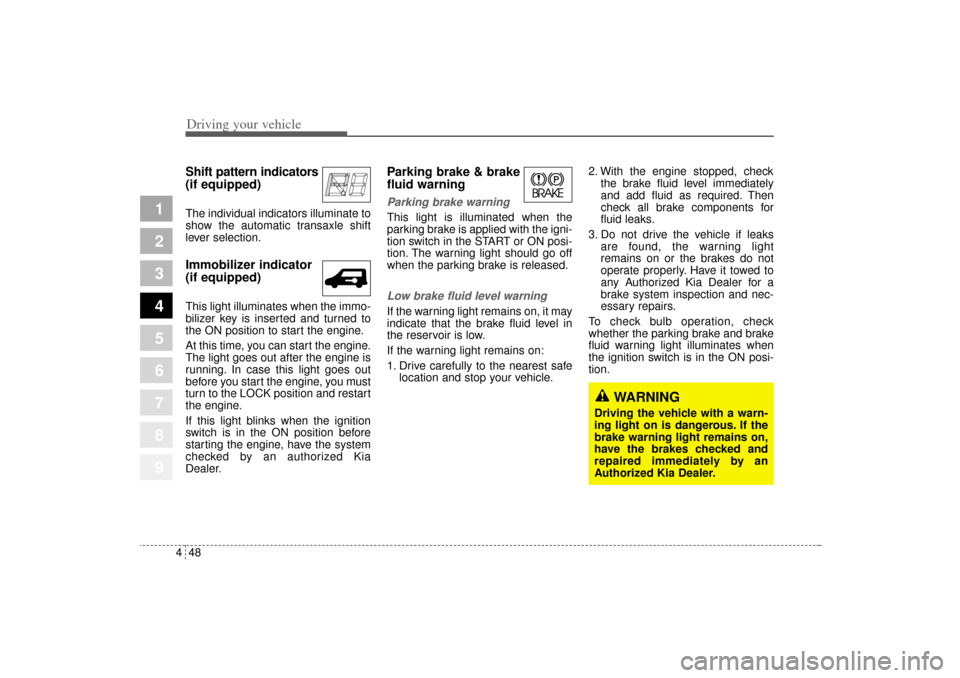
Shift pattern indicators
(if equipped)The individual indicators illuminate to
show the automatic transaxle shift
lever selection.Immobilizer indicator
(if equipped)This light illuminates when the immo-
bilizer key is inserted and turned to
the ON position to start the engine.
At this time, you can start the engine.
The light goes out after the engine is
running. In case this light goes out
before you start the engine, you must
turn to the LOCK position and restart
the engine.
If this light blinks when the ignition
switch is in the ON position before
starting the engine, have the system
checked by an authorized Kia
Dealer.
Parking brake & brake
fluid warning Parking brake warning This light is illuminated when the
parking brake is applied with the igni-
tion switch in the START or ON posi-
tion. The warning light should go off
when the parking brake is released.Low brake fluid level warningIf the warning light remains on, it may
indicate that the brake fluid level in
the reservoir is low.
If the warning light remains on:
1. Drive carefully to the nearest safe
location and stop your vehicle.2. With the engine stopped, check
the brake fluid level immediately
and add fluid as required. Then
check all brake components for
fluid leaks.
3. Do not drive the vehicle if leaks
are found, the warning light
remains on or the brakes do not
operate properly. Have it towed to
any Authorized Kia Dealer for a
brake system inspection and nec-
essary repairs.
To check bulb operation, check
whether the parking brake and brake
fluid warning light illuminates when
the ignition switch is in the ON posi-
tion.
WARNING
Driving the vehicle with a warn-
ing light on is dangerous. If the
brake warning light remains on,
have the brakes checked and
repaired immediately by an
Authorized Kia Dealer.
KM CAN (ENG) 4.qxd 9/13/2004 4:48 PM Page 48
Page 172 of 354
449
Driving your vehicle
1
2
3
4
5
6
7
8
9
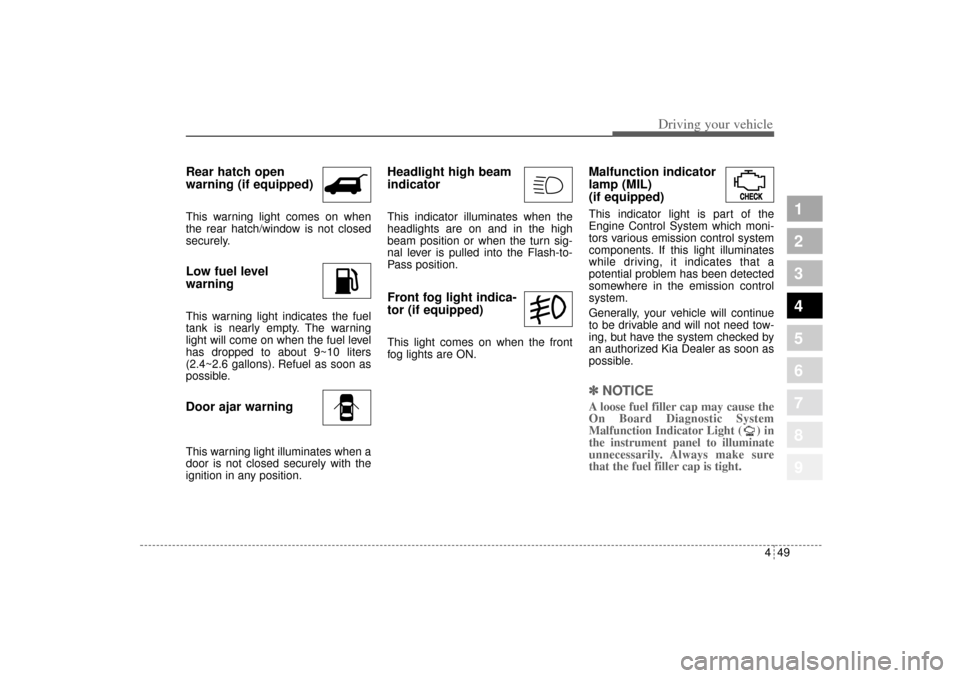
Rear hatch open
warning (if equipped)This warning light comes on when
the rear hatch/window is not closed
securely.Low fuel level
warningThis warning light indicates the fuel
tank is nearly empty. The warning
light will come on when the fuel level
has dropped to about 9~10 liters
(2.4~2.6 gallons). Refuel as soon as
possible.Door ajar warningThis warning light illuminates when a
door is not closed securely with the
ignition in any position.
Headlight high beam
indicator This indicator illuminates when the
headlights are on and in the high
beam position or when the turn sig-
nal lever is pulled into the Flash-to-
Pass position.Front fog light indica-
tor (if equipped) This light comes on when the front
fog lights are ON.
Malfunction indicator
lamp (MIL)
(if equipped)This indicator light is part of the
Engine Control System which moni-
tors various emission control system
components. If this light illuminates
while driving, it indicates that a
potential problem has been detected
somewhere in the emission control
system.
Generally, your vehicle will continue
to be drivable and will not need tow-
ing, but have the system checked by
an authorized Kia Dealer as soon as
possible.✽ ✽
NOTICEA loose fuel filler cap may cause the
On Board Diagnostic System
Malfunction Indicator Light ( ) in
the instrument panel to illuminate
unnecessarily. Always make sure
that the fuel filler cap is tight.
KM CAN (ENG) 4.qxd 9/13/2004 4:48 PM Page 49
Page 177 of 354

Driving your vehicle54 4
1
2
3
4
5
6
7
8
9
➀
Low tire pressure indicator
➁
TPMS indicator
Your car is equipped with a Tire
Pressure Monitoring System (TPMS)
that turns on every time you start the
engine and monitors the pressure in
your tires while driving. TPMS uses a
sensor to check tire pressure levels
of the vehicle tires.
Each tire has its own pressure sen-
sor. If the air pressure of a tire
becomes significantly low, the sen-
sor in that tire immediately sends a
signal that causes the low tire pres-
sure indicator in the instrument clus-
ter to come on.
Low tire pressure indi-
catorWhen the tire pressure monitoring
system warning light is illuminated,
one or more of your tires is signifi-
cantly under-inflated. You should
stop and check your tires as soon as
possible. (If this occurs, reduce vehi-
cle speed immediately and stop the
vehicle. Avoid hard braking and over-
correcting the steering wheel.) Inflate
the tires to the proper pressure as
indicated on the vehicle's tire infor-
mation placard.
Driving on a significantly under-inflat-
ed tire causes the tire to overheat
and can lead to tire failure. Under-
inflation also reduces fuel efficiency
and tire tread life, and may affect the
vehicle's handling and stopping abili-
ty.Each tire, including the spare, should
be checked monthly when cold and
set to the recommend inflation pres-
sure as specified in the vehicle tire
information placard and owner's
manual.
Although your tire pressure is moni-
tored, it is important that you manu-
ally check the tire pressures monthly.
If the Low Tire Pressure Indicator
( ) illuminates while you are driv-
ing, you should have your tires
checked by an authorized Kia dealer
as soon as possible. If you think you
can safely drive a short distance to a
service station, proceed slowly to the
station and inflate the tire to the rec-
ommended pressure shown on the
tire information placard on the dri-
ver's door sill. If the tire is flat, or if the
tire pressure is too low to continue
driving, replace the tire with the com-
pact spare tire.
TIRES PRESSURE MONITORING SYSTEM (TPMS)
5GHN3003
➀
➁
KM CAN (ENG) 4.qxd 9/13/2004 4:48 PM Page 54
Page 188 of 354
465
Driving your vehicle
1
2
3
4
5
6
7
8
9
If the washer does not work, check
the washer fluid level. If the fluid level
is not sufficient, you will need to add
appropriate non-abrasive windshield
washer fluid to the washer reservoir.
The reservoir filler neck is located in
the front of the engine compartment
on the passenger side.✽ ✽
NOTICETo prevent possible damage to the
washer pump, do not operate the
washer when the fluid reservoir is
empty.
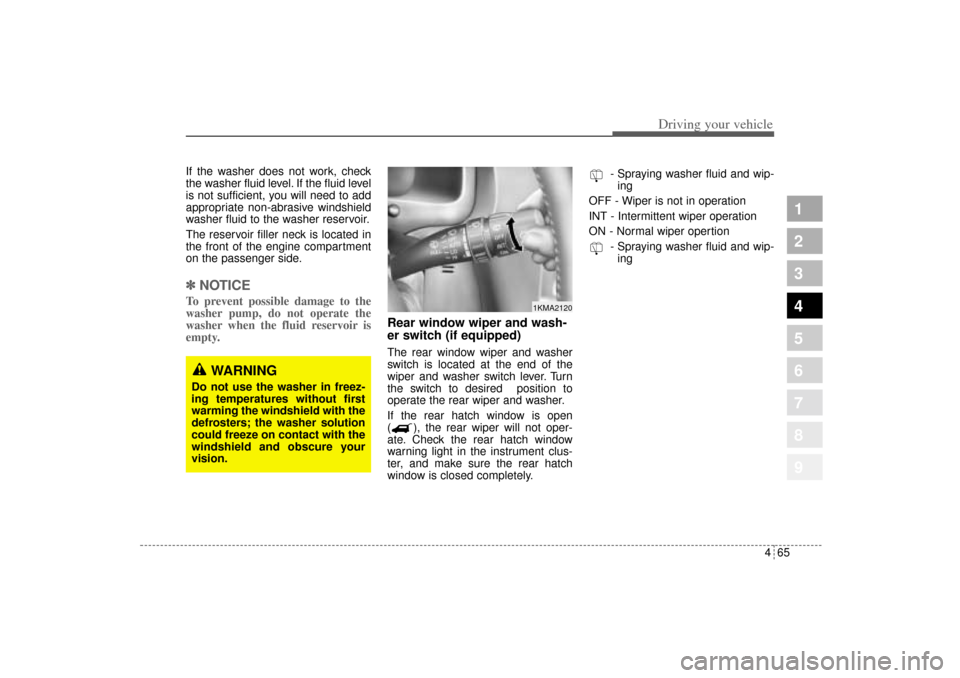
Rear window wiper and wash-
er switch (if equipped)The rear window wiper and washer
switch is located at the end of the
wiper and washer switch lever. Turn
the switch to desired position to
operate the rear wiper and washer.
If the rear hatch window is open
( ), the rear wiper will not oper-
ate. Check the rear hatch window
warning light in the instrument clus-
ter, and make sure the rear hatch
window is closed completely.- Spraying washer fluid and wip-
ing
OFF - Wiper is not in operation
INT - Intermittent wiper operation
ON - Normal wiper opertion
- Spraying washer fluid and wip-
ing
1KMA2120
WARNING
Do not use the washer in freez-
ing temperatures without first
warming the windshield with the
defrosters; the washer solution
could freeze on contact with the
windshield and obscure your
vision.
KM CAN (ENG) 4.qxd 9/13/2004 4:48 PM Page 65
Page 222 of 354
55
Driving tips
BEFORE DRIVING Before entering vehicle: Be sure that all windows, outside
mirror(s), and outside lights are
clean.
Check the condition of the tires.
Check under the vehicle for any
sign of leaks.
Be sure there are no obstacles
behind you if you intend to back up.Necessary inspections Fluid levels, such as engine oil,
engine coolant, brake fluid, and
washer fluid should be checked on a
regular basis, with the exact interval
depending on the fluid. Further
details are provided in Section 7,
Maintenance.
Before starting Close and lock all doors.
Position the seat so that all con-
trols are easily reached.
Adjust the inside and outside
rearview mirrors.
Be sure that all lights work.
Check all gauges.
Check the operation of warning
lights when the ignition switch is
turned to the ON position.
Release the parking brake and
make sure the brake warning light
goes out.
For safe operation, be sure you are
familiar with your vehicle and its
equipment.
1
2
3
4
5
6
7
8
9
WARNING
- Driving under
the influence of alcohol or
drugs
Drinking and driving is danger-
ous. Drunk driving is the num-
ber one contributor to the high-
way death toll each year. Even a
small amount of alcohol will
affect your reflexes, perceptions
and judgement.
You are much more likely to
have a serious accident if you
drink and drive.
If you are drinking or taking
drugs, don’t drive. Do not ride
with a driver who has been
drinking or taking drugs.
Choose a designated driver or
call a cab.
Driving while under the influ-
ence of drugs is as dangerous
or more dangerous than driving
drunk.
KM CAN (ENG) 5.qxd 9/13/2004 4:48 PM Page 5
Page 226 of 354

59
Driving tips
Driving too fast through large pud-
dles can affect your brakes. If you
must go through puddles, try to
drive through them slowly.
If you believe you may have gotten
your brakes wet, apply them lightly
while driving until normal braking
operation returns.
Winter driving We recommend that you carry
emergency equipment, including
tire chains, a window scraper,
windshield de-icer, a bag of sand
or salt, flares, a small shovel and
jumper cables.
Make sure you have sufficient eth-
ylene-glycol coolant in the radiator.
Check the battery condition and
cables. Cold temperatures reduce
the capacity of any battery, so it
must be in excellent condition to
provide enough winter starting
power.
Make sure the engine oil viscosity
is suitable for cold weather.
Check the ignition system for loose
connections and damage. Use antifreeze-formulated wind-
shield washer fluid. (Do not use
engine coolant antifreeze.)
Do not use the parking brake if it
might freeze. When parking, shift
to 1 (First) or R (Reverse) with a
manual transaxle or P (Park) with
an automatic transaxle and block
the rear wheels.
1
2
3
4
5
6
7
8
9
KM CAN (ENG) 5.qxd 9/13/2004 4:48 PM Page 9
Page 275 of 354
67
In case of an emergency
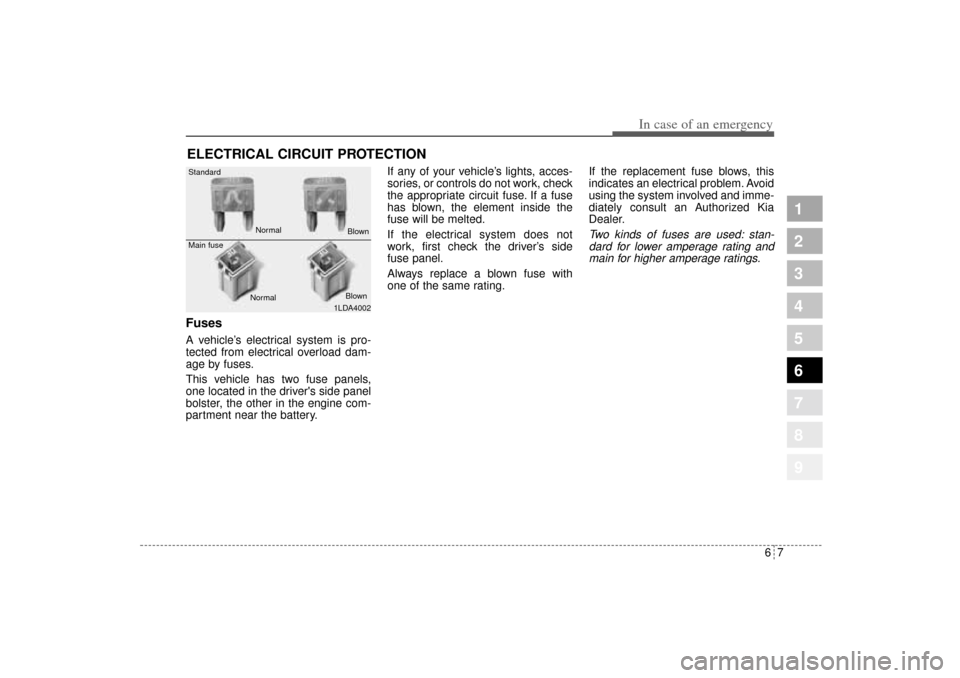
ELECTRICAL CIRCUIT PROTECTION Fuses A vehicle’s electrical system is pro-
tected from electrical overload dam-
age by fuses.
This vehicle has two fuse panels,
one located in the driver's side panel
bolster, the other in the engine com-
partment near the battery.If any of your vehicle’s lights, acces-
sories, or controls do not work, check
the appropriate circuit fuse. If a fuse
has blown, the element inside the
fuse will be melted.
If the electrical system does not
work, first check the driver’s side
fuse panel.
Always replace a blown fuse with
one of the same rating.If the replacement fuse blows, this
indicates an electrical problem. Avoid
using the system involved and imme-
diately consult an Authorized Kia
Dealer.
Two kinds of fuses are used: stan-
dard for lower amperage rating and
main for higher amperage ratings.
1
2
3
4
5
6
7
8
9
1LDA4002 Standard
Main fuse
NormalNormal
Blown
Blown
KM CAN (ENG) 6.qxd 9/13/2004 4:47 PM Page 7
Page 276 of 354
In case of an emergency8 6Fuse replacement
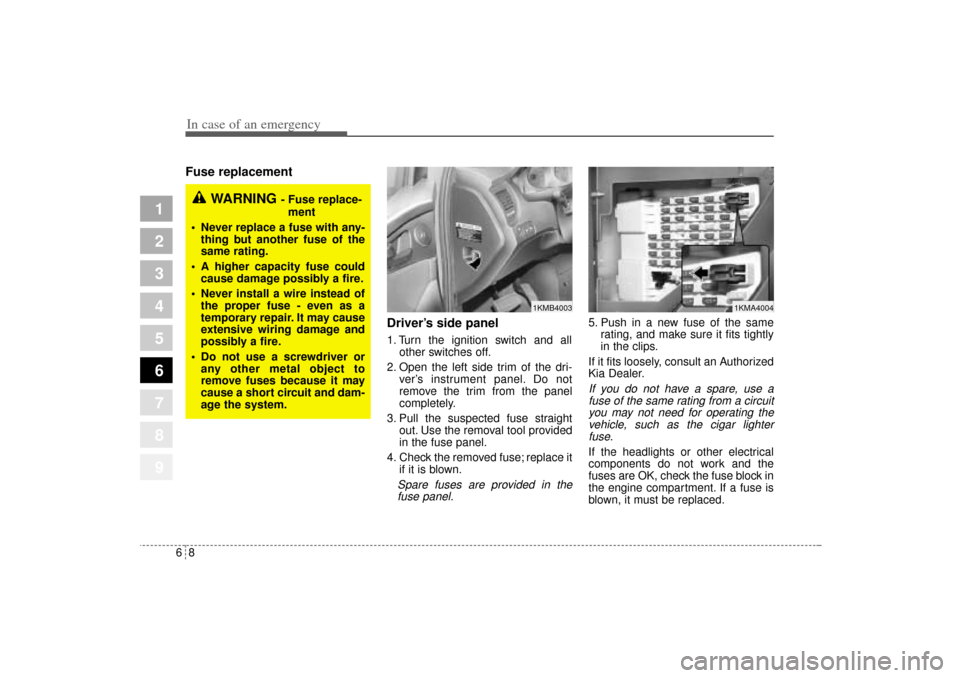
Driver’s side panel
1. Turn the ignition switch and all
other switches off.
2. Open the left side trim of the dri-
ver’s instrument panel. Do not
remove the trim from the panel
completely.
3. Pull the suspected fuse straight
out. Use the removal tool provided
in the fuse panel.
4. Check the removed fuse; replace it
if it is blown.Spare fuses are provided in the
fuse panel.
5. Push in a new fuse of the same
rating, and make sure it fits tightly
in the clips.
If it fits loosely, consult an Authorized
Kia Dealer.If you do not have a spare, use a
fuse of the same rating from a circuit
you may not need for operating the
vehicle, such as the cigar lighter
fuse.If the headlights or other electrical
components do not work and the
fuses are OK, check the fuse block in
the engine compartment. If a fuse is
blown, it must be replaced.
1
2
3
4
5
6
7
8
9
1KMB4003
1KMA4004
WARNING
- Fuse replace-
ment
Never replace a fuse with any-
thing but another fuse of the
same rating.
A higher capacity fuse could
cause damage possibly a fire.
Never install a wire instead of
the proper fuse - even as a
temporary repair. It may cause
extensive wiring damage and
possibly a fire.
Do not use a screwdriver or
any other metal object to
remove fuses because it may
cause a short circuit and dam-
age the system.
KM CAN (ENG) 6.qxd 9/13/2004 4:47 PM Page 8