2005 HYUNDAI XG350 warning
[x] Cancel search: warningPage 200 of 247

6
DO-IT-YOURSELF MAINTENANCE
20
POWER STEERING FLUID LEVEL
CHECKING ELECTRIC COOLING
FANS!
G250A01A-AATFOR MORE INFORMATION ABOUT
YOUR HYUNDAIIf you desire additional information about main-
taining and servicing your Hyundai, you may
purchase a factory Shop Manual at your Hyundai
dealer's parts department. This is the same
manual used by dealership technicians and
while it is highly technical it can be useful in
obtaining a better understanding of your car and
how it works.G240A01A-AATPOWER STEERING HOSESIt is suggested that you check the power steer-
ing hose connections for fluid leakage at regular
intervals. The power steering hoses should be
replaced if there is severe surface cracking,
scuffing or worn spots. Deterioration of the hose
could cause premature failure.
G230A01L-AAT
G220B01A-AAT
Checking Engine Cooling FanThe engine cooling fan should come on auto-
matically if the engine coolant temperature is
high.G220A01A-AAT
G220C01A-AATChecking Condenser Cooling FanThe condenser coolant fan should come on
automatically whenever the air conditioning is in
operation.
WARNING:
The cooling fan is controlled by engine
coolant temperature and may sometimes
operate even when the engine is not run-
ning. Use extreme caution when working
near the blades of the coolant fan, so that
you are not injured by a rotating fan blade.
As the engine coolant temperature de-
creases the fan will automatically shut off.
This is a normal condition.
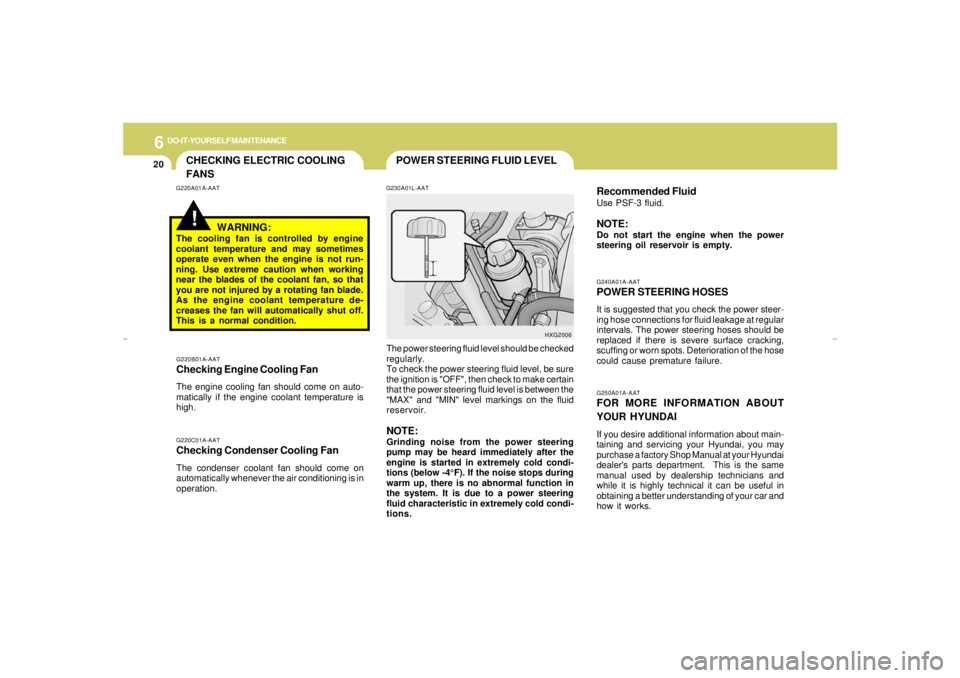
The power steering fluid level should be checked
regularly.
To check the power steering fluid level, be sure
the ignition is "OFF", then check to make certain
that the power steering fluid level is between the
"MAX" and "MIN" level markings on the fluid
reservoir.
NOTE:Grinding noise from the power steering
pump may be heard immediately after the
engine is started in extremely cold condi-
tions (below -4°F). If the noise stops during
warm up, there is no abnormal function in
the system. It is due to a power steering
fluid characteristic in extremely cold condi-
tions.
HXG2006
Recommended FluidUse PSF-3 fluid.NOTE:Do not start the engine when the power
steering oil reservoir is empty.
xgflhma-6.p656/16/04, 2:59 PM 20
Page 201 of 247

6
DO-IT-YOURSELF MAINTENANCE
21
HEADLIGHT AIMING ADJUSTMENT
!
!
G290A03L-AATHID Type (If Installed)Before performing aiming adjustment, make
sure of the following.
G290A02L-A
Vertical
aiming1. Keep all tires inflated to the correct pressure.
2. Place the vehicle on level ground and press
the front bumper & rear bumper down sev-
eral times. Place vehicle at a distance of 118
in. (3m) from the test wall.
3. See that the vehicle is unloaded (except for
full levels of coolant, engine oil and fuel, and
spare tire, jack, and tools). Have the driver
or equivalent weight placed in driver's seat.
4. Clean the head light lenses and turn on the
headlights (Low beam).
5. Open the hood.
6. Draw the vertical line (through the center of
each headlight) and the horizontal line
(through the center of each headlight) on the
aiming screen.
And then, draw a parallel line at 0.8in.(21mm.)
under the horizontal line.
7. Adjust each cut-off line of the low beam to the
parallel line with a phillips screwdriver -
VERTICAL AIMING
WARNING:
If you need headlight aiming adjustment,
have your vehicle inspected by your Hyundai
Dealer.
Don't attempt to replace or inspect the HID
headlight bulb to prevent danger of an
electric shock.General Type
WARNING:
Horizontal aiming should be adjusted by an
authorized Hyundai Dealer.
G290B02L-AATAdjustment After Headlight Assembly
ReplacementIf the vehicle has had front body repair and the
headlight assembly has been replaced, the
headlight aiming should be checked using an
aiming screen as shown in the illustration. Turn
on the headlight switch. (Low Beam Position)
1. Adjust headlights so that main axis of light is
parallel to center line of the body and is
aligned with point "P" shown in the illustration.
2. Dotted lines in the illustration show center of
headlights.
G290B01L-A
LW
H
HCut-off line
Ground
line
"P" Horizontal lineVertical line
0.83 in. (21 mm)
xgflhma-6.p656/16/04, 2:59 PM 21
Page 204 of 247

6
DO-IT-YOURSELF MAINTENANCE
24
!
G270A08L
12.To replace the front turn signal light bulb, take
out it from the bulb holder and install the new
bulb.
1FJB5036
WARNING:
This halogen bulb contains gas under pres-
sure and if impacted could shatter, result-
ing in flying fragments. Always wear eye
protection when servicing the bulb. Protect
the bulb against abrasions or scratches
and against liquids when lighted. Turn the
bulb on only when installing in a headlight.
Replace the headlight if damaged or cracked.
Keep the bulb out of the reach of children
and dispose of the used bulb with care.
G270A07L
8. Push the bulb spring to remove the headlight
bulb.
9. Remove the protective cap from the re-
placement bulb and install the new bulb by
matching the plastic base with the headlight
hole. Retighten the bulb spring and recon-
nect the power cord.
10.Use the protective cap and carton to prompt-
ly dispose of the old bulb.
11.Check for proper headlight aim.
xgflhma-6.p656/16/04, 2:59 PM 24
Page 216 of 247

6
DO-IT-YOURSELF MAINTENANCE
36
FUSERATING
10A
10A
15A
10A
20A
10A
10A
10A
10A
10A
10A
10A
10APROTECTED COMPONENTS
Door warning & Ignition key illumination, Courtesy lights
Instrument cluster
SRS controls
Automatic transaxle controls, Back-up light switch,
Vehicle speed sensor
Fuel filler door & Trunk lid opener, Driver (Assister) door module
Multipurpose check connector, Audio, lmmobiilizer controls,
Trip computers, Digital clock, Blower & A/C controls, Instrument cluster
Left (Right) inside lights, (HID) Head lights, Fog light relay,
Right HID turn signal light, Right rear combination light
Stop light failure relay
Immobilizer controls, TCS switch, Trip computers, Instrument cluster
ETACM, Hazard switch, Auto light sensor
Antenna, Blower & A/C controls,
Left (Right) outside mirror motor & Folding motor
(HID) Head lights, Front (Rear) cigarette lighters,
Left (Right) license lights, Left HID Turn signal light,
Left rear combination light
Burglar alarm relay, Transaxle range switch, Start relay, ETS controls DESCRIPTION
ROOM LP
A/BAG IND
A/BAG
B/UP
T/LID
D/CLOCK
RH TAIL
SPARE
CLUSTER
T/SIG
RR HTD IND
LH TAIL
START
xgflhma-6.p656/16/04, 2:59 PM 36
Page 219 of 247

7
EMISSION CONTROL SYSTEMS
3
CATALYTIC CONVERTER
!
WARNING:
o Use unleaded fuel only.
o Maintain the engine in good operating
condition. Extremely high catalytic con-
verter temperatures can result from im-
proper operation of the electrical, igni-
tion or multiport electronic fuel injec-
tion.
o If your engine stalls, pings, knocks, or is
hard to start, have your Hyundai dealer
inspect and repair the problem as soon
as possible.
o Avoid driving with a very low fuel level.
Running out of gasoline may cause the
engine to misfire and result in damage to
the catalytic converter.
o Avoid idling the engine for periods
longer than 10 minutes.
o The vehicle should not be pushed or
pulled to get started. This may cause the
catalytic converter to overheat and cre-
ate a fire hazard.
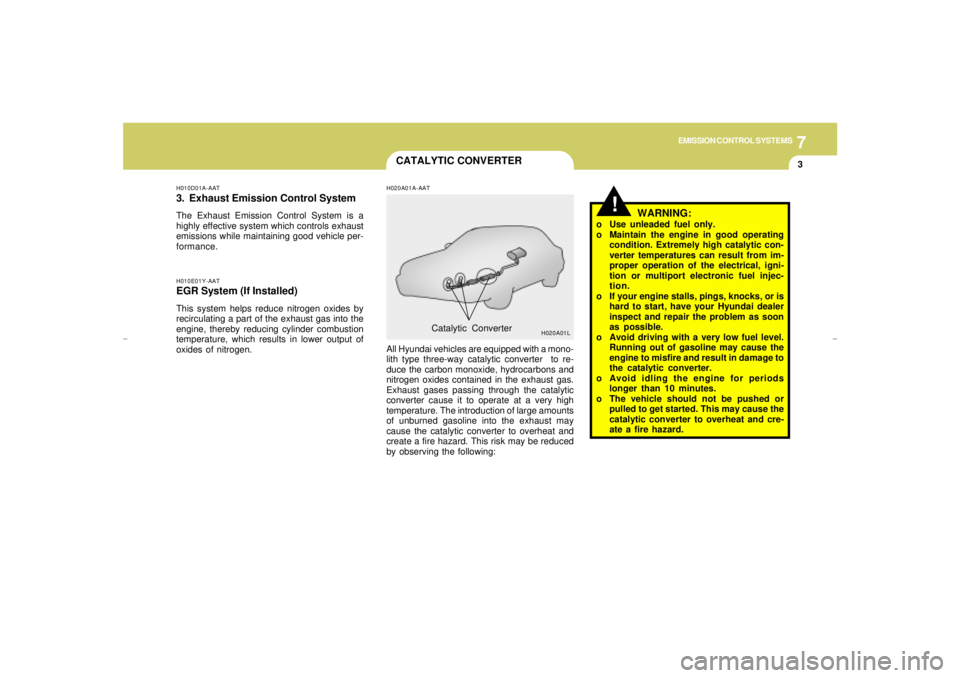
H020A01A-AATAll Hyundai vehicles are equipped with a mono-
lith type three-way catalytic converter to re-
duce the carbon monoxide, hydrocarbons and
nitrogen oxides contained in the exhaust gas.
Exhaust gases passing through the catalytic
converter cause it to operate at a very high
temperature. The introduction of large amounts
of unburned gasoline into the exhaust may
cause the catalytic converter to overheat and
create a fire hazard. This risk may be reduced
by observing the following:Catalytic Converter
H020A01L
H010E01Y-AATEGR System (If Installed)This system helps reduce nitrogen oxides by
recirculating a part of the exhaust gas into the
engine, thereby reducing cylinder combustion
temperature, which results in lower output of
oxides of nitrogen.H010D01A-AAT3. Exhaust Emission Control SystemThe Exhaust Emission Control System is a
highly effective system which controls exhaust
emissions while maintaining good vehicle per-
formance.
xgflhma-7.p656/16/04, 2:57 PM 3
Page 220 of 247

7
EMISSION CONTROL SYSTEMS4
!
WARNING:
o Do not touch the catalytic converter or
any other part of the exhaust system
while the catalytic converter is hot. Shut
off the engine, wait for at least one hour
before touching the catalytic converter
or any other part of the exhaust system.
o Remember that your Hyundai dealer is
your best source of assistance.
o Do not stop your Hyundai over any com-
bustible material such as grass, paper,
leaves or rags. These materials might
contact the hot catalytic converter and a
fire might result.
xgflhma-7.p656/16/04, 2:57 PM 4
Page 224 of 247

8
CONSUMER INFORMATION & REPORTING SAFETY DEFECTS4
!
RECOMMENDED INFLATION
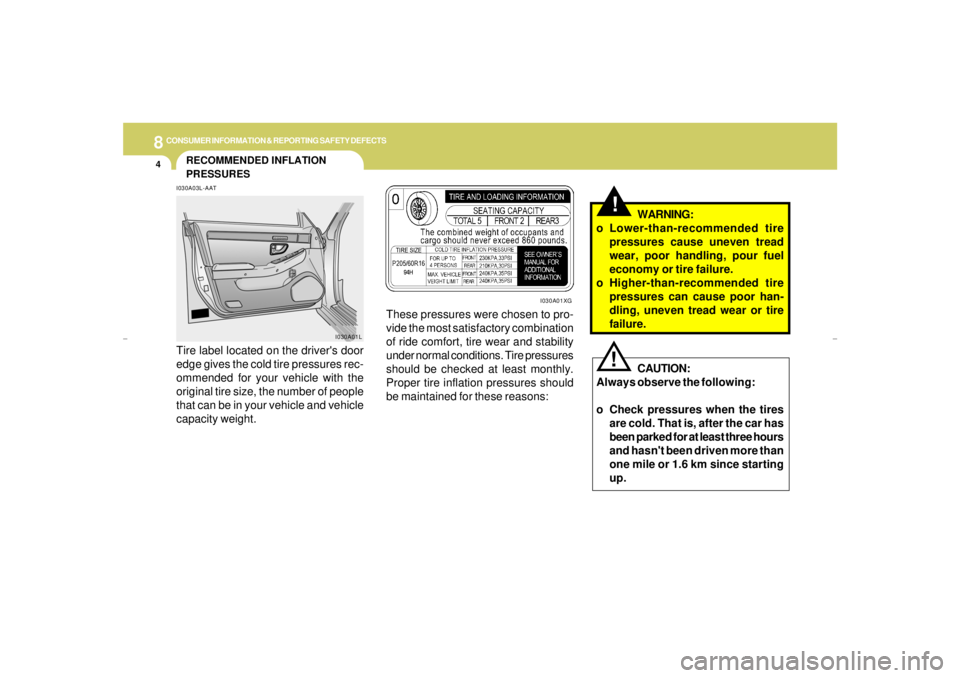
PRESSURESI030A03L-AATTire label located on the driver's door
edge gives the cold tire pressures rec-
ommended for your vehicle with the
original tire size, the number of people
that can be in your vehicle and vehicle
capacity weight.
I030A01L
These pressures were chosen to pro-
vide the most satisfactory combination
of ride comfort, tire wear and stability
under normal conditions. Tire pressures
should be checked at least monthly.
Proper tire inflation pressures should
be maintained for these reasons:
!
CAUTION:
Always observe the following:
o Check pressures when the tires
are cold. That is, after the car has
been parked for at least three hours
and hasn't been driven more than
one mile or 1.6 km since starting
up.WARNING:
o Lower-than-recommended tire
pressures cause uneven tread
wear, poor handling, pour fuel
economy or tire failure.
o Higher-than-recommended tire
pressures can cause poor han-
dling, uneven tread wear or tire
failure.
I030A01XG
xgflhma-8.p656/16/04, 2:57 PM 4
Page 230 of 247

8
CONSUMER INFORMATION & REPORTING SAFETY DEFECTS
10
!
I050A02Y-AATTIRE CHAINS
Tire chains, if necessary, should be
installed on the front wheels. Be sure
that the chains are installed in accor-
dance with the manufacturer's instruc-
tions.
To minimize tire and chain wear, do not
continue to use tire chains when they
are no longer needed.
WARNING:
When driving on roads covered with
snow or ice, drive at less than 20
mph (30 km/h).
I060A02A-AATTIRE ROTATION
Tires should be rotated every 7,500
miles (12,000 km). If you notice that
tires are wearing unevenly between ro-
tations, have the car checked by a
Hyundai dealer so the cause may be
corrected.
After rotating, adjust the tire pressures
and be sure to check the wheel nut
torque.
HEF-241 I040A01S-AAT
SNOW TIRES
If you equip your car with snow tires,
they should be the same size and have
the same load capacity as the original
tires. Snow tires should be installed on
all four wheels; otherwise, poor han-
dling may result.
Snow tires should carry 4 psi (28 kPa)
more air pressure than the pressure
recommended for the standard tires on
the tire label on the driver's door edge ,
or up to the maximum pressure shown
on the tire sidewall whichever is less.
Do not drive faster than 75 mph (120
km/h) when your car is equipped with
snow tires.
xgflhma-8.p656/16/04, 2:57 PM 10