2005 Hyundai Terracan oil level
[x] Cancel search: oil levelPage 486 of 539
6
OWNER MAINTENANCE
9
!
!
engine and ensure that no oil leaks exist. Turn off the engine and aftera couple minutes, recheck the oil level.
CAUTION:
Slowly pour the recommended oil by using a funnel. Do not overfill not to damage the engine.
WARNING:
Prolonged and repeated contact withused engine oils may result in seri- ous skin disorders including der-matitis and cancer. Avoid contact with skin as far as possible and always wash thoroughly after anycontact. Keep used oils out of reach of children. It is illegal to pollute drains, water courses and soil. Useonly authorized waste collection facilities including civic amenity sites and garages for the disposalof used oil and oil filters. If in doubt, contact the local authority for dis- posal instructions. WARNING:
Do not remove the radiator cap when
the engine is hot, since the system is pressurized and coolant may be ejected from the radiator resultingin scalding.
SG050B1-E
Coolant recommendations
Only ethylene glycol based coolant
with a corrosion inhibitor suited toaluminium alloy engine componentsshould be used in the cooling system. No further additives or inhibitors should be used. The coolant specificgravity should be checked as pre- scribed in the maintenance schedule to ensure adequate frost and corro-sion protection. In addition, the en- gine coolant must be replaced at the specified interval since the corrosioninhibitor properties deteriorate with time.
ENGINE COOLANT CHECK- ING AND REPLACING
SG050A1-E
! It is important to note that whilst an increase in the concentration of antifreeze gives an increase in the level of frost protection, a solution which is in excess of 65% anti freeze will resultin reduced frost protection and engine overheating. Therefore the recom- mended concentration of 50% shouldnot be exceeded for general use.The use of methanol based anti freezecompounds may result in engine over-heating and will invalidate the vehicle warranty. NOTE: It is imperative that vehicles fitted with an air conditioning systemhave a coolant concentration of the recommended strength at all times. The use of the air condition-ing system when the cooling sys- tem is filled with water only will result in the heater matrix freezingand subsequently bursting.
Page 494 of 539
6
OWNER MAINTENANCE
17
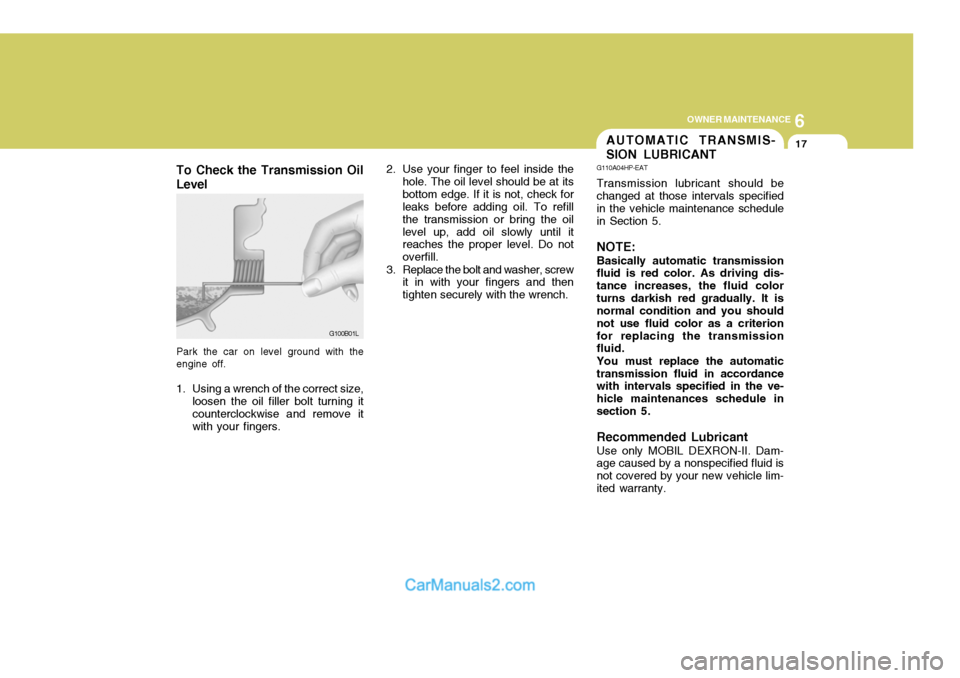
To Check the Transmission Oil Level
Park the car on level ground with the engine off.
1. Using a wrench of the correct size, loosen the oil filler bolt turning it counterclockwise and remove itwith your fingers. 2. Use your finger to feel inside the
hole. The oil level should be at itsbottom edge. If it is not, check for leaks before adding oil. To refill the transmission or bring the oillevel up, add oil slowly until it reaches the proper level. Do not overfill.
3. Replace the bolt and washer, screw it in with your fingers and thentighten securely with the wrench.
G100B01L
AUTOMATIC TRANSMIS- SION LUBRICANT
G110A04HP-EAT Transmission lubricant should be changed at those intervals specified in the vehicle maintenance schedulein Section 5. NOTE: Basically automatic transmission fluid is red color. As driving dis- tance increases, the fluid colorturns darkish red gradually. It is normal condition and you should not use fluid color as a criterionfor replacing the transmission fluid. You must replace the automatic transmission fluid in accordance with intervals specified in the ve- hicle maintenances schedule insection 5. Recommended Lubricant Use only MOBIL DEXRON-II. Dam- age caused by a nonspecified fluid is not covered by your new vehicle lim-ited warranty.
Page 510 of 539
6
OWNER MAINTENANCE
33
And then, draw a parallel line at 1.50 in. (38 mm) under the horizontal line incase of adjusting the low beam or at 0.83 in. (21 mm) under the horizontal line in case of adjusting the high beam.
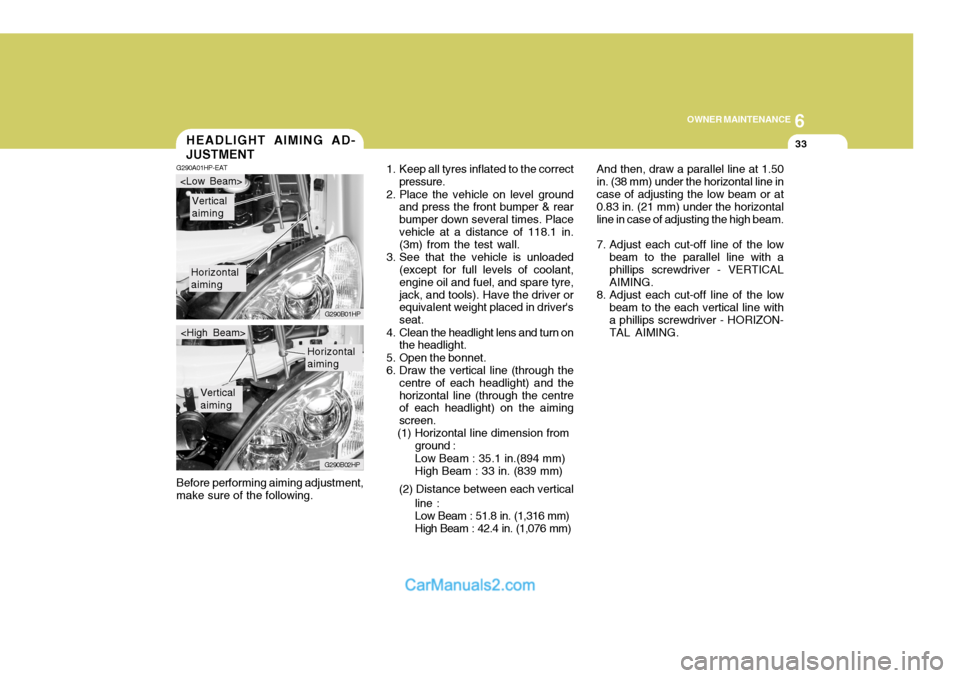
7. Adjust each cut-off line of the low beam to the parallel line with a phillips screwdriver - VERTICAL AIMING.
8. Adjust each cut-off line of the low beam to the each vertical line witha phillips screwdriver - HORIZON-TAL AIMING.
Before performing aiming adjustment,make sure of the following.HEADLIGHT AIMING AD- JUSTMENT
G290A01HP-EAT
1. Keep all tyres inflated to the correct
pressure.
2. Place the vehicle on level ground and press the front bumper & rear bumper down several times. Placevehicle at a distance of 118.1 in. (3m) from the test wall.
3. See that the vehicle is unloaded (except for full levels of coolant, engine oil and fuel, and spare tyre,jack, and tools). Have the driver or equivalent weight placed in driver's seat.
4. Clean the headlight lens and turn on the headlight.
5. Open the bonnet.
6. Draw the vertical line (through the centre of each headlight) and thehorizontal line (through the centre of each headlight) on the aiming screen.
(1) Horizontal line dimension from
Horizontal aiming
Vertical aiming
G290B01HP
G290B02HP
Horizontal aiming
Vertical aiming
ground : Low Beam : 35.1 in.(894 mm) High Beam : 33 in. (839 mm)
(2) Distance between each vertical line :Low Beam : 51.8 in. (1,316 mm) High Beam : 42.4 in. (1,076 mm)
Page 536 of 539

10
INDEX
3
Coolant temperature gauge .....................................1-57
If the engine overheats ............................................. 3-4
Number ..................................................................... 8-2
Oil ............................................................................. 6-4 Starting ..................................................................... 2-5
Engine Exhaust Can Be Dangerous! ........................... 2-2
F Fan Speed Control ................. .........................1-90, 1-101
Fog Light Switch Front ....................................................................... 1-62
Rear ........................................................................ 1-62
Four-Wheel Drive(4WD) ............................................. 2-14
Front Door Edge Warning Light ................................. 1-84
Front Seats
Adjustable head restraints ...................................... 1-17
Adjusting seatback angle ....................................... 1-17
Driver's seat lumbar support control .......................1-18
Seat adjust ment ..................................................... 1-16
Seat cushion height adjustment ............................. 1-19
Seat fore/aft adjustment ......................................... 1-16
Fuel Capacity ................................................................... 9-2
Gauge ..................................................................... 1-57
Recommendations .................................................... 1-2
Fuel-Filler Flap Remote release ........................................................ 1-2
Full-time 4WD Operation ............................................ 2-17
Fusible Links ............................................................. 6-25G
Glove Box ................................................................. 1-73
H Hatchback Door ......................................................... 1-78
Hazard Warning System ............................................ 1-65
Headlight Aiming Adjustment..................................... 6-33
Headlight Bulbs Replacement ....................................6-31
Headlight Leveling Device S ystem ............................1-85
Heated Front/Rear Window .. ......................................1-65
Heating and Cooling Control ......................................1-89
Heating and Ventilation
Air flow control ............................................. 1-91, 1-102
Air intake control ......................................... 1-91, 1-101
Defrosting/Defogging ............................................... 1-95
Fan speed control ........................................ 1-90, 1-101
Temperature control ................................................ 1-83
High-Mounted Rear Stop Light ...................................1-82
Horn ........................................................................... 1-84
I Ignition Switch ............................................................. 2-3
Illuminated ignition switch ......................................... 1-8
Immobiliser System ..................................................... 1-5
Indicator and Warning Lights ..................................... 1-50
Instrument Cluster and Indicator Lights ..................... 1-46
Interior Light ............................................................... 1-72
Interior Rearview Mirror .............................................. 1-77
Intermittent Wi pe Facility ........................................... 1-64