2005 Hyundai Terracan battery
[x] Cancel search: batteryPage 348 of 539
1
CONTROLS AND EQUIPMENT
43
!WARNING:
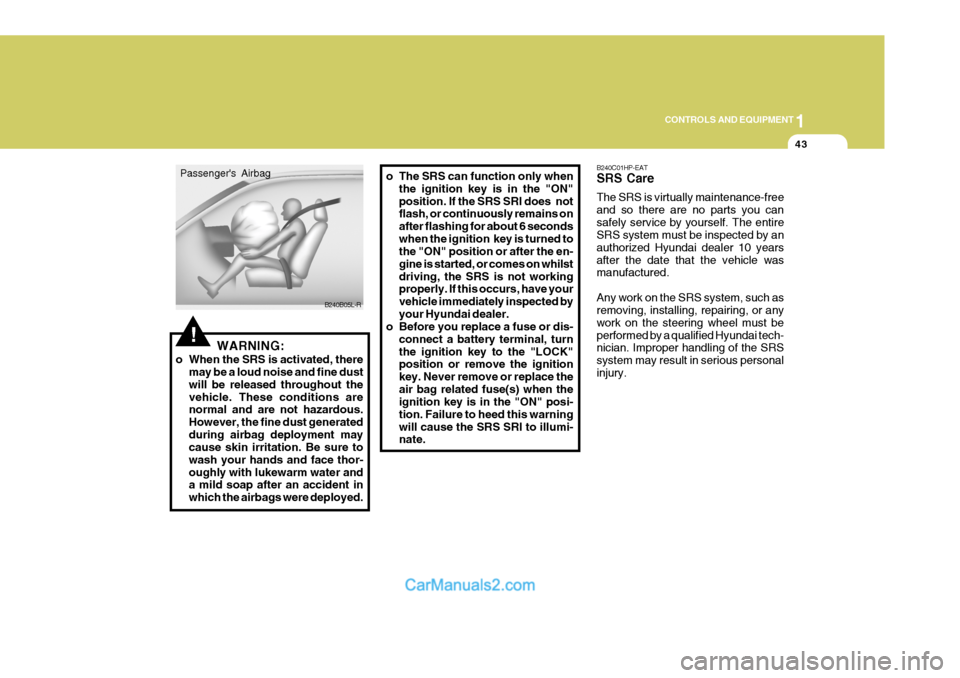
o When the SRS is activated, there may be a loud noise and fine dust will be released throughout thevehicle. These conditions are normal and are not hazardous. However, the fine dust generatedduring airbag deployment may cause skin irritation. Be sure to wash your hands and face thor-oughly with lukewarm water and a mild soap after an accident in which the airbags were deployed. o The SRS can function only when
the ignition key is in the "ON"position. If the SRS SRI does not flash, or continuously remains on after flashing for about 6 secondswhen the ignition key is turned to the "ON" position or after the en- gine is started, or comes on whilstdriving, the SRS is not working properly. If this occurs, have your vehicle immediately inspected byyour Hyundai dealer.
o Before you replace a fuse or dis-
connect a battery terminal, turnthe ignition key to the "LOCK" position or remove the ignition key. Never remove or replace theair bag related fuse(s) when the ignition key is in the "ON" posi- tion. Failure to heed this warningwill cause the SRS SRI to illumi- nate. B240C01HP-EAT SRS Care The SRS is virtually maintenance-free and so there are no parts you cansafely service by yourself. The entire SRS system must be inspected by an authorized Hyundai dealer 10 yearsafter the date that the vehicle was manufactured. Any work on the SRS system, such as removing, installing, repairing, or any work on the steering wheel must beperformed by a qualified Hyundai tech- nician. Improper handling of the SRS system may result in serious personalinjury.
B240B05L-R
Passenger's Airbag
Page 404 of 539
1
CONTROLS AND EQUIPMENT
99
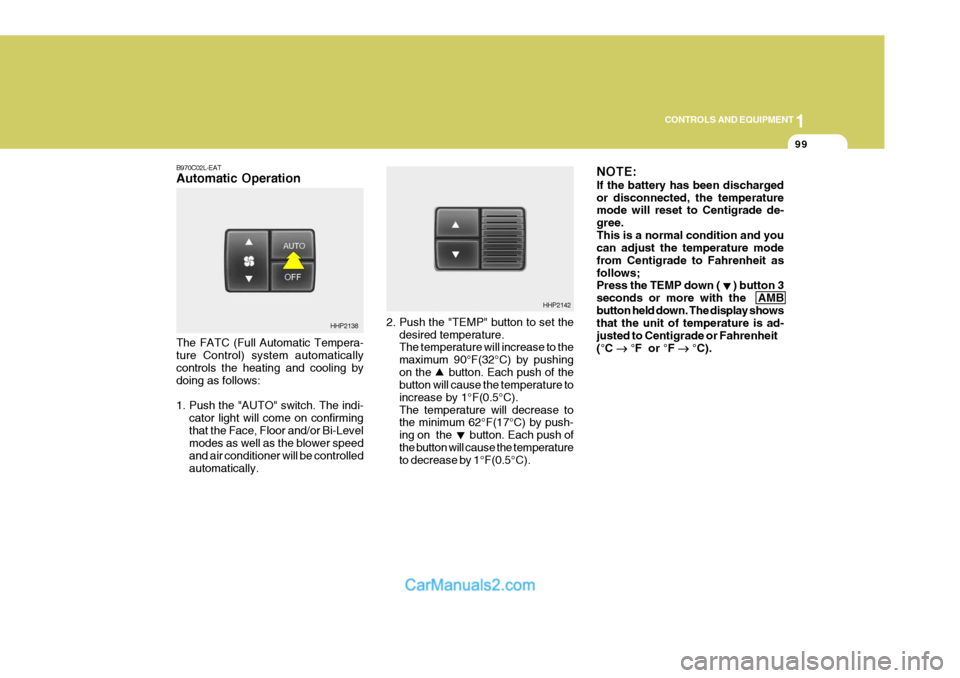
2. Push the "TEMP" button to set the desired temperature. The temperature will increase to the maximum 90°F(32°C) by pushingon the button. Each push of the button will cause the temperature to increase by 1°F(0.5°C).The temperature will decrease to the minimum 62°F(17°C) by push- ing on the button. Each push ofthe button will cause the temperature to decrease by 1°F(0.5°C). NOTE: If the battery has been discharged or disconnected, the temperature mode will reset to Centigrade de- gree.This is a normal condition and you can adjust the temperature mode from Centigrade to Fahrenheit asfollows; Press the TEMP down ( ) button 3 seconds or more with the AMBbutton held down. The display shows that the unit of temperature is ad- justed to Centigrade or Fahrenheit(°C
� �
� �
� °F or °F
� �
� �
� °C).
HHP2142
B970C02L-EAT Automatic Operation The FATC (Full Automatic Tempera- ture Control) system automatically controls the heating and cooling by doing as follows:
1. Push the "AUTO" switch. The indi-
cator light will come on confirming that the Face, Floor and/or Bi-Level modes as well as the blower speed and air conditioner will be controlledautomatically.
HHP2138
Page 417 of 539
2 DRIVING YOUR HYUNDAI
4
!WARNING:
The engine must never be turned off and the key removed from the igni-tion key cylinder whilst the vehicle is in motion since the steering lock will operate and control of the vehiclewill be lost.
"START" The engine is started in this position. It will crank until you release the key.
Ambient temp.
Above 5°F (-15°C) Below 5°F (-15°C) Warm up time
3 min. or longer 6 min. or longer
!WARNING: (Diesel only)
To ensure that sufficient vacuum exists within the brake system dur- ing cold weather start-up condi-tions, it is necessary to run the engine at idle after starting accord- ing to the following table. After starting the engine, do not drive the vehicle until the brake vacuum warning light has turned off.Failure to carry out the above pro- cedure may result in the need to apply greater pedal pressure in or-der to effect the necessary braking effort.
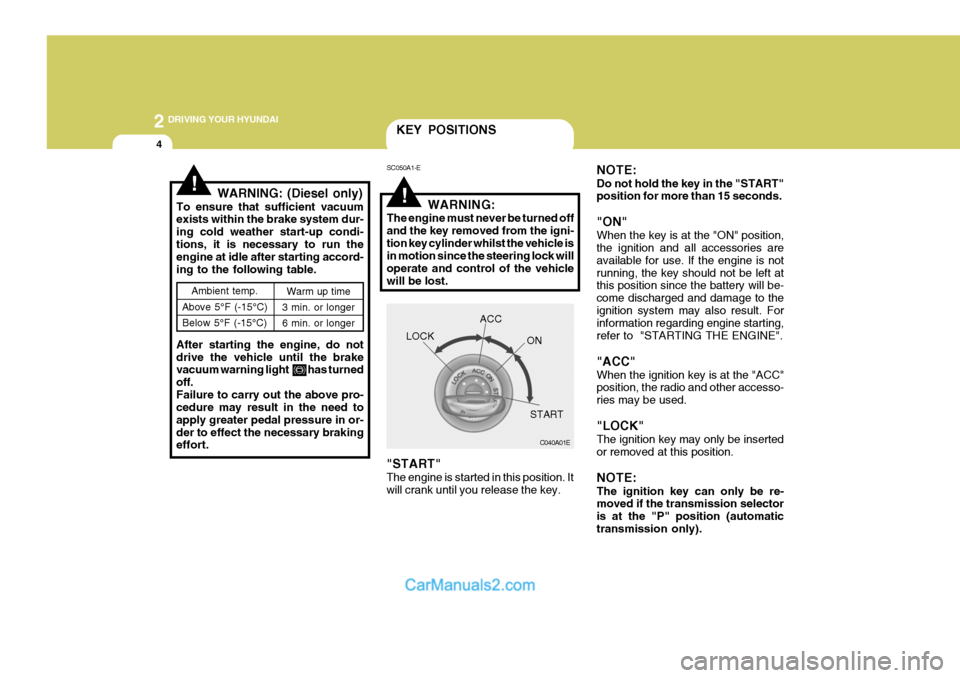
KEY POSITIONS
SC050A1-E
C040A01E
LOCK
ACC
ON
START
NOTE: Do not hold the key in the "START" position for more than 15 seconds. "ON" When the key is at the "ON" position, the ignition and all accessories are available for use. If the engine is notrunning, the key should not be left at this position since the battery will be- come discharged and damage to theignition system may also result. For information regarding engine starting, refer to "STARTING THE ENGINE". "ACC" When the ignition key is at the "ACC" position, the radio and other accesso- ries may be used. "LOCK" The ignition key may only be inserted or removed at this position. NOTE: The ignition key can only be re- moved if the transmission selector is at the "P" position (automatictransmission only).
Page 437 of 539
2 DRIVING YOUR HYUNDAI
24
ZC170B1-E Electrical System Winter conditions impose severe de- mands upon vehicle electrical systems, particularly the charging circuit. The battery condition and performance along with the alternator performance and drive belt condition should bechecked prior to the onset of winter.WINTER DRIVING
DC170A1-E The onset of winter conditions subject motor vehicles to greater operating demands. Therefore, the following suggestions will assist in maintainingpeak performance and reliability dur- ing these periods:
lowed to accumulate on the under- side of the car. This extra weight canresult in increased fuel consumption and also contribute to corrosion.
o Travel lightly. Don't carry unneces- sary weight in your car. Weight re-duces fuel economy.
o Don't let the engine idle longer than necessary. If you are waiting (andnot in traffic), turn off your engine and restart only when you're readyto go.
o Remember, your Hyundai does not
require extended warm-up. As soonas the engine is running smoothly, you can drive away. In very cold weather, however, give your enginea slightly longer warm-up period.
o Don't "labour" or "over-rev" the en-
gine. Labouring is driving too slowlyin too high a gear resulting in the vehicle kangarooing. If this happens, shift to a lower gear. Over-revving isracing the engine beyond its safe limit. This can be avoided by shifting at the recommended speeds.
o Use your air conditioning sparingly. The air conditioning system is oper-ated by engine power so your fueleconomy is reduced when you use it.SMOOTH CORNERING
C150A01A-EAT Avoid braking or gear changing in cor- ners, especially when roads are wet. Ideally, corners should always be taken under gentle acceleration. If you followthese suggestions, tyre wear will be held to a minimum.
Page 446 of 539
3 IN CASE OF EMERGENCY
2
!WARNING:
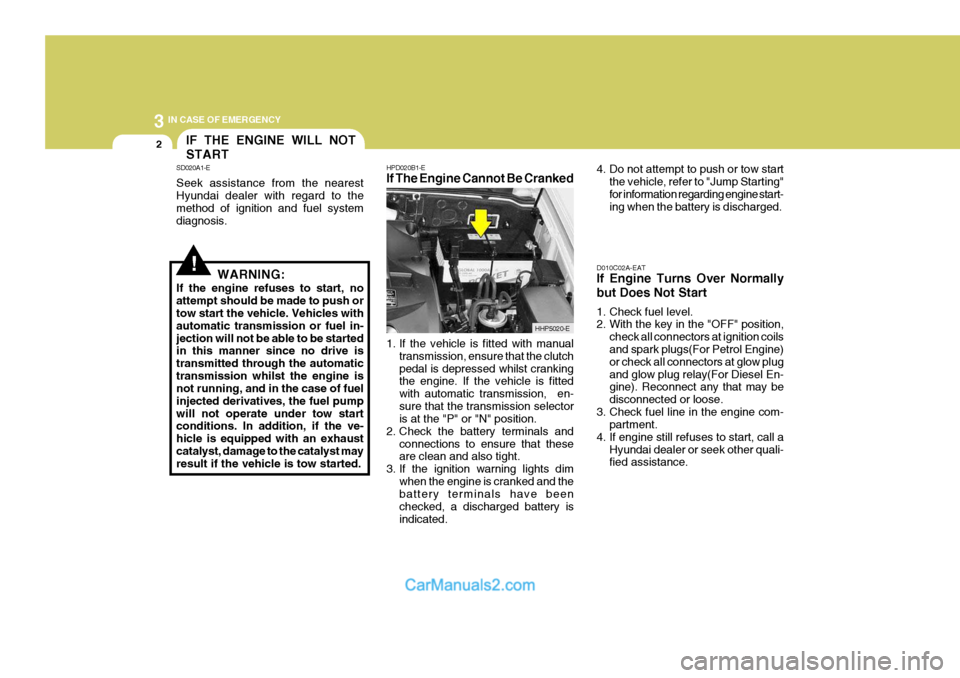
If the engine refuses to start, no attempt should be made to push or tow start the vehicle. Vehicles with automatic transmission or fuel in-jection will not be able to be started in this manner since no drive is transmitted through the automatictransmission whilst the engine is not running, and in the case of fuel injected derivatives, the fuel pumpwill not operate under tow start conditions. In addition, if the ve- hicle is equipped with an exhaustcatalyst, damage to the catalyst may result if the vehicle is tow started. HPD020B1-E If The Engine Cannot Be Cranked
1. If the vehicle is fitted with manual
transmission, ensure that the clutch pedal is depressed whilst cranking the engine. If the vehicle is fitted with automatic transmission, en-sure that the transmission selector is at the "P" or "N" position.
2. Check the battery terminals and
connections to ensure that theseare clean and also tight.
3. If the ignition warning lights dim
when the engine is cranked and thebattery terminals have been checked, a discharged battery isindicated. 4. Do not attempt to push or tow start
the vehicle, refer to "Jump Starting"for information regarding engine start- ing when the battery is discharged.
D010C02A-EAT If Engine Turns Over Normally but Does Not Start
1. Check fuel level.
2. With the key in the "OFF" position, check all connectors at ignition coilsand spark plugs(For Petrol Engine) or check all connectors at glow plugand glow plug relay(For Diesel En- gine). Reconnect any that may be disconnected or loose.
3. Check fuel line in the engine com- partment.
4. If engine still refuses to start, call a Hyundai dealer or seek other quali- fied assistance.
IF THE ENGINE WILL NOT START
SD020A1-E Seek assistance from the nearest Hyundai dealer with regard to the method of ignition and fuel system diagnosis.
HHP5020-E
Page 447 of 539
3
IN CASE OF EMERGENCY
3
!
D010A01A-EAT If Engine Stalls Whilst Driving
1. Reduce your speed gradually, keep-
ing a straight line. Move cautiously off the road to a safe place.
2. Turn on your emergency flashers.
3. Try starting the engine again. If your
vehicle will not start, contact Hyundai dealer or seek other qualified assis- tance.
CAUTION:
Personal injury and damage to thevehicle may occur if jump starting isnot performed correctly. If any doubt exists as to how this operation should be performed, seek assistance fromqualified personnel. WARNING:
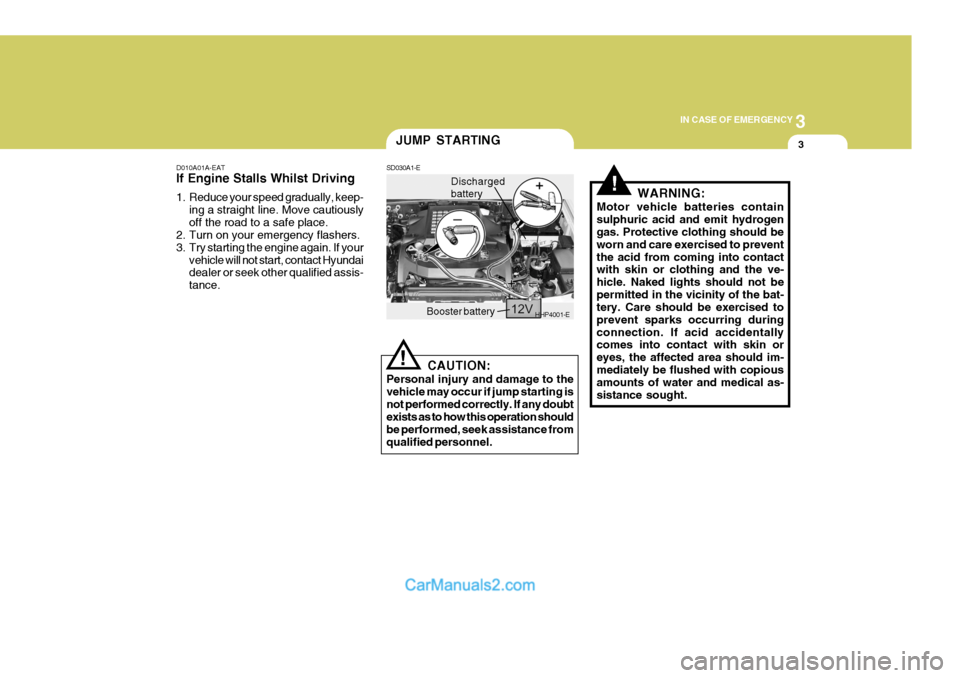
Motor vehicle batteries containsulphuric acid and emit hydrogen gas. Protective clothing should be worn and care exercised to preventthe acid from coming into contact with skin or clothing and the ve- hicle. Naked lights should not bepermitted in the vicinity of the bat- tery. Care should be exercised to prevent sparks occurring duringconnection. If acid accidentally comes into contact with skin or eyes, the affected area should im- mediately be flushed with copious amounts of water and medical as-sistance sought.
!
JUMP STARTING
SD030A1-E
HHP4001-EBooster battery Discharged battery
Page 448 of 539

3 IN CASE OF EMERGENCY
4
!
1. Ensure that the booster battery is 12
volt type. If the booster battery is installed in another vehicle, ensure that the two vehicles are not touch- ing.
2. Turn off all unnecessary electrical equipment in both vehicles.
3. Ensure that the engine of the ve- hicle providing the jump start is run- ning prior to connection of the jump cables.
4. Connect the red jump cable to the positive (+) terminal of the boosterbattery and the other end to thepositive (+) terminal of the dis- charged battery.
5. Attach the black jump cable to the negative (-) terminal of the boosterbattery, and the other end to a ground point within the engine compartmentof the vehicle with the flat bat-tery. Do not connect to the negative bat- tery terminal of the flat battery sincesparks may be generated with the subsequent risk of explosion.
6. Raise the booster vehicle engine speed to 2,000 r.p.m. and start theengine of the vehicle with the flat battery. 7. Switch "ON" the main beam
headlamps before carefully remov-ing the jumper cables in the reverse order of attachment. Once the jumper cables have been removed,switch "OFF" the main beam headlamps.
CAUTION:
If the jump cable is incorrectly in- stalled, damage to the vehicle elec- trical system may occur, in particu- lar the electronic components suchas the Fuel Injection system com- puter and the Automatic transmis- sion computer. The battery mustnever be disconnected whilst the engine is running.
IF THE ENGINE OVERHEATS
HPD040A2-E If the temperature gauge indicates overheating:
1. Pull off the road and stop as soon as it is safe to do so.
2. Place the gear selector lever in "P"
(automatic), or neutral (manual trans- mission) and set the parking brake. If the air conditioning is on, turn it off.
3. If coolant is running out under the car or steam is coming out from underthe bonnet, stop the engine. Do not open the bonnet until the coolant hasstopped running or the steaming has stopped. If there is no visible loss of coolant and no steam, leave theengine running and check to be sure the engine cooling fan is operating. If the fan is not running, turn theengine off.
4. Check to see if the water pump drive
belt is missing. If it is not missing,check to see that it is tight. If the drive belt seems to be satisfactory, check for coolant leaking from theradiator, hoses or under the car. (If the air conditioning had been in use, it is normal for cold water to bedraining from it).
Page 465 of 539
44APPEARANCE CARE
4
JE070A1-E POLISHING The exterior paint work should be pol- ished with a proprietary wax polish when water no longer collects in beadform on the paint work. The instruc- tions of the product manufacturer should be adhered to. JE080A1-E BUMPER MAINTENANCE The special material from which the bumpers are manufactured warrantsspecial attention to preserve the ap- pearance of the bumpers. Avoid con- tact with battery electrolyte or brakefluid and ensure that accidental spill- ages are immediately flushed with water.Do not use abrasive cleaning materi- als which may damage the bumpers. Avoid subjecting the bumpers to hightemperatures such as may be encoun- tered in high bake paint ovens.
JE090A1-E ACCIDENT REPAIRS In the event of the body work sustain- ing damage, the following points shouldbe noted prior to repairs being under- taken. If body panels are replaced or re-paired, anti corrosion treatment must be applied to the repair area. The product used must be compatible withthose used in manufacture. It is rec- ommended that repairs are entrusted to a Hyundai dealer to ensure thatreplacement parts used are of the same high quality as those used in manufac- ture of the vehicle and that the correctrepair methods and materials will en- sure adequate levels of corrosion pro- tection and the continued validity of theAnti Perforation Warranty.
JE060A1-E STAIN/SPOT REMOVAL Should tree sap, dead insects or tar prove to be difficult to remove from thepaint film, turpentine or a proprietary paint cutting compound may be used. Ensure that the area to be cleaned isnot rubbed intensively to prevent break- ing through the colour coat and expos- ing the under coat.