2005 Hyundai Terracan battery
[x] Cancel search: batteryPage 226 of 539
6 DO-IT-YOURSELF MAINTENANCE
4
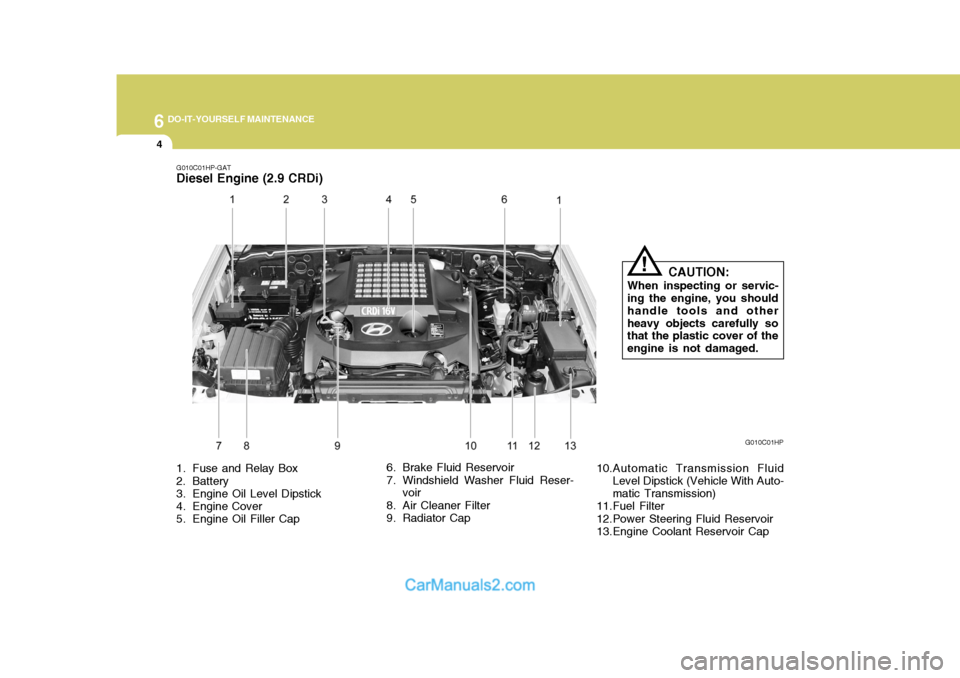
1. Fuse and Relay Box
2. Battery
3. Engine Oil Level Dipstick
4. Engine Cover
5. Engine Oil Filler Cap 6. Brake Fluid Reservoir
7. Windshield Washer Fluid Reser-
voir
8. Air Cleaner Filter
9. Radiator Cap 10.Automatic Transmission Fluid
Level Dipstick (Vehicle With Auto-matic Transmission)
11.Fuel Filter
12.Power Steering Fluid Reservoir
13.Engine Coolant Reservoir Cap G010C01HP
G010C01HP-GAT Diesel Engine (2.9 CRDi)
CAUTION:
When inspecting or servic-
ing the engine, you should handle tools and otherheavy objects carefully so that the plastic cover of the engine is not damaged.
!
Page 227 of 539
6
DO-IT-YOURSELF MAINTENANCE
5GENERAL CHECKS
G020A01HP-GAT
Engine Compartment
The following should be checked regu- larly:
o Engine oil level and condition
o Transmission fluid level and condi- tion
o Brake fluid level
o Clutch fluid level
o Engine coolant level
o Windshield washer fluid level
o Accessory drive belt condition
o Engine coolant hose condition
o Fluid leaks
(on or below components)
o Power steering fluid level
o Battery condition
o Air filter condition G020B01A-AAT
Vehicle Exterior
The following should be checked
monthly:
o Overall appearance and condition
o Wheel condition and wheel nut
torque
o Exhaust system condition
o Light condition and operation
o Windshield glass condition
o Wiper blade condition
o Paint condition and body corrosion
o Fluid leaks
o Door and hood lock condition
o Tire pressure and condition (including spare tire) o Defroster, heating system opera-
tion (and air conditioning, if in- stalled)
o Steering operation and condition
o Mirror condition and operation
o Turn signal operation
o Accelerator pedal operation
o Brake operation, including parking brake
o Manual transmission operation, in-
cluding clutch operation
o Automatic transmission operation, including "Park" mechanism opera-tion
o Seat control condition and opera-
tion
o Seat belt condition and operation
o Sun visor operation If you notice anything that does not operate correctly or appears to be functioning incorrectly, inspect it care- fully and seek assistance from yourHyundai dealer if service is needed.
G020C01HP-GAT
Vehicle Interior
The following should be checked each
time when the vehicle is driven:
o Lights operation
o Windshield wiper operation
o Horn operation
Page 252 of 539
6 DO-IT-YOURSELF MAINTENANCE
30CHECKING AND REPLACING FUSES
!
G200A01A-AAT
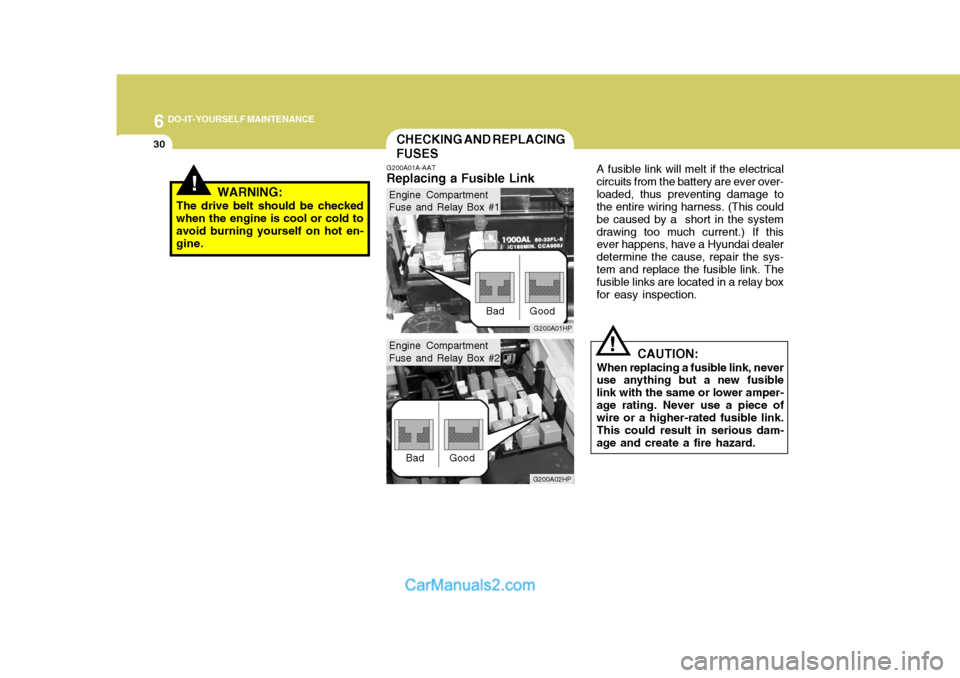
Replacing a Fusible Link A fusible link will melt if the electrical
circuits from the battery are ever over- loaded, thus preventing damage to the entire wiring harness. (This could be caused by a short in the systemdrawing too much current.) If this ever happens, have a Hyundai dealer determine the cause, repair the sys-tem and replace the fusible link. The fusible links are located in a relay box for easy inspection.
CAUTION:
When replacing a fusible link, never use anything but a new fusible link with the same or lower amper-age rating. Never use a piece of wire or a higher-rated fusible link. This could result in serious dam-age and create a fire hazard.
G200A01HP
G200A02HP
!WARNING:
The drive belt should be checked when the engine is cool or cold to avoid burning yourself on hot en- gine.
Bad GoodBad GoodEngine Compartment Fuse and Relay Box #1
Engine Compartment Fuse and Relay Box #2
Page 254 of 539
6 DO-IT-YOURSELF MAINTENANCE
32CHECKING THE BATTERY
!
G210A01A-AAT
WARNING:
Batteries can be dangerous! When
working with batteries, carefully observe the following precautionsto avoid serious injuries. o If battery fluid is on your skin, flush
the affected areas with water for atleast 15 minutes and then seek medical assistance.
o If battery fluid is in your eyes, rinse out your eyes with water and getmedical assistance as soon as possible. While you are being drivento get medical assistance, continue to rinse your eyes by using a sponge or soft cloth saturated withwater.
o If you swallow battery fluid, drink a large quantity of water or milk fol- lowed by milk of magnesia, eat a raw egg or drink vegetable oil. Getmedical assistance as soon as possible.
While batteries are being charged (either by a battery charger or by thevehicle's alternator), they produce explosive gases. Always observe these warnings to prevent injuries fromoccurring:
o Charge batteries only in a well ven- tilated area.
o Do not permit flames, sparks or smoking in the area.
o Keep children away from the area.
The fluid in the battery contains a
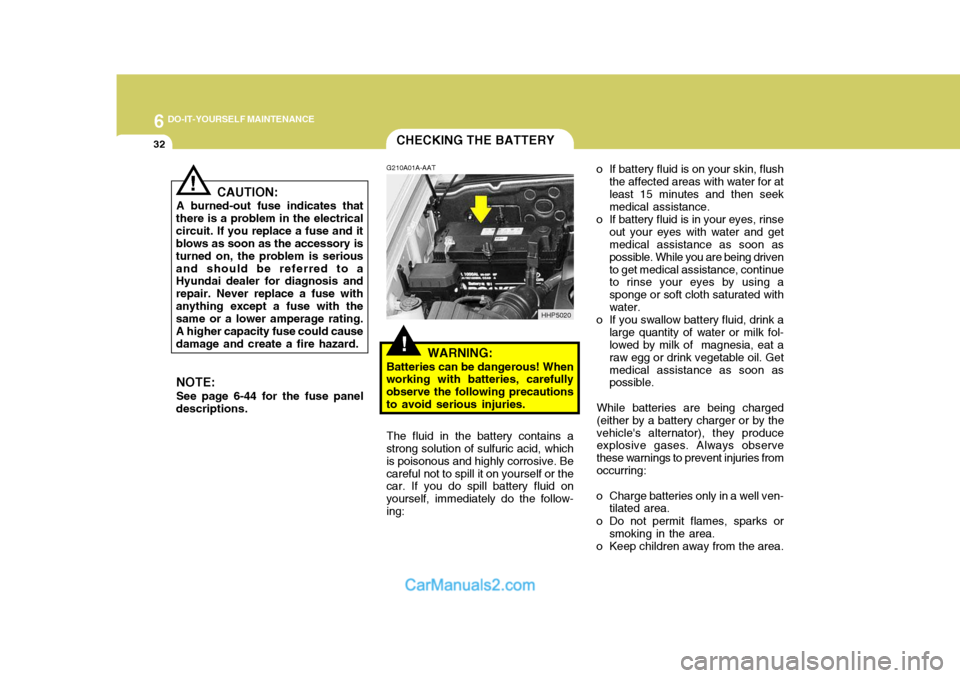
strong solution of sulfuric acid, whichis poisonous and highly corrosive. Becareful not to spill it on yourself or the car. If you do spill battery fluid on yourself, immediately do the follow-ing:
CAUTION:
A burned-out fuse indicates that
there is a problem in the electricalcircuit. If you replace a fuse and it blows as soon as the accessory is turned on, the problem is seriousand should be referred to a Hyundai dealer for diagnosis and repair. Never replace a fuse withanything except a fuse with the same or a lower amperage rating. A higher capacity fuse could causedamage and create a fire hazard.
NOTE: See page 6-44 for the fuse panel
descriptions.
!
HHP5020
Page 255 of 539
6
DO-IT-YOURSELF MAINTENANCE
33
!
G210B01Y-GET
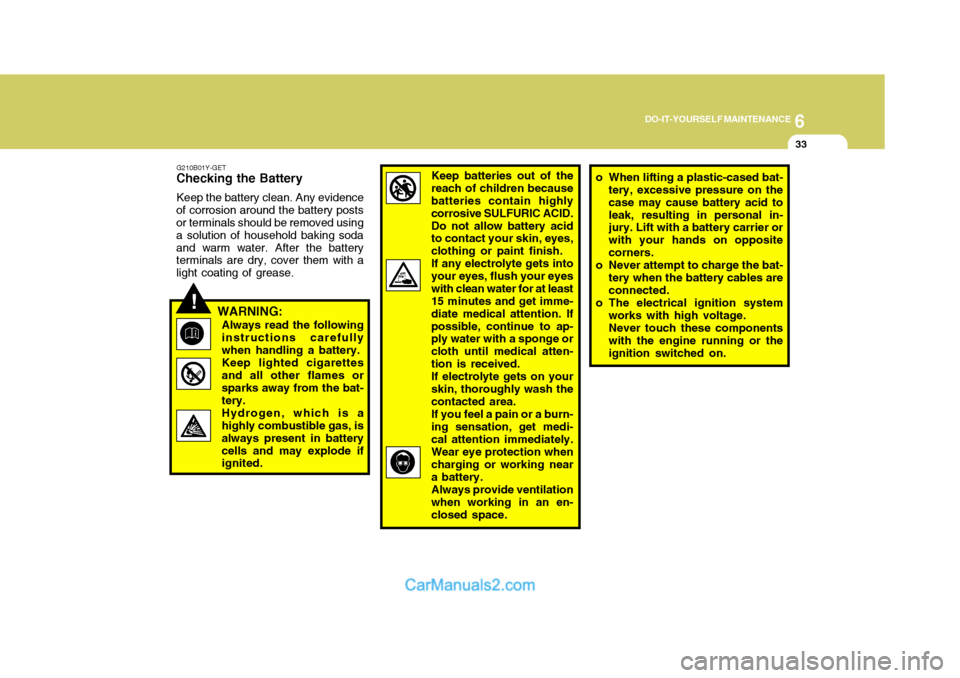
Checking the Battery
Keep the battery clean. Any evidence
of corrosion around the battery posts or terminals should be removed using a solution of household baking sodaand warm water. After the battery terminals are dry, cover them with a light coating of grease.
WARNING:Always read the followinginstructions carefullywhen handling a battery.Keep lighted cigarettesand all other flames orsparks away from the bat- tery. Hydrogen, which is a highly combustible gas, is always present in batterycells and may explode if ignited.Keep batteries out of the reach of children because batteries contain highly corrosive SULFURIC ACID.Do not allow battery acid to contact your skin, eyes, clothing or paint finish.If any electrolyte gets intoyour eyes, flush your eyeswith clean water for at least 15 minutes and get imme- diate medical attention. Ifpossible, continue to ap- ply water with a sponge or cloth until medical atten-tion is received.If electrolyte gets on yourskin, thoroughly wash thecontacted area.If you feel a pain or a burn-ing sensation, get medi- cal attention immediately. Wear eye protection when charging or working near a battery. Always provide ventilation when working in an en- closed space.o When lifting a plastic-cased bat- tery, excessive pressure on the case may cause battery acid toleak, resulting in personal in- jury. Lift with a battery carrier or with your hands on oppositecorners.
o Never attempt to charge the bat- tery when the battery cables are connected.
o The electrical ignition system works with high voltage. Never touch these componentswith the engine running or the ignition switched on.
Page 284 of 539
9 VEHICLE SPECIFICATIONS
2
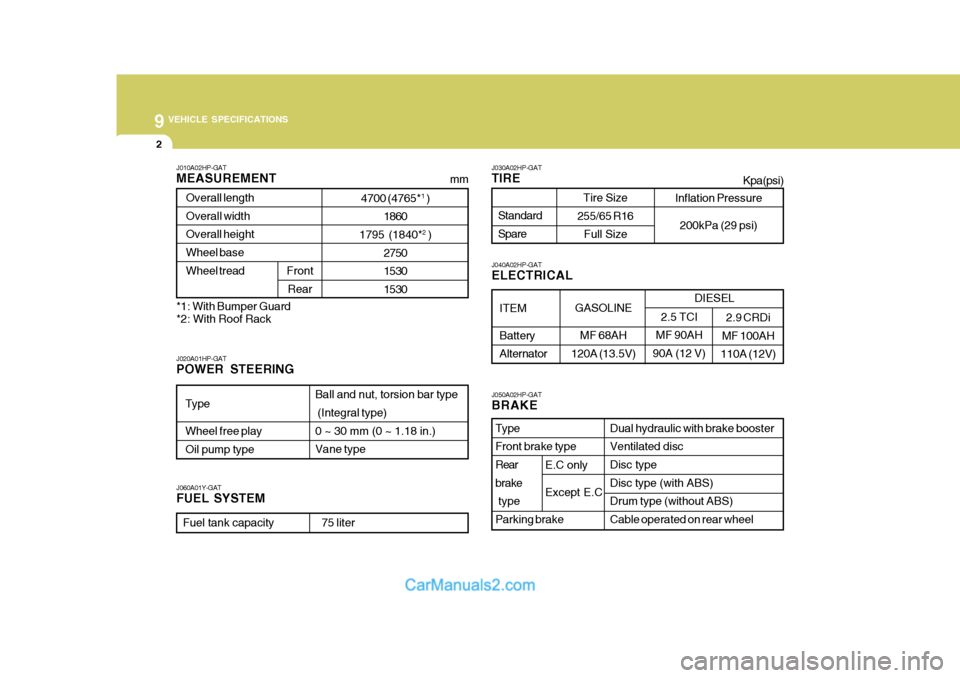
J010A02HP-GAT MEASUREMENT
4700 (4765* 1
)
1860
1795 (1840* 2
)
2750 15301530
Overall length Overall width Overall heightWheel base Wheel tread
Front
Rear
Type Wheel free play Oil pump type Ball and nut, torsion bar type (Integral type) 0 ~ 30 mm (0 ~ 1.18 in.)Vane type
J060A01Y-GAT FUEL SYSTEM
J020A01HP-GAT POWER STEERING J030A02HP-GAT TIRE
Standard Spare
J050A02HP-GAT BRAKE Dual hydraulic with brake booster Ventilated disc Disc type Disc type (with ABS)Drum type (without ABS) Cable operated on rear wheel
Type Front brake type Rear brake type Parking brake
ITEM Battery Alternator
J040A02HP-GAT ELECTRICAL
mm
Fuel tank capacity 75 liter
2.5 TCI
MF 90AH
90A (12 V)
Tire Size
255/65 R16 Full Size Kpa(psi)
2.9 CRDi
MF 100AH
110A (12V)GASOLINE
MF 68AH
120A (13.5V)DIESEL
E.C only Except E.C*1: With Bumper Guard *2: With Roof Rack Inflation Pressure
200kPa (29 psi)
Page 289 of 539
10INDEX
2
A Air bag ....................................................................... 1-47
Air Cleaner Filter ....................................................... 6-15
Air Conditioning Care ....................................................................... 6-24
Filter ........................................................... 1-118, 6-26 Operation ................................................... 1-110, 6-25
Switch ................................................................... 1-110
Antenna ................................................................... 1-140
Ashtray ...................................................................... 1-81
Audio Fault Code .................................................... 1-137
Automatic Heating and Cooling Control System .... 1-112
B
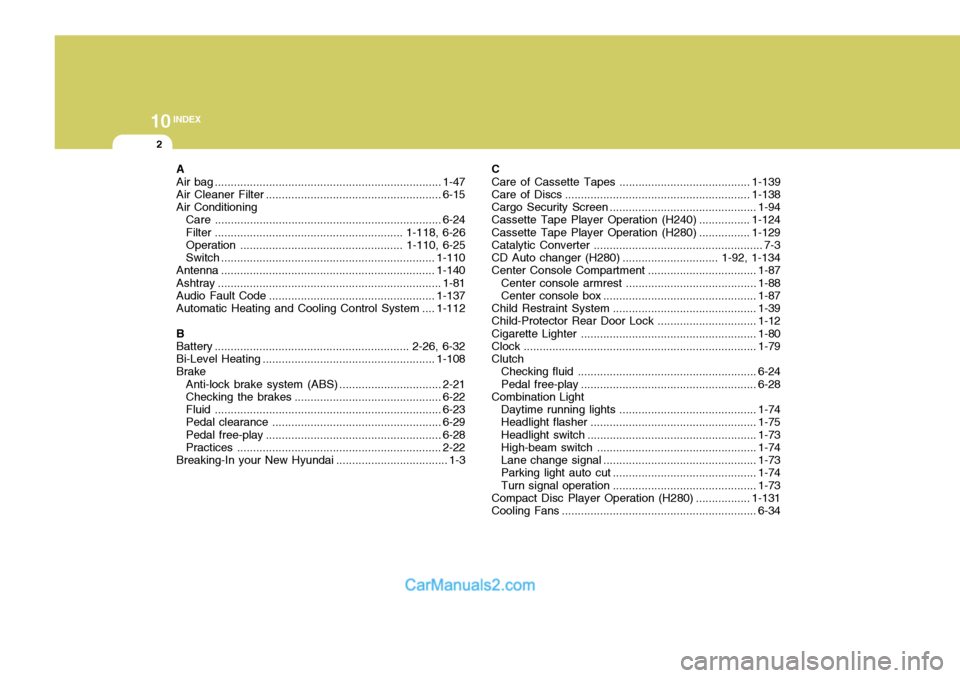
Battery ............................................................. 2-26, 6-32 Bi-Level Heating ...................................................... 1-108
Brake
Anti-lock brake system (ABS) ................................ 2-21
Checking the brakes .............................................. 6-22
Fluid ....................................................................... 6-23
Pedal clearance ..................................................... 6-29
Pedal free-play ....................................................... 6-28
Practices ................................................................ 2-22
Breaking-In your New Hyundai ................................... 1-3C
Care of Cassette Tapes ....................
..................... 1-139
Care of Discs .......................................................... 1-138
Cargo Security Screen.............................................. 1-94
Cassette Tape Player Operation (H240) ................1-124
Cassette Tape Player Operation (H280) ................1-129
Catalytic Converter ..................................................... 7-3
CD Auto changer (H 280) .............................. 1-92, 1-134
Center Console Compartment ..................................1-87
Center console armrest .................... ..................... 1-88
Center console box ................................................ 1-87
Child Restraint System............................................. 1-39
Child-Protector Rear Door Lock ...............................1-12
Cigarette Lighter ....................................................... 1-80
Clock ......................................................................... 1-79
Clutch Checking fluid ........................................................ 6-24
Pedal free-play ....................................................... 6-28
Combination Light
Daytime running lights .... .......................................1-74
Headlight flasher .................................................... 1-75
Headlight swi tch ..................................................... 1-73
High-beam swi tch .................................................. 1-74
Lane change si gnal ................................................ 1-73
Parking light auto cut ............................................. 1-74
Turn signal oper ation............................................. 1-73
Compact Disc Player Operation (H 280) .................1-131
Cooling Fans ............................................................. 6-34
Page 319 of 539
1CONTROLS AND EQUIPMENT
14
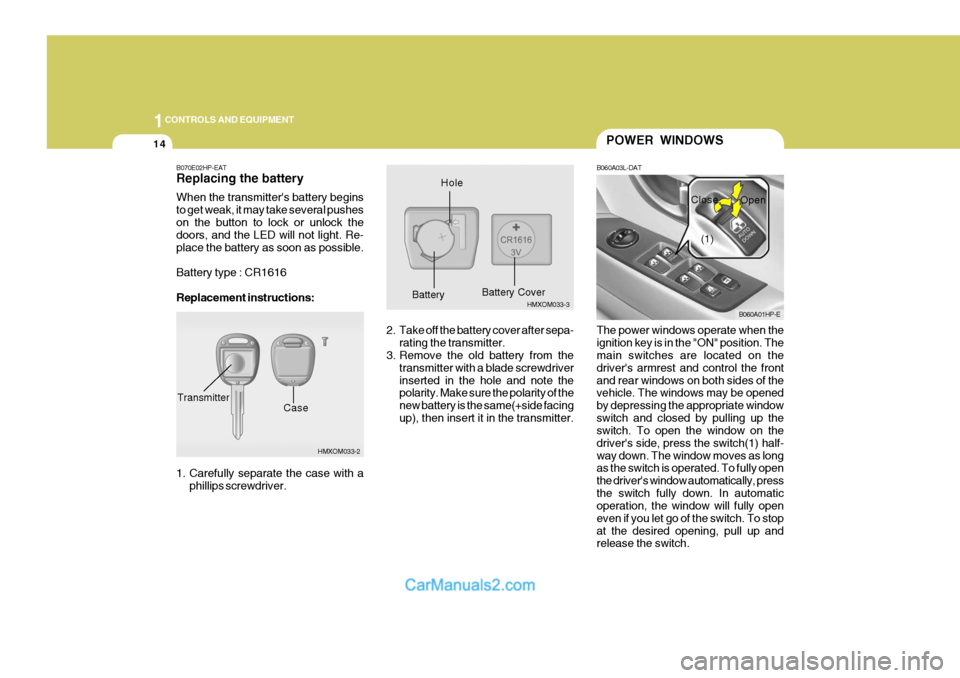
B070E02HP-EAT Replacing the battery When the transmitter's battery begins to get weak, it may take several pusheson the button to lock or unlock the doors, and the LED will not light. Re- place the battery as soon as possible. Battery type : CR1616 Replacement instructions:
1. Carefully separate the case with aphillips screwdriver.
HMXOM033-2
CaseTransmitter
HMXOM033-3
HoleBattery
Battery Cover
The power windows operate when the ignition key is in the "ON" position. The main switches are located on the driver's armrest and control the frontand rear windows on both sides of the vehicle. The windows may be opened by depressing the appropriate windowswitch and closed by pulling up the switch. To open the window on the driver's side, press the switch(1) half-way down. The window moves as long as the switch is operated. To fully open the driver's window automatically, pressthe switch fully down. In automatic operation, the window will fully open even if you let go of the switch. To stopat the desired opening, pull up and release the switch.
POWER WINDOWS
B060A03L-DAT
B060A01HP-E
(1)
Close
Open
2. Take off the battery cover after sepa- rating the transmitter.
3. Remove the old battery from the
transmitter with a blade screwdriver inserted in the hole and note the polarity. Make sure the polarity of the new battery is the same(+side facingup), then insert it in the transmitter.