Page 335 of 539

1CONTROLS AND EQUIPMENT
30
!
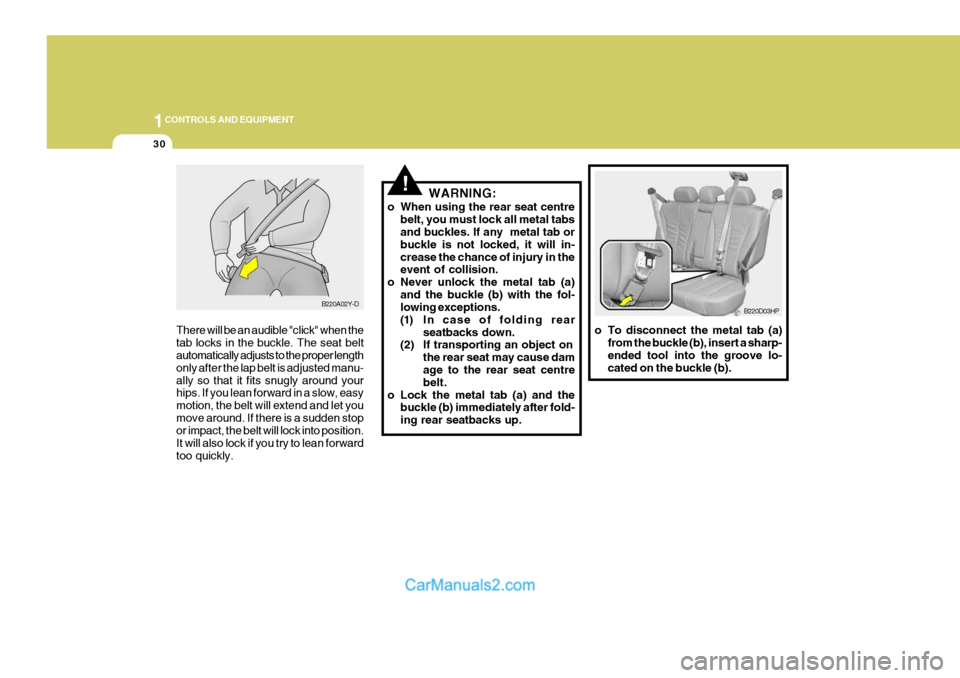
There will be an audible "click" when the tab locks in the buckle. The seat belt automatically adjusts to the proper length only after the lap belt is adjusted manu-ally so that it fits snugly around your hips. If you lean forward in a slow, easy motion, the belt will extend and let youmove around. If there is a sudden stop or impact, the belt will lock into position. It will also lock if you try to lean forwardtoo quickly. WARNING:
o When using the rear seat centre belt, you must lock all metal tabs and buckles. If any metal tab or buckle is not locked, it will in-crease the chance of injury in the event of collision.
o Never unlock the metal tab (a)
and the buckle (b) with the fol-lowing exceptions.
(1) In case of folding rear seatbacks down.
(2) If transporting an object on
the rear seat may cause dam age to the rear seat centre belt.
o Lock the metal tab (a) and the buckle (b) immediately after fold-ing rear seatbacks up.
B220A02Y-DB220D03HP
o To disconnect the metal tab (a) from the buckle (b), insert a sharp- ended tool into the groove lo- cated on the buckle (b).
Page 338 of 539

1
CONTROLS AND EQUIPMENT
33
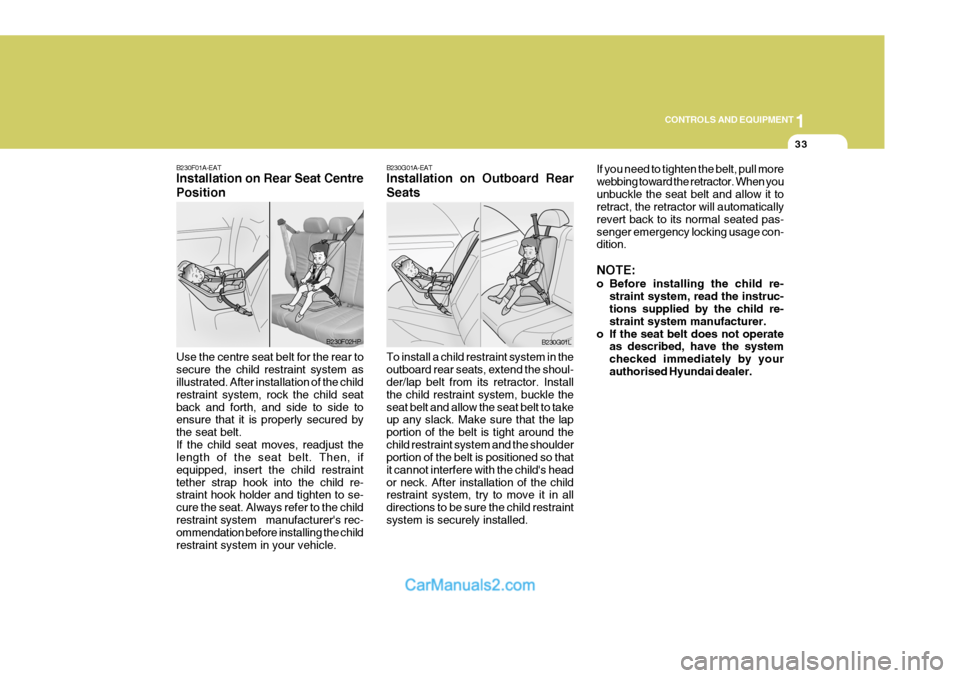
B230F01A-EAT Installation on Rear Seat Centre Position Use the centre seat belt for the rear to secure the child restraint system as illustrated. After installation of the child restraint system, rock the child seatback and forth, and side to side to ensure that it is properly secured by the seat belt.If the child seat moves, readjust the length of the seat belt. Then, if equipped, insert the child restrainttether strap hook into the child re- straint hook holder and tighten to se- cure the seat. Always refer to the childrestraint system manufacturer's rec- ommendation before installing the child restraint system in your vehicle.
B230F02HP
B230G01A-EAT Installation on Outboard Rear Seats To install a child restraint system in the outboard rear seats, extend the shoul- der/lap belt from its retractor. Install the child restraint system, buckle theseat belt and allow the seat belt to take up any slack. Make sure that the lap portion of the belt is tight around thechild restraint system and the shoulder portion of the belt is positioned so that it cannot interfere with the child's heador neck. After installation of the child restraint system, try to move it in all directions to be sure the child restraintsystem is securely installed. If you need to tighten the belt, pull morewebbing toward the retractor. When youunbuckle the seat belt and allow it to retract, the retractor will automatically revert back to its normal seated pas-senger emergency locking usage con- dition. NOTE:
o Before installing the child re-
straint system, read the instruc- tions supplied by the child re- straint system manufacturer.
o If the seat belt does not operate as described, have the systemchecked immediately by yourauthorised Hyundai dealer.
B230G01L
Page 381 of 539

1CONTROLS AND EQUIPMENT
76
HPB270C2-E OUTSIDE REARVIEW MIRROR HEATER (Not all models) The outside rearview mirror heater is actuated in connection with heated front/rear window.So, to heat the outside rearview mirror glass, push in the switch for heated front/rear window.The rearview mirror glass will be heated for defrosting or defogging and will give you improved rear vision in all
weather conditions. Push the switch again to turn the heater off. The outside rearview mirror heater au-tomatically turns itself off after 20 min- utes.
HHP2119
Type A
Type B!
B510B01Y-EAT Electric Type (Not all models) The outside rearview mirrors can be adjusted to your preferred rear vision, both directly behind the vehicle, and to the rear of the left and right sides.The remote control outside rearview mirror switch controls the adjustments for both right and left outside mirrors. To adjust the position of either mir- ror:
1. Move the selecting switch to the right or left to activate the adjustablemechanism for the correspondingdoor mirror.
2. Now, adjust mirror angle by de-
pressing the appropriate perimeterswitch as illustrated. CAUTION:
o Do not operate the switch continu- ously for an unnecessary lengthof time.
o Scraping ice from the mirror face
could cause permanent damage.To remove any ice, use a sponge, soft cloth or approved de-icer.
WARNING:
Be careful when judging the size or distance of any object seen in thepassenger side rearview mirror. It is a convex mirror with a curved sur- face. Any objects seen in this mirrorare closer than they appear.
!
B510B01HP-E
Page 530 of 539
9 VEHICLE SPECIFICATIONS
2
PETROL
MF 68 AH
120 A (13.5 V)
J010A02HP-EAT MEASUREMENT
185 in.
73.2 in.
70.7 in. (72.4 in. )
108.3 in.60.2 in. 60.2 in.
Overall lengthOverall width Overall height Wheel baseWheel tread
Front Rear
J060A01HP-EAT FUEL SYSTEM J030A02HP-EATTYRE
Standard Spare
J050A02HP-AAT BRAKE Dual hydraulic with brake booster Ventilated disc Disc typeCable operated on rear wheel
TypeFront brake type Rear brake type Parking brake
ITEM Battery Alternator
J040A02HP-EAT ELECTRICAL
Fuel tank capacity
DIESEL
MF 100 AH
110 A (12 V)
Tyre Size
255/65 R16
Full Size
16.5 lmp.gal (75 litres)
*1:With Roof Bar
*1
Type
Ball and nut, torsion bar type(Integtal type) 0~1.18 in. (0~30mm) Vane type
J020A01HP-EAT POWER STEERING
Wheel free play Oil pump type
Inflation Pressure
200 kPa(29psi)