Page 255 of 539

6
DO-IT-YOURSELF MAINTENANCE
33
!
G210B01Y-GET
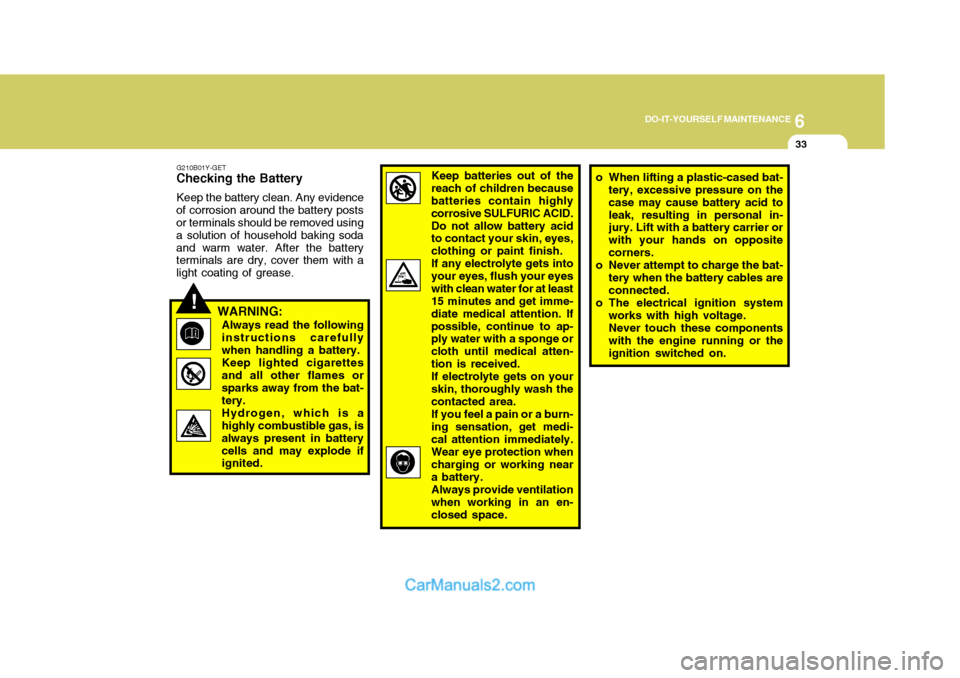
Checking the Battery
Keep the battery clean. Any evidence
of corrosion around the battery posts or terminals should be removed using a solution of household baking sodaand warm water. After the battery terminals are dry, cover them with a light coating of grease.
WARNING:Always read the followinginstructions carefullywhen handling a battery.Keep lighted cigarettesand all other flames orsparks away from the bat- tery. Hydrogen, which is a highly combustible gas, is always present in batterycells and may explode if ignited.Keep batteries out of the reach of children because batteries contain highly corrosive SULFURIC ACID.Do not allow battery acid to contact your skin, eyes, clothing or paint finish.If any electrolyte gets intoyour eyes, flush your eyeswith clean water for at least 15 minutes and get imme- diate medical attention. Ifpossible, continue to ap- ply water with a sponge or cloth until medical atten-tion is received.If electrolyte gets on yourskin, thoroughly wash thecontacted area.If you feel a pain or a burn-ing sensation, get medi- cal attention immediately. Wear eye protection when charging or working near a battery. Always provide ventilation when working in an en- closed space.o When lifting a plastic-cased bat- tery, excessive pressure on the case may cause battery acid toleak, resulting in personal in- jury. Lift with a battery carrier or with your hands on oppositecorners.
o Never attempt to charge the bat- tery when the battery cables are connected.
o The electrical ignition system works with high voltage. Never touch these componentswith the engine running or the ignition switched on.
Page 261 of 539
6
DO-IT-YOURSELF MAINTENANCE
39REPLACING HEADLIGHT BULBS
G260A02A-GAT Before attempting to replace a head- light bulb, be sure the switch is turned to the "OFF" position. The next paragraph shows how to reach the headlight bulbs so they may be changed. Be sure to replacethe burned-out bulb with one of the same number and wattage rating.
CAUTION:
Keep the lamps out of contact with
petroleum product, such as oil, gasoline, etc.
! G270A01B-GAT
Headlight Bulb
1. Allow the bulb to cool. Wear eye
protection.
2. Open the engine hood.
3. Always grasp the bulb by its plas- tic base, avoid touching the glass.
4. Using a spanner, remove the head- light assembly mounting bolts.
5. Disconnect the power cord from the bulb base in the back of the headlight.
G270A01HP7. Disconnect the connector from the
bulb base in the back of the head- light.
G270A02HP
6. Turn the plastic cover counter- clockwise and remove it. 8. Push the bulb spring to remove
the headlight bulb.
Page 262 of 539

6 DO-IT-YOURSELF MAINTENANCE
40HEADLIGHT AIMING AD- JUSTMENT
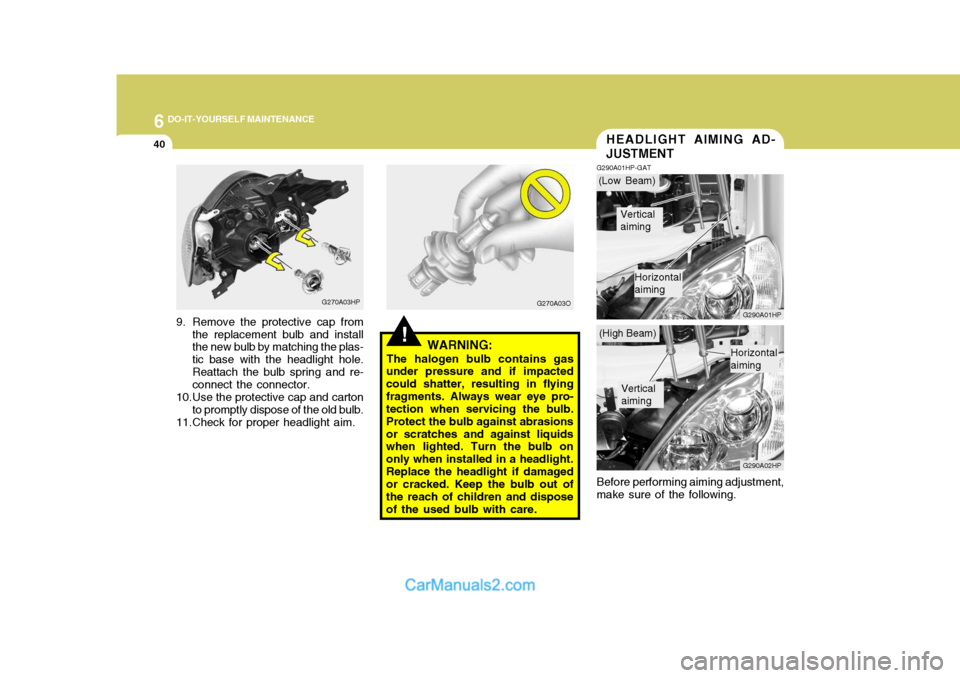
G290A01HP-GAT
G290A01HP G290A02HP
Before performing aiming adjustment,
make sure of the following.
!WARNING:
The halogen bulb contains gas
under pressure and if impacted could shatter, resulting in flyingfragments. Always wear eye pro- tection when servicing the bulb. Protect the bulb against abrasionsor scratches and against liquids when lighted. Turn the bulb on only when installed in a headlight.Replace the headlight if damaged or cracked. Keep the bulb out of the reach of children and disposeof the used bulb with care.
G270A03HP
9. Remove the protective cap from the replacement bulb and install the new bulb by matching the plas- tic base with the headlight hole.Reattach the bulb spring and re- connect the connector.
10.Use the protective cap and carton to promptly dispose of the old bulb.
11.Check for proper headlight aim. G270A03O(Low Beam)
(High Beam)
Vertical aiming
Horizontal aiming
Vertical aiming
Horizontal aiming
Page 263 of 539

6
DO-IT-YOURSELF MAINTENANCE
41
1. Keep all tires inflated to the correct
pressure.
2. Place the vehicle on level ground and press the front bumper & rear bumper down several times. Placevehicle at a distance of 3m (118.1 in.) from the test wall.
3. See that the vehicle is unloaded (except for full levels of coolant, engine oil and fuel, and spare tire,jack, and tools). Have the driver or equivalent weight placed in driver's seat.
4. Clean the headlight lens and turn on the headlight.
5. Open the hood.
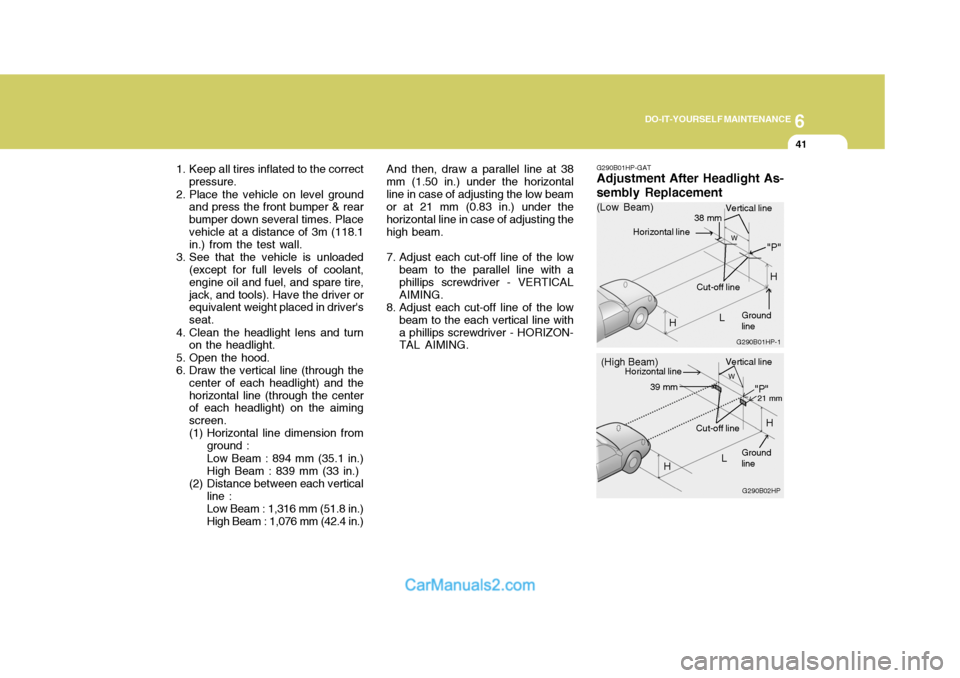
6. Draw the vertical line (through the center of each headlight) and thehorizontal line (through the center of each headlight) on the aiming screen.
(1) Horizontal line dimension from
ground : Low Beam : 894 mm (35.1 in.) High Beam : 839 mm (33 in.)
(2) Distance between each vertical line : Low Beam : 1,316 mm (51.8 in.) High Beam : 1,076 mm (42.4 in.) And then, draw a parallel line at 38
mm (1.50 in.) under the horizontalline in case of adjusting the low beam or at 21 mm (0.83 in.) under the horizontal line in case of adjusting thehigh beam.
7. Adjust each cut-off line of the low beam to the parallel line with a phillips screwdriver - VERTICALAIMING.
8. Adjust each cut-off line of the low beam to the each vertical line witha phillips screwdriver - HORIZON- TAL AIMING. G290B01HP-GAT Adjustment After Headlight As- sembly Replacement
G290B02HP
LW
H Cut-off line
"P"
Vertical line
Horizontal line
Ground line
21 mm39 mm
(High Beam)
H
G290B01HP-1
LW
"P"
38 mm
H
H
(Low Beam)
Vertical line
Ground line
Cut-off line
Horizontal line
Page 264 of 539
6 DO-IT-YOURSELF MAINTENANCE
42
"W" Distance between each headlight center :Low Beam : 1,316 mm (51.8 in.) High Beam : 1,076 mm (42.4 in.) "L" Distance between the headlightsand the wall that the lights are tested against : Low Beam : 3,000 mm (118.11 in.) High Beam : 3,000 mm (118.11in.)
If the vehicle has had front body
repair and the headlight assemblyhas been replaced, the headlight aim- ing should be checked using an aim- ing screen as shown in the illustra-tion. Turn on the headlight switch. (Low Beam or High Beam Position).
1. Adjust headlights so that main axis of light is parallel to center line of the body and is aligned with point "P" shown in the illustration.
2. Dotted lines in the illustration show the center of headlights. "H" Horizontal center line of headlightsfrom ground :Low Beam : 894 mm (35.1 in.) High Beam : 839 mm (33 in.)
Page 265 of 539
6
DO-IT-YOURSELF MAINTENANCE
43BULB WATTAGES
Wattage55/55 5
21 8
10 55 55
Part Name
Headlight (Low/High Beam)Front Position Light Front Turn Signal Light Map Light Interior Light Front Fog Light Side Repeater Light Front Door Edge Warning Light (If Installed) Wattage
1016
21/5 2116 215
No.
9
1011 12 Part Name
Luggage Compartment Light High Mounted Rear Stop Light (If Installed) Rear Combination Light Stop/Tail Light Turn Signal Light Back-up Light Rear Fog Light (If Installed) License Plate Light
No.
1 2 3 4 5 6 7 8
G280A03HP-GAT
G280A01HP
Socket Type S8.5/8.5W-2
BAY 15d BA 15s
W2.1 x 9.5D
BA 15s
W2.1 x 9.5D
Socket Type
Px26d/P14.5S W2.1x9.5D
BA 15s
S8.5/8.5 S8.5/8.5 P22d
W2.1 x 9.5D W2.1 x 4.6D
Page 270 of 539

6 DO-IT-YOURSELF MAINTENANCE
48
NO.1 2 34 5 67 8 9
10 11 1213 14 1516 17 1819 20 2122 23 2425 26 2728 AMPERAGES(A)
30A 10A 15A 20A10A15A30A20A 10A 10A20A10A- -
10A 10A -
10A10A10A10A 10A 10A
-
10A15A15A 10A CIRCUIT PROTECTED
Defogger Relay
Hazard Relay, Hazard Switch Stop Lamp Switch
TOD, EST Control Module - Sunroof Controller
Blower Relay
Power Door Locks
Rear Fog Lamp Relay
Audio, Map Lamp
Cigarette Lighter, Power Outlet relay, ACC Socket
Power Outside Mirror Switch- - A/C Switch
Left/Right Outside Mirror & Defogger -
TCM, ECM(COVEC-F), TCCS(TOD, EST), Immobilizer
Back-up Lamp Switch, Inside Rearview Mirror, Transmission Range Switch Hazard Switch
Instrument Cluster, ETACM, Vehicle Speed Sensor, DRL Control ModuleAirbag Airbag Indicator -
Blower & A/C, ETACM, Defogger Relay
Seat Warmer
Sunroof, Rear Wiper & Washer, Cruise Switch, Rear Intermittent Wiper Relay
Start Relay, Theft-Alarm Relay
G200E01HP-GAT Inner Panel NOTE: Not all fuse panel descriptions in this manual may be applicable to your vehicle. It is accurate at the time of printing. When you inspect the fuse box on your vehicle, refer to the fuse box label. G200D01HP
Page 289 of 539

10INDEX
2
A Air bag ....................................................................... 1-47
Air Cleaner Filter ....................................................... 6-15
Air Conditioning Care ....................................................................... 6-24
Filter ........................................................... 1-118, 6-26 Operation ................................................... 1-110, 6-25
Switch ................................................................... 1-110
Antenna ................................................................... 1-140
Ashtray ...................................................................... 1-81
Audio Fault Code .................................................... 1-137
Automatic Heating and Cooling Control System .... 1-112
B
Battery ............................................................. 2-26, 6-32 Bi-Level Heating ...................................................... 1-108
Brake
Anti-lock brake system (ABS) ................................ 2-21
Checking the brakes .............................................. 6-22
Fluid ....................................................................... 6-23
Pedal clearance ..................................................... 6-29
Pedal free-play ....................................................... 6-28
Practices ................................................................ 2-22
Breaking-In your New Hyundai ................................... 1-3C
Care of Cassette Tapes ....................
..................... 1-139
Care of Discs .......................................................... 1-138
Cargo Security Screen.............................................. 1-94
Cassette Tape Player Operation (H240) ................1-124
Cassette Tape Player Operation (H280) ................1-129
Catalytic Converter ..................................................... 7-3
CD Auto changer (H 280) .............................. 1-92, 1-134
Center Console Compartment ..................................1-87
Center console armrest .................... ..................... 1-88
Center console box ................................................ 1-87
Child Restraint System............................................. 1-39
Child-Protector Rear Door Lock ...............................1-12
Cigarette Lighter ....................................................... 1-80
Clock ......................................................................... 1-79
Clutch Checking fluid ........................................................ 6-24
Pedal free-play ....................................................... 6-28
Combination Light
Daytime running lights .... .......................................1-74
Headlight flasher .................................................... 1-75
Headlight swi tch ..................................................... 1-73
High-beam swi tch .................................................. 1-74
Lane change si gnal ................................................ 1-73
Parking light auto cut ............................................. 1-74
Turn signal oper ation............................................. 1-73
Compact Disc Player Operation (H 280) .................1-131
Cooling Fans ............................................................. 6-34