Page 208 of 271

6
DO-IT-YOURSELF MAINTENANCE
10
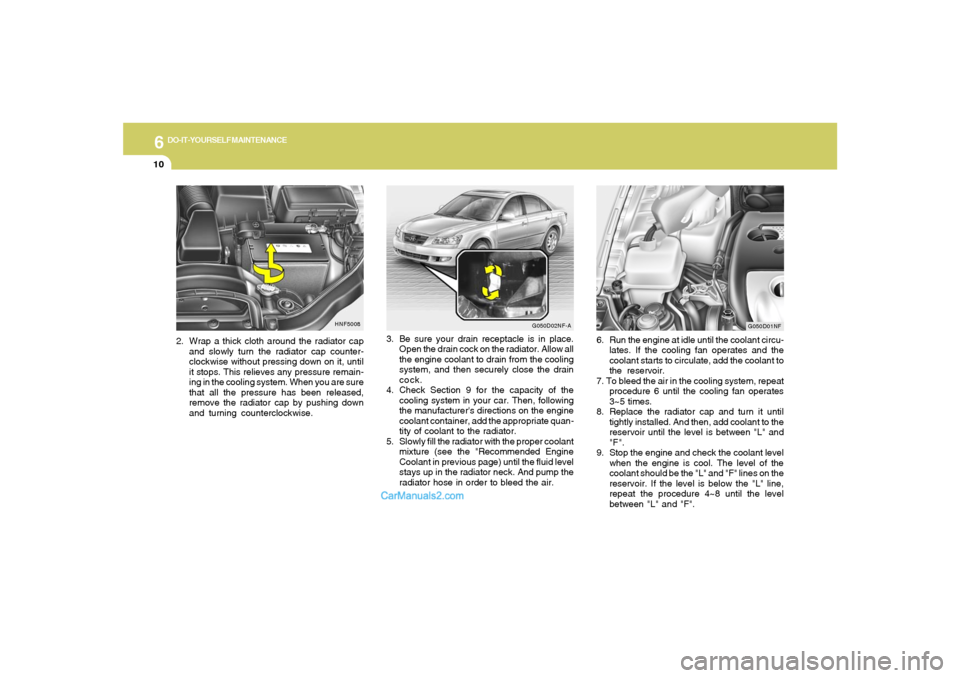
3. Be sure your drain receptacle is in place.
Open the drain cock on the radiator. Allow all
the engine coolant to drain from the cooling
system, and then securely close the drain
cock.
4. Check Section 9 for the capacity of the
cooling system in your car. Then, following
the manufacturer's directions on the engine
coolant container, add the appropriate quan-
tity of coolant to the radiator.
5. Slowly fill the radiator with the proper coolant
mixture (see the "Recommended Engine
Coolant in previous page) until the fluid level
stays up in the radiator neck. And pump the
radiator hose in order to bleed the air.
HNF5008
2. Wrap a thick cloth around the radiator cap
and slowly turn the radiator cap counter-
clockwise without pressing down on it, until
it stops. This relieves any pressure remain-
ing in the cooling system. When you are sure
that all the pressure has been released,
remove the radiator cap by pushing down
and turning counterclockwise.
G050D02NF-A
G050D01NF
6. Run the engine at idle until the coolant circu-
lates. If the cooling fan operates and the
coolant starts to circulate, add the coolant to
the reservoir.
7. To bleed the air in the cooling system, repeat
procedure 6 until the cooling fan operates
3~5 times.
8. Replace the radiator cap and turn it until
tightly installed. And then, add coolant to the
reservoir until the level is between "L" and
"F".
9. Stop the engine and check the coolant level
when the engine is cool. The level of the
coolant should be the "L" and "F" lines on the
reservoir. If the level is below the "L" line,
repeat the procedure 4~8 until the level
between "L" and "F".
Page 211 of 271
6
DO-IT-YOURSELF MAINTENANCE
13
!
WARNING:
It is recommended that the engine be cool
or cold when changing the spark plugs. If
the engine is hot, you could burn yourself
on the insulated connector, the spark plug
or the engine itself. 6. Remove the mounting bolt (3) of the ignition
coil with a socket wrench.
7. Pull straight up on the ignition coil (4).
G060C03NF
8. When preparing to remove the spark plug,
guide the socket down over the spark plug,
being careful not to damage the ceramic
insulator.
9. To remove the spark plug, turn the wrench
handle in a counterclockwise direction. (3)
(4)
G060C06NF
G060C05NF
10. To install the new spark plug, guide the
socket down over the spark plug, being
careful not to damage the ceramic insulator.
Page 216 of 271

6
DO-IT-YOURSELF MAINTENANCE
18
CHECKING THE TRANSAXLE
FLUID (AUTOMATIC)G110A01E-AATTransaxle fluid in the automatic transaxle should
be checked at those intervals specified in the
vehicle maintenance schedule in Section 5.NOTE:Automatic transaxle fluid is basically red in
color. As driving distance increases, the
fluid color turns darkish red gradually. It is
a normal condition and you should not
judge the need to replace based upon the
changing color.
You must replace the automatic transaxle
fluid in accordance with intervals specified
in the vehicle maintenance schedule in
section 5.
!
G110B05A-AATRecommended FluidYour Hyundai automatic transaxle is specially
designed to operate with HYUNDAI GENUINE
ATF SP III, DIAMOND ATF SP III, SK ATF SP
III or other brands meeting the SP III specifica-
tion approved by Hyundai Motor Co.. Damage
caused by a nonspecified fluid is not covered by
your new vehicle limited warranty.
CAUTION:
Use of aftermarket ATF additives may cause
damage to the automatic transaxle.
Only use HYUNDAI GENUINE ATF SP III,
DIAMOND ATF SP III, SK ATF SP III or other
brands meeting the SP III specification ap-
proved by Hyundai Motor Co.. If you are
having your vehicle serviced at a facility
other than a Hyundai dealer, verify that the
correct ATF is used for your vehicle.
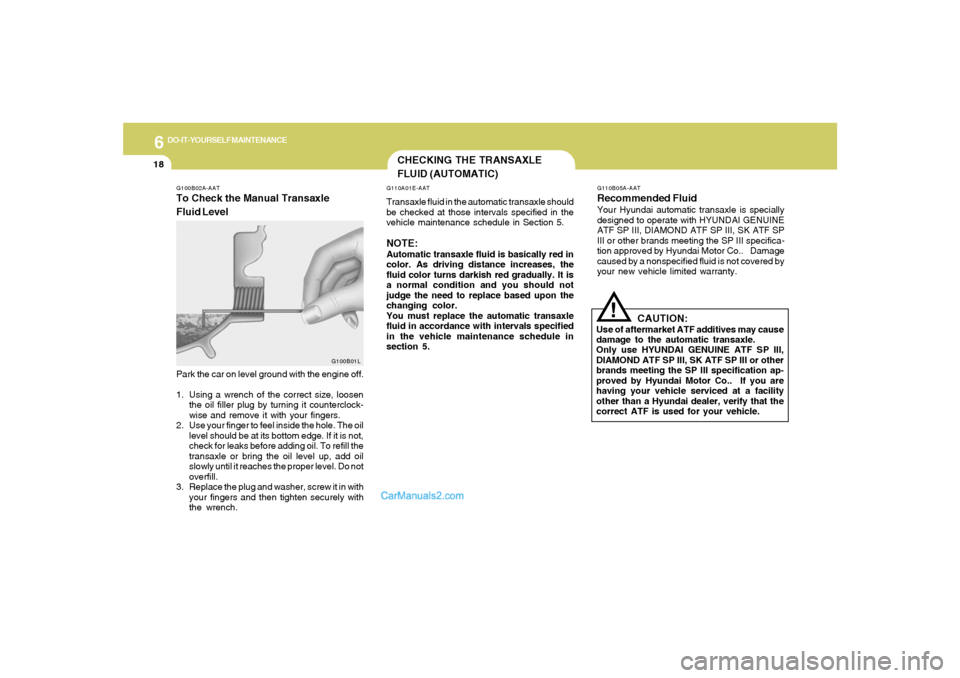
G100B02A-AATTo Check the Manual Transaxle
Fluid Level
G100B01L
Park the car on level ground with the engine off.
1. Using a wrench of the correct size, loosen
the oil filler plug by turning it counterclock-
wise and remove it with your fingers.
2. Use your finger to feel inside the hole. The oil
level should be at its bottom edge. If it is not,
check for leaks before adding oil. To refill the
transaxle or bring the oil level up, add oil
slowly until it reaches the proper level. Do not
overfill.
3. Replace the plug and washer, screw it in with
your fingers and then tighten securely with
the wrench.
Page 230 of 271
6
DO-IT-YOURSELF MAINTENANCE
32
HNF5027
9. Remove the protective cap from the re-
placement bulb and install the new bulb by
matching the plastic base with the headlight
hole. Reattach the bulb spring and recon-
nect the connector.
10. Use the protective cap and carton to
promptly dispose of the old bulb.
11. Check for proper headlight aim.
HNF5023
4. Using a socket wrench of the correct size,
remove the headlight assembly mounting
bolts.
HNF5024
5. Disconnect the power cord from the back of
the headlight.
HNF5025
6. Turn the plastic cover counterclockwise
and remove it.
HNF5026
7. Disconnect the connector from the bulb base in
the back of the headlight.
8. Push the bulb spring to remove the headlight
bulb.
Page 231 of 271
6
DO-IT-YOURSELF MAINTENANCE
33
12. To replace the front turn signal light bulb
(front position light), remove it from the bulb
holder and install the new bulb.
!
WARNING:
This halogen bulb contains gas under pres-
sure and if impacted could shatter, result-
ing in flying fragments. Always wear eye
protection when servicing the bulb. Protect
the bulb against abrasions or scratches
and against liquids when lighted. Turn the
bulb on only when installing in a headlight.
Replace the headlight if damaged or cracked.
Keep the bulb out of the reach of children
and dispose of the used bulb with care.
HNF5028
G270A03O
Front Fog Light
NOTE:
It is recommended that the front fog light
bulb should be replaced by an authorized
Hyundai dealer.
G270D01NF-AATREAR COMBINATION LIGHT
Stop/Tail Light, Rear Turn Signal Light,
Back-up Light and Rear Side Marker
Light1. Open the trunk lid.
2. Remove the cover on the inside of the rear
luggage trim by turning the knob counter-
clockwise.
HNF5029
Page 232 of 271
6
DO-IT-YOURSELF MAINTENANCE
34
3. To replace the rear combination light (stop/
tail light, rear side marker light and rear turn
signal light), remove it from the bulb holder
and install the new bulb.
(1) Stop/tail light
(2) Rear side marker light
(3) Rear turn signal light
HNF5030-A
HNF5042
4. Loosen the mounting screws of the trunk lid
trim with a phillips screwdriver and remove
the trunk lid trim.
5. To replace the rear combination light (back-
up light and stop/tail light), remove the socket
by turning it counterclockwise.
6. Install the new bulb.
G270C01L-AATLUGGAGE COMPARTMENT
LIGHT1. Open the trunk lid.
2. Remove the luggage compartment light cover
on the rear package tray panel with a flat-
head screwdriver.
HNF5031
Page 240 of 271

6
DO-IT-YOURSELF MAINTENANCE
42
PROTECTED COMPONENTS
(Spare)
Seat warmer switch
BCM(Body Control Module), Sunroof control module, Electronic chrome mirror
ESC module, High blower relay, Humidity sensor
Cigarette lighter
(Spare)
Illumination lights, Right : License light, Rear combination light, Headlight, Glove box light
Front fog light relay, Left : License light, Rear combination light, Headlight
Headlight washer relay, Right headlight leveling actuator
DRL control module, Headlight relay, AQS and ambient sensor, Left headlight leveling actuator
Wiper and washer
A/C control module
SRS control module, Passenger's Airbag switch
Front accessory socket, Rear power outlet
Digital clock, Audio, A/T shift lock control module, Power outside mirror and mirror folding
Safety window module
(Spare)
A/T shift lock control module
Power window main switch, Left rear power window switch
Power window main switch, Right power window switch
FUSE RATING
15A
15A
10A
10A
25A
10A
10A
10A
10A
10A
25A
10A
15A
20A
10A
25A
15A
10A
20A
30A FUSE
1
2
3
4
5
6
7
8
9
10
11
12
13
14
15
16
17
18
19
20
Page 241 of 271
6
DO-IT-YOURSELF MAINTENANCE
43
PROTECTED COMPONENTS
Audio amp
Door lock/unlock relay
Hazard switch, Hazard relay
Power seat manual switch(RHD)
Instrument cluster
Hazard switch
BCM(Body Control Module), Instrument cluster, Yaw rate sensor, ESC switch
(Spare)
Burglar alarm relay
(Spare)
Rear fog light relay
Trunk lid relay, Fuel filler door and trunk lid switch
(Spare)
Power seat manual switch
Sport mode switch, Key solenoid
A/C control module, Outside mirror and mirror folding motor
Audio
BCM(Body Control Module), Digital clock, Instrument cluster, A/C control module, Courtesy lights
FUSE RATING
20A
20A
10A
30A
10A
10A
10A
15A
10A
15A
15A
15A
15A
30A
10A
10A
15A
15A FUSE
21
22
23
24
25
26
27
28
29
30
31
32
33
34
35
36
POWER CONNECTOR. 1
POWER CONNECTOR. 2