2005 Hyundai Santa Fe inflation pressure
[x] Cancel search: inflation pressurePage 170 of 277
2
DRIVING YOUR HYUNDAI
20
o Be sure that the wheels are aligned cor-
rectly. Improper alignment can result from
hitting curbs or driving too fast over irregular
surfaces. Poor alignment causes faster tire
wear and may also result in other problems
as well as greater fuel consumption.
o Keep your car in good condition. For better
fuel economy and reduced maintenance
costs, maintain your car in accordance with
the maintenance schedule in Section 5. If
you drive your car in severe conditions,
more frequent maintenance is required (see
Section 5 for details).
o Keep your car clean. For maximum service,
your Hyundai should be kept clean and free
of corrosive materials. It is especially impor-
tant that mud, dirt, ice, etc. not be allowed to
accumulate on the underside of the car. This
extra weight can result in increased fuel
consumption and also contribute to corro-
sion.
o Travel lightly. Don't carry unnecessary
weight in your car. Weight reduces fuel
economy.
o Don't let the engine idle longer than neces-
sary. If you are waiting (and not in traffic),
turn off your engine and restart only when
you're ready to go.
DRIVING FOR ECONOMYC140A01A-AATYou can save fuel and get more miles from your
car if you follow these suggestions:
o Drive smoothly. Accelerate at a moderate
rate. Don't make "jack-rabbit" starts or full-
throttle shifts and maintain a steady cruising
speed. Don't race between stoplights. Try to
adjust your speed to that of the other traffic
so you don't have to change speeds unnec-
essarily. Avoid heavy traffic whenever pos-
sible. Always maintain a safe distance from
other vehicles so you can avoid unneces-
sary braking. This also reduces brake wear.
o Drive at a moderate speed. The faster you
drive, the more fuel your car uses. Driving at
a moderate speed, especially on the high-
way, is one of the most effective ways to
reduce fuel consumption.
o Don't "ride" the brake or clutch pedal. This
can increase fuel consumption and also
increase wear on these components. In
addition, driving with your foot resting on the
brake pedal may cause the brakes to over-
heat, which reduces their effectiveness and
may lead to more serious consequences.
o Take care of your tires. Keep them inflated
to the recommended pressure. Incorrect
inflation, either too much or too little, results
in unnecessary tire wear. Check the tire
pressures at least once a month. o Under some conditions your parking brake
can freeze in the engaged position. This is
most likely to happen when there is an ac-
cumulation of snow or ice around or near the
rear brakes or if the brakes are wet. If there
is a risk that the parking brake may freeze,
apply it only temporarily while you put the
gear selector lever in "P" and block the rear
wheels so the car cannot roll. Then release
the parking brake.
o Do not hold the vehicle on the upgrade with
the accelerator pedal. This can cause the
transaxle to overheat. Always use the brake
pedal or parking brake.
Page 173 of 277
2
DRIVING YOUR HYUNDAI
23
C160J01A-AATDon't Let Ice and Snow Accumulate
UnderneathUnder some conditions, snow and ice can build
up under the fenders and interfere with the
steering. When driving in severe winter condi-
tions where this may happen, you should peri-
odically check underneath the car to be sure the
movement of the front wheels and the steering
components is not obstructed.C160I01L-AATDon't Let Your Parking Brake FreezeUnder some conditions your parking brake can
freeze in the engaged position. This is most
likely to happen when there is an accumulation
of snow or ice around or near the rear brakes
or if the brakes are wet. If there is a risk the
parking brake may freeze, apply it only tempo-
rarily while you put the gear selector lever in "P"
and block the rear wheels so the car cannot roll.
Then release the parking brake.
C160K01A-AATCarry Emergency EquipmentDepending on the severity of the weather where
you drive your car, you should carry appropri-
ate emergency equipment. Some of the items
you may want to carry include tire chains, tow
straps or chains, flashlight, emergency flares,
sand, a shovel, jumper cables, a window scraper,
gloves, ground cloth, coveralls, a blanket, etc.
HIGHER SPEED MOTORINGC170A01A-AATPre-Trip Inspections1. Tires:
Adjust the tire inflation pressures to specifica-
tion. Low tire inflation pressures will result in
overheating and possible failure of the tires.
Avoid using worn or damaged tires which may
result in reduced traction or tire failure.NOTE:Never exceed the maximum tire inflation
pressure shown on the tires.
2. Fuel, engine coolant and engine oil:
High speed travel consumes more fuel than
urban motoring. Do not forget to check both
engine coolant and engine oil.
3. Drive belt:
A loose or damaged drive belt may result in
overheating of the engine.
Page 180 of 277
2
DRIVING YOUR HYUNDAI
30
!
!
This label also tells you the maximum
weights that can be supported by the
front and rear axles, called Gross Axle
Weight Rating (GAWR). To find out the
actual loads on your front and rear
axles, you need to go to a weigh station
and weigh your vehicle. Your dealer can
help you with this. Be sure to spread out
your load equally on the left and right
sides of the centerline.
WARNING:
o Never exceed the GVWR for your
vehicle or the GAWR for either the
front or rear axle.
o Do not load your vehicle any
heavier than the GVWR or either
the maximum front or rear GAWR.
If you do, parts on your vehicle
can break, and it can change the
way your vehicle handles. This
could cause you to lose control
and crash. Also, overloading can
shorten the life of your vehicle.
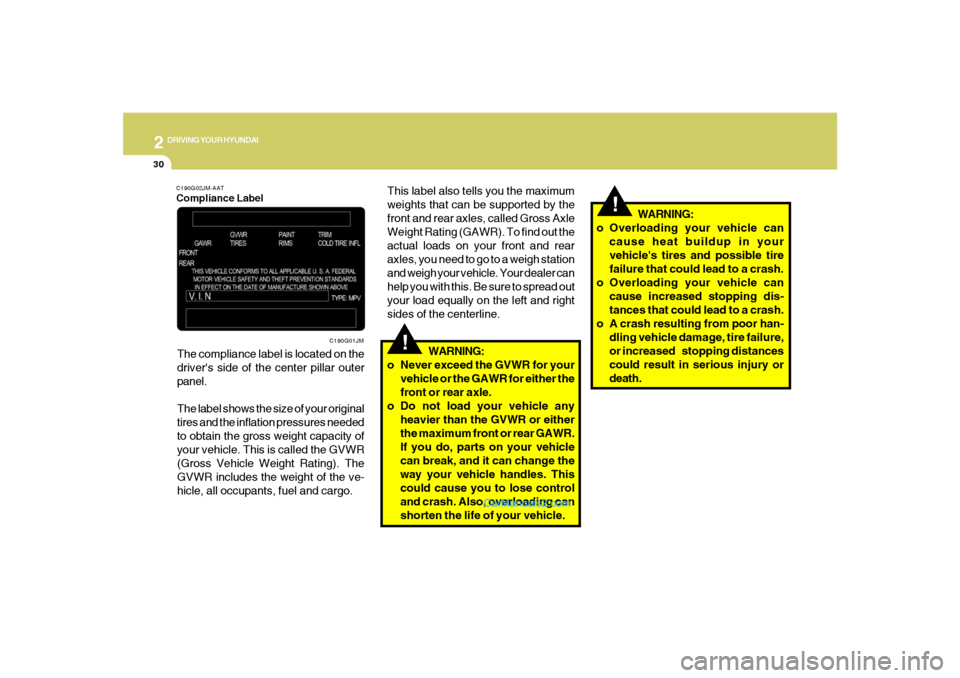
C190G02JM-AATCompliance LabelThe compliance label is located on the
driver's side of the center pillar outer
panel.
The label shows the size of your original
tires and the inflation pressures needed
to obtain the gross weight capacity of
your vehicle. This is called the GVWR
(Gross Vehicle Weight Rating). The
GVWR includes the weight of the ve-
hicle, all occupants, fuel and cargo.
C190G01JM
WARNING:
o Overloading your vehicle can
cause heat buildup in your
vehicle's tires and possible tire
failure that could lead to a crash.
o Overloading your vehicle can
cause increased stopping dis-
tances that could lead to a crash.
o A crash resulting from poor han-
dling vehicle damage, tire failure,
or increased stopping distances
could result in serious injury or
death.
Page 186 of 277
3
WHAT TO DO IN AN EMERGENCY
5
SPARE TIRED040A01O-GATThe following instructions for the FULL
SIZE spare tire should be observed:
Check inflation pressure as soon as
practical after installing the spare tire,
and adjust to the specified pressure.
The tire pressure should be periodically
checked and maintained at the speci-
fied pressure while the tire is stored.
Spare Tire Pressure
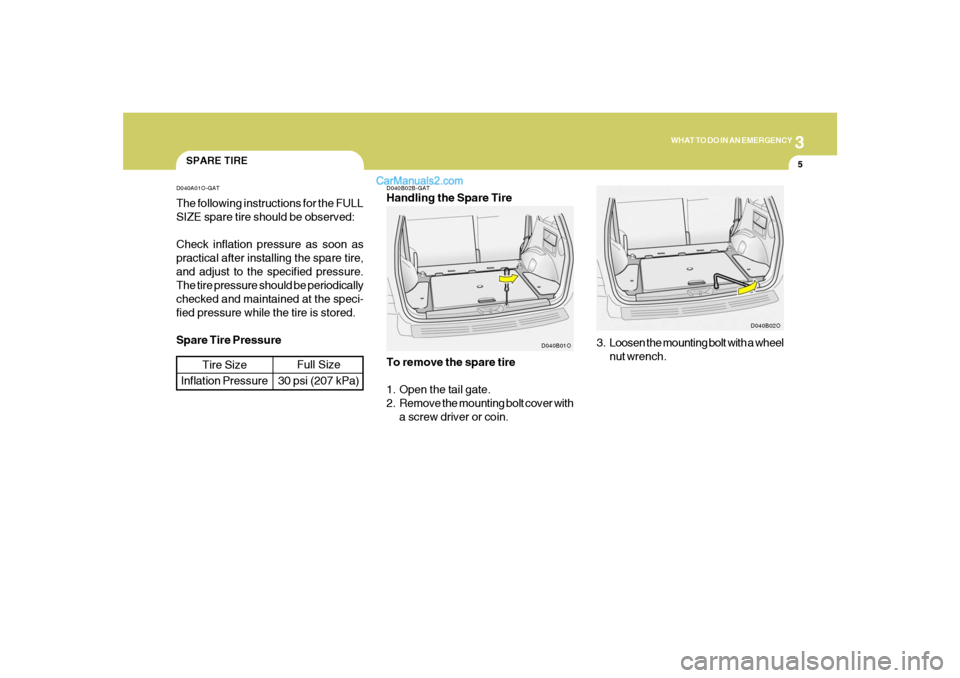
D040B02B-GATHandling the Spare Tire
Tire Size
Inflation Pressure
Full Size
30 psi (207 kPa)To remove the spare tire
1. Open the tail gate.
2. Remove the mounting bolt cover with
a screw driver or coin.
D040B01O
3. Loosen the mounting bolt with a wheel
nut wrench.
D040B02O
Page 250 of 277
Vehicle Identification Number (VIN) .............................. 8-2
Engine Number ............................................................. 8-2
Tire Information ............................................................. 8-2
Recommended Inflation Pressures ............................... 8-3
Tire Sidewall Labeling ................................................... 8-4
Tire Terminology and Definitions ................................... 8-6
Snow Tires .................................................................... 8-8
Tire Chains .................................................................... 8-9
Tire Rotation .................................................................. 8-9
Tire Balancing ............................................................... 8-9
Tire Traction................................................................8-10
When to Replace Tires ...............................................8-10
Tire Maintenance........................................................8-11
Spare Tire and Tools ...................................................8-11
Warranties for Your Hyundai Vehicle..........................8-12
Consumer Information.................................................8-12
Reporting Safety Defects............................................8-15
Binding Arbitration of Warranty Claims.......................8-15
CONSUMER INFORMATION, REPORTING
SAFETY DEFECTS & BINDING
ARBITRATION OF WARRANTY CLAIMS
8
8
Page 252 of 277
8
CONSUMER INFORMATION, REPORTING SAFETY DEFECTS & BINDING ARBITRATION OF WARRANTY CLAIMS
3
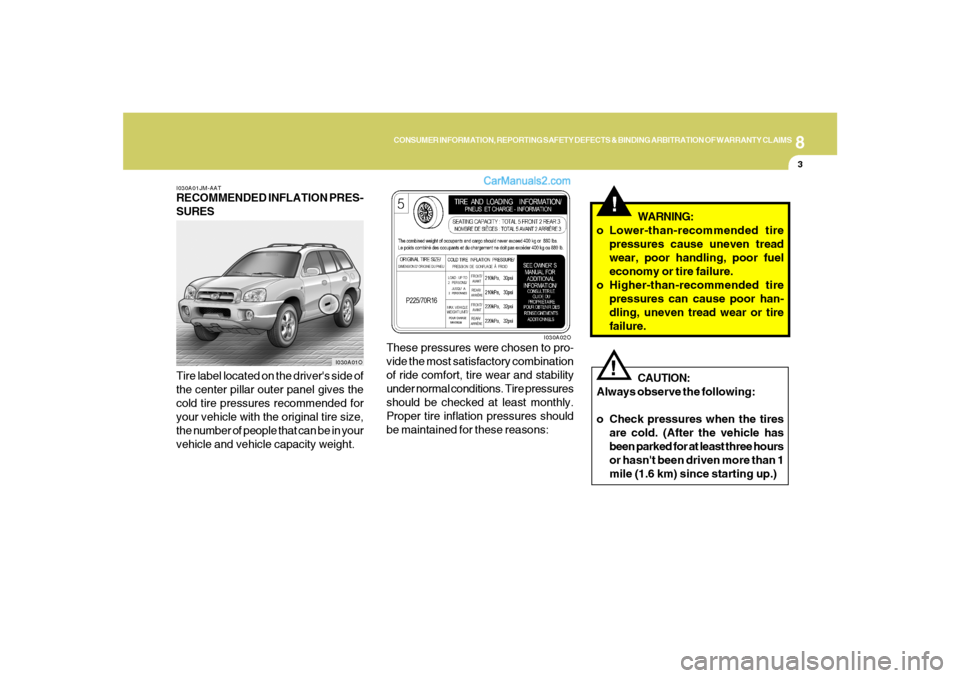
I030A01JM-AATRECOMMENDED INFLATION PRES-
SURES
Tire label located on the driver's side of
the center pillar outer panel gives the
cold tire pressures recommended for
your vehicle with the original tire size,
the number of people that can be in your
vehicle and vehicle capacity weight.These pressures were chosen to pro-
vide the most satisfactory combination
of ride comfort, tire wear and stability
under normal conditions. Tire pressures
should be checked at least monthly.
Proper tire inflation pressures should
be maintained for these reasons:
I030A02O
I030A01O
!
CAUTION:
Always observe the following:
o Check pressures when the tires
are cold. (After the vehicle has
been parked for at least three hours
or hasn't been driven more than 1
mile (1.6 km) since starting up.)
!
WARNING:
o Lower-than-recommended tire
pressures cause uneven tread
wear, poor handling, poor fuel
economy or tire failure.
o Higher-than-recommended tire
pressures can cause poor han-
dling, uneven tread wear or tire
failure.
Page 253 of 277
8
CONSUMER INFORMATION, REPORTING SAFETY DEFECTS & BINDING ARBITRATION OF WARRANTY CLAIMS4
at them. Radial tires may look properly
inflated even when they're underinflated.
Check the tire's inflation pressure when
the tires are cold. - "Cold" means your
vehicle has been sitting for at least
three hours or driven no more than 1
mile (1.6 km).
Remove the valve cap from the tire
valve stem. Press the tire gauge firmly
onto the valve to get a pressure mea-
surement. If the cold tire inflation pres-
sure matches the recommended pres-
sure on the tire and loading information
label, no further adjustment is neces-
sary. If the pressure is low, add air until
you reach the recommended amount.
If you overfill the tire, release air by
pushing on the metal stem in the center
of the tire valve. Recheck the tire pres-
sure with the tire gauge. Be sure to put
the valve caps back on the valve stems.
They help prevent leaks by keeping out
dirt and moisture. o Check the pressure of your spare
tire each time you check the pres-
sure of other tires.
o Never overload your vehicle. Be
especially careful about overload-
ing if you equip your vehicle with
a luggage rack.
o Worn, old tires can cause acci-
dents. If your tread is badly worn,
or if your tires have been dam-
aged, replace them.
I035A01JM-AATCHECKING TIRE INFLATION PRES-
SURE
Check your tires once a month or more.
Also, check the tire pressure of the
spare tire.
How to Check
Use a good quality gauge to check tire
pressure. You cannot tell if your tires
are properly inflated simply by looking
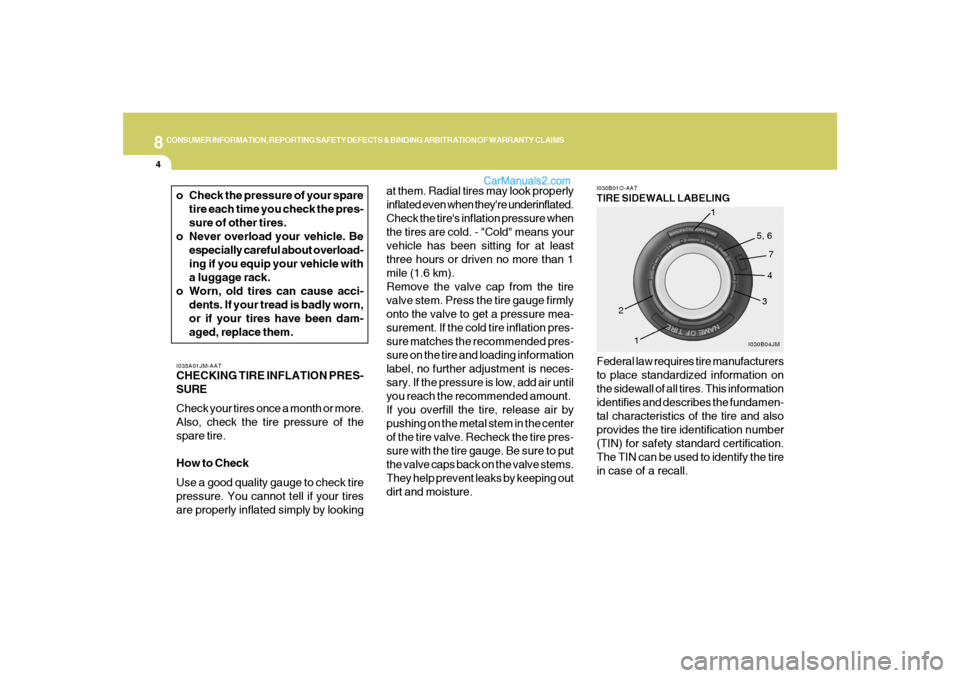
Federal law requires tire manufacturers
to place standardized information on
the sidewall of all tires. This information
identifies and describes the fundamen-
tal characteristics of the tire and also
provides the tire identification number
(TIN) for safety standard certification.
The TIN can be used to identify the tire
in case of a recall.I030B01O-AATTIRE SIDEWALL LABELING
I030B04JM
1
234 5, 6
7
1
Page 254 of 277
8
CONSUMER INFORMATION, REPORTING SAFETY DEFECTS & BINDING ARBITRATION OF WARRANTY CLAIMS
5
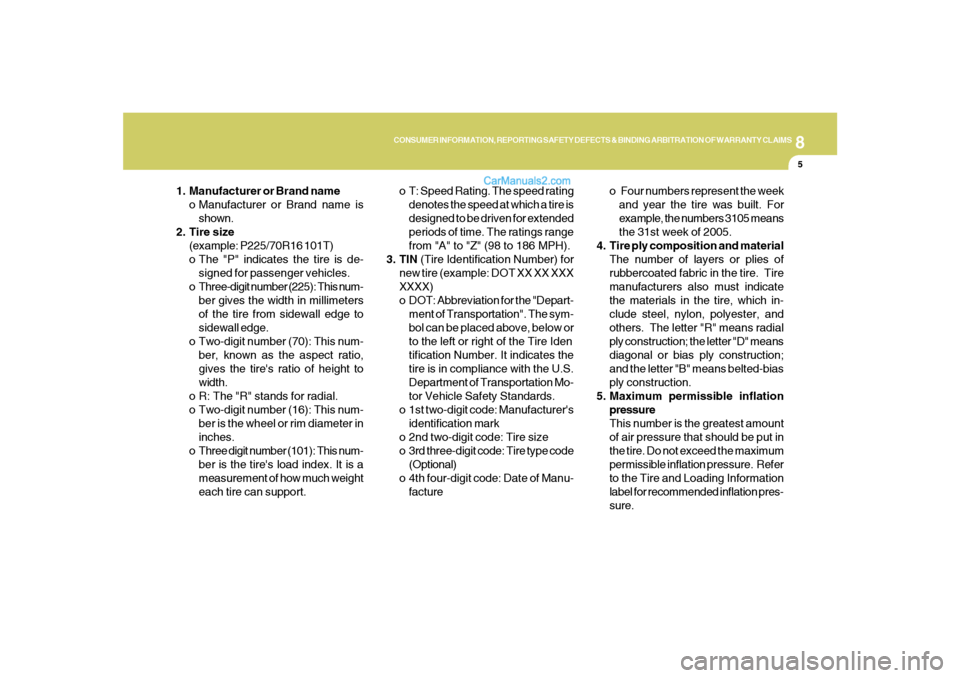
1. Manufacturer or Brand name
o Manufacturer or Brand name is
shown.
2. Tire size
(example: P225/70R16 101T)
o The "P" indicates the tire is de-
signed for passenger vehicles.
o Three-digit number (225): This num-
ber gives the width in millimeters
of the tire from sidewall edge to
sidewall edge.
o Two-digit number (70): This num-
ber, known as the aspect ratio,
gives the tire's ratio of height to
width.
o R: The "R" stands for radial.
o Two-digit number (16): This num-
ber is the wheel or rim diameter in
inches.
o Three digit number (101): This num-
ber is the tire's load index. It is a
measurement of how much weight
each tire can support.o T: Speed Rating. The speed rating
denotes the speed at which a tire is
designed to be driven for extended
periods of time. The ratings range
from "A" to "Z" (98 to 186 MPH).
3. TIN (Tire Identification Number) for
new tire (example: DOT XX XX XXX
XXXX)
o DOT: Abbreviation for the "Depart-
ment of Transportation". The sym-
bol can be placed above, below or
to the left or right of the Tire Iden
tification Number. It indicates the
tire is in compliance with the U.S.
Department of Transportation Mo-
tor Vehicle Safety Standards.
o 1st two-digit code: Manufacturer's
identification mark
o 2nd two-digit code: Tire size
o 3rd three-digit code: Tire type code
(Optional)
o 4th four-digit code: Date of Manu-
factureo Four numbers represent the week
and year the tire was built. For
example, the numbers 3105 means
the 31st week of 2005.
4. Tire ply composition and material
The number of layers or plies of
rubbercoated fabric in the tire. Tire
manufacturers also must indicate
the materials in the tire, which in-
clude steel, nylon, polyester, and
others. The letter "R" means radial
ply construction; the letter "D" means
diagonal or bias ply construction;
and the letter "B" means belted-bias
ply construction.
5. Maximum permissible inflation
pressure
This number is the greatest amount
of air pressure that should be put in
the tire. Do not exceed the maximum
permissible inflation pressure. Refer
to the Tire and Loading Information
label for recommended inflation pres-
sure.