2005 Hyundai Santa Fe clock
[x] Cancel search: clockPage 10 of 277

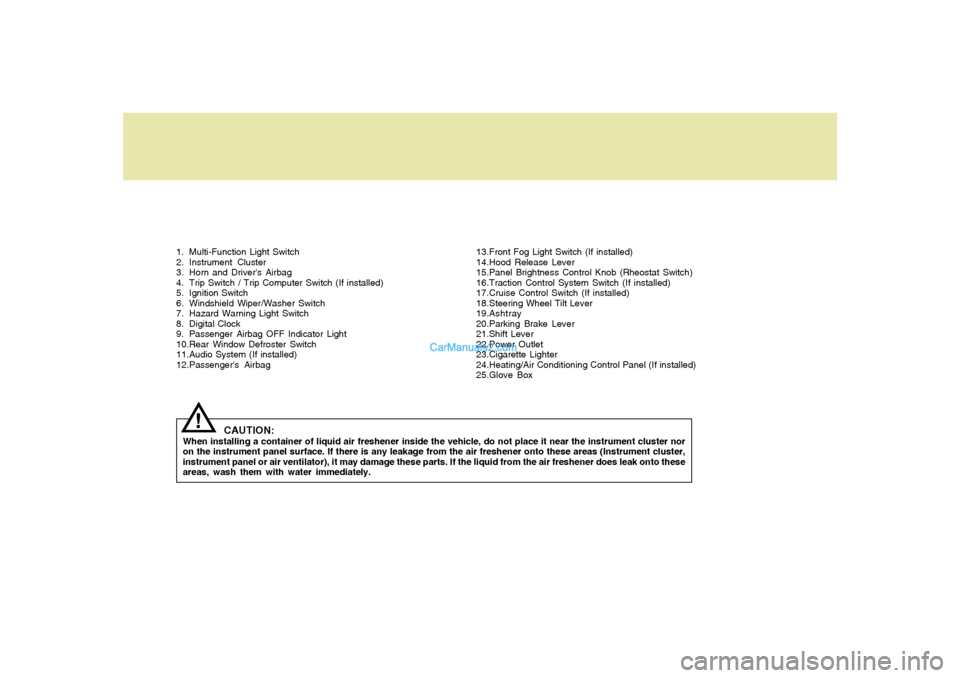
1. Multi-Function Light Switch
2. Instrument Cluster
3. Horn and Driver's Airbag
4. Trip Switch / Trip Computer Switch (If installed)
5. Ignition Switch
6. Windshield Wiper/Washer Switch
7. Hazard Warning Light Switch
8. Digital Clock
9. Passenger Airbag OFF Indicator Light
10.Rear Window Defroster Switch
11.Audio System (If installed)
12.Passenger's Airbag13.Front Fog Light Switch (If installed)
14.Hood Release Lever
15.Panel Brightness Control Knob (Rheostat Switch)
16.Traction Control System Switch (If installed)
17.Cruise Control Switch (If installed)
18.Steering Wheel Tilt Lever
19.Ashtray
20.Parking Brake Lever
21.Shift Lever
22.Power Outlet
23.Cigarette Lighter
24.Heating/Air Conditioning Control Panel (If installed)
25.Glove Box
CAUTION:
When installing a container of liquid air freshener inside the vehicle, do not place it near the instrument cluster nor
on the instrument panel surface. If there is any leakage from the air freshener onto these areas (Instrument cluster,
instrument panel or air ventilator), it may damage these parts. If the liquid from the air freshener does leak onto these
areas, wash them with water immediately.
!
Page 54 of 277

1
FEATURES OF YOUR HYUNDAI
43
!
B240C02O-AATSRS Careo The SRS is virtually maintenance free and
there are no parts you can safely service by
yourself. If the SRS SRI (Service Reminder
Indicator) does not illuminate, or continu-
ously remains on, have your vehicle imme-
diately inspected by your Hyundai dealer
o Any work on the SRS system, such as
removing, installing, repairing, or any work
on the steering wheel or front seats must be
performed by a qualified Hyundai technician.
Improper handling of the airbag system may
result in serious personal injury. o To prevent unexpected deployment of
the side impact air bag that may result in
personal injury, avoid impact to the side
impact airbag sensor when the ignition
key is on.
WARNING:
WARNING:
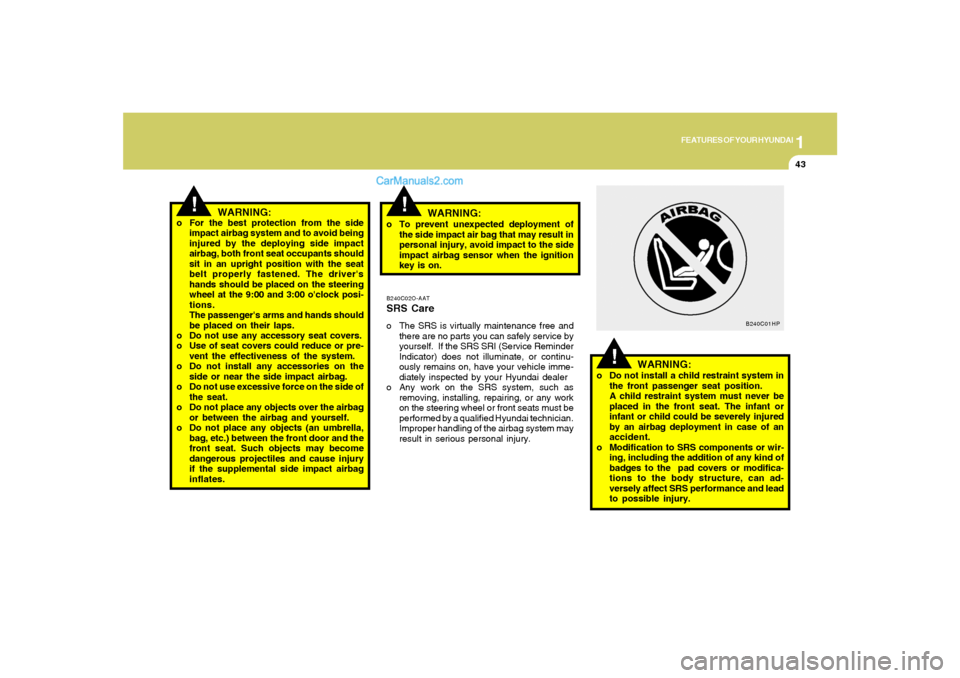
o Do not install a child restraint system in
the front passenger seat position.
A child restraint system must never be
placed in the front seat. The infant or
infant or child could be severely injured
by an airbag deployment in case of an
accident.
o Modification to SRS components or wir-
ing, including the addition of any kind of
badges to the pad covers or modifica-
tions to the body structure, can ad-
versely affect SRS performance and lead
to possible injury.
!
!
o For the best protection from the side
impact airbag system and to avoid being
injured by the deploying side impact
airbag, both front seat occupants should
sit in an upright position with the seat
belt properly fastened. The driver's
hands should be placed on the steering
wheel at the 9:00 and 3:00 o'clock posi-
tions.
The passenger's arms and hands should
be placed on their laps.
o Do not use any accessory seat covers.
o Use of seat covers could reduce or pre-
vent the effectiveness of the system.
o Do not install any accessories on the
side or near the side impact airbag.
o Do not use excessive force on the side of
the seat.
o Do not place any objects over the airbag
or between the airbag and yourself.
o Do not place any objects (an umbrella,
bag, etc.) between the front door and the
front seat. Such objects may become
dangerous projectiles and cause injury
if the supplemental side impact airbag
inflates.
WARNING:
B240C01HP
Page 74 of 277

1
FEATURES OF YOUR HYUNDAI
63
DIGITAL CLOCK
NOTE:
The ignition must be in the "ON" position
for the rear window defroster to operate.
B400A01A-AATThere are three control buttons for the digital
clock. Their functions are:
HOUR - Push "H" to advance the hour indi-
cated.
MIN - Push "M" to advance the minute indicated.
RESET - Push "R" to reset minutes to ":00" to
facilitate resetting the clock to the correct time.
When this is done:
Pressing "R" between 10 : 30 and 11 : 29
changes the readout to 11 : 00.
Pressing "R" between 11 : 30 and 12 : 29
changes the readout to 12 : 00.
B400A01O-A
CAUTION:
Do not clean the inner side of the rear
window glass with an abrasive type of glass
cleaner or use a scraper to remove foreign
deposits from the inner surface of the glass
as this may cause damage to the defroster
elements.
!
ELECTRIC AZIMUTH COMPASSB990C01O-AAT(With sunroof) (If installed)It displays 8 azimuth according to the vehicle’s
driving direction and the angle of one graduation
is 45°.
The indication is displayed only when the ve-
hicle is in motion.
Heading Display
E : East, W: West,
S : South, N : North
ex) NW : North WestNOTE:If new vehicle is first driven or if the battery
has been disconnected, correct the azi-
muth indicator before driving.
B990C01O
Page 81 of 277

1FEATURES OF YOUR HYUNDAI70
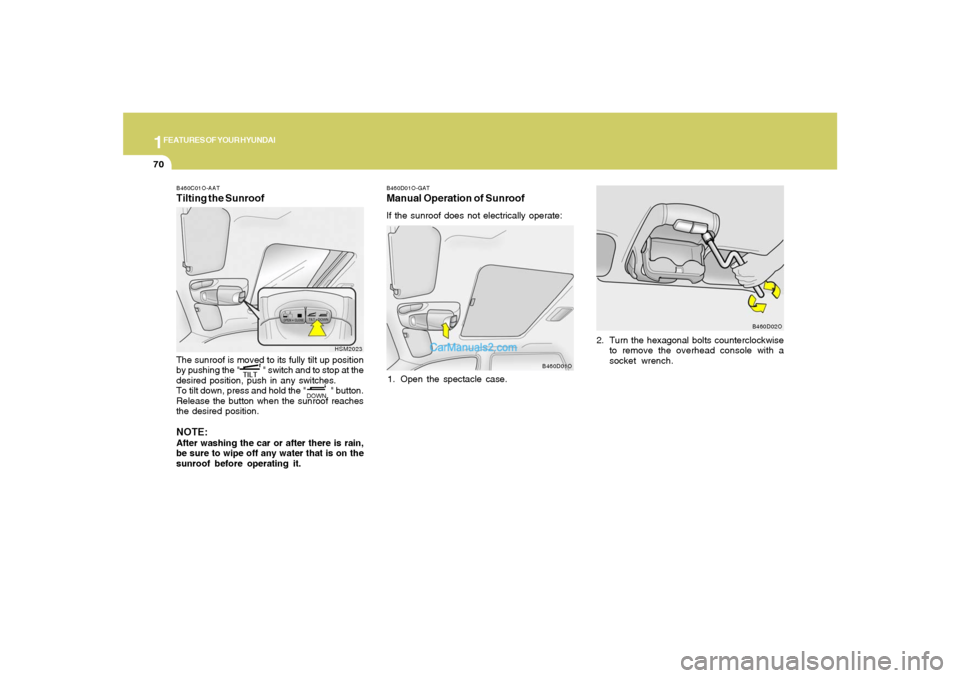
B460D01O-GATManual Operation of SunroofIf the sunroof does not electrically operate:
1. Open the spectacle case.2. Turn the hexagonal bolts counterclockwise
to remove the overhead console with a
socket wrench.
B460D01OB460D02O
B460C01O-AATTilting the SunroofThe sunroof is moved to its fully tilt up position
by pushing the " " switch and to stop at the
desired position, push in any switches.
To tilt down, press and hold the " " button.
Release the button when the sunroof reaches
the desired position.NOTE:After washing the car or after there is rain,
be sure to wipe off any water that is on the
sunroof before operating it.
HSM2023
Page 82 of 277

1
FEATURES OF YOUR HYUNDAI
71
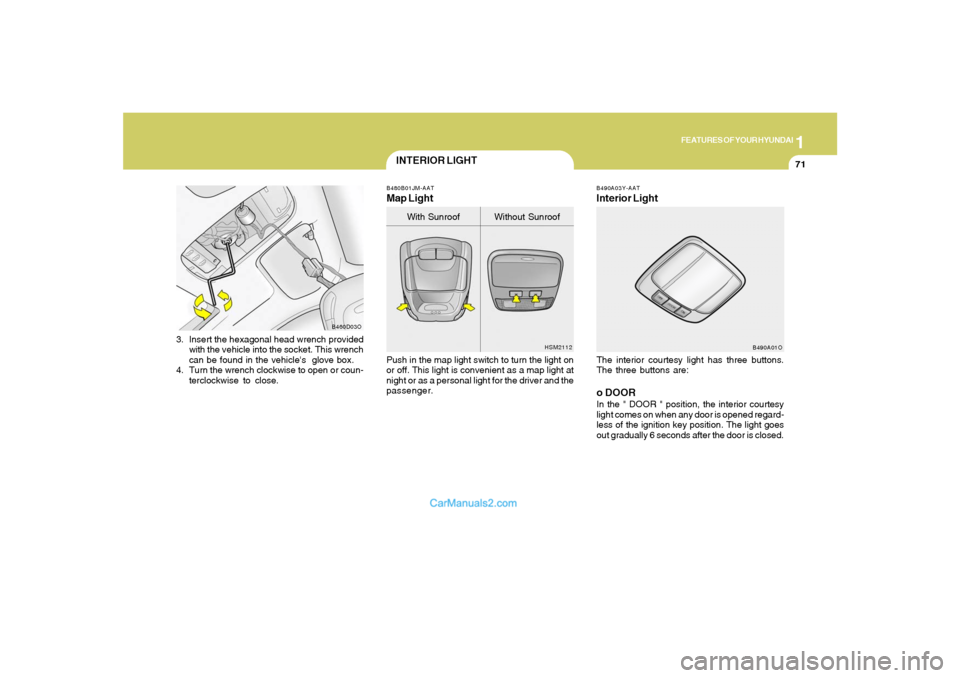
3. Insert the hexagonal head wrench provided
with the vehicle into the socket. This wrench
can be found in the vehicle's glove box.
4. Turn the wrench clockwise to open or coun-
terclockwise to close.
B460D03O
INTERIOR LIGHT
B490A03Y-AATInterior LightThe interior courtesy light has three buttons.
The three buttons are:o DOORIn the " DOOR " position, the interior courtesy
light comes on when any door is opened regard-
less of the ignition key position. The light goes
out gradually 6 seconds after the door is closed.
B490A01O B480B01JM-AAT
Map LightPush in the map light switch to turn the light on
or off. This light is convenient as a map light at
night or as a personal light for the driver and the
passenger.
HSM2112
With Sunroof Without Sunroof
Page 123 of 277

1FEATURES OF YOUR HYUNDAI
112
H260B04O-AAT1. POWER ON-OFF Control KnobThe radio unit may be operated when the ignition
key is in the "ACC" or "ON" position. Press the
knob to switch the power on. The LCD shows
the radio frequency in the radio mode or the CD
track indicator in the CD mode. To switch the
power off, press the knob again.VOLUME ControlRotate the knob clockwise to increase the
volume and turn the knob counterclockwise to
reduce the volume.BALANCE ControlPull and turn the control knob clockwise to
emphasize right speaker sound (left speaker
sound will be attenuated). When the control
knob is turned counterclockwise, left speaker
sound will be emphasized (right speaker sound
will be attenuated).2. FAD (Fader Control) KnobTurn the control knob counterclockwise to
emphasize front speaker sound (rear speaker
sound will be attenuated). When the control
knob is turned clockwise, rear speaker sound
will be emphasized (front speaker sound will be
attenuated).
3. BASS Control KnobPress to pop the knob out and turn to the left or
right for the desired bass tone.TREB (Treble Control) KnobPull the bass control knob further out.
Turn to the left or right for the desired treble tone.4. SCAN ButtonWhen the scan button is pressed, the frequency
will increase and the receivable stations will be
tuned in one after another, receiving each sta-
tion for 5 seconds. To stop scanning, press the
scan button again.5. TUNE (Manual) Select ButtonPress the ( ) side or ( ) side to increase or to
decrease the frequency. Press either button
and hold down to continuously scroll.
Release button once the desired station is
reached.
SEEK Operation
(Automatic Channel Selection)Press the TUNE select button for 0.5 sec or
more. Releasing it will automatically tune to the
next available station with a beep sound.
When the ( ) side is pressed longer than 0.5
second, releasing will automatically tune to the
next higher frequency and when the ( ) side is
pressed longer than 0.5 second, releasing will
automatically tune to the next lower frequency.6. BAND SelectorPressing the button changes the AM, FM1
and FM2 bands. The mode selected is dis-
played on LCD.7. PRESET STATION SELECT ButtonSix (6) stations for AM, FM1 or FM2 respec-
tively can be preset in the electronic memory
circuit on this unit.
FM/AM
Page 130 of 277

1
FEATURES OF YOUR HYUNDAI
119
D285B02O-AAT1. POWER ONPress this knob to turn the system on and off.VOLUME ControlTurn the knob clockwise to increase volume.
Turn it counterclockwise to decrease volume.2. BAND Select ButtonPress this button to switch between AM, FM1
and FM2. The display will show your selection.3. RADIO STATION Control KnobTurn this knob to tune to radio stations.4. SEEK/SCAN Button
SEEKPress the up or down arrow to seek to the next
or previous station and stay there. The sound
will mute while seeking.
SCANPress and hold one of the arrows for more than
two seconds. The radio will produce one beep.
The radio will produce one beep. The radio will
scan to each stations, play for a few seconds,
then go on to the next station. Press one of the
arrows or one of the pushbuttons again to stop
scanning. SCAN will be displayed whenever the
tuner is in the scan mode. In FM mode, this
function will scan through the current band such
as FM1 or FM2. The radio will scan stations with
a strong signal only. The sound will mute while
scanning.5. PRESET STATION Select ButtonThe six numbered pushbuttons let you return to
your favorite stations. You can set up to 18
stations (six AM, six FM1 and six FM2) by
performing the following steps:
1. Turn the radio on.
2. Press BAND select button to select AM, FM1
of FM2.
3. Tune in the desired station.
4. Press AUTO EQ to choose the bass and
treble equalization that best suits the type of
station you are listening to.5. Press and hold one of the six numbered
pushbuttons. The radio will produce one
beep. Whenever you press that numbered
pushbutton, the station you set will return
and the bass and treble equalization that you
selected will also be automatically selected
for that pushbutton.
6. Repeat the above steps for each pushbutton.
6. AUDIO Knob
Setting the Tone (BASS/Treble)Push and release the AUDIO knob until BASS
or TREB appears on the display. Turn the knob
clockwise or counterclockwise to increase or
decrease. The display will show the bass or
treble level. If a station is weak or noisy, you may
want to decrease the treble.
To adjust bass and treble to the middle position,
push and hold the AUDIO knob. The radio will
produce one beep and adjust the display level
to the middle position.
To adjust all tone and speaker controls to the
middle position, push and hold the AUDIO knob
when no tone or speaker control is displayed.
The radio will produce one beep and display
CENTERED.
Page 131 of 277

1FEATURES OF YOUR HYUNDAI
120
Adjusting the Speakers (Balance/Fade)To adjust the balance between the right and left
speakers, push and release the AUDIO knob
until BAL appears on the display. Turn the knob
clockwise to move the sound to the right speak-
ers and counterclockwise to move the sound to
the left speakers.
To adjust the fade between the front and rear
speakers push and release the AUDIO knob
until FADE appears on the display. Turn the
knob clockwise to move the sound to the front
speakers and counterclockwise to move the
sound to the rear speakers.
The middle position balances the sound be-
tween the speakers. To adjust the balance and
fade to the middle position, push the AUDIO
knob then push it again and hold it until you hear
one beep. The balance and fade will be adjusted
to the middle position and the display will show
the speaker balance.
To adjust all tone and speaker controls to the
middle position, push and hold the AUDIO knob
when no tone or speaker control is display ALL
with the level display in the middle position.
7. AUTO EQUALIZERThis feature allows you to choose bass and
treble equalization settings designed for coun-
try jazz, news, pop, rock and classical stations.
Each time you press the AUTO TONE button,
this feature will change to one of the preset
equalization settings previously listed.
To return the bass and treble to the custom
mode, push and release the AUDIO knob until
custom is displayed.8. Tips About Your Audio SystemHearing damage form loud noise is almost
undetectable until it is too late. Your hearing can
adapt to higher volumes of sound. Sound that
seems normal can be loud and harmful to your
hearing. Take precautions by adjusting the
volume control on your radio to a safe sound
level before your hearing adapts to it.
To help avoid hearing loss or damage do the
following:
1. Adjust the volume knob to the lowest setting.
2. Increase volume slowly until you hear com-
fortably and clearly.
CAUTION:
o Do not place beverages close to the
audio system. The audio system mecha-
nism may be damaged if you spill them.
o Do not impact on the audio system, or
the audio system mechanism could be
damaged.
!