Page 115 of 205

44IN CASE OF EMERGENCY
14
!
!
1) If any of the loaded wheels or sus-
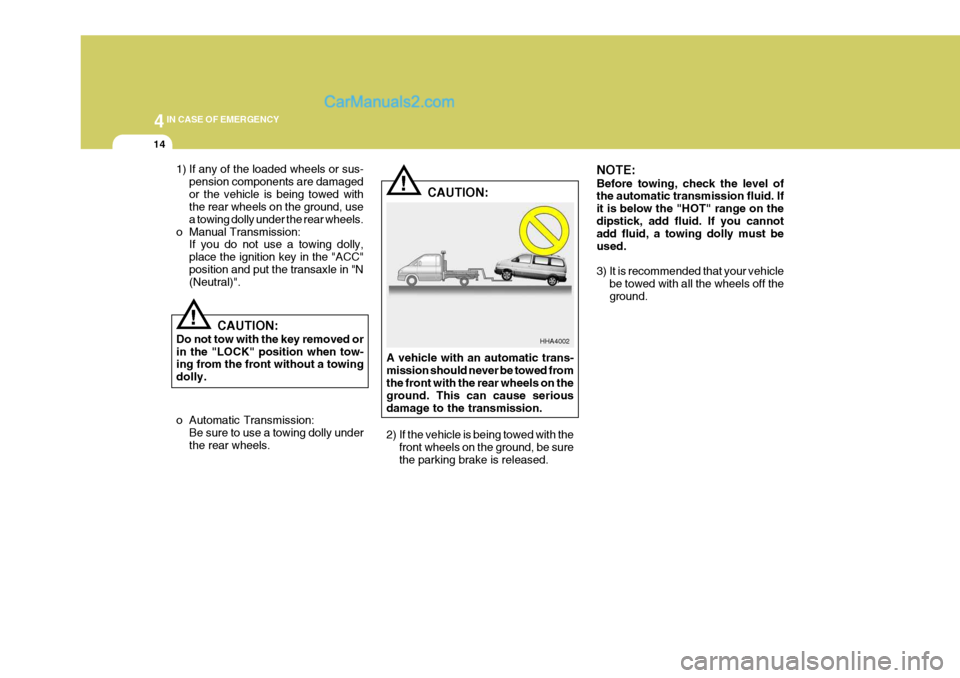
pension components are damaged or the vehicle is being towed with the rear wheels on the ground, use a towing dolly under the rear wheels.
o Manual Transmission: If you do not use a towing dolly,place the ignition key in the "ACC"position and put the transaxle in "N (Neutral)".
HHA4002
CAUTION:
Do not tow with the key removed or in the "LOCK" position when tow- ing from the front without a towing dolly. A vehicle with an automatic trans-mission should never be towed from the front with the rear wheels on the ground. This can cause seriousdamage to the transmission.
2) If the vehicle is being towed with the
front wheels on the ground, be sure the parking brake is released.
o Automatic Transmission:
Be sure to use a towing dolly under the rear wheels. CAUTION:
NOTE: Before towing, check the level of the automatic transmission fluid. If it is below the "HOT" range on thedipstick, add fluid. If you cannot add fluid, a towing dolly must be used.
3) It is recommended that your vehicle
be towed with all the wheels off the ground.
Page 117 of 205

44IN CASE OF EMERGENCY
16
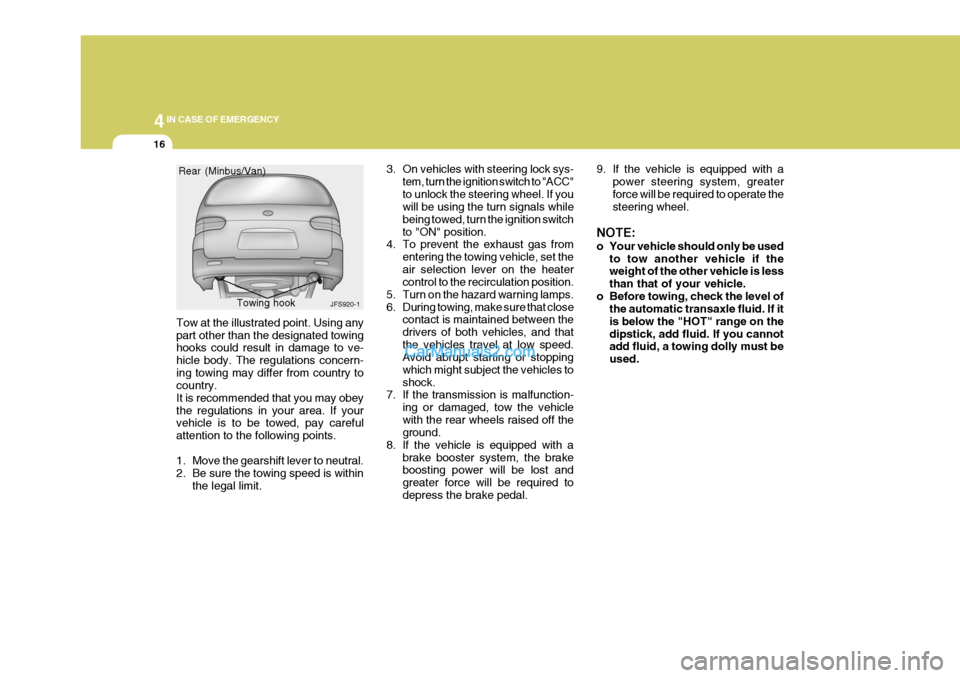
Tow at the illustrated point. Using any part other than the designated towing hooks could result in damage to ve- hicle body. The regulations concern-ing towing may differ from country to country. It is recommended that you may obeythe regulations in your area. If your vehicle is to be towed, pay careful attention to the following points.
1. Move the gearshift lever to neutral.
2. Be sure the towing speed is within
the legal limit. 3. On vehicles with steering lock sys-
tem, turn the ignition switch to "ACC"to unlock the steering wheel. If you will be using the turn signals while being towed, turn the ignition switchto "ON" position.
4. To prevent the exhaust gas from
entering the towing vehicle, set theair selection lever on the heater control to the recirculation position.
5. Turn on the hazard warning lamps.
6. During towing, make sure that close contact is maintained between thedrivers of both vehicles, and thatthe vehicles travel at low speed. Avoid abrupt starting or stopping which might subject the vehicles toshock.
7. If the transmission is malfunction-
ing or damaged, tow the vehiclewith the rear wheels raised off the ground.
8. If the vehicle is equipped with a brake booster system, the brakeboosting power will be lost and greater force will be required todepress the brake pedal.
JFS920-1
Rear (Minbus/Van)
Towing hook
9. If the vehicle is equipped with apower steering system, greater force will be required to operate the steering wheel.
NOTE:
o Your vehicle should only be used to tow another vehicle if the weight of the other vehicle is less than that of your vehicle.
o Before towing, check the level of the automatic transaxle fluid. If itis below the "HOT" range on thedipstick, add fluid. If you cannot add fluid, a towing dolly must be used.
Page 165 of 205

6VEHICLE MAINTENANCE REQUIREMENTS
14
G080N01P-GAT
o Brake Hoses and Lines
Visually check for proper installation,
chafing, cracks, deterioration and any leakage. Replace any deteriorated or damaged parts immediately.
G080O01P-GAT
o Brake Fluid
Check brake fluid level in the brake
fluid reservoir. The level should be between "MIN" and "MAX" marks on the side of the reservoir. Use onlyhydraulic brake fluid conforming SAE J1703.
G080P01P-GAT
o Rear Brake Drums and
Linings
Check for scoring, burning, leaking
fluid, broken parts, and excessive wear. G080Q01P-GAT
o Brake Pads, Calipers and
Rotors
Check the pads for excessive wear, discs for run out and wear, and cali- pers for fluid leakage. G080R01P-GAT
o Parking Brake
Inspect the parking brake system such as parking brake lever, cables, and so on. For detailed service procedures,refer to the Shop Manual.
G080S01P-GAT
o Exhaust Pipe Connections,
Muffler and Suspension Bolts
Check the exhaust pipe, muffler, and
suspension connections for loosenessor damage.
G080L01P-GAT
o Manual Transmission Oil Check manual transmission oil ac- cording to the maintenance schedule. NOTE: If the oil level is low, check for possible leaks before adding oil. Do not overfill. G080M03P-GAT
o Automatic Transmission Fluid The fluid level should be in the "HOT" range of the dipstick, after engine and transmission are at normal operatingtemperature. Check the Automatic Transmission Fluid level with the en- gine running and the transmission inneutral, with the parking brake properly applied. Use MOBIL DEXRON-II or DIAMOND ATF SP-I when adding orchanging fluid.
Page 171 of 205
8DO-IT YOURSELF MAINTENANCE
2ENGINE COMPARTMENT
1. Windshield washer fluid reservoir cap
2. Engine oil filler cap
3. Engine oil level dipstick
I010A01P-GAT DIESEL ENGINE (2.6 N/A)
4. Brake booster
5. Brake fluid reservoir
6. Radiator cap
7. Air cleaner 8. Power steering fluid reservoir
9. Battery
10.Engine coolant reservoirI010A01P-1
Page 172 of 205
8
DO-IT YOURSELF MAINTENANCE
3
I010B01P-GAT
DIESEL ENGINE (2.5 4D56 TCI)
1. Windshield washer fluid reservoir cap
2. Automatic transmission fluid level dipstick (If installed)
3. Engine oil filler cap 4. Engine oil level dipstick
5. Brake booster
6. Brake fluid reservoir
7. Engine coolant reservoir
8. Air cleaner 9. Power steering fluid reservoir
10.Battery
11.Fuse and relay boxI010B02P
Page 173 of 205
8DO-IT YOURSELF MAINTENANCE
4
I010C01P-GAT DIESEL ENGINE (2.5 CRDi TCI)
1. Windshield washer fluid reservoircap
2. Engine oil filler cap
3. Brake booster 4. Brake fluid reservoir
5. Engine coolant reservoir
6. Air cleaner
7. Power steering fluid reservoir 8. Engine oil level dipstick
9. Battery
10.Fuse and relay boxI010C02P
CAUTION:
When inspecting or servic-ing the engine, you should handle tools and other heavy objects carefully sothat the plastic cover of the engine is not damaged.
!
Page 174 of 205
8
DO-IT YOURSELF MAINTENANCE
5
I011A02P-GAT
GASOLINE ENGINE (2.4 DOHC)
1. Windshield washer fluid reservoir
cap
2. Engine oil filler cap
3. Engine oil level dipstick 4. Brake booster
5. Brake fluid reservoir
6. Radiator cap
7. Air cleaner
8. Power steering oil tank
9. Battery
10.Fuse and relay boxI011A03P
CAUTION:
When inspecting or servic-ing the engine, you should handle tools and other heavy objects carefully sothat the plastic cover of the engine is not damaged.
!
Page 178 of 205

8
DO-IT YOURSELF MAINTENANCE
9
!
I060A01P-GAT
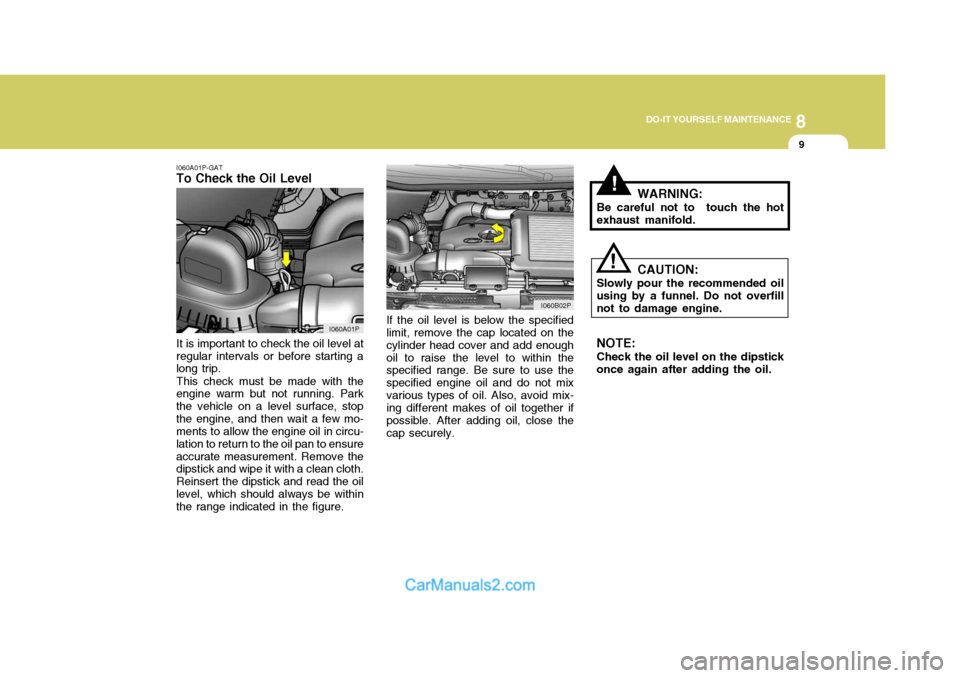
To Check the Oil Level
If the oil level is below the specified limit, remove the cap located on the cylinder head cover and add enoughoil to raise the level to within the specified range. Be sure to use the specified engine oil and do not mixvarious types of oil. Also, avoid mix- ing different makes of oil together if possible. After adding oil, close thecap securely.
It is important to check the oil level at
regular intervals or before starting a long trip.
This check must be made with the
engine warm but not running. Park the vehicle on a level surface, stopthe engine, and then wait a few mo- ments to allow the engine oil in circu- lation to return to the oil pan to ensureaccurate measurement. Remove the dipstick and wipe it with a clean cloth. Reinsert the dipstick and read the oillevel, which should always be within the range indicated in the figure. WARNING:
Be careful not to touch the hot exhaust manifold.
CAUTION:
Slowly pour the recommended oilusing by a funnel. Do not overfillnot to damage engine. NOTE: Check the oil level on the dipstick once again after adding the oil.
!
I060A01P I060B02P