2005 Hyundai Azera warning lights
[x] Cancel search: warning lightsPage 101 of 297

1FEATURES OF YOUR HYUNDAI
84FRONT/REAR WINDOW DE- FROSTER SWITCH
B380A01TG
With Automatic A/C
With Manual A/C
B380A02HP-AAT (If Installed)
The front/rear window defroster is turned on by pushing in on the switch. At thesame time, the front/rear window de- froster indicator light on the switch is turned on. To turn the defroster off,push in on the switch a second time. The front/rear window defroster auto- matically turns itself off after about 20minutes. To restart the defroster cycle, push in on the switch again after it has turned itself off. CAUTION:
Do not clean the inner side of thefront/rear window glass with an abrasive type of glass cleaner or use a scraper to remove the foreigndeposits from the inner surface of the glass as this may cause dam- age to the defroster elements. NOTE: The ignition must be in the "ON" position for the front/rear window defroster to operate.
!
The hazard warning system should be used whenever you find it necessaryto stop the car in a hazardous location. When you must make such an emer- gency stop, always pull off the road asfar as possible. The hazard warning lights are turned on by pushing in on the hazard switch.This causes all turn signal lights to blink. The hazard warning lights will operate even though the key is not inthe ignition. To turn the hazard warning lights off, push in on the switch a second time.
Page 116 of 297

1
FEATURES OF YOUR HYUNDAI
99DAY/NIGHT INSIDE REAR- VIEW MIRROR
B520A01A-AAT Manual type Your Hyundai is equipped with a day/ night inside rearview mirror. The "night" position is selected by flipping the tab at the bottom of the mirror toward you.In the "night" position, the glare of headlights of cars behind you is re- duced. HTG2079
!
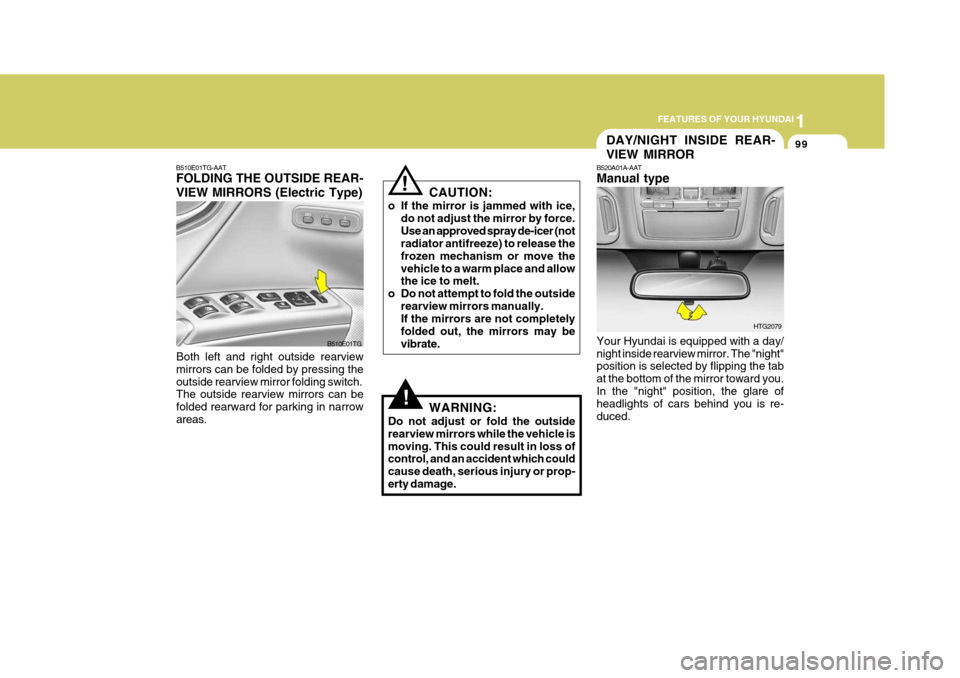
B510E01TG-AAT FOLDING THE OUTSIDE REAR- VIEW MIRRORS (Electric Type)
Both left and right outside rearview mirrors can be folded by pressing theoutside rearview mirror folding switch. The outside rearview mirrors can be folded rearward for parking in narrowareas. B510E01TGCAUTION:
o If the mirror is jammed with ice, do not adjust the mirror by force.Use an approved spray de-icer (not radiator antifreeze) to release the frozen mechanism or move thevehicle to a warm place and allow the ice to melt.
o Do not attempt to fold the outside
rearview mirrors manually.If the mirrors are not completely folded out, the mirrors may bevibrate.
!
WARNING:
Do not adjust or fold the outside rearview mirrors while the vehicle ismoving. This could result in loss of control, and an accident which could cause death, serious injury or prop-erty damage.
Page 120 of 297

1
FEATURES OF YOUR HYUNDAI
103
!WARNING:
o Fuel vapors are dangerous. Be- fore refueling, always stop the engine and never allow sparks oropen flames near the filler area. If you need to replace the filler cap, use a genuine Hyundai replace-ment part. If you open the fuel filler cap during high ambient tempera-tures, a slight "pressure sound" may be heard. This is normal and not a cause for concern.Whenever you open the fuel filler cap, turn it slowly. HTG2023
REMOTE FUEL-FILLER LID RELEASE
B560A02NF-GAT The fuel-filler lid may be opened from inside the vehicle by pushing on thefuel-filler lid opener located on the driver side door. NOTE: If the fuel-filler lid will not open because ice has formed around it, tap lightly or push on the lid tobreak the ice and release the lid. Do not pry on the lid. If necessary, spray around the lid with an ap-proved de-icer fluid (do not use radiator anti-freeze) or move the vehicle to a warm place and allowthe ice to melt. HTG2022HIGH-MOUNTED REAR STOP LIGHT
B550A01A-AAT In addition to the lower-mounted rear stop lights on either side of the car, the high mounted rear stop light in thecenter of the rear window also lights when the brakes are applied. B550A01TG
Page 187 of 297

2
DRIVING YOUR HYUNDAI
3BEFORE STARTING THE ENGINE
C020A01A-AAT Before you start the engine, you should always:
1. Look around the vehicle to be sure
there are no flat tires, puddles of oil, water or other indications of pos- sible trouble.
2. After entering the car, check to be sure the parking brake is engaged.
3. Check that all windows and lights are clean.
4. Check that the interior and exterior
mirrors are clean and in position.
5. Check your seat, seatback and headrest to be sure they are in theirproper positions.
6. Lock all the doors.
7. Fasten your seat belt and be sure
that all other occupants have fas- tened theirs.
8. Turn off all lights and accessories
that are not needed. C030A01TG-GAT COMBINATION IGNITION SWITCH
o Place the shift lever in "P" (park) and
depress the brake pedal fully.
o To start the engine, insert the ignition key and turn it to the "START" posi- tion. Release it as soon as the en-gine starts. Do not hold the key in the "START" position for more than 15 seconds.
NOTE: For safety, the engine will not start if the shift lever is not in "P" or "N" position.
9. When you turn the ignition switch to
"ON", check that all appropriatewarning lights are operating and that you have sufficient fuel.
10.Check the operation of warning
lights and all bulbs when key is inthe "ON" position. TO START THE ENGINE
Page 189 of 297

2
DRIVING YOUR HYUNDAI
5
!
STARTING
C050A01A-AAT
WARNING:
Never run the engine in a closed or poorly ventilated area any longerthan is needed to move your car in or out of the area. The carbon mon- oxide gas emitted is odorless andcan cause serious injury or death. C050B01TG-GAT Normal Conditions: The Starting Procedure:
1. Insert key, and fasten the seat belt.
2. Depress the brake pedal fully and
place the selector lever in "P" (park) position.
3. After turning the ignition key to the
"ON" position, make certain all warn-ing lights and gauges are function- ing properly before starting the en- gine.
4. Turn the ignition key to the "START" position and release it when the en-gine starts.
C050A01EAUTOMATIC TRANSAXLE
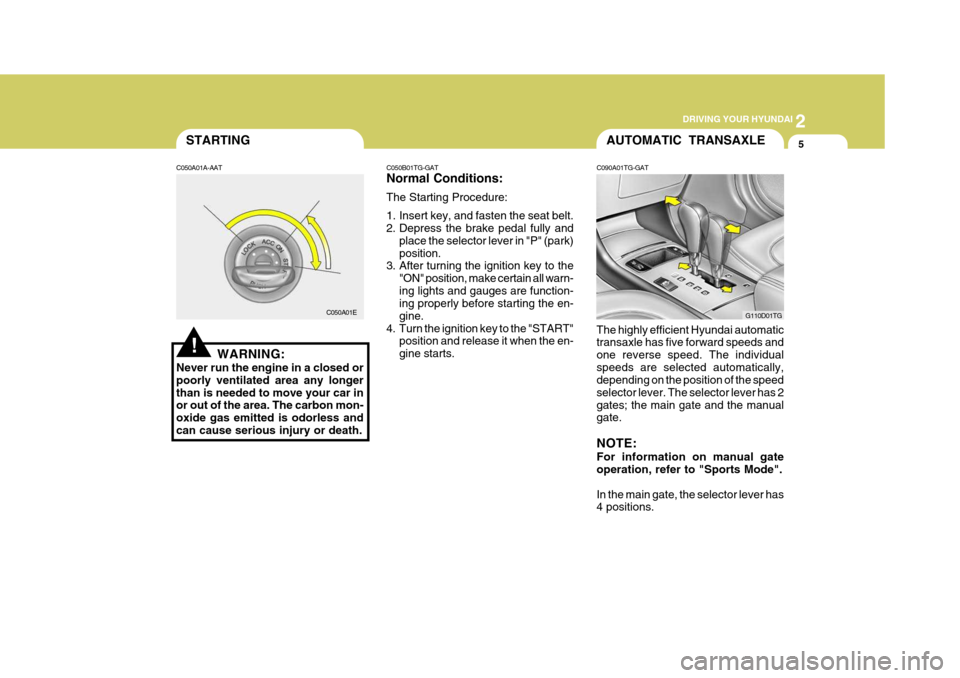
C090A01TG-GAT The highly efficient Hyundai automatic transaxle has five forward speeds and one reverse speed. The individualspeeds are selected automatically, depending on the position of the speed selector lever. The selector lever has 2gates; the main gate and the manual gate. NOTE: For information on manual gate operation, refer to "Sports Mode". In the main gate, the selector lever has 4 positions. G110D01TG
Page 210 of 297

3
WHAT TO DO IN AN EMERGENCY
3
!
JUMP STARTING
D020A02A-AAT
WARNING:
The gas produced by the battery during the jump-start operation ishighly explosive. If these instruc- tions are not followed exactly, seri- ous personal injury and damage tothe vehicle may occur! If you are not sure how to follow this proce- dure, seek qualified assistance.Automobile batteries contain sul- furic acid. This is poisonous and highly corrosive. When jump start-ing, wear protective glasses and be careful not to get acid on yourself, your clothing or on the car. o If you should accidentally get acid on
your skin or in your eyes, immedi-ately remove any contaminated cloth- ing and flush the area with clean water for at least 15 minutes. Thenpromptly obtain medical attention. If you must be transported to an emer- gency facility, continue to apply wa-ter to the affected area with a sponge or cloth.
o The gas produced by the battery
during the jump-start operation ishighly explosive. Do not smoke or allow a spark or an open flame inthe vicinity.
o The battery being used to provide
the jump start must be 12-volt. If youcannot determine that it is a 12-volt battery, do not attempt to use it for the jump start.
o To jump start a car with a discharged battery, follow this procedure ex-actly:
1. If the booster battery is installed in another vehicle, be sure the twovehicles are not touching.
2. Turn off all unnecessary lights and
accessories in both vehicles.
HTG4001
Booster battery
3. Attach the clamps of the jumper
cable in the exact location shown in the illustration. First, attach one clamp of the jumper cable to the positive (+) post or cable of thedischarged battery. Then attach the other end of the same cable to the positive (+) post or cable of thebooster battery. Next, using the other cable, attach one clamp to the negative (-) post or cable of thebooster battery. Then attach the other end of that cable to a solid metal part of the engine away from the battery.Do not connect the cable to any moving part.
4. Start the engine in the car with the booster battery and let it run for afew minutes. This will help to as- sure that the booster battery is fullycharged. During the jumping opera- tion, run the engine in this vehicle at about 2,000 rpm.
5. Start the engine in the car with the discharged battery using the normalstarting procedure. After the enginestarts, leave the jumper cables con- nected and let the engine run at fast idle or about 2,000 rpm for severalminutes.
Discharged battery
Page 211 of 297

3 WHAT TO DO IN AN EMERGENCY
4
!
!
IF THE ENGINE OVERHEATS
(If the air conditioning had been in use, it is normal for cold water to bedraining from it when you stop).
D030A01TG-AAT If your temperature gauge indicates overheating, you experience a loss of power, or hear loud pinging or knock- ing, the engine is probably too hot. Ifthis happens to you, you should:
1. Pull off the road and stop as soon as
it is safe to do so.
2. Place the gear selector lever in "P"
and set the parking brake. If the air conditioning is on, turn it off.
3. If engine coolant is running out under
the car or steam is coming out fromthe hood, stop the engine. Do not open the hood until the engine coolant has stopped running or thesteaming has stopped. If there is no visible loss of coolant and no steam, leave the engine running and checkto be sure the engine cooling fan is operating. If the fan is not running, turn the engine off.
4. Check to see if the water pump drive belt is missing. If it is not missing,check to see that it is tight. If thedrive belt seems to be satisfactory, check for engine coolant leaking from the radiator, hoses or under the car.
6. Carefully remove the jumper cables
in the reverse order of attachment.
If you do not know why your batterybecame discharged (because the lightswere left on, etc.), have the charging system checked by your Hyundai dealer. WARNING:
While the engine is running, keephands and clothing away from mov-ing parts such as the fan and drive belts to prevent injury.
5. If the water pump drive belt is broken or coolant is leaking out, stop theengine immediately and call the near- est Hyundai dealer for assistance.
WARNING:
Do not remove the radiator cap whenthe engine is hot. This can allow coolant to be blown out of the open- ing and cause serious burns.
Page 293 of 297

10INDEX
2
A Accessory Box .......................................................... 1-95
Air Cleaner Filter ........................................................ 6-10
Air Conditioning Care ........................................................................ 6-18
Filter ............................................................ 1-132, 6-18
Operation .......................................... 1-121, 1-124, 6-18
Switch ........................................................ 1-120, 1-127
Airbag ........................................................................ 1-46
Curtain airbag ......................................................... 1-54
Driver's and passenger's front airbag ...................... 1-47
Passenger's front airbag O N/OFF switch ...............1-51
Side impact airbag .................................................. 1-53
Antenna ................................................................... 1-167
Ashtray ...................................................................... 1-87
Audio System Audio remote control switch ................................. 1-112
Cassette tape player operation (M455) .................1-146
Cassette tape player operation (M465) .................1-156
Compact disc player operation (M445) .................1-139
Compact disc player operation (M455) .................1-149
Compact disc player operation (M465) .................1-159
Stereo radio operation (M445) ..............................1-136
Stereo radio operation (M455) ..............................1-143
Stereo radio operation (M465) ..............................1-153
Automatic Heating and Cooling Control System ...... 1-123BBack Warning
System ............................................... 2-12
Battery .............................................................. 2-17, 6-23
Brake Anti-lock brake system (ABS) ................................ 2-10
Checking the brakes ............................................... 6-16
Fluid ........................................................................ 6-16
Pedal clearance ...................................................... 6-20
Pedal free-play ........................................................ 6-20
Practices ................................................................ 2-13
Breaking-In your New Hyundai .................................... 1-3
C
Care of Cassette Tapes .......................................... 1-165
Care of Discs .......................................................... 1-164
Catalytic Converter ...................................................... 7-3
Child Restraint System .............................................. 1-37
Child-Protector Rear Door Lock ................................. 1-12
Cigarette Lighter ........................................................ 1-85
Clock ......................................................................... 1-85
Combination Light
Auto light ................................................................ 1-78
Daytime running lights ............................................ 1-78
Headlight flasher ..................................................... 1-79
Headlight swi tch ..................................................... 1-77
High-beam switch ................................................... 1-79
Lane change si gnal ................................................. 1-77
Parking light auto cut ............................................. 1-78
Turn signal operation .............................................. 1-77