2005 HONDA ODYSSEY ESP
[x] Cancel search: ESPPage 146 of 414

You can manually open or close the
sliding doors. The MAIN switch
must be in the OFF position. To
open a door, pull the inside or
outside door handle, and slide the
door back. It will latch in the f ully
open position. To close, pull either
handle and slide the door f orward.
When the door is almost closed, the
auto-closer will pull the door shut.
Bef ore operating the sliding doors,
check that passengers, especially
children, do not have their hands on
the edge of the sliding door or on the
door pillar. The auto-reverse motor
stops working when the door is
about to latch so the auto-closer can
pull the door shut.If there is an obstacle in the door sill,
the power sliding door may not open
or close properly. When removing
the obstacle f rom the door sill, make
sure to turn off the main switch on
the dashboard.
When replacing a flat tire, make sure
to turn of f the power sliding door
main switch on the dashboard.
Do not allow anyone to step on the
lower arm of the sliding door while
the door is open. This could damage
the sliding door mechanism.
Whenyoudrivewithchildreninyour
vehicle, use the childproof door
locks (see page ). This will
prevent children f rom opening the
doors accidentally.
Do not put any item in the door
pocket sticks out f rom the pocket. It
can prevent the doors f rom opening
or closing properly, and damage the
vehicle body.
138
On all models
On EX and Touring models
Sliding Doors
Manually Opening/Closing t he Power Sliding Door
Important Sliding Door
Precautions
Inst rument s and Cont rols
145
Closing a sliding door while any
part of a passenger is in the
door’s path can cause serious
injury.
Make sure all passengers are
clear of the doorway before
closing a sliding door.
Page 207 of 414

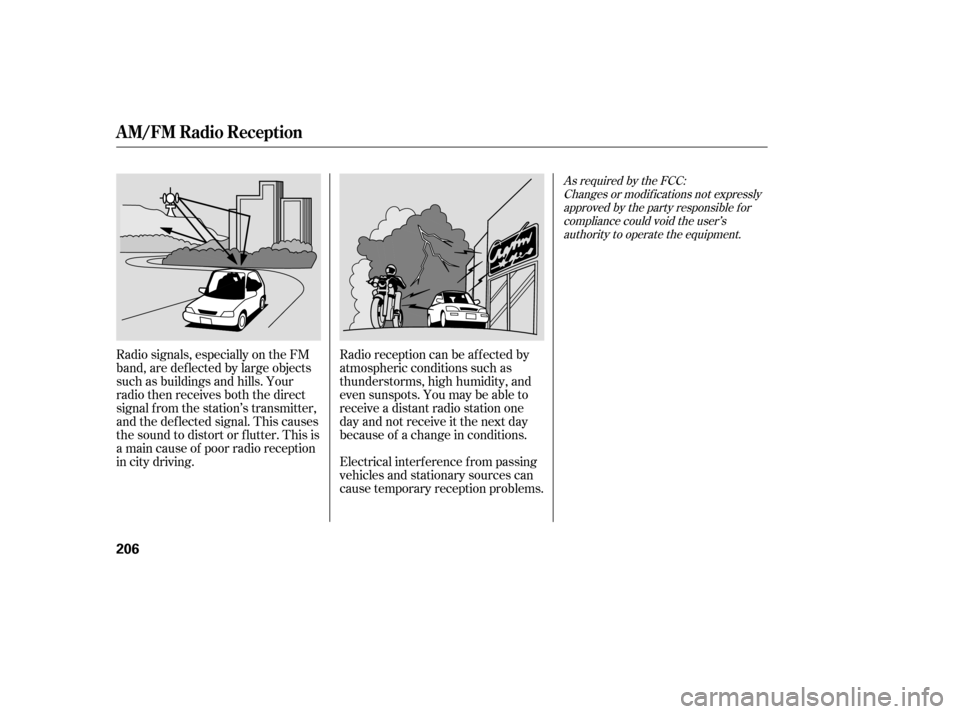
Radio signals, especially on the FM
band, are def lected by large objects
such as buildings and hills. Your
radio then receives both the direct
signal f rom the station’s transmitter,
and the def lected signal. This causes
the sound to distort or flutter. This is
a main cause of poor radio reception
in city driving.Radio reception can be af f ected by
atmospheric conditions such as
thunderstorms, high humidity, and
even sunspots. You may be able to
receive a distant radio station one
day and not receive it the next day
because of a change in conditions.
Electrical interf erence f rom passing
vehicles and stationary sources can
cause temporary reception problems.
As required by the FCC:
Changes or modif ications not expresslyapproved by the party responsible f orcompliance could void the user’sauthority to operate the equipment.
A M/FM Radio Recept ion
206
Page 212 of 414

Depending on where you drive, you
may experience reception problems.
Interf erence can be caused by any of
these conditions:Driving on the north side of a
large commercial truck on an
east/west road.
Driving in the tunnels.
Driving on a road beside a vertical
wall, steep clif f , or hill to the south
of you.
Driving on the lower level of a
multi-tiered road.
Driving on a single lane road
alongside dense trees taller than
50 ft. (15 m) to the south of you. If your XM Radio service has expired
or you purchased your vehicle f rom
a previous owner, you can listen to a
sampling of the broadcasts available
on XM Satellite Radio. With the
ignition switch in the ACCESSORY
(I) or ON (II) position, push the
PWR/VOL knob to turn on the audio
system and press the XM RADIO
button. A variety of music types and
styles will play.
If you decide to purchase XM
Satellite Radio service, contact XM
Radio at
, or at
1-800-852-9696. You will need to give
them your radio I.D. number and
your credit card number. To get your
radio I.D. number, turn the TUNE knob until ‘‘0’’ appears in the display.
Your I.D. will appear in the display.
There may be other geographic
situations that could af f ect XM radio
reception. After you’ve registered with XM
Radio, keep your audio system in the
satellite radio mode while you wait
f or activation. This should take about
30 minutes.
While waiting f or activation, make
sure your vehicle remains in an open
area with good reception. Once your
audio system is activated, ‘‘category’’
or ‘‘CH’’ will appear in the display,
andyou’llbeabletolistentoXM
radio broadcasts. XM Radio will
continue to send an activation signal
to your vehicle for at least 12 hours
from the activation request. If the
service has not been activated after
36 hours, contact XM Radio.
Driving on the north side of an
east/west mountain roadAs required by the FCC:
Changes or modif ications not expresslyapproved by the party responsible f orcompliance could void the user’sauthority to operate the equipment.
www.xmradio.com
Receiving Satellite Radio Service
Playing t he XMSatellite Radio
Features
211
Page 221 of 414

When you press the RDM button or
touch the TRACK RANDOM icon on
the upper display, the system plays
the tracks of the current disc in
random order. You will see
RANDOM (TRACK RANDOM) in
the display. To turn this feature off,
press the RDM button (touch
TRACK RANDOM) again.
Operation of TRACK SCAN, DISC
SCAN, TRACK REPEAT, DISC
REPEAT, and TRACK RANDOM on
the upper display is possible only
when the audio display is in the
upright position.
To take the system out of CD mode,
press the AM/FM button or SAT
RADIO button (U.S. models). Each
time you press the AM/FM button,
the system changes to the next
mode (AM, FM1, or FM2). When
you return to CD mode by pressing
the CD button, play will continuewhere it lef t of f .
To eject all discs, press and hold the
eject button until the indicators
above the disc buttons blink. To eject one disc, press and release
the eject button. You can also eject discs when the
ignition switch is on or of f : When you press the eject button
while listening to the radio, or with
the audio system turned of f , the disc
that was last selected is ejected.
Af ter that disc is ejected, pressing
the eject button again will eject the
next disc in numerical order. By
doing this six times, you can remove
all the discs f rom the changer. To remove the disc f rom the
changer,firstselectitbypressing
the appropriate disc button or
corresponding number on the preset
button. When that disc begins
playing, press the eject button.
If you do not remove the CD f rom
the slot, the system will reload the
CD af ter 15 seconds and put the CD
changer in pause mode. To begin
playing the CD, press the CD button. To remove the disc that is currently
playing, press the eject button. You
will see ‘‘EJECT’’ in the display.
When you remove the disc f rom the
slot, the system automatically begins
the load sequence so you can load
another disc in that position. If you
do not load another CD, within 15
seconds, the system selects the
previous mode [AM, FM1, FM2, or
XM Radio (U.S. models)]. If you turn the system of f while a CD
is playing, either with the PWR/VOL
knob or the ignition switch, play will
continue at the same point when you
turn it back on.
Playing a CD, CD Changer
Random Play
To Stop Playing a Disc Removing CDs f rom the Changer
220
Page 240 of 414

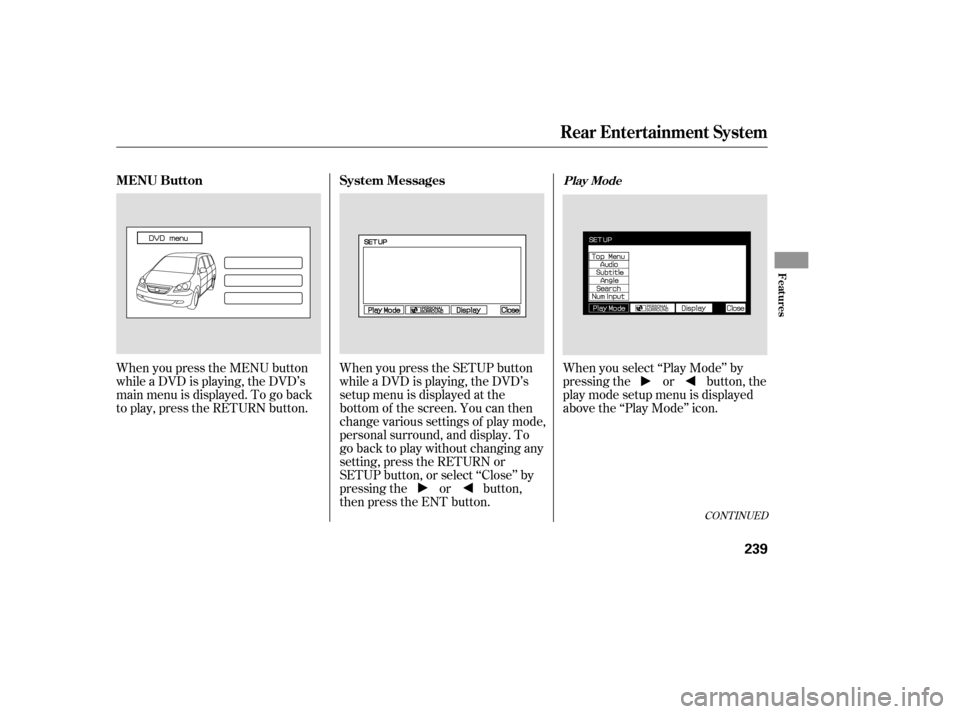
When you press the MENU button
while a DVD is playing, the DVD’s
main menu is displayed. To go back
to play, press the RETURN button.When you press the SETUP button
while a DVD is playing, the DVD’s
setup menu is displayed at the
bottom of the screen. You can then
change various settings of play mode,
personal surround, and display. To
go back to play without changing any
setting, press the RETURN or
SETUP button, or select ‘‘Close’’ by
pressing the or button,
then press the ENT button.When you select ‘‘Play Mode’’ by
pressing the or button, the
play mode setup menu is displayed
abovethe‘‘PlayMode’’icon.
CONT INUED
MENU Button
System MessagesPlay Mode
Rear Entertainment System
Features
239
Page 258 of 414

If it takes several pushes on the
button to operate the rear
entertainment system, have your
dealer replace the batteries as soon
as possible.
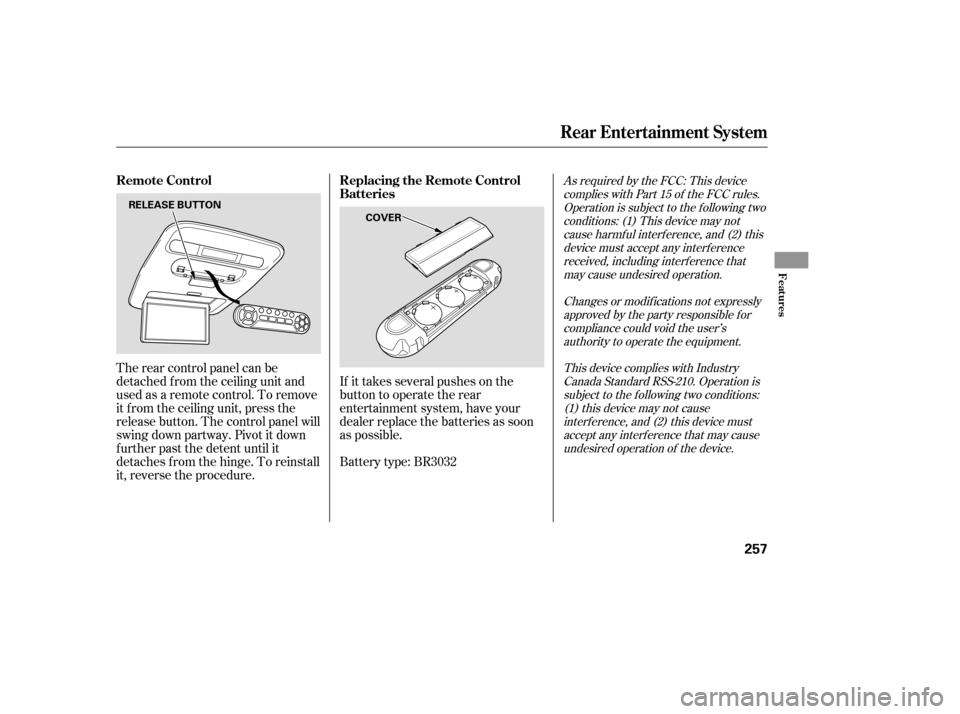
The rear control panel can be
detached f rom the ceiling unit and
used as a remote control. To remove
it f rom the ceiling unit, press the
release button. The control panel will
swing down partway. Pivot it down
f urther past the detent until it
detaches f rom the hinge. To reinstall
it, reverse the procedure.
Battery type: BR3032
As required by the FCC: This device
complies with Part 15 of the FCC rules.Operation is subject to the f ollowing twoconditions: (1) This device may notcause harmf ul interf erence, and (2) thisdevice must accept any interf erencereceived, including interf erence thatmay cause undesired operation.
Changes or modif ications not expresslyapproved by the party responsible f orcompliance could void the user’sauthority to operate the equipment.
This device complies with IndustryCanada Standard RSS-210. Operation issubject to the f ollowing two conditions:(1) this device may not causeinterf erence, and (2) this device mustaccept any interf erence that may causeundesired operation of the device.Remote Control Replacing the Remote Control
Batteries
Rear Entertainment System
Features
257
COVER
RELEASE BUTTON
Page 271 of 414

Youshoulderaseallthreecodes
bef ore selling the vehicle.If you have problems with training
the HomeLink Universal Transceiver,
or would like inf ormation on home
products that can be operated by
HomeLink, call (800) 355-3515. On
the Internet, go to
www.homelink.com.
HomeLink
is a registered
trademark of Johnson Controls, Inc.
Toerasethecodesstoredinallthree
buttons, press and hold the two
outside buttons until the red
indicator begins to f lash, then
release the buttons.
Totrainanalreadyprogrammed
HomeLink button with a new device,
you do not have to erase all the
memory. Train the selected button
over the existing memory code
f ollowing the steps under ‘‘Training
HomeLink’’.
As required by the FCC:
This device complies with Part 15 of theFCC rules. Operation is subject to thef ollowing two conditions: (1) This devicemay not cause harmf ul interf erence, and(2) this device must accept anyinterf erence received, includinginterf erence that may cause undesiredoperation.
Changes or modif ications not expresslyapproved by the party responsible f orcompliance could void the user’sauthority to operate the equipment.
This device complies with IndustryCanada Standard RSS-210.Operation is subject to the f ollowing twoconditions: (1) this device may not causeinterf erence, and (2) this device mustaccept any interf erence that may causeundesired operation of the device.
HomeL ink Universal T ransceiver
Erasing Codes
Retraining a Button Customer Assistance
270
Page 302 of 414

CONT INUED
If the VSA system indicator comes
on while driving, pull to the side of
theroadwhenitissafe,andturnoff
the engine. Reset the system by
restarting the engine. If the VSA
system indicator stays, or comes
back on while driving, have the VSA
system inspected by your dealer.
If the indicator does not come on
when the ignition switch is turned to
ON (II), there may be a problem
with the VSA system. Have your
dealer inspect your vehicle as soon
as possible.You will also see a ‘‘CHECK VSA
SYSTEM’’ message on the multi-
inf ormation display if there is a
problem with the VSA system.
The vehicle stability assist (VSA)
system helps to stabilize the vehicle
during cornering if the vehicle turns
more or less than desired. It also
assists you in maintaining traction
while accelerating on loose or
slippery road surf aces. It does this
by regulating the engine’s output,
and by selectively applying the
brakes.
The VSA system cannot enhance the
vehicle’s driving stability in all
situations and does not control your
vehicle’s entire braking system. It is
still your responsibility to drive and
corner at reasonable speeds and to
leave a sufficient margin of safety. When VSA activates, you may notice
that the engine does not respond to
the accelerator in the same way it
does at other times. When VSA activates, you will see the
VSA activation indicator blink.
If the low tire pressure indicator
comes on (see page ), or the
multi-inf ormation display shows a
‘‘CHECK TPMS SYSTEM’’ message
(see page ), the VSA system
automatically turns on even if you
turn it off with the VSA OFF button.66
84
On Touring model only
Vehicle Stability Assist (VSA) System
VSA A ctivation Indicator
VSA System Indicator
Driving
301