2005 FORD TAURUS weight
[x] Cancel search: weightPage 70 of 248
The liftgate and liftgate window should be closed before driving your
vehicle. If not, possible damage may occur to the liftgate lift cylinders
and attaching hardware.
CARGO AREA FEATURES
Storage compartment (Wagon)
Your vehicle comes equipped with a storage compartment in the floor of
the cargo area. An additional compartment is in the rear trim panel on
the right. Always put the load you are carrying as far forward as possible.
Cargo net (if equipped) (Wagon)
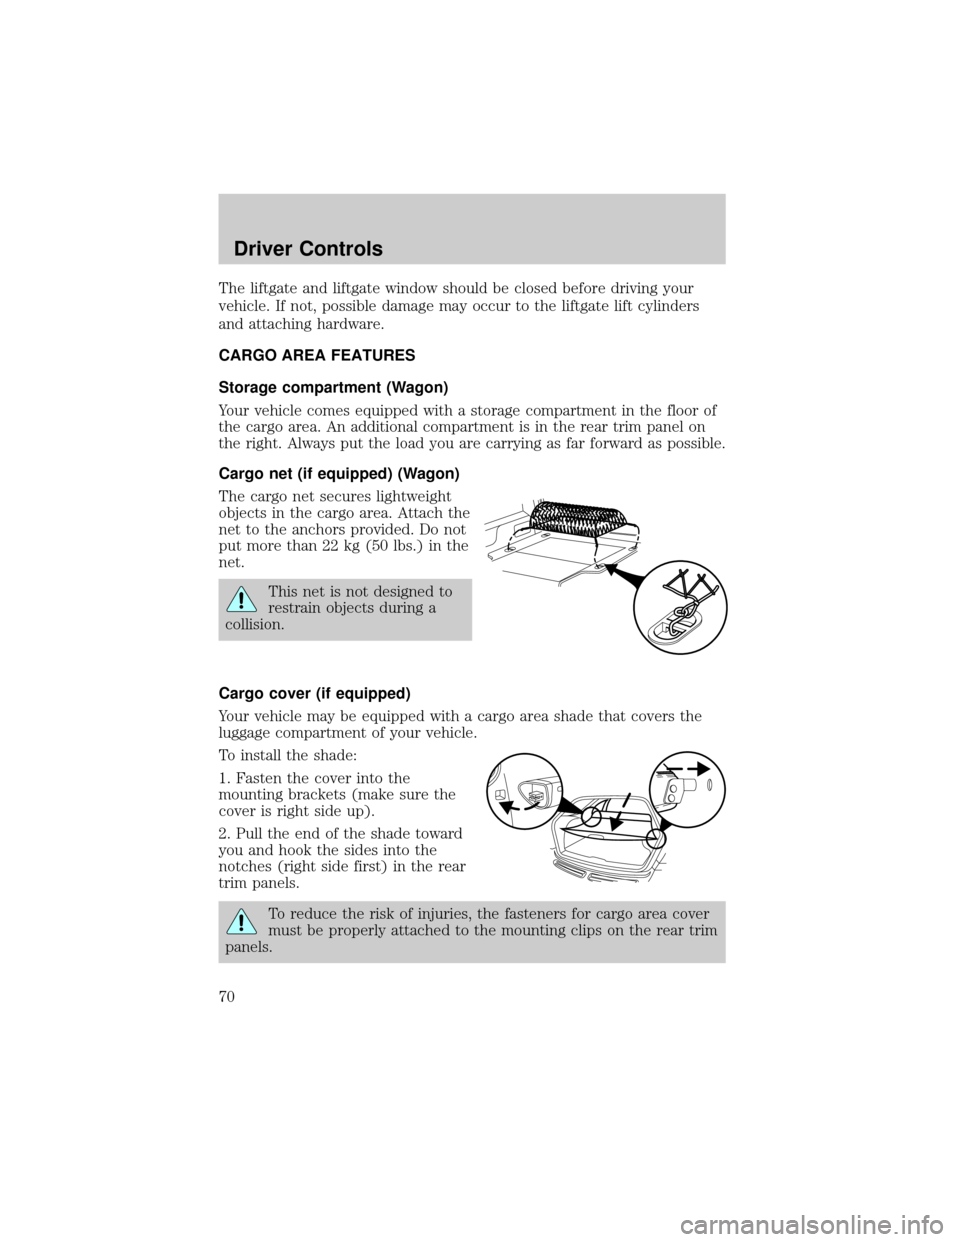
The cargo net secures lightweight
objects in the cargo area. Attach the
net to the anchors provided. Do not
put more than 22 kg (50 lbs.) in the
net.
This net is not designed to
restrain objects during a
collision.
Cargo cover (if equipped)
Your vehicle may be equipped with a cargo area shade that covers the
luggage compartment of your vehicle.
To install the shade:
1. Fasten the cover into the
mounting brackets (make sure the
cover is right side up).
2. Pull the end of the shade toward
you and hook the sides into the
notches (right side first) in the rear
trim panels.
To reduce the risk of injuries, the fasteners for cargo area cover
must be properly attached to the mounting clips on the rear trim
panels.
Driver Controls
70
Page 72 of 248
The cover may cause injury in a sudden stop or accident if it is
not securely installed.
Cargo utility hooks (Sedan)
The utility hooks located inside the trunk can be used to attach a cargo
net to secure lightweight objects or hang small items on. Do not hang
more than 12 kg (20 lbs) on the hooks.
The hooks are not designed to restrain objects during a collision.
LUGGAGE RACK (IF EQUIPPED)
The rear cross-bar can be adjusted to fit the item being carried. The
front cross-bar does not move. Do not load more than 44 kg (100 lbs.)
on the luggage rack.
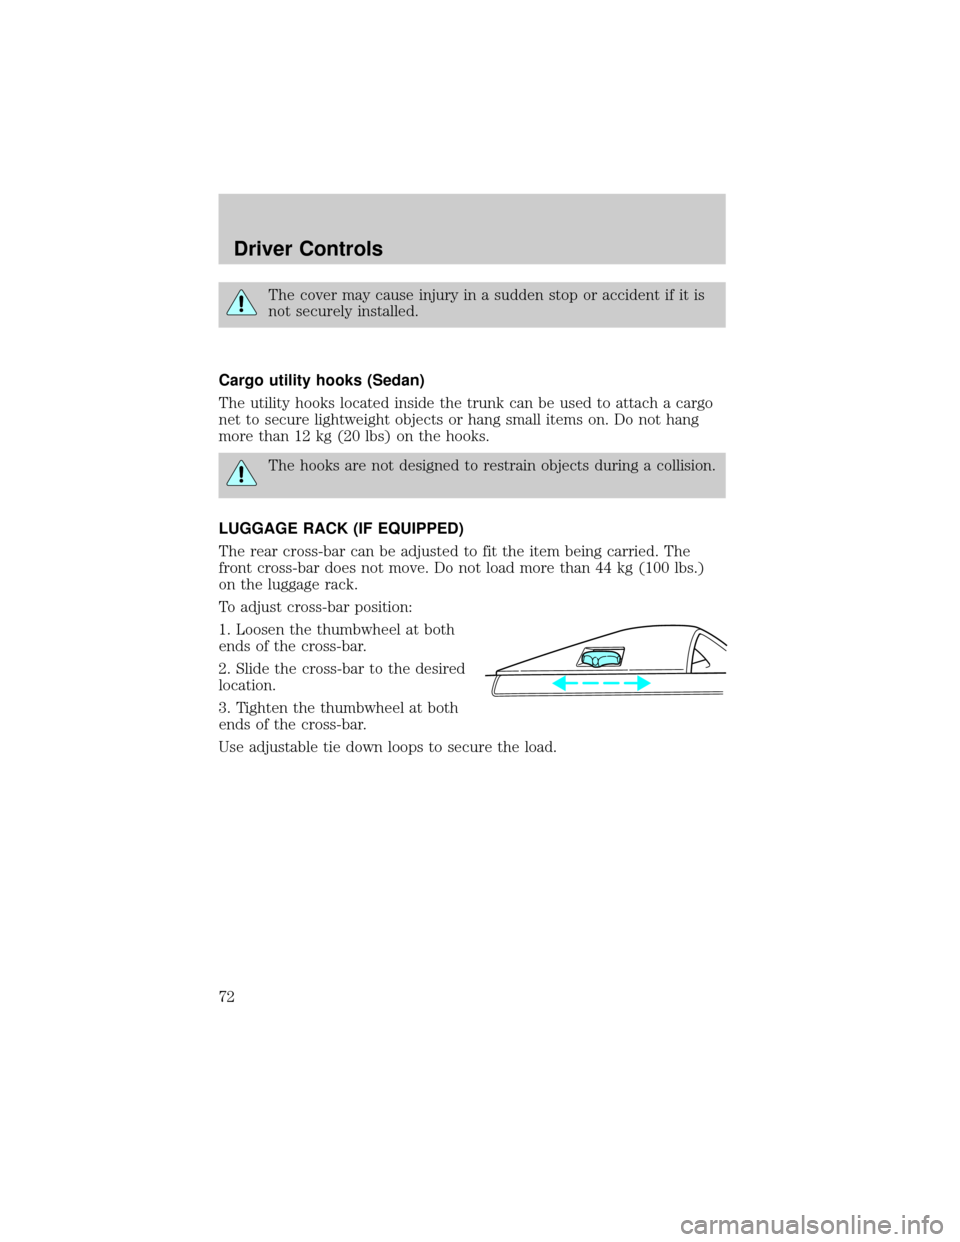
To adjust cross-bar position:
1. Loosen the thumbwheel at both
ends of the cross-bar.
2. Slide the cross-bar to the desired
location.
3. Tighten the thumbwheel at both
ends of the cross-bar.
Use adjustable tie down loops to secure the load.
Driver Controls
72
Page 91 of 248
Make sure that the safety belt for the rear center passenger is properly
routed over the rear seatback.
3rd seat (if equipped) (wagon only)
The third seat faces the rear of the vehicle. For height and weight limits,
see the label on the seat cushion. When the seat is down, the back of
your wagon has a flat surface for carrying cargo.
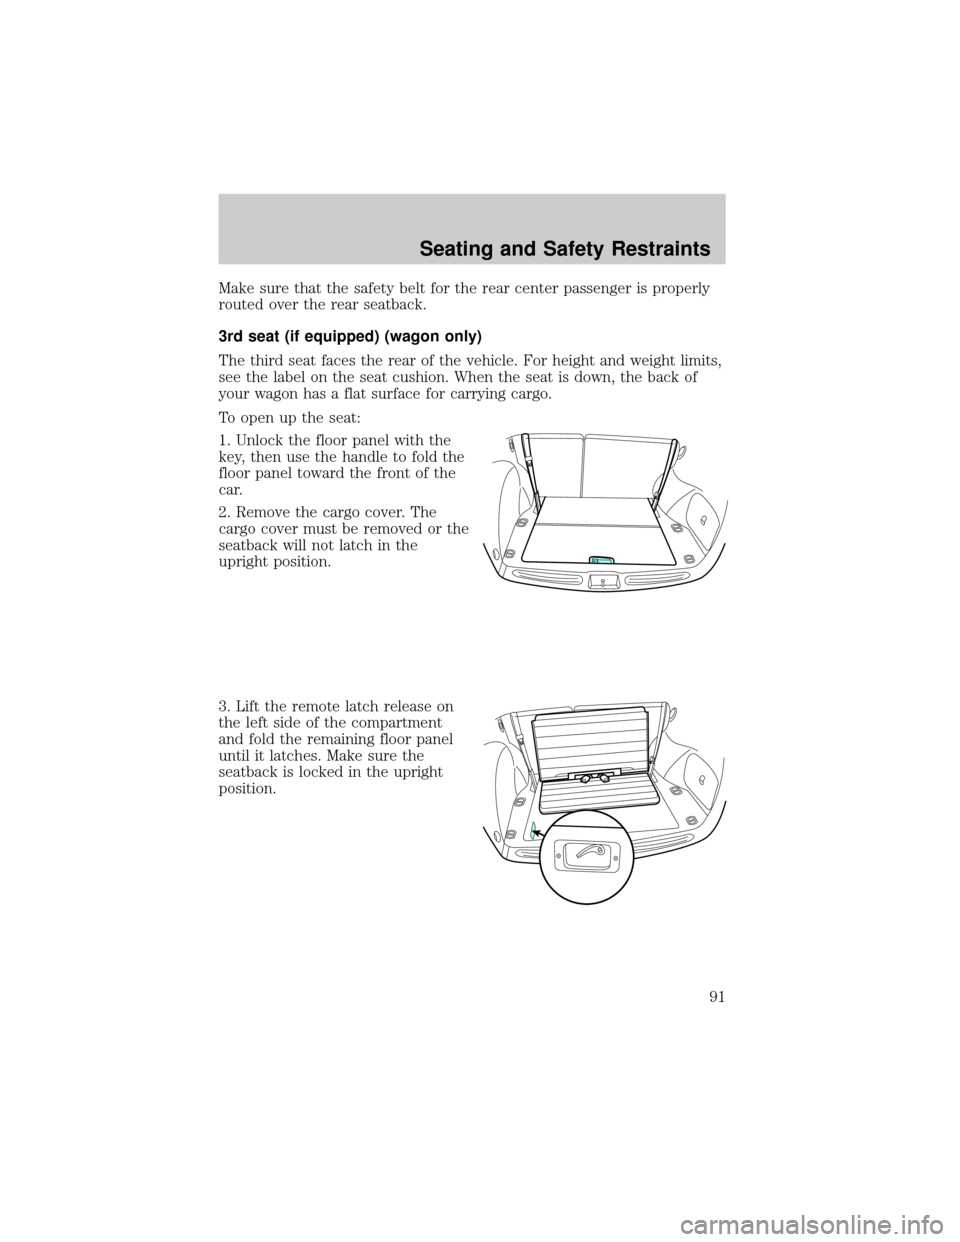
To open up the seat:
1. Unlock the floor panel with the
key, then use the handle to fold the
floor panel toward the front of the
car.
2. Remove the cargo cover. The
cargo cover must be removed or the
seatback will not latch in the
upright position.
3. Lift the remote latch release on
the left side of the compartment
and fold the remaining floor panel
until it latches. Make sure the
seatback is locked in the upright
position.
Seating and Safety Restraints
91
Page 112 of 248
are not properly restrained or are otherwise out of position at the time
of air bag deployment. Thus, it is extremely important that occupants be
properly restrained as far away from the air bag module as possible while
maintaining vehicle control.
Several air bag system components get hot after inflation. Do not
touch them after inflation.
If the air bag has deployed,the air bag will not function
again and must be replaced immediately.If the air bag is not
replaced, the unrepaired area will increase the risk of injury in a
collision.
Front passenger sensing system
The front passenger sensing system will turn off the front passenger's
frontal airbag under certain conditions. For side airbag equipped
vehicles, the front passenger sensing system will turn off the passenger
seat side airbag if the seat is empty (unless for some reason the safety
belt is properly buckled). The front passenger sensing system works with
sensors that are part of the front passenger's seat and safety belt. The
sensors are designed to detect the presence of a properly-seated
occupant and determine if the front passenger's frontal airbag should be
enabled (may inflate) or not.
The front passenger sensing system is designed to meet the regulatory
requirements of Federal Motor Vehicle Safety Standard (FMVSS) 208
and is designed to turn off the front passenger's frontal airbag if:
²the front passenger seat is unoccupied, or has small/medium objects in
the front seat,
²the system determines that an infant is present in a rear-facing infant
seat that is installed according to the manufacturer's instructions,
²the system determines that a small child is present in a forward-facing
child restraint that is installed according to the manufacturer's
instructions,
²the system determines that a small child is present in a booster seat,
²a front passenger takes his/her weight off of the seat for a period of
time,
Even with the front passenger sensing system, children 12 and
under should be properly restrained in the back seat.
Seating and Safety Restraints
112
Page 114 of 248
Sitting improperly out of position or with the seat back reclined
too far can take off weight from the seat cushion and affect the
decision of the passenger sensing system, resulting in serious injury or
death in a crash. Always sit upright against your seatback, with your
feet on the floor.
The front passenger sensing system may detect small or medium objects
placed on the seat cushion. For most objects that are in the front
passenger seat, the passenger airbag will be disabled. Even though the
passenger airbag is disabled, the9pass airbag off9light may or may not
be illuminated according to the table below.
ObjectsPass Airbag Off
Indicator LightPassenger Airbag
Empty seat Unlit Disabled
Small (i.e. 3 ring
binder, small purse,
bottled water)Unlit Disabled
Medium (i.e. heavy
briefcase, fully packed
luggage)Lit Disabled
Empty seat, Small or
medium object with
safety belt buckledLit Disabled
In case there is a problem with the
passenger sensing system, the
airbag readiness light in the
instrument cluster will stay lit. DO
NOT attempt to repair or service the system; take your vehicle
immediately to the dealer.
The front passenger airbag is not designed to offer protection to
an occupant in the center seating position.
An out of position front center occupant could affect the
decision of the front passenger sensing system.
If it is necessary to modify an advanced front airbag system to
accommodate a person with disabilities, contact the Ford Customer
Seating and Safety Restraints
114
Page 120 of 248
The shoulder belt should cross the chest, resting snugly on the center of
the shoulder. The lap belt should rest low and snug across the hips,
never up high across the stomach.
If the booster seat slides on the vehicle seat, placing a rubberized mesh
sold as shelf or carpet liner under the booster seat may improve this
condition.
The importance of shoulder belts
Using a booster without a shoulder belt increases the risk of a child's
head hitting a hard surface in a collision. For this reason, you should
never use a booster seat with a lap belt only. It is best to use a booster
seat with lap/shoulder belts in the back seat- the safest place for children
to ride.
Follow all instructions provided by the manufacturer of the
booster seat.
Never put the shoulder belt under a child's arm or behind the
back because it eliminates the protection for the upper part of
the body and may increase the risk of injury or death in a collision.
Never use pillows, books, or towels to boost a child. They can
slide around and increase the likelihood of injury or death in a
collision.
SAFETY SEATS FOR CHILDREN
Child and infant or child safety seats
Use a safety seat that is recommended for the size and weight of the
child. Carefully follow all of the manufacturer's instructions with the
safety seat you put in your vehicle. If you do not install and use the
safety seat properly, the child may be injured in a sudden stop or
collision.
When installing a child safety seat:
Seating and Safety Restraints
120
Page 142 of 248

If necessary, try turning the Traction Controlysystem off. This will allow
the wheels to spin, which may help to free your stuck vehicle. For more
information, refer toTraction Controly(if equipped)in this chapter.
Do not rock the vehicle if the engine is not at normal operating
temperature or damage to the transmission may occur.
Do not rock the vehicle for more than a minute or damage to the
transmission and tires may occur, or the engine may overheat.
DRIVING THROUGH WATER
If driving through deep or standing water is unavoidable, proceed very
slowly especially when the depth is not known. Never drive through
water that is higher than the bottom of the hubs (for trucks) or the
bottom of the wheel rims (for cars). When driving through water,
traction or brake capability may be limited. Also, water may enter your
engine's air intake and severely damage your engine or your vehicle may
stall.Driving through deep water where the transmission vent
tube is submerged may allow water into the transmission and
cause internal transmission damage.
Once through the water, always dry the brakes by moving your
vehicle slowly while applying light pressure on the brake pedal.
Wet brakes do not stop the vehicle as quickly as dry brakes.
VEHICLE LOADING ± WITH AND WITHOUT A TRAILER
This section will guide you in the proper loading of your vehicle and/or
trailer, to keep your loaded vehicle weight within its design rating
capability, with or without a trailer. Properly loading your vehicle will
provide maximum return of vehicle design performance. Before loading
your vehicle, familiarize yourself with the following terms for determining
your vehicle's weight ratings, with or without a trailer, from the vehicle's
Safety Certification Label and Tire Label:
Base Curb Weight± is the weight of the vehicle including a full tank of
fuel and all standard equipment. It does not include passengers, cargo, or
optional equipment.
Vehicle Curb Weight± is the weight of your new vehicle when you
picked it up from your dealer plus any aftermarket equipment.
Driving
142
Page 143 of 248

Cargo Weight± includes all weight added to the Base Curb Weight,
including cargo and optional equipment. When towing, trailer tongue load
or king pin weight is also part of cargo weight.
GAW (Gross Axle Weight)± is the total weight placed on each axle
(front and rear) ± including vehicle curb weight and all payload.
GAWR (Gross Axle Weight Rating)± is the maximum allowable
weight that can be carried by a single axle (front or rear).These
numbers are shown on the Safety Compliance Certification Label
located on the driver's door or door pillar. The total load on each
axle must never exceed its GAWR.
Exceeding the Safety Certification Label axle weight rating limits
could result in substandard vehicle handling, performance,
engine, transmission and/or structural damage, serious damage to the
vehicle, loss of control and personal injury.
Note:For trailer towing information refer toTrailer towingfound in
this chapter or theRV and Trailer Towing Guideprovided by your
dealership.
Driving
143